

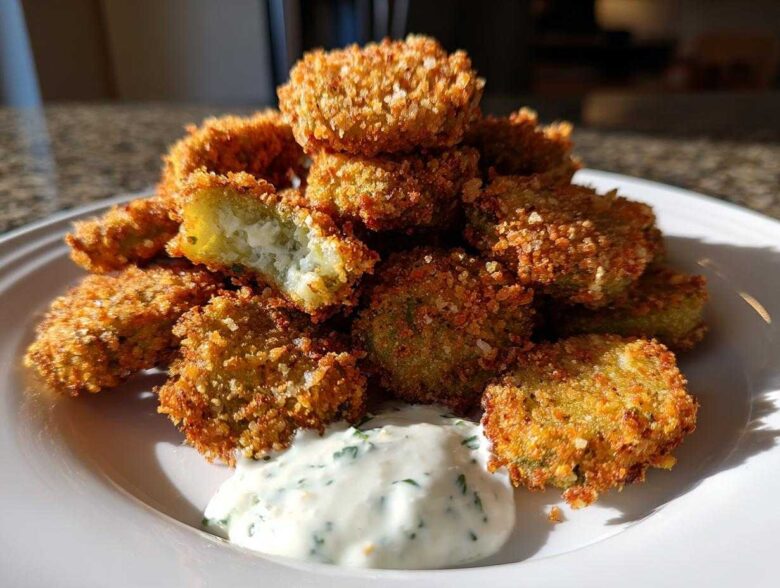
Oh my goodness, there is honestly no better sound in the world than biting into a perfectly crisp, piping hot fried pickle. I mean it! That satisfying crunch followed by that sharp, vinegary dill tang? Pure magic! For years, I struggled with soggy coatings—you know, where the breading just slides right off the moment it hits the dip? Terrible! But I finally cracked the code on the **Best Fried Pickles** recipe. Seriously, this isn’t just any recipe; this method guarantees that unbelievably crunchy exterior, whether you choose the traditional deep-fry route or you’re going lighter with the air fryer. Trust me, once you try these perfectly seasoned, **crunchy fried snacks**, you’ll never look back. As someone who pours my whole heart into my kitchen adventures, which you can read more about over at my little corner of the internet, I’m so thrilled to share my obsession with you!
Why This Crispy Fried Pickles Recipe Works So Well
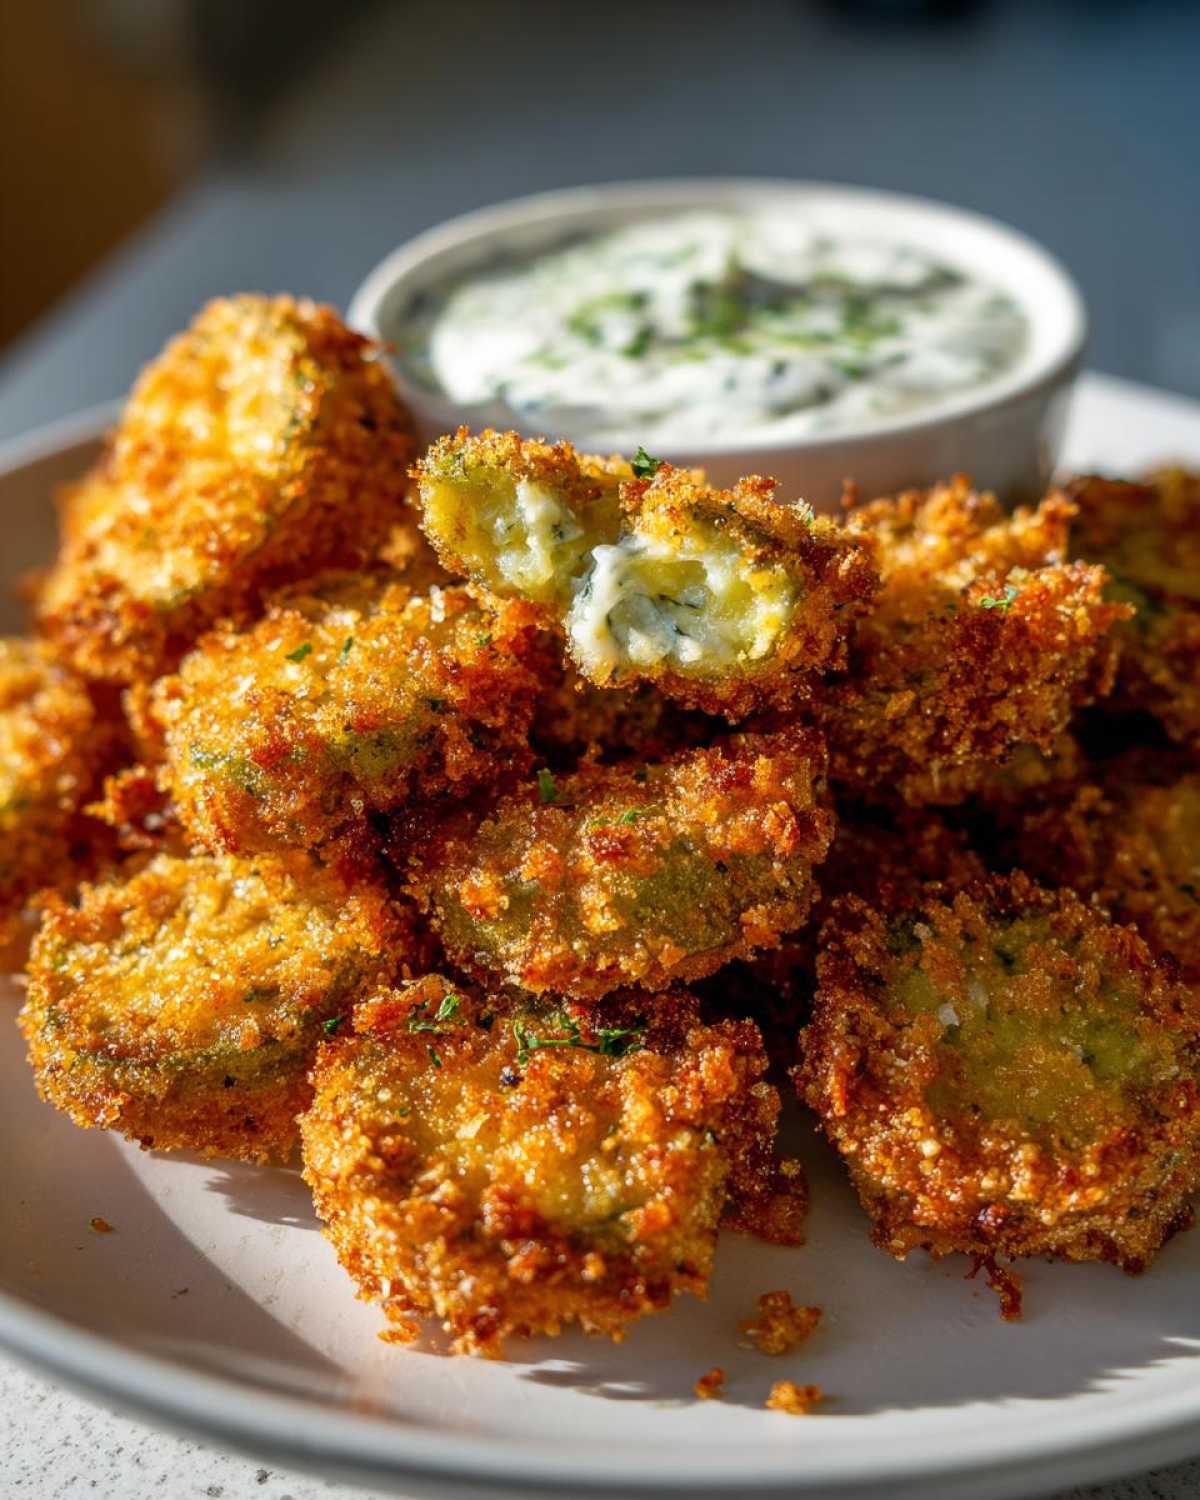
There’s a science to getting that perfect pub-style crunch when you make **Homemade Fried Pickles**, and I’m happy to share the tricks I learned the hard way! I promise this **Crispy Fried Pickles Recipe** takes the guesswork out of the equation. It all comes down to controlling moisture and building layers of crunchiness right before they hit the heat. Forget those floppy, sad versions you might have had before; we want texture!
- We rely on Panko breadcrumbs—they’re lighter and flakier than standard crumbs, giving you that amazing shatter when you bite in.
- The dredging station is non-negotiable; it ensures every part of the pickle slice gets sealed up properly so the oil doesn’t soak in and make things greasy.
The Secret to Ultra-Dry Pickles for Perfect Fried Pickles
Listen closely, because this is where 90% of people mess up these tangy fried pickle bites! You absolutely must start with the driest pickle possible. I only use jarred dill pickle chips for this. Drain them completely, then lay them out between layers of paper towels and press down *hard*. You need to press out all that brine moisture. If they aren’t bone dry, your beautiful breading will just turn into batter mush when it hits the hot oil. Don’t skip this pressing step, seriously!
Achieving the Best Seasoned Breading for Pickles
Once those pickles are dry as a bone, we build armor! Our dredging station has three parts. First, a seasoned flour mix—I dump salt, pepper, paprika, and a tiny kick of cayenne in there for warmth. Next, the wet bath (egg and milk). The final stage is the most important: pressing them into the Panko until they look completely snow-covered. This ensures a robust, crunchy coating. Mastering the **Seasoned Breading for Pickles** is what takes our snack from good to absolutely legendary for game day!
Gathering Ingredients for Your Homemade Fried Pickles
Okay, let’s get everything lined up! Having all your components ready—I mean *everything*—is going to make this process super smooth once the oil starts heating up. Remember, whether we’re doing the **Easy Pickle Appetizer** in the fryer or the air fryer, speed is our friend. We’re making a batch that yields about four hungry servings, so you might want to double up if you’re planning a big party!
For the pickles and the coating, you need that one jar of dill chips, flour, eggs, milk, and those glorious Panko breadcrumbs. Make sure you’re reaching for the Panko! It’s what separates these from the floppy attempts of the past. I organize mine into three little bowls, just like we talked about earlier, so I can move fast.
Ingredients for the Zesty Ranch Dip
You absolutely cannot serve **Fried Pickles** without a killer dip, and our Zesty Ranch is non-negotiable! It comes together in literally two minutes, but that fresh dill makes it taste like it took hours. You’ll need your mayo and sour cream as the base, along with a little lemon juice for brightness. Don’t forget the onion and garlic powders for that classic ranch punch!
- 1/2 cup mayonnaise
- 1/4 cup sour cream
- 1 tablespoon fresh dill, chopped (this is the secret!)
- 1 teaspoon onion powder
- 1/2 teaspoon garlic powder
- 1 tablespoon lemon juice
How to Make Fried Pickles Using the Deep Fry Method
If you want those authentic, amazing southern fried pickles, you have to embrace the bubbling oil! This deep-fry method is what delivers that quick, intense heat that sets the Panko perfectly—it’s how we get those deep golden fried pickles, not soggy ones. First things first: get your oil going! You need a heavy pot, pour in about two inches of neutral oil, and get that thermometer reading 375°F. Don’t try to guess; if it’s too cool, they soak up oil. If it’s scorching hot, the crust burns before the center warms up.
Now, remember how we painstakingly dried those pickle chips? That pays off right here! Take just a small handful of your breaded beauties and gently slip them into the hot oil. Seriously, small batches are everything—don’t crowd the pot! If you overload it, the oil temperature plummets instantly, and that’s when the sogginess creeps in. They cook incredibly fast, usually just one minute on each side until they are beautifully golden brown and smell amazing.
Use a slotted spoon to fish them out right away and place them on a plate lined with paper towels. We want them draining quickly! Immediately toss the next batch in, adjusting the heat as needed to keep that steady 375°F. This traditional method is hands-down the best way to achieve that crackling crunch every single time.
Making Air Fryer Fried Pickles for a Lighter Option
I know not everyone wants to deal with deep-frying oil, and honestly, I totally get it! Maybe you’re looking for something quick, or perhaps you just want to keep clean-up minimal. That’s where the air fryer swoops in to save the day! These **Air Fryer Fried Pickles** are honestly almost as crunchy as the deep-fried batch, and they use way less fat, which is always a win, right?
First, preheat your air fryer to a pretty high temperature—I find 400°F works best to get that rapid crisping action going. Toss your breaded pickles into the basket. Now, this is super important for that signature golden color: you have to lightly spray the tops of the pickles with cooking spray. If you don’t spray them, the tops stay pale and floury. A quick mist allows the crumbs to brown beautifully!
They usually take about 6 to 8 minutes total. About halfway through, you need to pull the basket out and flip them over. This ensures both sides get that perfect crunchy texture we’re aiming for. If you ever want to check out my thoughts on kitchen safety and testing equipment, I link to that info over on my standard kitchen disclaimer page. Quick, easy, and guilt-free snacking!
Tips for Perfect Golden Fried Pickles Every Time
Even with the recipe down perfectly, sometimes you just want that extra reassurance, right? I totally get it! Over the years, I’ve picked up a few extra secret weapons to ensure these **Golden Fried Pickles** are absolutely flawless every single time I make them for a party. These aren’t in the main steps, but trust me, they elevate the crunch factor immensely.
If you are deep-frying and you truly want that thick, almost restaurant-style shell that never falls off? You have to double coat them! After you put them through the Panko for the first time, dip that pickle right back into the egg wash and then back into the Panko again. Shake off the excess gently. That second layer locks everything down beautifully.
Also, don’t feel stuck on chips! While chips are perfect for dipping, sometimes I use dill pickle spears instead. If you use spears—which are thicker—you just need to add maybe 30 seconds to a minute to your frying or air-frying time so the pickle itself gets warm all the way through without burning that perfect crust.
Serving Suggestions for Your Fried Pickles
Honestly, these crispy jewels are fantastic all on their own, but they really reach their peak potential when paired with the right stuff. Our Zesty Ranch Dip is truly the **Best Dipping Sauce for Fried Pickles**—the cool, herby creaminess cuts right through the heat and tanginess of the fried dill. You absolutely must serve them together!
If you need more variety for your spread, especially when you’re pulling out all the stops for **Game Day Snacks**, try putting out a small bowl of honey mustard. For a real pub style experience, even a little drizzle of spicy comeback sauce works wonders. They disappear so fast, though, I doubt you’ll need more than one dipping option!
Storage and Reheating Instructions for Leftover Fried Pickles
Now, let’s be real—these **Fried Pickles** are at their absolute peak moments after they leave the oil or the air fryer basket. They lose a little bit of that fresh-off-the-press crackle quickly, and I won’t lie, microwaving them is a disaster waiting to happen! If you have leftovers (which I rarely do, oops!), we need to save that crunch.
The best way to bring them back to life? Use dry heat. Pop them on a baking sheet and toss them into a 350°F oven for about 5 to 7 minutes. If you have an air fryer, even better—380°F for 4 minutes works wonders to revive that crispiness quickly and safely. Store any extras in an airtight container at room temperature for up to a day. Enjoy!
Frequently Asked Questions About Making Fried Pickles
I know when I try a new recipe, especially one that needs to be perfectly crunchy like this **Easy Pickle Appetizer**, I always have a few lingering questions bouncing around my head. I’ve tried to cover the biggest ones here, but if you have anything else, feel free to reach out to me directly on my contact page!
Why do my homemade fried pickles always end up soggy?
Oh, trust me, I’ve been there! A soggy **Fried Pickle** is a tragedy. Almost every single time, sogginess comes down to one thing: moisture. Did you press every bit of liquid out of those pickle chips before you started dredging? Brine is your enemy here. Also, check your oil temperature if deep-frying—if it’s under 375°F, the coating absorbs oil instead of crisping up fast. That’s why drying them thoroughly is the number one step!
Can I use fresh pickles instead of jarred deli chips?
That’s a great question, especially if you’re after that perfect **Southern Fried Pickles** vibe! While you technically *can* use fresh cucumbers—you’d slice them and then salt them for about an hour to draw out water—it adds a whole extra day to the prep! Since this recipe is designed to be a quick and easy appetizer, I strongly recommend sticking to the jarred dill chips. They already have that essential pickled tang and texture required for this three-step breading process.
What is the best oil to use for achieving that pub style crunch?
For deep-frying, you need an oil with a high smoke point that doesn’t impart a lot of flavor. I love using peanut oil or vegetable oil. Both get nice and hot, stay stable, and contribute to that beautiful, non-greasy finish. If you’re looking for the absolute best results for **Pub Style Fried Pickles**, peanut oil gives that slight, barely-there roastiness that tastes incredible.
Do I have to use Panko, or can I use regular breadcrumbs?
You *can* use regular fine breadcrumbs, but I really, really, *really* encourage you to use Panko. Panko are Japanese-style breadcrumbs, and they are lighter, flakier, and absorb way less oil than traditional crumbs, which is the entire key to getting that light, airy, crunchy coating rather than something heavy. If you want the crunchiest coating possible, stick with Panko!
Estimated Nutritional Data for These Fried Pickles
I always like to give you folks a heads-up on what you’re diving into when you’re snacking on these golden bites! Keep in mind that these nutrition numbers are just estimates from my calculations, and they can swing wildly depending on how you cook them. Frying in a heavy oil is definitely going to bump up the fat and calorie count compared to tossing them in the air fryer—just something to keep in mind!
These figures are based on one serving size, which is about one-quarter of the whole batch, and that doesn’t even include the glorious Zesty Ranch Dip we made, which, let’s be honest, you’ll eat way more of! You can check out all the details below. Making things transparent is super important to me, so I always keep my recipe data open for everyone to see. These are definitely an indulgence, but oh, so worth it!
- Serving Size: 1/4 of recipe (without dip)
- Calories: 350
- Fat: 22g
- Carbohydrates: 30g
- Protein: 8g
- Sodium: 950mg (Yes, they’re briny! That’s the pickle talking!)
If you decide to go the air fryer route, you’ll definitely see slightly lower fat content! Enjoy these crowd-pleasers, but maybe serve them with half the recommended ranch dipping sauce to keep those numbers down just a tiny bit!
PrintCrispy Homemade Fried Pickles with Zesty Ranch Dip
Make crunchy, golden fried pickles at home using this simple recipe. This recipe includes instructions for both deep-frying and air-frying methods, paired with a zesty ranch dipping sauce.
- Prep Time: 20 min
- Cook Time: 10 min
- Total Time: 30 min
- Yield: 4 servings
- Category: Appetizer
- Method: Frying or Air Frying
- Cuisine: American
- Diet: Vegetarian
Ingredients
- 1 (16 ounce) jar dill pickle chips, drained and patted very dry
- 1 cup all-purpose flour
- 1 teaspoon salt
- 1/2 teaspoon black pepper
- 1/2 teaspoon paprika
- 1/4 teaspoon cayenne pepper
- 2 large eggs, lightly beaten
- 1/2 cup milk
- 1 cup panko breadcrumbs
- Vegetable oil, for frying (if deep-frying)
- For the Zesty Ranch Dip: 1/2 cup mayonnaise, 1/4 cup sour cream, 1 tablespoon fresh dill, chopped, 1 teaspoon onion powder, 1/2 teaspoon garlic powder, 1 tablespoon lemon juice
Instructions
- Prepare the pickles: Place the drained pickle chips between several layers of paper towels and press firmly to remove as much moisture as possible. Dry pickles are key for crispiness.
- Set up the dredging station: In one shallow dish, combine the flour, salt, pepper, paprika, and cayenne pepper. In a second dish, whisk together the eggs and milk. In a third dish, place the panko breadcrumbs.
- Dredge the pickles: Take a small batch of dry pickle chips and coat them thoroughly in the flour mixture, shaking off the excess. Dip them into the egg mixture, letting the excess drip off. Finally, press them firmly into the panko breadcrumbs until fully coated. Place the coated pickles on a wire rack or plate. Repeat with all pickles.
- Prepare the dip: Mix the mayonnaise, sour cream, dill, onion powder, garlic powder, and lemon juice in a small bowl. Stir until smooth. Cover and refrigerate while you cook the pickles.
- Cook the pickles (Deep Fry Method): Pour 2 inches of oil into a heavy-bottomed pot or deep fryer and heat to 375°F (190°C). Working in small batches, carefully drop the breaded pickles into the hot oil. Fry for 1 to 2 minutes, turning once, until golden brown and crisp. Remove with a slotted spoon and drain on a paper towel-lined plate.
- Cook the pickles (Air Fryer Method): Preheat your air fryer to 400°F (200°C). Lightly spray the air fryer basket with cooking spray. Arrange the breaded pickles in a single layer (work in batches). Lightly spray the tops of the pickles with cooking spray. Air fry for 6 to 8 minutes, flipping halfway through, until golden and crisp.
- Serve immediately with the zesty ranch dip.
Notes
- For extra crispiness when deep-frying, you can double-coat the pickles: after the first dip in panko, dip them back into the egg wash and then into the panko again.
- If you prefer thinner pickles, use dill pickle spears instead of chips, but adjust frying time slightly.
- For a copycat flavor similar to restaurant versions, add 1/2 teaspoon of garlic powder to the flour mixture.
Nutrition
- Serving Size: 1/4 of recipe (without dip)
- Calories: 350
- Sugar: 3
- Sodium: 950
- Fat: 22
- Saturated Fat: 4
- Unsaturated Fat: 18
- Trans Fat: 0
- Carbohydrates: 30
- Fiber: 2
- Protein: 8
- Cholesterol: 85