

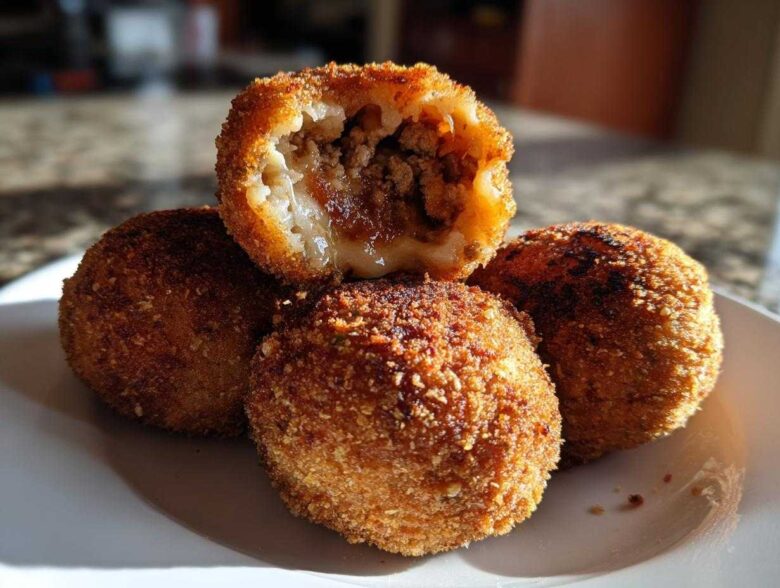
Oh my gosh, if you are looking for the ultimate comfort food spheres that just scream ‘special occasion appetizer’—stop everything you’re doing right now! I remember my first few attempts at making proper Italian Arancini rice balls? Absolute disaster. They looked like cheesy little meteorites destined for the trash. But trust me, after too many spills of hot oil and too many sad, flat disks, I finally cracked the code.
This isn’t just any recipe; this is the definitive guide designed to get you that perfect, shatteringly crispy exterior hugging a wonderfully warm, gooey center every single time. Forget everything you thought you knew about simple rice balls; these cheesy stuffed rice balls are the true showstoppers for any party. Grab your leftover risotto, because we’re making magic!
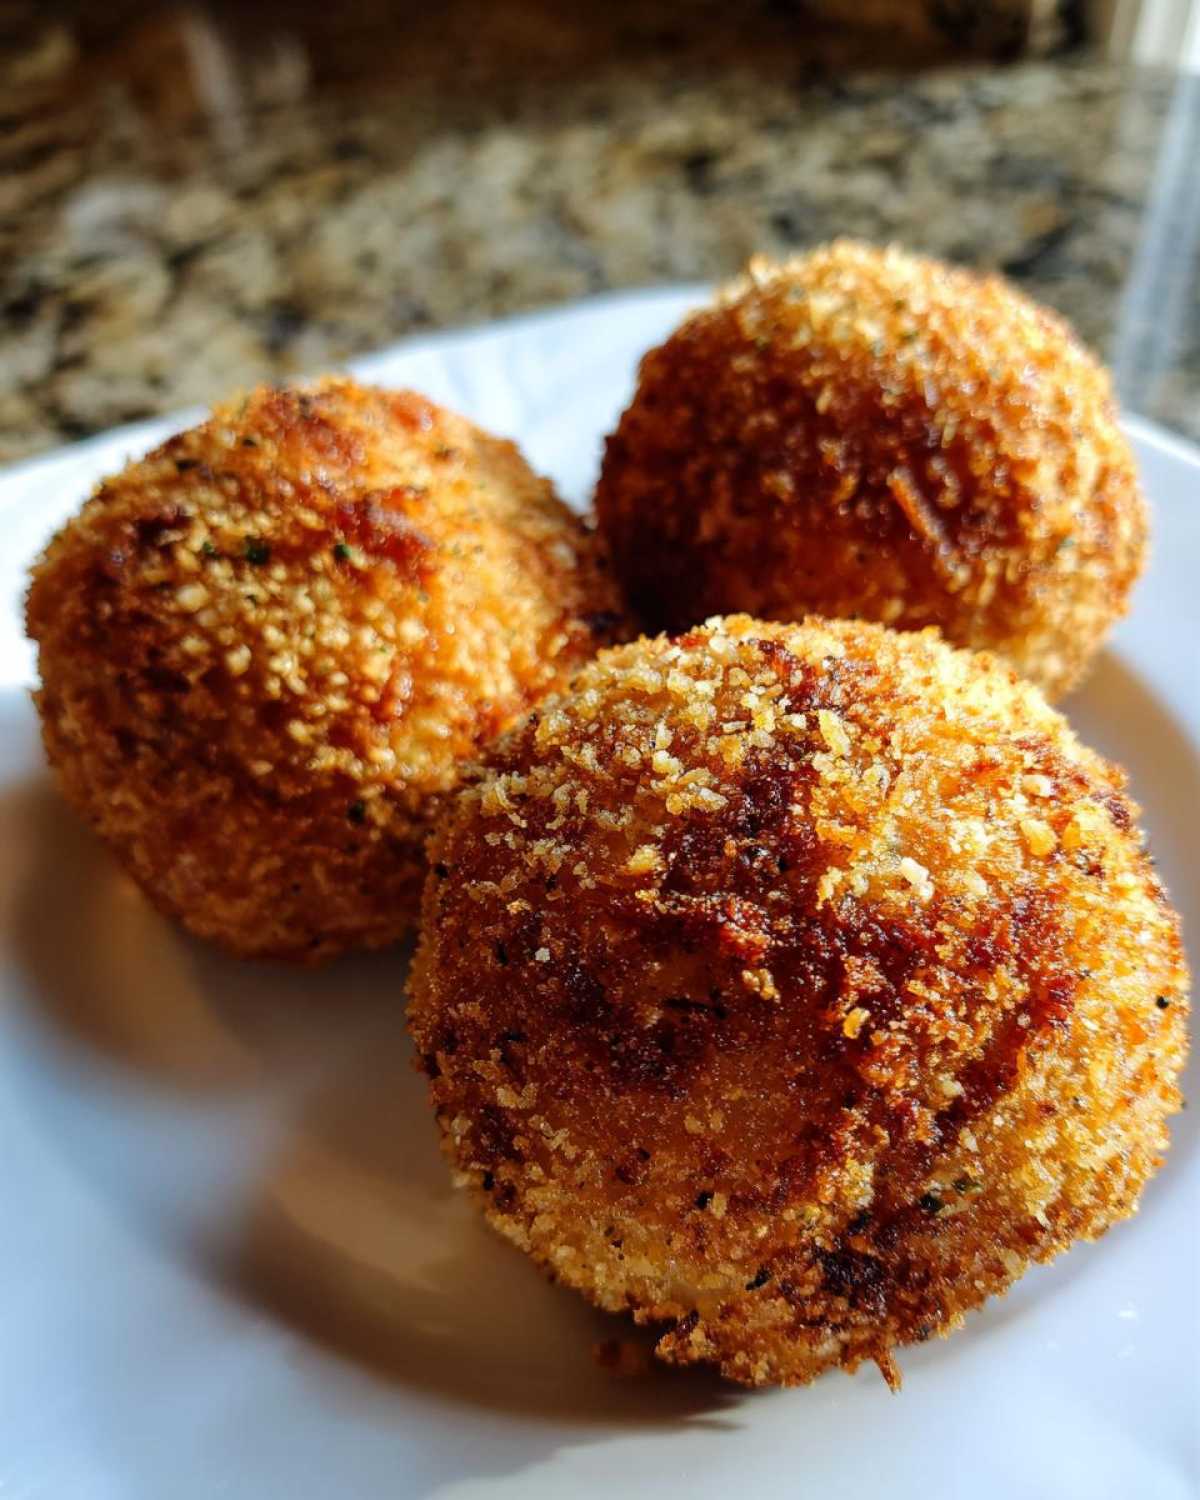
I learned so much about technique making these—it truly is all in the chilling and the shaping. If you’re interested in how we keep all our recipes honest and transparent, you can always check out our story here!
Why You Will Master These Crispy Fried Risotto Balls
When you follow these steps, you stop fighting the rice and start controlling it! Seriously, anyone can pull this off, even if you’re nervous about deep frying. We focus on stability first, which means less mess and more deliciousness. You’re going to nail this!
Key Benefits of Our Cheesy Stuffed Rice Balls
- The ultimate texture: that loud crunch followed by melted cheese in a gooey center appetizer.
- They are incredible easy party snacks—make them ahead and fry right before guests arrive!
- Uses leftover risotto, turning yesterday’s dinner into today’s star dish.
- Perfectly portioned comfort food spheres; everyone gets their own little treasure.
Essential Ingredients for Authentic Italian Rice Balls
Okay, before we even whisper the word ‘frying,’ we need to talk structure. The single most important thing you must have sitting on your counter is perfectly chilled, day-old risotto. I cannot stress this enough! Warm rice collapses like a sad soufflé. You need that cold, firm base to successfully encapsulate the delicious fillings.
This recipe yields about 12 perfect servings! You’ll need about 30 minutes of hands-on prep once your risotto is chilled, and then only about 20 minutes of actual cooking time. Perfect for making ahead!
Ingredient Clarity and Preparation Notes
We are keeping this classic Italian appetizer recipe straightforward. Every component plays a vital role in achieving that amazing structural integrity. Make sure your filling ingredients are also cooled down!
- The Base: You need 3 cups of your cooked risotto. Remember, it must be cold! This is your sturdy foundation for these flavorful rice mound recipes.
- The Goo: We are using 1 cup of shredded mozzarella—shred it yourself for the best melt! Plus, about 1/2 cup of grated Parmesan for that salty kick.
- The Heart: 1 cup of beef or pork ragu that has been fully cooled down. If you aren’t doing meat for your family friendly rice recipes, you can swap this for nicely sautéed mushrooms and spinach—it’s a great vegetarian substitution!
- The Shell: This is where things get messy and fun! You need three separate stations set up: 2 beaten eggs, 1 cup of all-purpose flour, and 2 cups of fine breadcrumbs. This three-step dredging process is non-negotiable for that guaranteed crunch.
The Foundation: Preparing Your Risotto for Perfect Rice Balls
Listen carefully, because this is the secret handshake for making amazing rice balls that don’t fight you when you try to roll them: You absolutely must chill your risotto. I mean, *really* chill it. This isn’t a suggestion; it’s the law of the land when making authentic Arancini!
Why the ice bath for flavor? Cold, leftover risotto is firm, sticky, and sturdy. It has lost that loose, soupy quality delicious warm risotto has. This allows you to shape those beautiful spheres tightly around the filling without them oozing out the minute you start rolling. If you try shaping warm risotto, you’re just asking for a delicious, greasy mess!
Best Rice for Rice Balls: Risotto Texture Check
If you’re starting from scratch instead of using leftovers, grab Arborio or Carnaroli rice—they handle the liquid better for that creamy interior. Whichever rice you use, once it’s cooked, check its texture before chilling. You should be able to scoop a spoonful and gently squeeze it into a loose mound in your hand without it dissolving immediately. If you can squeeze a tiny bit in your palm and it holds together like sticky mud, you’re golden for rolling those gorgeous rice balls!
Step-by-Step: How to Make Arancini Rice Balls
This is the fun part, but you need to move with purpose now! Make sure those three dredging bowls—flour, egg, breadcrumbs—are right next to your big bowl of cold risotto. We are going straight from forming to coating, so don’t wander off. You’re making classic rice balls here, and technique is everything to avoid the dreaded blow-out while frying!
Forming and Sealing the Cheesy Stuffed Rice Balls
First, lightly wet your hands—this is key so the cold, sticky risotto doesn’t glue itself to your skin! Take about two big tablespoons of risotto and flatten it into a disk in your palm. Now, for the surprise inside: place a tiny spoonful of that cold ragu right in the middle, along with a small pinch of mozzarella and Parmesan. Remember, less filling is better than too much!
Take a little more cold risotto and gently place it over the filling. Now, start closing it up. You need to press firmly and carefully to make a tight ball, sealing that delicious filling completely inside. Give it a good roll between your palms to make sure it’s smooth and compact. It has to be tight! If there are any cracks or weak spots, the filling will escape when it hits the hot oil.
Achieving the Ultimate Coating for Crispy Fried Risotto Balls
Once you have a perfect, sealed ball, it goes through the triple-dip treatment. Roll it completely in the flour first—shake off anything that doesn’t stick. Then, dunk it quickly but thoroughly into the beaten egg. Finally, roll it lovingly in the breadcrumbs. Really press those crumbs in so they adhere everywhere. You want a thick, even coat for the best crust when you fry these amazing rice balls!
Frying Technique for Golden Brown Rice Balls
Now we bring the heat! This is where all that hard work shaping your rice balls pays off, but if you mess up the oil temperature, you’ll end up with soggy, oily things, and nobody wants that! For that picture-perfect, shatteringly crisp shell, you need consistent heat. We are aiming right for 350°F (175°C).
If you add too many of these beautiful, cold spheres into the pot at once, the oil temperature drops dramatically. When the oil is too cool, your breadcrumbs soak it up instead of sealing instantly, and boom—your appetizer turns into a deep-fried sponge. Only fry in small batches! Seriously, maybe 3 or 4 at a time, depending on the size of your pot. You want them to sizzle happily, not crowd each other.
Watch them turn a gorgeous, deep golden brown—this usually takes about 4 to 6 minutes. Use a slotted spoon to gently turn them halfway through so they look even on all sides.
Oil Temperature Control for Perfect Results
If your thermometer is hiding (always happens, right?), there’s a little trick I use. Take one of your leftover breadcrumbs—the ones you didn’t use for coating—and gently drop it into the oil. If it starts sizzling right away, bubbling happily around the edges but not violently exploding or turning dark brown instantly, your oil is ready for those beautiful rice balls.
If the test breadcrumb sinks and sits there silently, the oil is too cold. If it turns black in two seconds, pull the pot off the heat immediately! Once they are golden, get them out quickly and place them on a paper towel-lined plate. That brief drain time is crucial to wick away any surface oil. Serve these beauties hot!
Serving Suggestions for Your Homemade Italian Street Food
So, you’ve pulled those perfect, golden, crispy treasures out of the fryer! Congratulations! Now you have these amazing, handheld rice balls begging to be eaten. While I’ve personally snacked on them while standing over the cooling rack (don’t judge!), they really shine when presented nicely, especially as part of a larger spread of Italian appetizer recipes.
We treat these like the special event they are. Think about setting up a little dip station! Serve them on a big platter lined with crisp lettuce leaves to make them look professional, or—and this is my favorite suggestion for a game day spread—serve them speared with little toothpicks alongside olives and marinated artichoke hearts. They work brilliantly as fantastic make ahead finger foods once they’ve been fried.
Pairing with Arancini Recipe with Marinara Sauce
You absolutely *must* have a sauce for dipping. Hands down, the best pairing for these cheesy, savory rice balls is a simple, vibrant marinara sauce. It cuts through the richness of the fried crust and the gooey cheese filling perfectly. It brings that authentic, rustic feeling of homemade Italian street food right into your kitchen.
It doesn’t need to be complicated! Just warm up a decent quality jarred marinara—or better yet, simmer your own quick sauce with good canned tomatoes, garlic, and basil. The key is that the sauce should be warm, maybe even simmering slightly, contrasting beautifully with the hot, crispy surface of your Arancini.
Remember, these rice balls are dense and comforting, so you don’t need a heavy sauce. A bright, slightly acidic marinara lets the flavor of the creamy, cheesy filling really shine through. Seriously, don’t skip the sauce!
Storing and Reheating Your Leftover Rice Balls
Don’t you hate it when you have two perfectly delicious rice balls left over and you think, “Can I really save these?” Of course, you can! But throwing them in the plastic container and nuking them in the microwave? Absolutely not. That’s how you turn a crispy dream into a sad, soggy pillow. We want texture, people!
For refrigeration—say, if you have leftovers for lunch the next day—just let them cool totally, pop them into a good airtight container, and keep them in the fridge for up to three days. When it’s time to eat, do not use the microwave! That steamy environment destroys the crust we worked so hard to build.
The very best way to revive those precious flavorful rice mound recipes is in the oven or, if you’re lucky enough to have one, the air fryer. Preheat your oven to about 375°F (190°C). Pop those cold guys on a baking sheet lined with parchment paper (so nothing sticks!) and bake them for about 10 to 12 minutes. You’ll hear them start to crisp up again. If you use the air fryer, 5 minutes at 350°F usually does the trick beautifully.
Make Ahead Finger Foods: Freezing Instructions
This is where these homemade Italian street food beauties really shine as make ahead finger foods. You actually have two great options for freezing, depending on when you want to cook them.
If you know you want to fry them later in the week, freeze them *before* you bread them! After you’ve formed your perfectly sealed balls (they should be holding their shape tight!), lay them out on a baking sheet lined with parchment paper—give them a little breathing room. Place that tray directly into the freezer until they are rock-solid, maybe an hour or two. Then, transfer the frozen, un-breaded balls into a zip-top bag. When you’re ready to cook, just remove the amount you need, thaw them slightly on the counter for about 15 minutes, and proceed with the flour, egg, and breadcrumb coating as usual. They fry up great!
If you’ve already fried them and have leftovers, you can freeze those too! Cool the cooked Arancini completely, place them in a freezer bag, and they’ll last a couple of months. When reheating from frozen, you might want to skip the microwave for the first step and just microwave them gently for about a minute to heat the filling through, and *then* toss them in a 400°F oven or air fryer for 5-7 minutes to bring that crispy crust back to life. That two-step heating process is the trick to perfect leftovers!
Frequently Asked Questions About Rice Balls
I get so many questions whenever I post these on social media! It makes sense; mastering a recipe like this requires a little inside knowledge. People always want to tweak the filling or worry about the frying part. Don’t hold back on reaching out if you have a specific issue—you can always get in touch with me here!
Can I bake these rice balls instead of frying?
Oh, that age-old question! Yes, you absolutely *can* bake these if frying just isn’t your thing or you want to lean into lighter family friendly rice recipes. But, I have to warn you: the texture is completely different. You won’t get that signature loud, shatteringly crisp crust of the traditional crispy fried risotto balls.
If you bake them, make sure they are fully breaded and sprayed heavily with oil—like, misted completely on all sides. Bake them on a wire rack set inside a baking sheet (this helps air circulate and prevents the bottoms from getting soggy) at about 400°F (200°C). It usually takes about 18 to 20 minutes, turning them halfway through, until they are golden. They’ll be pleasingly crisp, but never as intensely crunchy as fried ones.
What is the best alternative to meat ragu for these comfort food spheres?
That’s a fantastic question, especially if you’re making these for a crowd that has dietary needs! For me, the goal is always to pack maximum flavor into that small pocket of filling. If you can’t do the meat ragu, you have a few amazing options that hold up beautifully inside these comfort food spheres.
My absolute favorite vegetarian swap is a pesto and cheese blend. Use about half a cup of good quality basil pesto mixed with half a cup of ricotta cheese instead of the ragu. The pesto gets wonderfully fragrant when heated.
Another winner is simply a blend of finely sautéed, well-drained mushrooms (think cremini or shiitake) mixed with a little onion powder and garlic. Make sure whatever veggie filling you use is cooked down and very dry. If your filling is too wet, it will steam the inside of the rice ball and make everything mushy instead of perfectly structured!
Share Your Experience Making These Flavorful Rice Mound Recipes
Wow, we actually did it! You’ve mastered the technique for making the most unbelievably crispy and cheesy rice balls. I’m so proud of you for taking on this classic Italian beauty. Now that you’ve got that perfect texture locked down—that loud, satisfying crunch followed by the warm, melty center—I really, really want to hear about it!
Did you stick totally traditional with the meat ragu, or did you get creative with your fillings? I love seeing how everyone puts their spin on these flavorful rice mound recipes! Did you try my suggestion for the pesto ricotta filling? Or maybe you dusted them with Parmesan instead of just serving them plain?
Please take a minute and drop a rating right down in the comments below. Was it a five-star masterpiece? Were they the best homemade Italian street food snacks you’ve ever made? Knowing how they turned out helps me keep refining these tips for the next person who comes along feeling intimidated by frying!
Seriously, don’t be shy! Share your successes, your near-misses, or even your favorite way to reheat leftovers. The community here is all about helping each other cook well. While you’re thinking about sharing, just a quick reminder about how we handle your info—you can review our privacy policy right here if you ever have questions about your privacy on the site.
Thanks for cooking with me today. Happy snacking!
PrintClassic Italian Arancini Rice Balls

Make crispy, cheesy fried risotto balls filled with a savory meat ragu. These Italian appetizers are perfect for parties.
- Prep Time: 30 min
- Cook Time: 20 min
- Total Time: 50 min
- Yield: 12 servings
- Category: Appetizer
- Method: Frying
- Cuisine: Italian
- Diet: Vegetarian
Ingredients
- 3 cups cooked risotto (cooled)
- 1 cup shredded mozzarella cheese
- 1/2 cup grated Parmesan cheese
- 1 cup beef or pork ragu (cooled)
- 2 large eggs, beaten
- 1 cup all-purpose flour
- 2 cups fine breadcrumbs
- Vegetable oil, for frying
Instructions
- Prepare the risotto the day before and chill it completely.
- Place a small bowl of the cooled ragu, a bowl of mozzarella, a bowl of Parmesan, a bowl of beaten eggs, a bowl of flour, and a bowl of breadcrumbs near your workspace.
- Take about 2 tablespoons of cold risotto and flatten it in your palm.
- Place a small spoonful of ragu and a pinch of mozzarella and Parmesan in the center.
- Place a small amount of risotto on top and carefully shape the mixture into a tight ball, sealing the filling inside.
- Roll the ball first in flour, then dip it completely in the beaten egg, and finally coat it thoroughly in breadcrumbs.
- Heat about 3 inches of vegetable oil in a deep pot to 350°F (175°C).
- Carefully fry the rice balls in batches for 4 to 6 minutes, turning occasionally, until they are deep golden brown and crispy.
- Remove the arancini with a slotted spoon and place them on a paper towel-lined plate to drain excess oil.
- Serve hot, optionally with warm marinara sauce for dipping.
Notes
- Use leftover risotto for the best texture; fresh, warm risotto will not hold its shape well.
- For a vegetarian version, substitute the meat ragu with sautéed mushrooms and spinach.
- If you do not have a deep fryer, use a heavy-bottomed pot for frying, monitoring the oil temperature closely.
Nutrition
- Serving Size: 1 ball
- Calories: 280
- Sugar: 3
- Sodium: 450
- Fat: 15
- Saturated Fat: 6
- Unsaturated Fat: 7
- Trans Fat: 0
- Carbohydrates: 28
- Fiber: 1
- Protein: 10
- Cholesterol: 55