

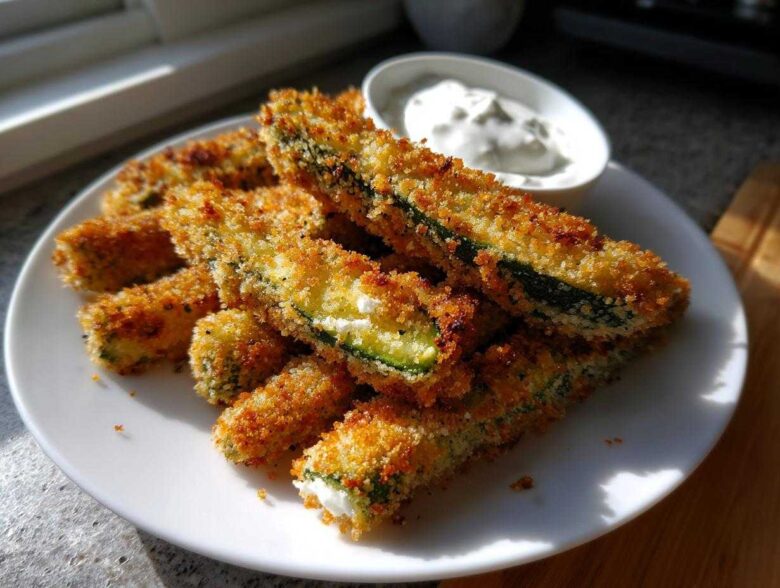
If you’re anything like us, you sometimes feel like you’re always saving the best food for company. We used to do that—fancy plating, complicated appetizers, the works. But honestly? Our best nights happen when it’s just us, maybe a handful of our closest friends, and a spread of snackable perfection. That’s why I, Marco, had to nail the absolute best Crispy Fried Pickles Recipe so we could treat ourselves any night of the week. Forget those sad, soggy disappointments you get sometimes. We are talking about restaurant-style crunch achieved in only 25 minutes total!
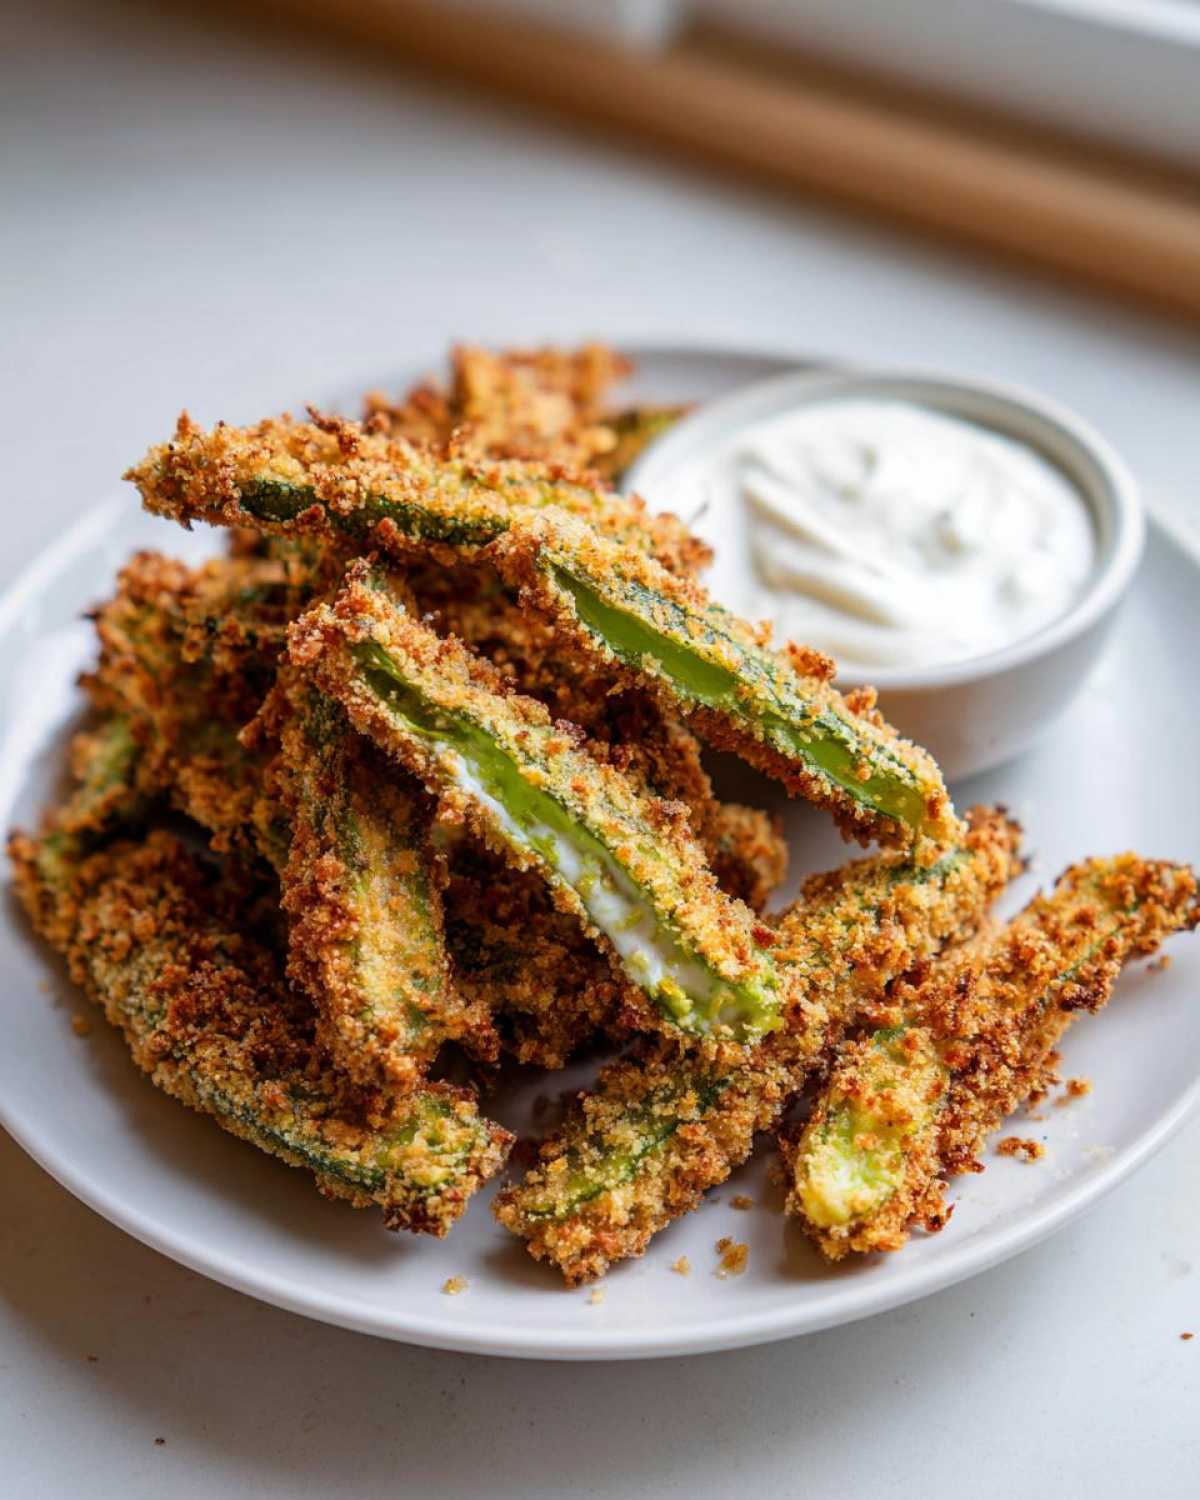
These Fried Pickles are seasoned perfectly—that spot-on tangy flavor balanced by a salty, crunchy crust—and they are ready faster than you can decide which Netflix show to watch. This recipe, complete with our simple Homemade Creamy Ranch Dip, has become the unofficial uniform for our intimate game days now. Trust me, once you taste these, you’ll understand why we claim this as the staple for treating ourselves like royalty right here in our own kitchen. If you are looking for more easy snacks fit for an Empress, you can check out our full collection of simple recipes right here.
Why You Will Crown This Crispy Fried Pickles Recipe The Best
It’s time to retire the soggy snacks forever! When Marco and I set out to make the perfect Fried Pickles Appetizer, we weren’t messing around. We wanted that satisfying, loud *crunch* you only usually get from your favorite sports bar. Here is why this recipe is going to be your new go-to party favorite:
- Unbeatable Crunch: We use panko breadcrumbs, and trust me, it makes all the difference for that ultimate texture everybody craves.
- Speedy Service: You can have these beauties ready to go—from prep to plate—in about 25 minutes total. Perfect for quick cravings or last-minute guests!
- Perfectly Tangy Flavor: The seasoning blend hits that spot between salty, savory, and that sharp, wonderful pickle tang.
- The Ultimate Pairing: It comes with our shockingly easy, cool, and creamy homemade ranch dip that cuts right through the richness of the frying.
Ingredients for Perfect Fried Pickles and Ranch Dip
When you are making something as sacred as Homemade Fried Pickles, you can’t just throw things together willy-nilly! We need precision because every little element works to secure that spectacular crunch. You’ll notice we are using spears because they hold up beautifully in the heat, but remember you can always try chips if you prefer. Don’t forget, having everything measured out beforehand is key to keeping the cooking process quick and seamless. If you want the full written recipe card for reference, you can pop over to our dedicated recipe page.
For the Crunchy Fried Pickles Batter
This is where we build the golden fortress around the pickle. The secret weapon here is definitely the panko; don’t swap it for regular breadcrumbs if you are aiming for that truly shatteringly crisp exterior!
- 2 cups dill pickle spears (make sure they are drained really well!)
- 1 cup all-purpose flour
- 1 teaspoon salt
- 1 teaspoon black pepper
- 1 teaspoon garlic powder
- 1/2 teaspoon paprika
- 1/4 teaspoon cayenne pepper (only if you like a little celebratory kick!)
- 2 large eggs
- 1/2 cup milk
- 1 cup panko breadcrumbs (Seriously, use this!)
- Vegetable oil, for frying (You’ll need enough for about 2 inches in your pot.)
For the Homemade Creamy Ranch Dip
We simply cannot serve our Crunchy Pickle Snack without this cool counterbalance. This ranch is so much better than anything from a jar, and it perfectly balances the sharp, tangy flavor of the fried pickles.
- 1/2 cup mayonnaise
- 1/4 cup sour cream
- 2 tablespoons buttermilk
- 1 teaspoon dried parsley
- 1/2 teaspoon dried dill
- 1/4 teaspoon onion powder
- 1/4 teaspoon garlic powder
Step-by-Step Instructions for Crispy Fried Pickles
Alright, this is where the magic really starts to happen. Making amazing Fried Pickles isn’t about complicated steps; it’s about doing the simple steps *right*. Pay close attention to the beginning and the end—that’s what separates a good appetizer from a truly regal one. For reference on technique, I poured out some extra thoughts on how to get them crispy elsewhere on the site, but let’s walk through this journey together right now.
Preparing Your Pickles for the Best Coating
This step is non-negotiable if you want true crunch, folks! We need those dill pickle spears bone dry. Water is the eternal enemy of crispy batter, so please, don’t skip this part. I lay them out on a plate lined with paper towels and then I gently pat the tops with more towels. You want them to be almost dusty dry.
If you leave any moisture clinging to the pickles, the flour won’t stick properly, and you’ll end up with patchy breading that falls off the second it hits the hot oil. We are building layers here; those layers need a solid foundation, which means dry pickles!
Assembling the Three-Step Dredging Station
Think of this as your assembly line for perfection. Get three shallow bowls lined up in order for easy work. First, your seasoned flour mix—this is the glue. Second, the egg and milk wash—this is the sticky binder. Third, your panko breadcrumbs—this is the armor.
Take one dried pickle spear at a time. Coat it well in the flour, shake off the excess like you’re shedding sand, then dunk it into the egg wash. Now, here’s the important bit for that ultra-thick crust: press that wet pickle firmly, really press it, into the panko. Make sure every millimeter of surface is covered by breadcrumbs. Set the coated spears aside on a clean, dry platter while you do the rest.
Mixing the Cool Ranch Dipping Sauce
While you’re coating the pickles, just take a minute to whisk up the ranch dressing. It’s super simple—just combine the mayo, sour cream, buttermilk, and all those lovely dried herbs and powders.
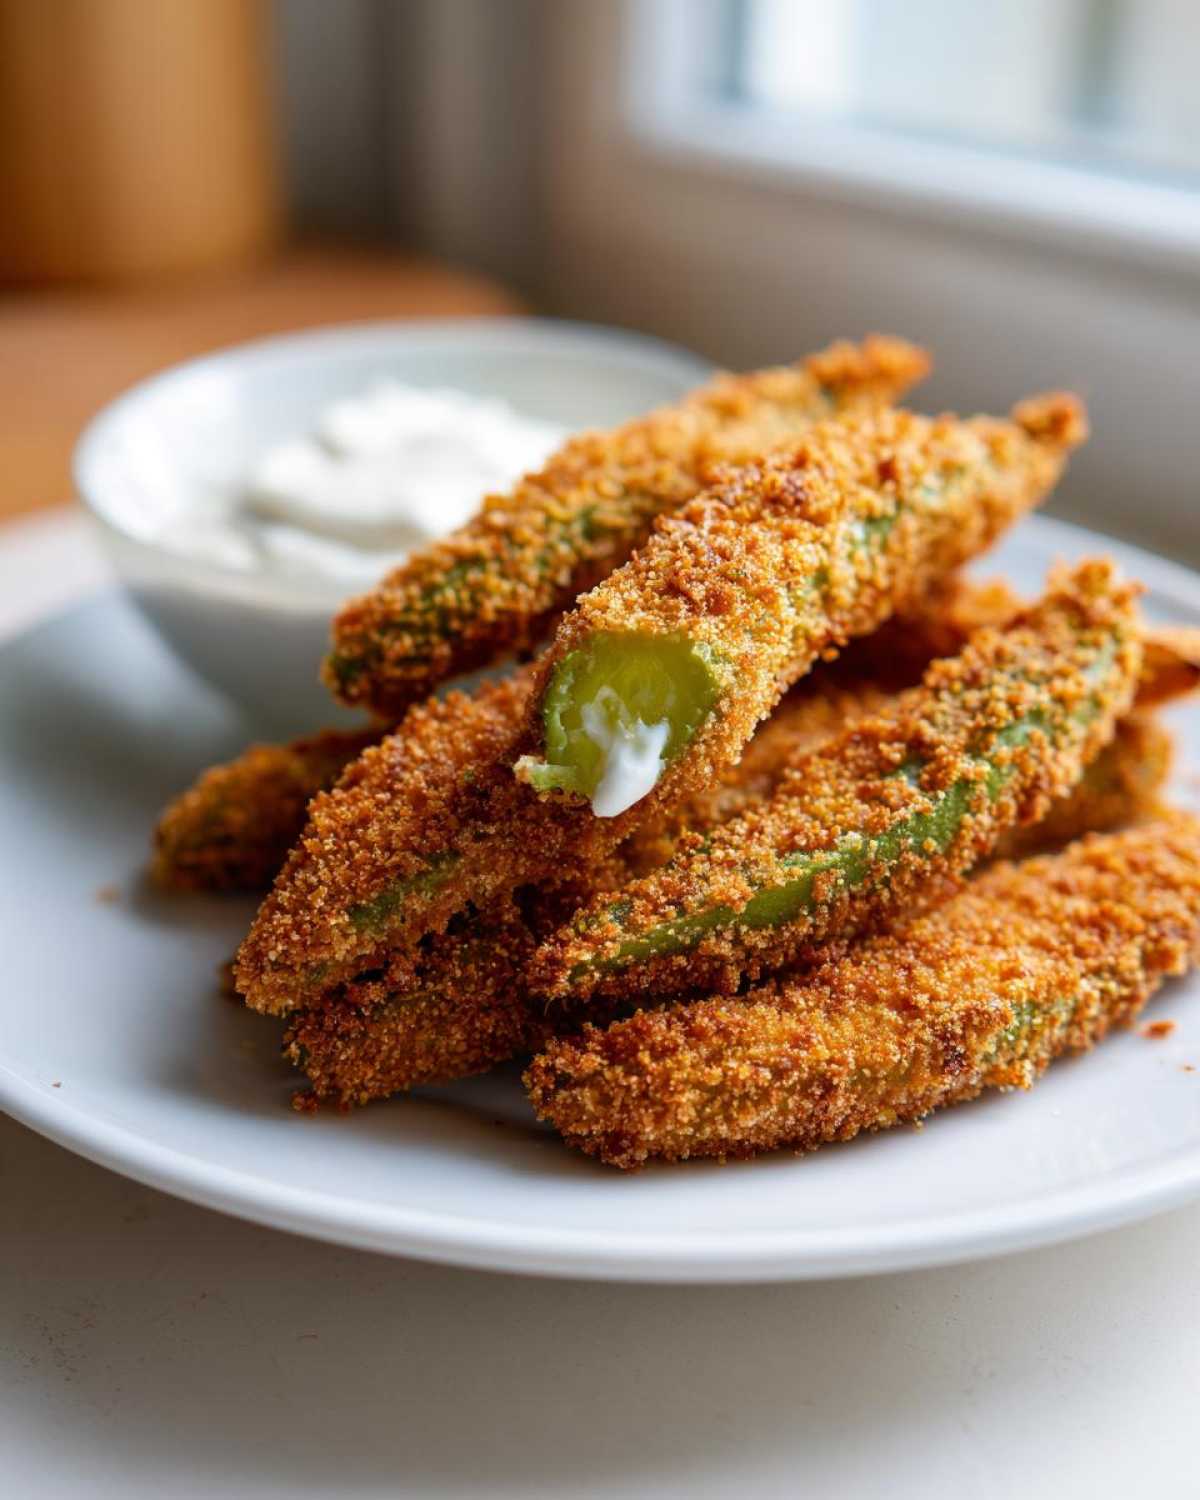
I always put this dip in the fridge for at least 15 minutes before serving. Why? Because letting it chill allows the dill and parsley to really bloom and lets the flavors marry. Serving cold ranch with piping hot, tangy fried pickles? That contrast is just *chef’s kiss*.
Frying Your Fried Pickles to Golden Perfection
Now, for the heat! This is where Marco, the Taster-in-Chief, always stresses one thing: temperature management. If your oil isn’t hot enough, the breading will soak up grease and turn soggy. If it’s too hot, the outside burns before the inside even warms up.
Heat your oil to a steady 375°F (190°C). Seriously, use a thermometer if you have one! Working in small batches—and I mean small, don’t overcrowd that pot—carefully lower your breaded spears in. You only need about 1 to 2 minutes per batch until they are a rich, golden brown. Pull them out quickly with a slotted spoon and get them straight onto a wire rack to drain off any extra oil. Serve them immediately while they scream hot and crunchy!
Expert Tips for Making Truly Crunchy Fried Pickles
We’ve got the basic method locked down, but if you want to achieve next-level, hold-the-phone crunchy pickle snack status, you need a secret weapon or two up your apron sleeve. This is where we stop making just *good* fried pickles and start making the kind people ask for at every gathering. I always say, honoring a simple recipe means knowing its potential!
If you’re looking for that supreme texture that rivals any professional joint, try the double-coat technique. After you do the first dip in the panko, don’t stop there! Dip the pickle *back* into the egg wash, and then press it firmly into the panko breadcrumbs one more time. That second layer of coating creates an even thicker, more rugged crust that stays crispier longer. You can find some of my thoughts on batter consistency over at my guide to the best fried pickle batter.
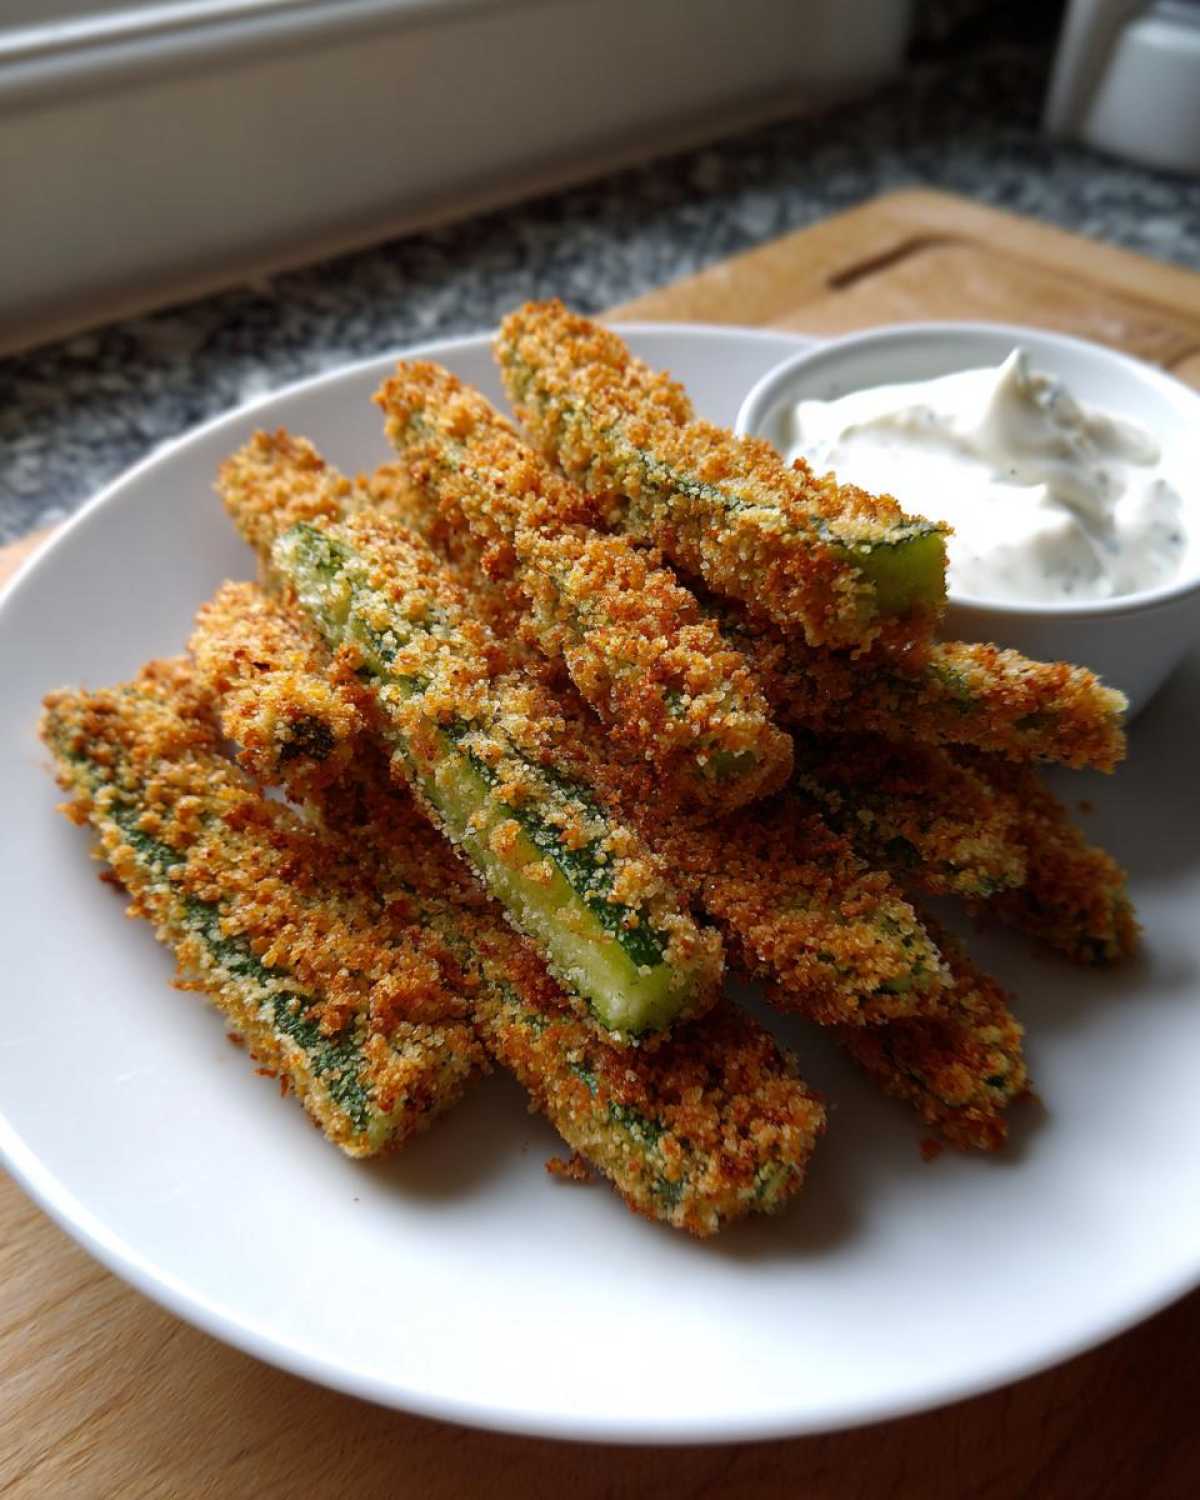
Also, remember what I said about 375°F? That temperature is crucial for these tangy fried pickles. If you have a candy thermometer, keep it handy. Keeping that heat consistent means that glorious golden exterior forms fast, sealing in the pickle’s delicious, acidic juices without letting the breading get oily or soggy. That’s the whole trick to making them worth the effort!
Variations: Beyond Deep-Fried Pickles
Okay, listen, I absolutely love deep frying because nothing beats that initial, perfect crunch. But let’s be real: sometimes you want that amazing salty, tangy flavor without pulling out the big oil pot, especially for a casual mid-week snack. We live in a world with brilliant gadgets now, and we absolutely should put them to good use!
We’ve experimented a ton to make sure these Fried Pickles are amazing no matter the method. Whether you are trying to save on cleanup or just want a slightly lighter bite, we have you covered. I keep notes for these adjustments over on my post about Air Fryer Fried Pickles, but here are the key takeaways for making this appetizer work for your royal table.
Making Air Fryer Fried Pickles for a Lighter Snack
If you own an air fryer, this is your ticket to a fantastic, guilt-free Crunchy Pickle Snack! The goal here is to mimic the high heat of the fryer while circulating air to dry out the coating quickly. You need to treat the coating gently for this method.
Once you’ve breaded your spears using the exact same dredging process we detailed above—don’t skip the panko!—it’s time for the air fryer. Preheat it to 380°F (195°C). Lay your coated pickles in a single layer inside the basket—you must work in batches, or they will steam instead of crisp. Give them a generous light spray with some cooking spray or oil. Pop them in for 8 to 10 minutes total. Remember to flip them halfway through! When they come out, they’ll be golden and delightfully crisp, just shy of deep-fried perfection.
Copycat Texas Roadhouse Fried Pickles Style
Who doesn’t love that specific, addictive flavor combo from chain restaurants? If your heart is set on recreating that famous, highly-sauced experience, it’s all down to the spice blend in the flour dredge. We want those Restaurant Style Fried Pickles!
To lean into that smoky, slightly complex flavor profile they are famous for, just make a small adjustment in the flour mixture. Add an extra quarter teaspoon of paprika—maybe even a pinch of dried ground mustard if you have it lying around. That little boost of spice elevates the standard savory coating into something that tastes instantly familiar and totally crave-worthy. Serve them piping hot with a spicy dip for the full experience!
Serving Suggestions for Your Fried Pickles Appetizer
This is where we celebrate! Honestly, these Fried Pickles make any occasion feel like a special event, even if the “occasion” is just getting through Monday. We find that the best food is the food that gets shared with people you love, so let’s talk about where these stellar snacks shine brightest.
For us, they are absolutely the MVP of any Game Day Fried Pickles spread. Seriously, make a big batch, set them on a platter next to the TV, and watch them disappear before the first commercial break is even over. They are crunchy, salty, and perfectly sized for grabbing between plays.
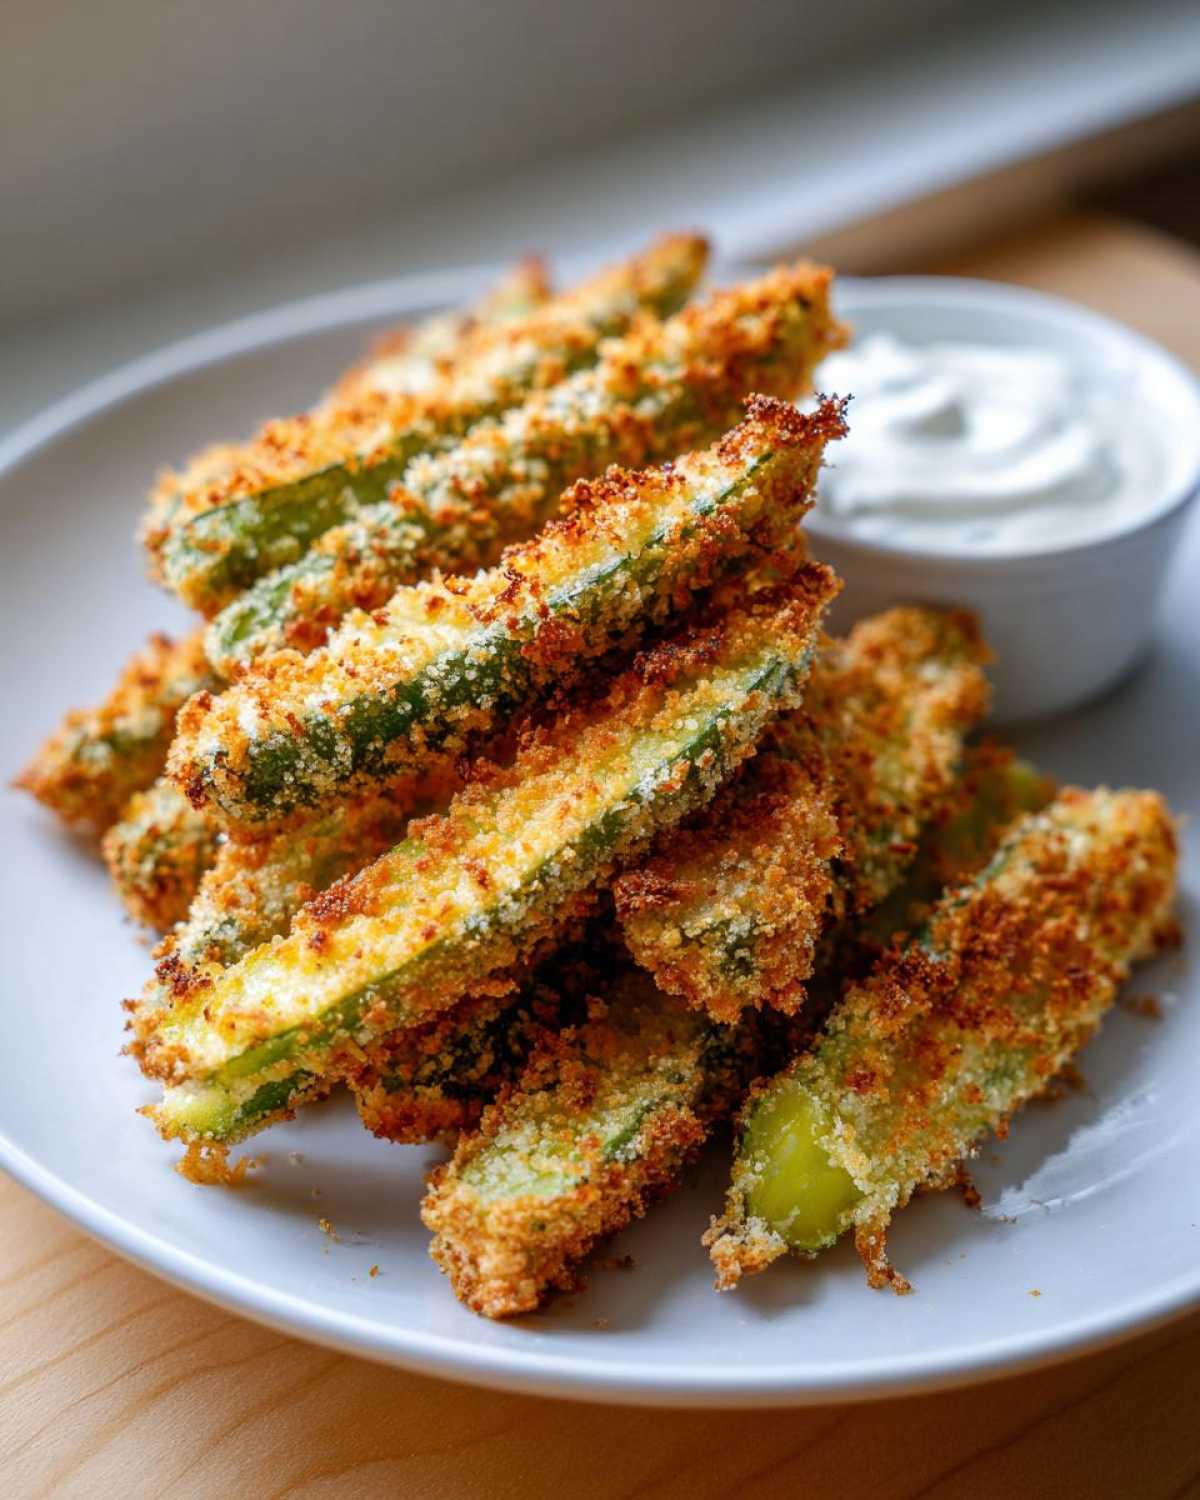
But don’t just reserve them for sports! These make incredible, easy vegetarian party food that feels way more elevated than the effort you put in. I always scatter a few parsley flakes over the top of the dipping bowl just before setting it out—it’s a tiny touch that makes the whole presentation feel regal. Don’t forget that phenomenal dip we made; a good, cool, creamy ranch dip is the only acceptable partner for these tangy bites. If you want more ideas for turning a simple snack into a full celebration ritual, check out my post on elevating your game day spread.
Marco insists that they work wonderfully as a side dish too! Forget standard fries sometimes. Imagine cutting into a juicy burger or grabbing a smoky pulled pork sandwich—and instead of a side of routine vegetables, you get a vinegary, crispy hit of flavor from these Homemade Fried Pickles. They provide a fantastic textural contrast. They’re really a versatile star: appetizer, side dish, or just a very fancy, very necessary midnight snack. You deserve it!
Storage and Reheating Instructions for Fried Pickles
Look, I have to be upfront with you here. As with almost all fried foods, the absolute pinnacle of texture—that loud, glorious crunch we worked so hard for—happens the instant these Fried Pickles come out of the oil and hit that draining rack. They are meant to be eaten hot, right away, usually before I even finish the batch!
That said, life happens, and you might have leftovers. We can’t let that wonderful tangy flavor go to waste, but we have to be realistic about reheating. Please, please, I beg you, skip the microwave! The microwave is guaranteed to steam the panko coating, turning your beautiful crunchy shells into sad, floppy sponges. That’s a culinary tragedy we simply won’t allow in the Empress’s kitchen.
If you want to resurrect some of that crispiness the next day, you have two royal decrees:
- The Oven Method: Preheat your oven to about 375°F (190°C). Lay the cooled, leftover Fried Pickles out on a clean wire rack set over a baking sheet. Pop them in the oven for about 5 to 7 minutes. The dry heat will work wonders to re-crisp the outside.
- The Air Fryer Encore: This is actually my favorite backup method! Set your air fryer to 350°F (175°C). Cook the leftovers in a single layer for about 4 minutes, checking them constantly. They tend to crisp up beautifully this way in no time at all.
And the ranch dip? Well, that lasts wonderfully in the fridge for several days. Just give it a quick whisk before serving alongside your reheated, crunchy treasures. Enjoy your second feast!
Frequently Asked Questions About Fried Pickles
We get so many wonderful messages after people try making these! It’s wonderful to see everyone treating themselves to such a fantastic appetizer. Since frying can sometimes feel intimidating, I gathered a few of the most common questions we hear about achieving that perfect bite. We want every attempt at our Fried Pickles to be a royal success!
If you’re looking for more simple entertaining ideas, I put together a few of my favorite quick appetizer recipes that are perfect for an impromptu gathering.
What is the secret to making Fried Pickles truly crispy?
Oh, this is the most important question of all! If you only take one thing away from this entire post, let it be this: Moisture control is everything. We went over this in the steps, but seriously, you must drain those pickles thoroughly and pat them down until they feel almost dusty dry before they ever touch the flour. Seriously, they need to be desert-dry!
The second massive secret is maintaining your oil temperature. You absolutely must fry these Fried Pickles at 375°F (190°C). If the oil drops even a tiny bit, you are going to end up with a greasy, soggy crust that just won’t do. Keep that temperature steady, and you’ll be rewarded with the ultimate crunchy, tangy fried pickles!
Can I use pickle chips instead of spears for this recipe?
You totally can! We love spears because they are sturdier and you can really grip them for dipping, but pickle chips are fantastic if you want a slightly different texture or are serving them as canapés. The main adjustment you’ll need to make is in the frying time.
Since pickle chips are much thinner than spears, they cook substantially faster. You’ll only need to fry them for about 60 to 90 seconds in that hot oil. Watch them closely—they go from golden brown to slightly overdone in a heartbeat! This makes them an even speedier option if you need a Quick Appetizer Recipe!
Are these Fried Pickles vegetarian?
Yes, absolutely! This recipe is perfect for anyone looking for wonderful Vegetarian Party Food. The batter uses standard flour, eggs, and milk, and the main ingredient is, of course, pickles! There are no meat or seafood products involved at all. They are a fantastic, satisfying, crunchy item that everyone at the table can enjoy!
Nutrition Estimate for Your Fried Pickles Snack
Now, every Empress knows that indulging in delicious food means knowing what you’re enjoying, right? While cooking for ourselves is about savoring the moment, we also like to keep things transparent. So, please remember that since this is based on deep frying and specific brands might vary slightly, these numbers are an estimate—but a very helpful one!
This is the estimated nutrition breakdown for our Fried Pickles recipe per serving (about 6 spears, plus a reasonable dip portion). They are certainly a decadent snack, meant for enjoying during your celebrations!
- Serving Size: 6 spears
- Calories: About 350
- Fat: 25g (mostly unsaturated, which is great, but remember we are frying!)
- Saturated Fat: 4g
- Carbohydrates: 25g
- Protein: 6g
- Sugar: Only 3g (thank you, pickles!)
- Sodium: 850mg (Pickles are salty, friends—just a heads up!)
We think these numbers prove that this is a fantastic, show-stopping appetizer for game day or parties, but maybe not the right choice for every single Tuesday night. Save these special, crunchy bites for when you truly want to treat yourself like royalty!
PrintCrispy Fried Dill Pickle Spears with Homemade Ranch Dip
Make restaurant-style crispy fried pickles at home. This easy appetizer recipe delivers perfectly seasoned, crunchy pickles served with a cool, creamy homemade ranch dipping sauce.
- Prep Time: 15 min
- Cook Time: 10 min
- Total Time: 25 min
- Yield: 4 servings
- Category: Appetizer
- Method: Deep Frying
- Cuisine: American
- Diet: Vegetarian
Ingredients
- 2 cups dill pickle spears (drained well)
- 1 cup all-purpose flour
- 1 teaspoon salt
- 1 teaspoon black pepper
- 1 teaspoon garlic powder
- 1/2 teaspoon paprika
- 1/4 teaspoon cayenne pepper (optional, for heat)
- 2 large eggs
- 1/2 cup milk
- 1 cup panko breadcrumbs
- Vegetable oil, for frying
- For the Ranch Dip: 1/2 cup mayonnaise
- 1/4 cup sour cream
- 2 tablespoons buttermilk
- 1 teaspoon dried parsley
- 1/2 teaspoon dried dill
- 1/4 teaspoon onion powder
- 1/4 teaspoon garlic powder
Instructions
- Prepare the pickles: Place the drained pickle spears on a paper towel-lined plate and pat them very dry. Moisture prevents crispiness.
- Set up the dredging station: In one shallow bowl, combine the flour, salt, pepper, garlic powder, paprika, and cayenne pepper. In a second bowl, whisk together the eggs and milk. In a third bowl, place the panko breadcrumbs.
- Dredge the pickles: Take a dry pickle spear and coat it thoroughly in the flour mixture, shaking off any excess. Dip it into the egg mixture, letting the excess drip off. Finally, press the pickle firmly into the panko breadcrumbs until fully coated. Place the coated pickles on a clean, dry plate.
- Make the ranch dip: In a small bowl, whisk together the mayonnaise, sour cream, buttermilk, parsley, dill, onion powder, and garlic powder until smooth. Taste and adjust seasoning if needed. Cover and chill while you fry the pickles.
- Heat the oil: Pour about 2 inches of vegetable oil into a heavy-bottomed pot or deep fryer. Heat the oil to 375°F (190°C). Use a thermometer to monitor the temperature; maintaining heat is key for crispiness.
- Fry the pickles: Working in small batches to avoid overcrowding the pot, carefully lower the breaded pickles into the hot oil. Fry for 1 to 2 minutes, turning occasionally, until they are deep golden brown and crunchy.
- Drain: Remove the fried pickles with a slotted spoon and place them immediately on a wire rack set over a baking sheet or on a plate lined with fresh paper towels to drain excess oil.
- Serve immediately with the chilled homemade ranch dipping sauce.
Notes
- For extra crunch, you can double-coat the pickles: after the first dip in panko, dip them back into the egg mixture and then back into the panko again.
- If you want to try the air fryer method for a lighter snack, spray the coated pickles lightly with cooking spray and air fry at 380°F (195°C) for 8 to 10 minutes, flipping halfway through, until golden.
- Use dill pickle chips instead of spears for a different texture, adjusting the frying time to about 60-90 seconds.
Nutrition
- Serving Size: 6 spears
- Calories: 350
- Sugar: 3
- Sodium: 850
- Fat: 25
- Saturated Fat: 4
- Unsaturated Fat: 21
- Trans Fat: 0
- Carbohydrates: 25
- Fiber: 1
- Protein: 6
- Cholesterol: 75