

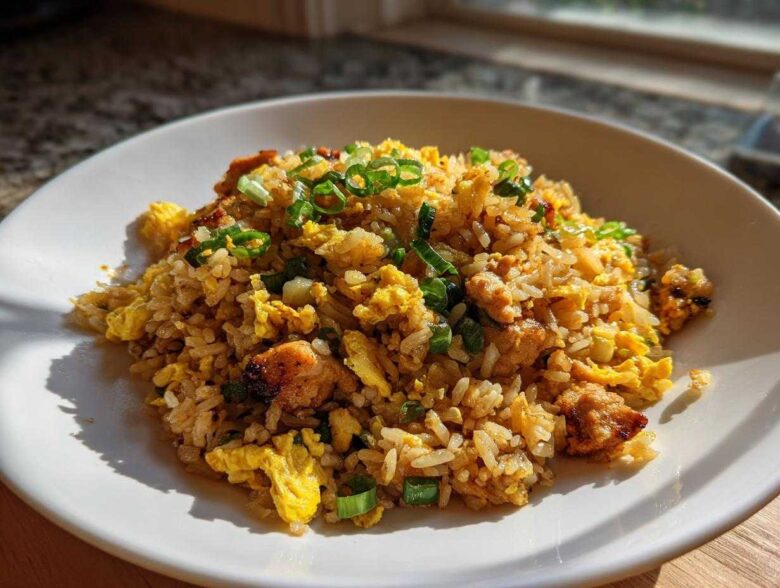
Oh my goodness, you know those nights, right? You’ve had a marathon of a day, and the only thing that sounds good is picking up the phone and ordering takeout. But then you smell your fridge, see that leftover rice, and you think, “Maybe… just maybe…” Well, stop thinking and start stirring! I’m going to show you the real secret to making Better Than Takeout Chicken Fried Rice that blasts anything they deliver right out of the water. Seriously, we are talking authentic, savory, slightly charred goodness coming out of your home pan in under 30 minutes. I finally cracked the code on mimicking that super-high-heat wok technique using my regular skillet. Trust me, once you nail this simple method, weeknight dinners just got a massive upgrade!
I’m so excited to share this recipe with you. If you want to learn more about my kitchen adventures, you can always check out my story!
Why This Is the Best Chicken Fried Rice Recipe You Will Make
Listen, there are a lot of quick stir-fries out there, but this Best Chicken Fried Rice Recipe is different. So many homemade versions end up tasting… sad. A little mushy, maybe too salty, definitely missing that unmistakable smoky depth. I spent weeks trying to replicate that perfect texture—you know, where the rice grains are separate, slightly chewy, and maybe even a little bit crisp on the edges? That’s the magic of high heat, and we can capture it!
This recipe guarantees you get that authentic, **Better Than Takeout Fried Rice** experience without needing a giant commercial wok. The speed is amazing; we’re looking at fifteen minutes of active cooking time, tops. If you want **Restaurant Style Chicken Fried Rice**, you must not skip heating your pan until it practically glows before adding the next ingredient. Don’t be shy with the heat—it’s the non-negotiable expert tip for perfect texture every single time!
Achieving Restaurant Style Chicken Fried Rice Flavor
The flavor punch comes down to just two heavy-hitters that most people overlook or under-measure. First, **oyster sauce**. Wow, this stuff brings umami and body to the sauce base that soy sauce alone just can’t touch. It coats everything beautifully. Second, and this is critical for that authentic finish, use **toasted sesame oil** only at the very end.
Don’t try to use regular sesame oil or add it too early—it burns off. The toasted, nutty aroma it releases right before serving is what makes your whole kitchen smell like your favorite Chinese spot. It’s the finishing aromatic that ties the savory chicken and the fluffy rice together perfectly.
Essential Ingredients for Perfect Chicken Fried Rice
Alright, let’s talk about what makes this dish work, because the quality of your building blocks matters immensely. When I first tried making this **Easy Chicken Fried Rice**, my rice was a soupy mess! The secret, and I mean the absolute non-negotiable secret, is the rice itself. You have to use rice that is at least one day old and chilled in the fridge. Fresh, warm rice is packed with too much moisture, and it just turns into sticky glue when you try to toss it over high heat.
We’re keeping the ingredient list simple—this should be a **Quick Dinner Recipe**, after all! No need for a specialty grocery run:
- 1 tablespoon vegetable oil (We are using high heat, so use something neutral here!)
- 1 pound boneless, skinless chicken breast, cut into 1/2-inch pieces
- 2 cloves garlic, minced
- 1 cup frozen mixed vegetables (peas, carrots, corn) – easy peasy!
- 3 cups cold, day-old cooked white rice
- 2 large eggs, lightly beaten
- 2 tablespoons soy sauce
- 1 tablespoon oyster sauce
- 1 teaspoon toasted sesame oil
- 1/4 teaspoon ground white pepper
- 2 green onions, sliced (Save these for the very end)
Ingredient Notes and Using Day Old Rice Recipe Tips
My biggest pointer, which I can’t stress enough for that beautiful **Using Day Old Rice Recipe** success, is the cold rice. You want it dry and firm so it can absorb the sauce and lightly toast without clumping. If you absolutely can’t wait a day, you can spread your fresh rice on a sheet pan and stick it in the freezer for about 30 minutes; just be careful not to let it freeze solid.
For the chicken, chopping it into small, consistent pieces (that 1/2-inch size) means cooked chicken comes out fast and evenly. Now, if you don’t have oyster sauce, you can cheat a tiny bit by using an equal amount of soy sauce mixed with about half a teaspoon of sugar or honey. It won’t be *exactly* the same spectacular flavor, but it keeps the savory element going strong. This is what makes it a true **Weeknight Chicken Meal** staple!
How to Make Restaurant Style Chicken Fried Rice Instructions
This is where the magic happens! Even though this is a full meal—a true **One Pan Chicken Dinner**—it moves so fast you’ll swear you’re working over a raging gas burner. Remember, we are shooting for that **Easy Takeout at Home** vibe here, so have every single ingredient prepped and ready right next to your stove! Seriously, measure out your sauces and have your eggs cracked BEFORE the oil even hits the pan.
First things first: cook that chicken. Get your largest skillet or, ideally, your seasoned cast iron or wok screaming hot over medium-high heat. Add that tablespoon of oil, wait until it shimmers, and toss in your diced chicken. Work it until it’s beautifully browned all over; this usually takes about five to seven minutes. Don’t crowd the pan, or it will steam instead of sear! Once it’s cooked through, scoop that cooked chicken out onto a clean plate and set it aside for later. We don’t want it overcooking!
Next step, keep that pan hot! Toss in your minced garlic—just 30 seconds here until you can smell that gorgeous aroma. Then throw in the frozen mix of peas, carrots, and corn. I just cook those for about two minutes until they aren’t rock hard anymore. Now, the balancing act! Push all those veggies and garlic to one side of your pan. You need that empty space. Pour your lightly beaten eggs right into the empty section. Scramble them super fast until they are just barely set, then break them up and mix them into the vegetables.
Time for the star of the show: the rice. Add your 3 cups of cold, day-old cooked rice right into the center of the pan. Use your spatula like a chopper to break up any clumps you see. This is crucial for that perfect, individual grain texture. You need to stir fry this over high heat (turn the burner up if you can!) for three to four minutes. You are looking for the rice to heat up and start getting a little tiny bit of color or maybe even pop a few grains—that’s the toasting process making this a great **20 Minute Chicken Rice**!
Once the rice is dancing happily, return your cooked chicken to the pan. While that gets warm, quickly mix your sauce components—soy sauce, that wonderful oyster sauce, the white pepper, and the sesame oil—in a tiny bowl. Pour that mixture evenly over everything and stir like crazy for about 60 seconds until every grain glistens and everything is piping hot. Finish by tossing in those sliced green onions! Quick wipe-down and a little bit of care here will result in the **Best Chicken Fried Rice Recipe** you’ve ever made. Don’t forget you can check out my recipe disclaimer if you have questions about ingredient sources!
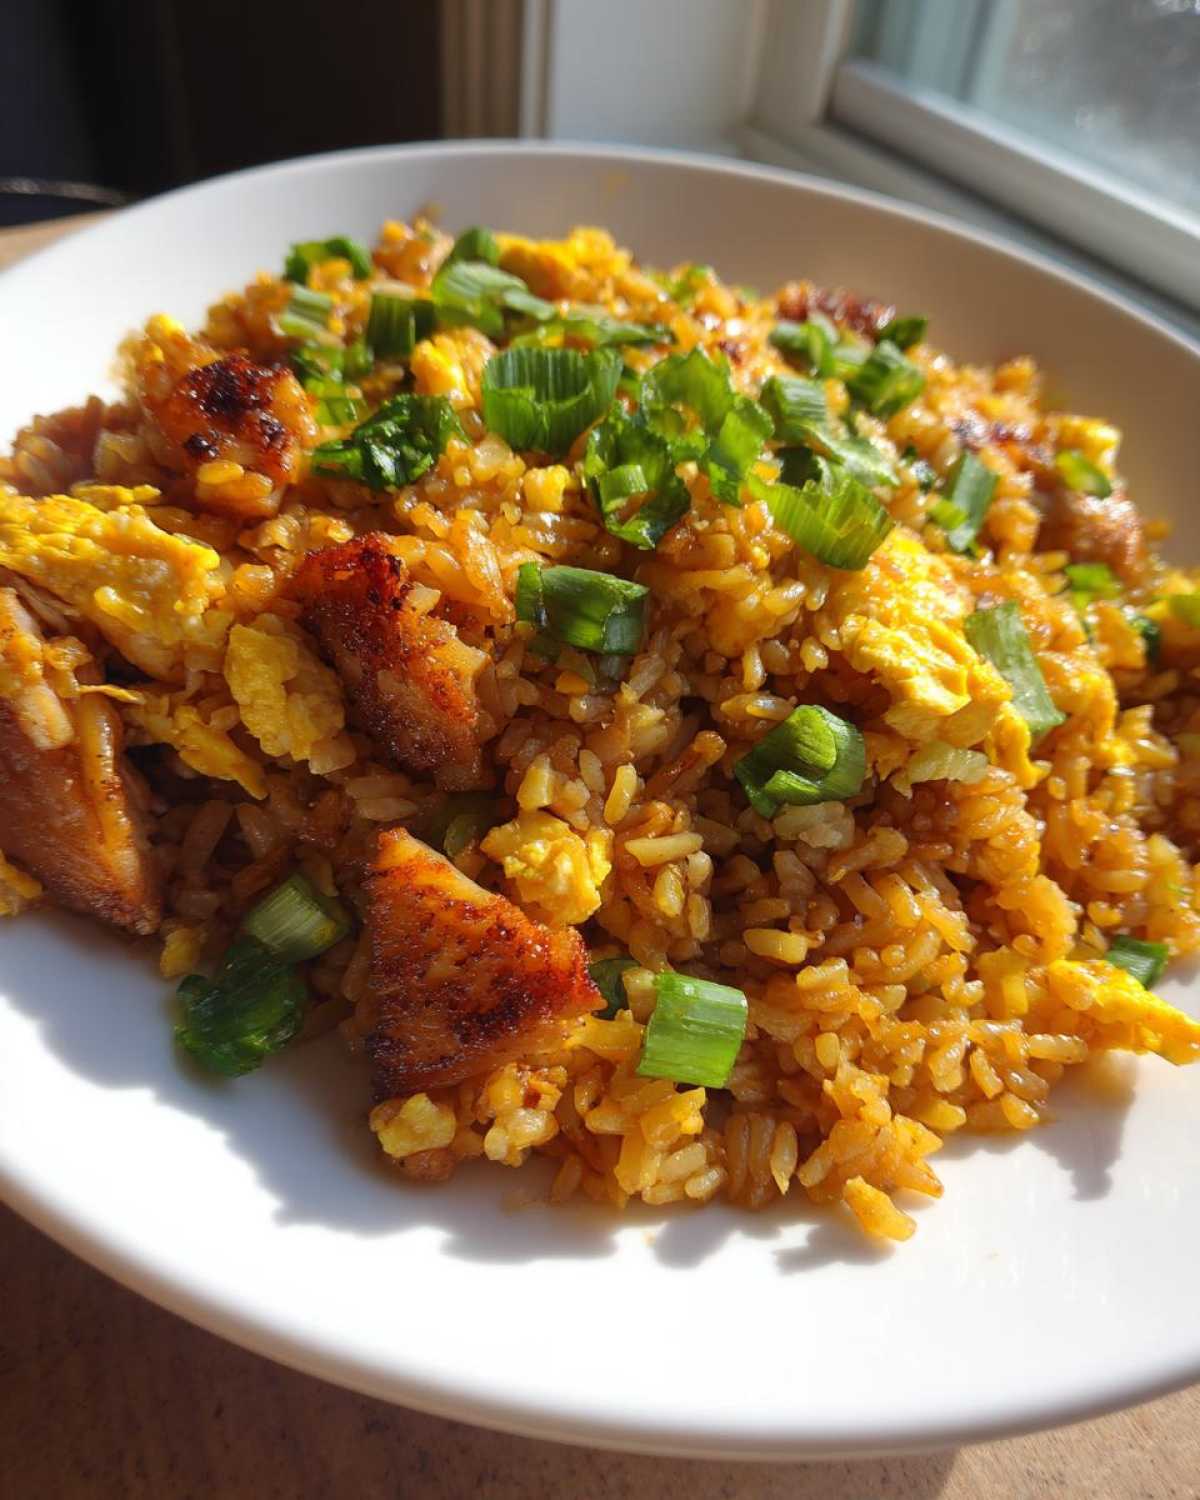
The Importance of High Heat for Easy Chicken Fried Rice
Honestly, if you take nothing else away from this whole post, remember the heat! People trying to make **Easy Chicken Fried Rice** often fail because they use medium heat, trying to avoid burning things. But burning is what gives you flavour, folks! We are creating that *wok hei*—that smoky, intense flavour imparted by super hot cooking surfaces.
If you are using a standard skillet, you simply must divide your ingredients into batches if your pan seems crowded. Overcrowding drops the temperature instantly, leading to steaming, not frying. When you stir-fry the rice, you want it to sizzle audibly the entire time. This ensures you get the slightly crispy texture we need for truly **Better Than Takeout Fried Rice**. Staying on high heat is how we keep the *total cook time* down and satisfy that craving for **Quick Dinner Recipes** in minutes—it’s all about speed and sizzling!
Tips for Success: Mastering Your Chicken Fried Rice
Now that you’ve mastered the flow—chicken out, eggs scrambled, rice toasted—let’s talk about the finer points that push this into the realm of legendary! Getting the sauce consistency right is key. We don’t want a thick, heavy blanket smothering the rice; we want it thinly coating every grain. That’s why we mix the soy, oyster, and sesame oil separately before pouring it all in at the end. It ensures even distribution before the heat locks it in place.
To prevent any lingering sogginess, remember those notes about the rice being super cold and dry. But another trick for **How to Make Perfect Fried Rice** is to wipe your pan absolutely clear of any liquid or steam between batches, especially after cooking the eggs. Hot, dry surface equals crispy, glorious rice. This technique keeps things light and fluffy, making it a perfect **Savory Chicken and Rice** dish!
Variations on Your Homemade Chinese Fried Rice
One of the best things about mastering the base technique for this **Homemade Chinese Fried Rice** is how easily it adapts! You’ve nailed the timing, you know the secret about the cold rice, so now you can start playing around with what goes into the pan. It’s super satisfying to create different flavors using the same core method.
If you want to swap out the protein, go for it! Shrimp is a fantastic option, but you have to cook it even faster than the chicken—maybe just 2 minutes per side until pink, then pull it right back out before introducing the vegetables.
Swapping in Different Veggies and Proteins
My personal favorite veggie addition besides the standard frozen mix? Mushrooms, definitely! Sauté them along with the chicken when you first start. I like slicing them thinly so they release their moisture early. Bean sprouts are amazing too, but they go in right at the very end with the green onions—they just need a quick toss to warm them up, not a long cook time, otherwise they get slimy. That keeps them nice and snappy!
If you want to make this vegetarian, just skip the chicken step entirely and maybe bulk up the eggs (do four eggs!) or toss in some crispy tofu cubes you’ve air-fried beforehand. It stands up beautifully as a **Simple Asian Stir Fry** base.
The Trick to Hibachi Chicken Fried Rice Flavor
Want to lean into that buttery, slightly sweeter **Hibachi Chicken Fried Rice** vibe? It’s easy, promise! When you are cooking the chicken initially (Step 1), instead of just using vegetable oil, use half the oil and half real unsalted butter. That little bit of browned butter flavor changes everything!
Also, for that authentic hibachi flavor that you get at the teppanyaki tables, you need a tiny hint of ginger. Mince about a teaspoon of fresh ginger and toss it in when you add the garlic. It adds a specific zip that separates it from standard soy-sauce fried rice. Keep your sauce ratios the same, and you’ve basically made a whole new meal!
Serving Suggestions for Your One Pan Chicken Dinner
So you’ve got this fantastic, flavor-packed **One Pan Chicken Dinner** that’s ready to go, and you’re thinking, what now? While this **Chicken Fried Rice** is honestly a complete meal all by itself—it has protein, veggies, and rice—sometimes you just want a little something extra on the side to round out the plate. The key here is keeping it simple so you don’t lose that awesome 25-minute speed we worked so hard to achieve!
I find that anything too rich or heavy just competes with that perfect savory flavor we built with the oyster and sesame oils. So, my go-to sides are always quick, crunchy, or fresh. Think of it as adding texture contrast to your meal. Steamed green vegetables are always welcome here. You can steam broccoli or bok choy in one of those little microwave steam bags in literally three minutes. That’s fast!
If you need something crisp, you cannot beat a super easy cucumber salad. Just thinly slice a cucumber, toss it with a splash of rice vinegar, a tiny pinch of sugar, and maybe a few shakes of salt. Five minutes, max. It gives you this bright, cooling counterpoint to the savory rice. It’s a classic pairing in Asian meals for a reason—it cleanses the palate perfectly between bites of your **Homemade Chinese Fried Rice**!
Storage and Reheating Instructions for Leftover Chicken Fried Rice
Now, if you managed to have any leftovers of this amazing Better Than Takeout Fried Rice—which, let’s be honest, is a feat in itself!—you need to treat it right so it tastes just as good tomorrow. Properly storing your leftovers is crucial, especially since we’re relying on that dry rice structure.
The moment it cools down a bit, get it into an airtight container. Don’t leave it sitting on the counter for hours; food safety first, always! Once it’s sealed up tight, it’s good in the refrigerator for about three to four days. Because this is such a great recipe for meal preppers, I always make a double batch on Sunday just for grab-and-go lunches.
The microwave? Oh, I generally avoid it for fried rice. Microwaving heats unevenly and it’s the fastest way to turn those perfect, separate rice grains back into slightly rubbery clumps. You want to preserve that texture we worked so hard to achieve! So, here is how you reheat your Easy Chicken Fried Rice perfectly:
- Take the amount you want to eat and spread it out in a thin layer in your skillet or wok. Don’t pile it high!
- Place the skillet over medium-high heat. Skip the extra oil if you can; if the pan looks really dry, just a tiny spritz (maybe 1/2 teaspoon) of vegetable oil is fine.
- Toss and stir frequently. You want to hear that sizzle again! By heating it quickly and tossing constantly, you evaporate any surface moisture and bring back that lovely, individual grain texture from the very first time you made it.
It takes about four to six minutes on the stovetop, but I promise it’s worth the extra five minutes compared to nuking it in the microwave. Enjoy that second helping of your Homemade Chinese Fried Rice! If you ever need to reach out for recipe questions, you can always find me on my contact page!
Frequently Asked Questions About This Easy Chicken Fried Rice
I get so many questions about this recipe—it’s such a staple in my kitchen, and I love helping you troubleshoot! Cooking something fast like this can sometimes feel tricky, but once you know the little quirks, it becomes second nature. Here are the things I hear most often about making the perfect batch of Easy Chicken Fried Rice.
Can I skip using day-old rice? My fresh rice looks fine!
Oh, I know the temptation is strong, especially when you are hungry *now*! But please, trust me on this: absolutely do not use fresh rice for this recipe. Freshly cooked rice is sticky and full of water vapor. When you throw it into that hot pan, the steam has nowhere to go, and it just ends up creating a soupy, gummy mess instead of the separate grains you need for *real* takeout texture. The key to **How to Make Perfect Fried Rice** is using dry, cold, leftover rice. It crisps up beautifully and can properly absorb all that delicious sauce!
What oil is best for this chicken fried rice?
Because we are cooking over higher heat for speed and flavor development (remember we talked about that high heat for **Better Than Takeout Fried Rice**?), you need a neutral oil with a high smoke point. That means vegetable, canola, or even avocado oil works perfectly. I listed vegetable oil in the ingredients. The only exception is that little bit of real butter I mentioned for a **Hibachi Chicken Fried Rice** variation. You use the butter *with* the oil so it doesn’t scorch immediately!
How do I prevent my scrambled eggs from sticking to the pan?
This is a super common issue, especially if your pan isn’t seasoned perfectly. When you push the vegetables to one side and pour in those eggs, make sure that empty space in your **Chicken Rice Skillet Meal** is hot enough again! If the pan is only lukewarm, the protein in the egg hits the metal and instantly bonds—stick city!
My trick is that right before pouring the eggs in that empty space, I drop just a tiny extra bead of oil in that spot, making sure it coats the base well. Then, whisk or scramble them quickly and forcefully. Once they start setting up, immediately scrape them out with your spatula and mix them with the veggies. That quick cook time usually keeps them from gluing themselves down, giving you perfectly fluffy bits for your **Savory Chicken and Rice**!
I don’t eat chicken. Can I make this vegetarian?
Of course! This recipe is so adaptable. If you want a vegetarian version of your **Easy Takeout at Home** meal, simply skip cooking the chicken in Step 1. Instead, you can substitute it with firm or extra-firm tofu that you’ve pressed really well (to remove extra water) and then pan-fried or air-fried until golden brown and crispy *before* you start the main cooking process.
Or, you can just significantly increase the number of eggs; using four or even five eggs for this amount of rice gives you plenty of protein and richness. Make sure you still use the oyster sauce for depth, perhaps swapping in a vegetarian mushroom-based oyster sauce if you prefer, or just increasing the soy sauce slightly. It still hits all the right notes!
If you have any other questions while baking, please see my privacy policy for contact details!
Nutritional Estimates for Savory Chicken and Rice
As I always tell folks, since we are making this **Quick Dinner Recipe** right in our own kitchen, the nutrition can swing a bit based on how much oil you personally use or if you opt for low-sodium soy sauce! But based on the standard measurements for this **Savory Chicken and Rice**, here’s the general estimate:
- Serving Size: 1 serving
- Calories: 410
- Sugar: 3g
- Sodium: 850mg (This can be lower if you use low-sodium soy!)
- Fat: 12g
- Saturated Fat: 2g
- Unsaturated Fat: 10g
- Trans Fat: 0g
- Carbohydrates: 45g
- Fiber: 2g
- Protein: 32g
- Cholesterol: 150mg
It’s a fantastic, balanced dish, especially for a Family Favorite Dinner Idea that checks all the boxes!
Nutritional Estimates for Savory Chicken and Rice
As I always tell folks, since we are making this Quick Dinner Recipe right in our own kitchen, the nutrition can swing a bit based on how much oil you personally use or if you opt for low-sodium soy sauce! But based on the standard measurements for this Savory Chicken and Rice, here’s the general estimate:
- Serving Size: 1 serving
- Calories: 410
- Sugar: 3g
- Sodium: 850mg (This can be lower if you use low-sodium soy!)
- Fat: 12g
- Saturated Fat: 2g
- Unsaturated Fat: 10g
- Trans Fat: 0g
- Carbohydrates: 45g
- Fiber: 2g
- Protein: 32g
- Cholesterol: 150mg
It’s a fantastic, balanced dish, especially for a Family Favorite Dinner Idea that checks all the boxes!
PrintBetter Than Takeout Chicken Fried Rice
Make restaurant-style chicken fried rice quickly at home using day-old rice for the best texture and savory flavor.
- Prep Time: 10 min
- Cook Time: 15 min
- Total Time: 25 min
- Yield: 4 servings
- Category: Dinner
- Method: Stir Fry
- Cuisine: Asian
- Diet: Low Fat
Ingredients
- 1 tablespoon vegetable oil
- 1 pound boneless, skinless chicken breast, cut into 1/2-inch pieces
- 2 cloves garlic, minced
- 1 cup frozen mixed vegetables (peas, carrots, corn)
- 3 cups cold, day-old cooked white rice
- 2 large eggs, lightly beaten
- 2 tablespoons soy sauce
- 1 tablespoon oyster sauce
- 1 teaspoon toasted sesame oil
- 1/4 teaspoon ground white pepper
- 2 green onions, sliced
Instructions
- Heat vegetable oil in a large skillet or wok over medium-high heat. Add chicken and cook until browned and cooked through, about 5 to 7 minutes. Remove chicken and set aside.
- Add a little more oil if the pan is dry. Add garlic and cook for 30 seconds until fragrant.
- Add frozen vegetables and cook for 2 minutes until slightly tender. Push vegetables to one side of the pan.
- Pour beaten eggs into the empty side of the pan. Scramble quickly until just set, then break into small pieces and mix with the vegetables.
- Add the cold, day-old rice to the pan. Break up any clumps with your spatula. Stir fry for 3 to 4 minutes until the rice is heated through and slightly toasted.
- Return the cooked chicken to the pan.
- In a small bowl, whisk together soy sauce, oyster sauce, sesame oil, and white pepper. Pour the sauce mixture over the rice and stir constantly until everything is evenly coated and hot, about 1 minute.
- Stir in the sliced green onions. Serve immediately.
Notes
- Use cold, day-old rice; fresh rice contains too much moisture and will result in sticky fried rice.
- Cook the rice mixture over high heat to achieve a slightly crispy texture.
- Adjust soy sauce amount based on your preference for saltiness.
Nutrition
- Serving Size: 1 serving
- Calories: 410
- Sugar: 3
- Sodium: 850
- Fat: 12
- Saturated Fat: 2
- Unsaturated Fat: 10
- Trans Fat: 0
- Carbohydrates: 45
- Fiber: 2
- Protein: 32
- Cholesterol: 150