

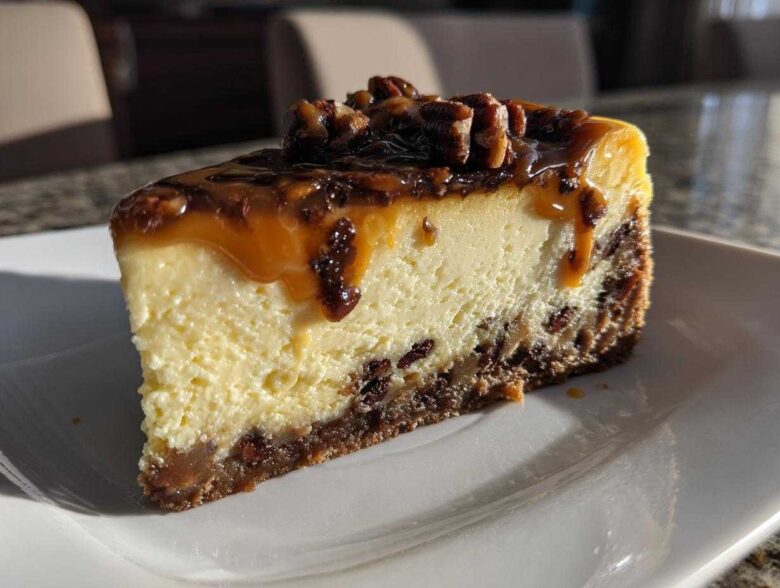
Listen, sometimes only pure, unadulterated decadence will do. We’re talking about desserts that make you close your eyes on the first bite, that feel like hitting the gourmet jackpot. If you agree, then you absolutely need my Ultimate Baked turtle cheesecake recipe in your life. This isn’t some flimsy dessert; this is the real deal. I’ve spent years chasing that flawless, sink-your-spoon-right-in creamy texture, and I finally cracked the code.
This particular recipe nails that perfect trifecta: rich, velvety cheesecake base loaded with chocolate chips, laced with salty caramel swirls, and that gorgeous crunch from toasted pecans. It’s impressive enough for a holiday table but so comforting when you just need a giant slice after a long week. Trust me, once you master this technique, you won’t look back!
If you’re curious about how serious I am about the quality that goes into my recipes, take a peek at my baking philosophy here!
Why You Will Love This Ultimate Turtle Cheesecake Recipe
I know you’ve probably seen a million cheesecake recipes out there, but this one just hits different. It’s the kind of dessert you bring out when you want everyone to stop talking and just eat. Here’s why this specific recipe is going straight into your favorites cookbook:
- That Rich and Creamy Texture: We use the water bath method, which honestly feels like cheating, but it results in the smoothest, densest, no-crack cheesecake you’ve ever made. It melts in your mouth!
- The Perfect Salted Caramel Swirl: We aren’t skimping here. The balance between the sweet caramel and that tiny kiss of sea salt cuts right through the richness of the chocolate and cream cheese. It’s addictive.
- Impressive Presentation (Without the Stress): Even though it looks like it belongs on a baking show, the layering and swirling are actually super straightforward. You don’t even need advanced piping skills for this one.
- Crunch Factor Guaranteed: The pecan crust gives you that fantastic textural contrast. It’s not just soft filling; you get that satisfying toasty nut flavor in every single bite you scoop up.
- Make-Ahead Wonder: This is a real bonus for busy folks! Cheesecakes taste better the next day, so you can whip this up entirely before your guests arrive. No last-minute scrambling needed.
- It’s the Ultimate Comfort Dessert: Chocolate, caramel, nuts—it’s all the best things wrapped up in something truly elegant. It just screams special occasion, even if the special occasion is Tuesday night!
Gathering Ingredients for Your Turtle Cheesecake
Okay, before we even think about turning on the oven, we have to talk about ingredients. Seriously, the quality here determines everything. If you want that super smooth, velvety result that people rave about, you have to pay attention to temperature. I learned this the hard way years ago when I tried to rush things!
Please, please, please make sure your cream cheese and your eggs are sitting out on the counter for at least an hour before you start. Room temperature ingredients whip up beautifully and mix without any tiny, annoying lumps getting stuck in the batter. If your cream cheese is stubbornly cold, your texture will suffer, and we absolutely aren’t having that!
For the Pecan Crust
The crust is where we start building that nutty foundation. It’s simple, but don’t skip that quick 10-minute bake—it sets it up perfectly so it doesn’t turn soggy under all that creamy goodness.
- 1 1/2 cups graham cracker crumbs (the fine stuff works best!)
- 1/2 cup chopped pecans, toasted ahead of time until they smell fragrant
- 1/4 cup granulated sugar
- 6 tablespoons unsalted butter, melted, just barely still warm
For the Homemade Creamy Cheesecake Filling
This is the heart of the whole operation! Remember what I said about temperature? Make sure these have time to relax on the counter!
- 3 (8 ounce) packages cream cheese, softened like room temperature clay
- 1 1/2 cups granulated sugar
- 1 teaspoon vanilla extract (use the real stuff, it makes a difference!)
- 1/4 cup sour cream (this adds that slight zing!)
- 3 large eggs, cold eggs will make your batter lumpy!
For the Chocolate and Caramel Swirl Topping
These are the ‘turtle’ components that make this dessert world-class. For the chocolate, I always opt for dark or semi-sweet chips because milk chocolate is just too sweet when mixed with the caramel. If you want the absolute best payoff in your final slice, choose a quality chocolate.
- 1 cup semi-sweet chocolate chips
- 1/2 cup caramel sauce, divided (I keep mine warm so it drizzles easier)
- 1/2 cup chopped pecans, toasted again, reserved just for the grand finale topping
Step-by-Step Instructions for Baked Turtle Cheesecake
Now for the fun part, actually putting this gorgeous dessert together! Don’t let the baking section scare you; the secret to a perfect, creamy texture is all in the technique, especially managing that heat. Follow these steps exactly, and you’ll have the most incredible turtle cheesecake you’ve ever tasted.
Preparing the Crust and Preheating
First things first, get your oven warmed up to 325 degrees Fahrenheit. This is important because the crust needs a head start! In a bowl, mix those graham cracker crumbs, your pre-toasted pecans, the tiny bit of sugar, and that melted butter until it all looks like wet sand. Press this mixture firmly into the bottom of your 9-inch springform pan.
Pop that crust in the oven for just 10 minutes to set, and then let it cool while you tackle the filling. Oh, and here’s a pro tip for the water bath later: wrap the outside of your springform pan really well with heavy-duty foil—like two or three layers—to keep every drop of water out. Don’t skip that or you’ll have a soggy disaster!
Mixing the Rich Nutty Cheesecake Batter
This is where patience really pays off. Use your electric mixer on medium speed to beat that softened cream cheese until it’s truly smooth—no lumps allowed!
Next, gradually add your sugar, vanilla, and sour cream, beating until everything is just combined and looking creamy. Now, the eggs! You must add the eggs one at a time, mixing only until you see that yolk disappear before adding the next one. If you beat the eggs too much, you introduce too much air, and that’s how we get cracks later. We are aiming for dense and smooth, not light and airy!
Layering and Creating the Salted Caramel Swirl
Time to build the layers that make this dessert legendary. Pour about half of your beautiful cheesecake batter over that slightly cooled crust. Sprinkle half of your chocolate chips across the top, and then drizzle about half of that gorgeous caramel over them.
Gently pour the rest of the batter over that layer. Top that with the remaining chocolate chips. Now for the swirl magic: dollop the rest of the caramel sauce right on top of the whole thing. Take a butter knife or a skewer and carefully drag it through the layers a few times. You want to see streaks, not just blend everything into a muddy brown mess. Keep those swirls gentle for the best turtle cheesecake presentation!
Baking the Turtle Cheesecake in a Water Bath
Place your foil-wrapped springform pan inside a large roasting pan—this is your water bath setup. Carefully pour very hot water into the roasting pan until it comes about halfway up the sides of the springform pan. The water insulates the sides, ensuring even, gentle cooking. If you skip this, your edges will bake too fast!
Bake this masterpiece for about 60 to 75 minutes. You’ll know it’s nearly done when the edges look set and firm, but the very center—maybe a two-inch circle—still has a slight jiggle to it, like firm Jell-O. Don’t push it past that point!
Cooling and Chilling for the Best Turtle Cheesecake
This part tests my patience every time, but it is the secret weapon against cracking! Once the baking time is done, simply turn the oven off. Prop the oven door open just a crack—about an inch—and let your cheesecake hang out inside for a full hour. This slow temperature decrease is vital.
After that initial hour, take it out of the water bath, remove that foil, and let it cool completely on a wire rack on the counter. Once it’s totally cool to the touch, cover it snugly and move it directly into the fridge. You must let it chill for a minimum of six hours, but honestly, overnight is the gold standard for the absolute best texture in your finished turtle cheesecake.
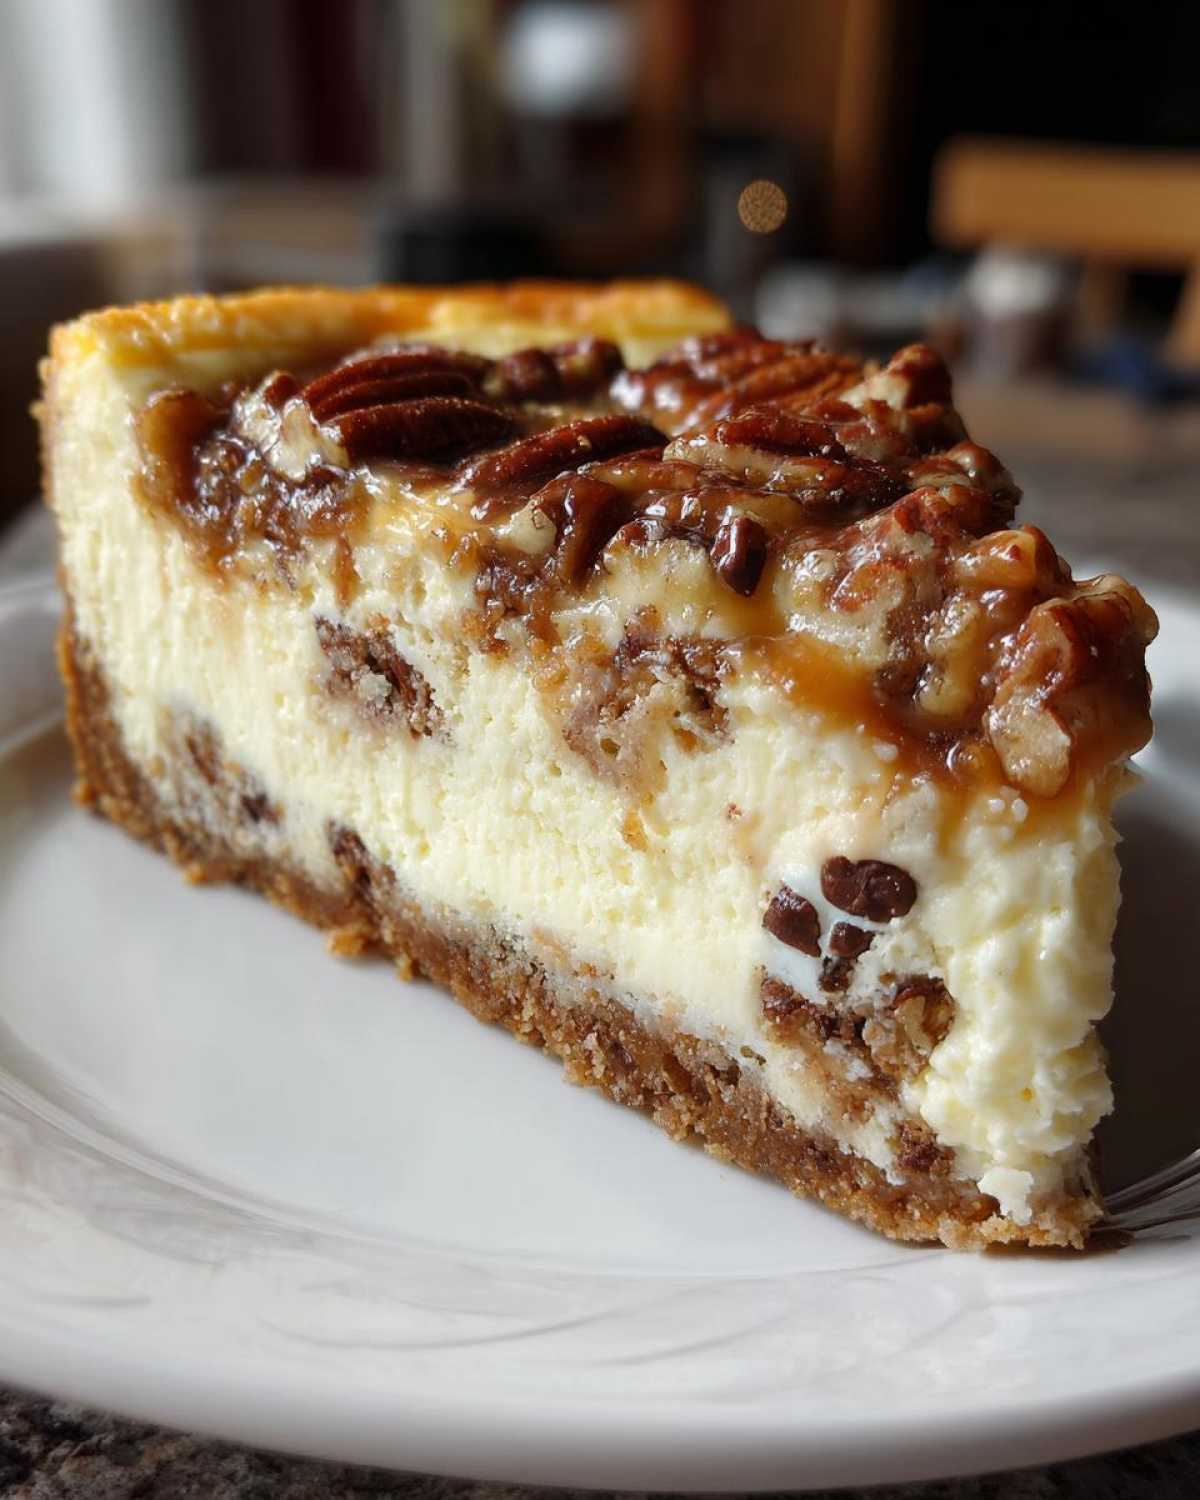
Tips for Success with Your Decadent Cheesecake Desserts
Look, I know cheesecake seems fussy, but that’s just because it demands a little respect! If you forget one small step, you might end up with a sunken mess, and nobody wants that after all that careful layering. The key to making this a showstopper every time ties back directly to what we talked about earlier, but let’s dive into these success tips just to be sure we nail it.
My biggest piece of advice, which I can’t stress enough, is about temperature. If your cream cheese is cold, it hates mixing with the sugar, and it creates microscopic pockets of air that collapse during baking, leading to cracks. Always, always let your dairy chill out on the counter for at least sixty minutes. I feel like this is the single biggest factor in getting that signature smooth texture in these Decadent Cheesecake Desserts.
Also, when you are whisking things, be gentle! Overmixing the batter after the eggs are in is a recipe for a cracked top, guaranteed. We want gentle incorporation, not a high-speed fluff job.
Ingredient Notes and Substitutions for Turtle Cheesecake
Let’s talk specifics because sometimes we run out of things, right? If you happen to be out of sour cream, don’t panic. You can substitute it with an equal amount of full-fat plain Greek yogurt. It provides that necessary acidity and tanginess that cuts the sweetness, so keep the proportions the same!
What about that caramel sauce? If you are in a pinch and only have regular caramel, you can easily make a quick salted version. Just warm up the amount you need on the stovetop or microwave, and stir in a small pinch—maybe 1/4 teaspoon—of flaky sea salt. Give it a good taste test until it has that beautiful sweet-and-salty punch we are looking for to elevate this Chocolate Caramel Pecan Cheesecake.
Also, I should mention that if you happen to find this recipe helpful in your baking journey, please check out the full disclaimer details over here. I always want to be transparent about any advice I give!
Serving Suggestions for Your Chocolate Caramel Pecan Cheesecake
You’ve done the hard work! You’ve baked it slow, waited patiently, and now you have this absolute masterpiece staring back at you from the fridge. How do you serve this glorious turtle cheesecake up so it gets the reaction it deserves?
The truth is, this dessert is so rich and layered that it really doesn’t need much fuss. Overloading it with toppings can actually distract from that perfect creamy texture we worked so hard to achieve. I always say, when the main event is this good, the supporting cast should be quiet but present.
My favorite presentation is incredibly simple. Right before slicing, give the top a super light dusting of good quality unsweetened cocoa powder. It adds a little visual depth and gives you that faint, bitter note that tastes amazing next to the sweet caramel.
If you are serving it right away, a pristine dollop of freshly whipped heavy cream—unsweetened is best, to keep that balance—on the side of the slice makes people feel like they are eating something truly special. Don’t mix the cream into the cake itself; just let people add it if they want!
And for pairing? Forget soda. This needs a strong cup of coffee. A rich, dark roast or a smooth espresso cuts perfectly through the fat and sugar, cleansing your palate for the next bite of your Chocolate Caramel Pecan Cheesecake.
If you want to get fancy for a holiday gathering, sometimes I’ll put a few extra toasted pecans around the serving platter just to show off, but honestly, the cheesecake speaks for itself.
Storage and Reheating Instructions for Homemade Creamy Cheesecake
Alright, you made it! You wrestled with the water bath, you’ve waited the obligatory six hours (or maybe just four if you’re less disciplined than me!), and now you have the most incredible turtle cheesecake sitting in your kitchen. The worry now is—how do I keep this treasure perfect until I want the next slice?
The good news is that cheesecakes, especially properly baked ones like this, store beautifully. They actually get even denser and richer the next day, which I personally love. I always feel like I’m eating a gourmet treat when I have a slice for breakfast!
The main enemy here is air exposure. Air dries out the edges and can sometimes pick up weird fridge smells, and we absolutely cannot let that happen to this masterpiece!
- First thing’s first: make sure that cheesecake is completely chilled before you cover it. Warming it up under the fridge light as you sneak a slice will cause condensation, and condensation equals weeping cheesecake!
- Once fully chilled, use plastic wrap, but wrap it loosely but completely around the entire pan (if you haven’t removed the springform ring yet). If you have already removed the outer ring, transfer the cheesecake onto a serving plate and cover the entire plate and cake tightly with plastic wrap.
- You’re aiming to keep it airtight. I usually follow up the plastic wrap with a layer of aluminum foil just to be extra cautious, especially when putting it near those leftover tuna casserole moments in the fridge.
- Stored correctly this way, your Homemade Creamy Cheesecake will stay absolutely pristine in the refrigerator for up to 5 days. Seriously, it holds up like a champ!
Now, what about freezing? Can you freeze this wonderful slice of heaven? Yes, you definitely can, though I always maintain that fresh or freshly chilled is always superior for baked cheesecake dairy products.
If you decide to freeze, I highly recommend slicing it first. Wrap each individual slice tightly first in plastic wrap, then maybe a layer of foil. This way, you can thaw exactly what you need without messing up the rest of the cake. Freeze it flat, and when you’re ready to eat a slice, just let it thaw slowly in the refrigerator overnight. If the texture feels a tiny bit softer when thawed, don’t worry! A quick 30 minutes out on the counter before cutting usually firms it right back up and restores that lovely density.
Frequently Asked Questions About Turtle Cheesecake Recipe
I totally get it—when you’re setting out to make something this decadent, you want all your ducks in a row! There are always those little technical questions that pop up when you’re trying a new, fancy dessert like this. Hopefully, these little bits of advice will help smooth out the process for you so you can nail that perfect swirl!
Can I make this turtle cheesecake without a water bath?
Oh, the eternal cheesecake debate! Look, the water bath is my absolute best friend because it guarantees a crack-free, evenly cooked texture. Without it, the dry heat of the oven tends to cook the edges way faster than the middle, leading to those dry, cracked rims we want to avoid. That’s the risk you take when you skip it.
If you absolutely cannot use a water bath—maybe your roasting pan isn’t tall enough—here is your backup plan for some Easy Cheesecake Baking: Place a pan of boiling hot water on the rack directly below your cheesecake pan. It won’t be as perfect as a true water bath, but that trapped steam will help keep things moist while it bakes. Just watch the baking time closely!
How do I ensure my pecan crust is perfectly crisp?
This is where that initial 10-minute bake time really earns its keep! You want that crust to be set and slightly golden before the cheesecake batter even touches it. When you’re mixing your graham crackers, pecans, and melted butter, mix it until every single crumb is coated in that rich butter. Don’t leave any dry patches behind!
Press it firmly and evenly into the bottom of that springform pan—tap the bottom gently on the counter a few times if you need help compressing it. When it comes out of that initial 10-minute bake, it should smell nutty and feel firm to the touch. That little bit of pre-baking locks everything in place so your nuts get toasty instead of soggy later.
Is it possible to make this a No Bake Turtle Dessert?
That’s a great question, especially if you’re trying to avoid turning on the oven in the summer heat! Yes, you absolutely can adapt this into a No Bake Turtle Dessert, but you have to adjust the structure, since we’re losing the binding power of the baked eggs.
For a no-bake version, you’d skip the baking steps entirely for the crust (though you might want to chill it for 20 minutes to set the butter). For the filling, you’d rely on heavy refrigeration, or better yet, dissolve a couple of teaspoons of unflavored gelatin into a little bit of warm water and beat that into your filling right before pouring it into the crust. You still layer the chocolate and caramel, but then you’ll need at least 8 hours, preferably overnight, in the fridge to get that firm, sliceable texture.
Estimated Nutritional Data for Your Turtle Cheesecake
I know some of you are tracking macros, or maybe you just want to know what you’re walking into when you commit to a slice of this rich, glorious dessert! Providing exact numbers is tricky, because my caramel might be salted and yours might be sweet, or maybe you use a different brand of cream cheese, right? So, please treat these numbers as a really good guideline for the Ultimate Baked turtle cheesecake, not gospel!
These estimates are based on making the recipe exactly as written and dividing it into 12 generous servings, which is how I always cut mine—no stingy little slivers allowed!
- Serving Size: 1 slice
- Calories: about 450
- Sugar: Roughly 45 grams (Yes, it’s a treat!)
- Fat: Around 28 grams
- Protein: About 8 grams
- Carbohydrates: Approximately 48 grams
If you’re watching your sodium, that’s the part that moves around the most because of the caramel sauce choice. We estimated 250mg, but if you use unsalted caramel, you can drop that down significantly!
Just know that this is an indulgent dessert, and that’s okay! We bake these treats for joy, not just for daily fuel. If you want to dive into the specifics of how I handle data and privacy on the site, you can always review my full policy here. Enjoy this amazing slice of decadence!
Share Your Baking Showstopper Recipes Experience
Seriously, seeing your results is the absolute best part of sharing these recipes with you all! You’ve conquered the water bath, you’ve mastered the swirl, and now you have this glorious turtle cheesecake sitting there cooling.
I want to hear everything! Did you manage to keep your swirl neat? Did the salt level on the caramel hit just right? Don’t keep that masterpiece hidden away in your fridge!
Please take a moment and rate this recipe right down below. Your feedback helps others know that this effort is worth it. It really builds my confidence in sharing these heirloom-quality recipes.
If you snap a picture—and I really hope you do!—tag me on social media! I absolutely love scrolling through and seeing your creations. Tagging me lets me share your gorgeous work with the whole community. Let’s see those decadent slices!
If you have any final lingering questions or just want to tell me how much you loved it, head over to my contact page and send me a note. Happy baking to you all!
PrintUltimate Baked Turtle Cheesecake
A rich, creamy baked cheesecake featuring a pecan crust, chocolate, salted caramel swirl, and toasted pecans.
- Prep Time: 25 min
- Cook Time: 75 min
- Total Time: 100 min
- Yield: 12 servings
- Category: Dessert
- Method: Baking
- Cuisine: American
- Diet: Vegetarian
Ingredients
- 1 1/2 cups graham cracker crumbs
- 1/2 cup chopped pecans, toasted
- 1/4 cup granulated sugar
- 6 tablespoons unsalted butter, melted
- 3 (8 ounce) packages cream cheese, softened
- 1 1/2 cups granulated sugar
- 1 teaspoon vanilla extract
- 1/4 cup sour cream
- 3 large eggs
- 1 cup semi-sweet chocolate chips
- 1/2 cup caramel sauce, divided
- 1/2 cup chopped pecans, toasted, for topping
Instructions
- Preheat your oven to 325 degrees Fahrenheit. Wrap the outside of a 9-inch springform pan tightly with heavy-duty aluminum foil.
- Prepare the crust: Combine graham cracker crumbs, 1/2 cup toasted pecans, 1/4 cup sugar, and melted butter. Press the mixture firmly into the bottom of the prepared springform pan. Bake for 10 minutes. Let cool slightly.
- Prepare the cheesecake filling: Beat the softened cream cheese, 1 1/2 cups sugar, vanilla extract, and sour cream with an electric mixer until smooth. Beat in the eggs one at a time, mixing just until combined after each addition. Do not overmix.
- Pour half of the cheesecake batter over the cooled crust. Sprinkle half of the chocolate chips over the batter. Drizzle with half of the caramel sauce. Pour the remaining batter over the top. Sprinkle with the remaining chocolate chips.
- Create the swirl: Dollop the remaining caramel sauce over the top of the cheesecake. Use a knife or skewer to gently swirl the caramel into the batter.
- Bake the cheesecake in a water bath: Place the foil-wrapped springform pan into a larger roasting pan. Carefully pour hot water into the roasting pan until it reaches halfway up the sides of the springform pan.
- Bake for 60 to 75 minutes, or until the edges are set and the center has a slight jiggle.
- Turn off the oven, crack the door open slightly, and let the cheesecake cool in the oven for 1 hour.
- Remove the cheesecake from the water bath and let it cool completely on a wire rack. Refrigerate for at least 6 hours, or preferably overnight, before serving.
- Before serving, top with the remaining toasted pecans. Release the springform side and slice.
Notes
- For a salted caramel effect, use salted caramel sauce or add a pinch of sea salt to your sauce.
- If you prefer a no-bake version, chill the filling for 6 hours instead of baking.
- Use room temperature ingredients for the cream cheese and eggs for the smoothest batter.
Nutrition
- Serving Size: 1 slice
- Calories: 450
- Sugar: 45
- Sodium: 250
- Fat: 28
- Saturated Fat: 15
- Unsaturated Fat: 13
- Trans Fat: 0.5
- Carbohydrates: 48
- Fiber: 2
- Protein: 8
- Cholesterol: 85