

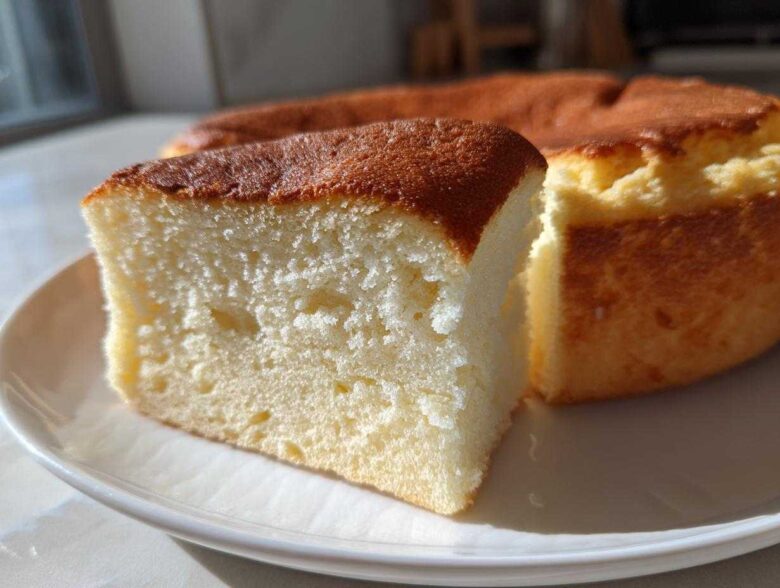
Listen, I know you’ve been scrolling endlessly looking for that one dessert that doesn’t involve three trips to the store and specialty tools. Well, stop scrolling, because I finally cracked the code on the absolute easiest, most rewarding bake ever: the Ultra-Simple 4-Ingredient Moist Condensed Milk Cake. Seriously, I made this last weekend when unexpected guests dropped by, and they thought I’d spent all day fussing in the kitchen! This isn’t just a dessert; it’s proof that incredible flavor doesn’t need complication. If you need a truly delicious condensed milk cake that’s foolproof, you’re in the right place. I’m so excited to share this little secret with you. You can check out just who we are if you want to know more about my baking obsession!
Why This Easy Condensed Milk Cake Recipe is a Must-Try
If you’re tired of recipes that call for tubs of softened butter, room-temperature eggs, and a stand mixer running for twenty minutes, then you are going to *adore* this Easy Condensed Milk Cake Recipe. The reason I keep coming back to this one? It’s genuinely just four things! Four! That means fewer dishes and faster results, which is why I call it my favorite No Mixer Dessert. It’s perfect for those days when you just need something sweet right now.
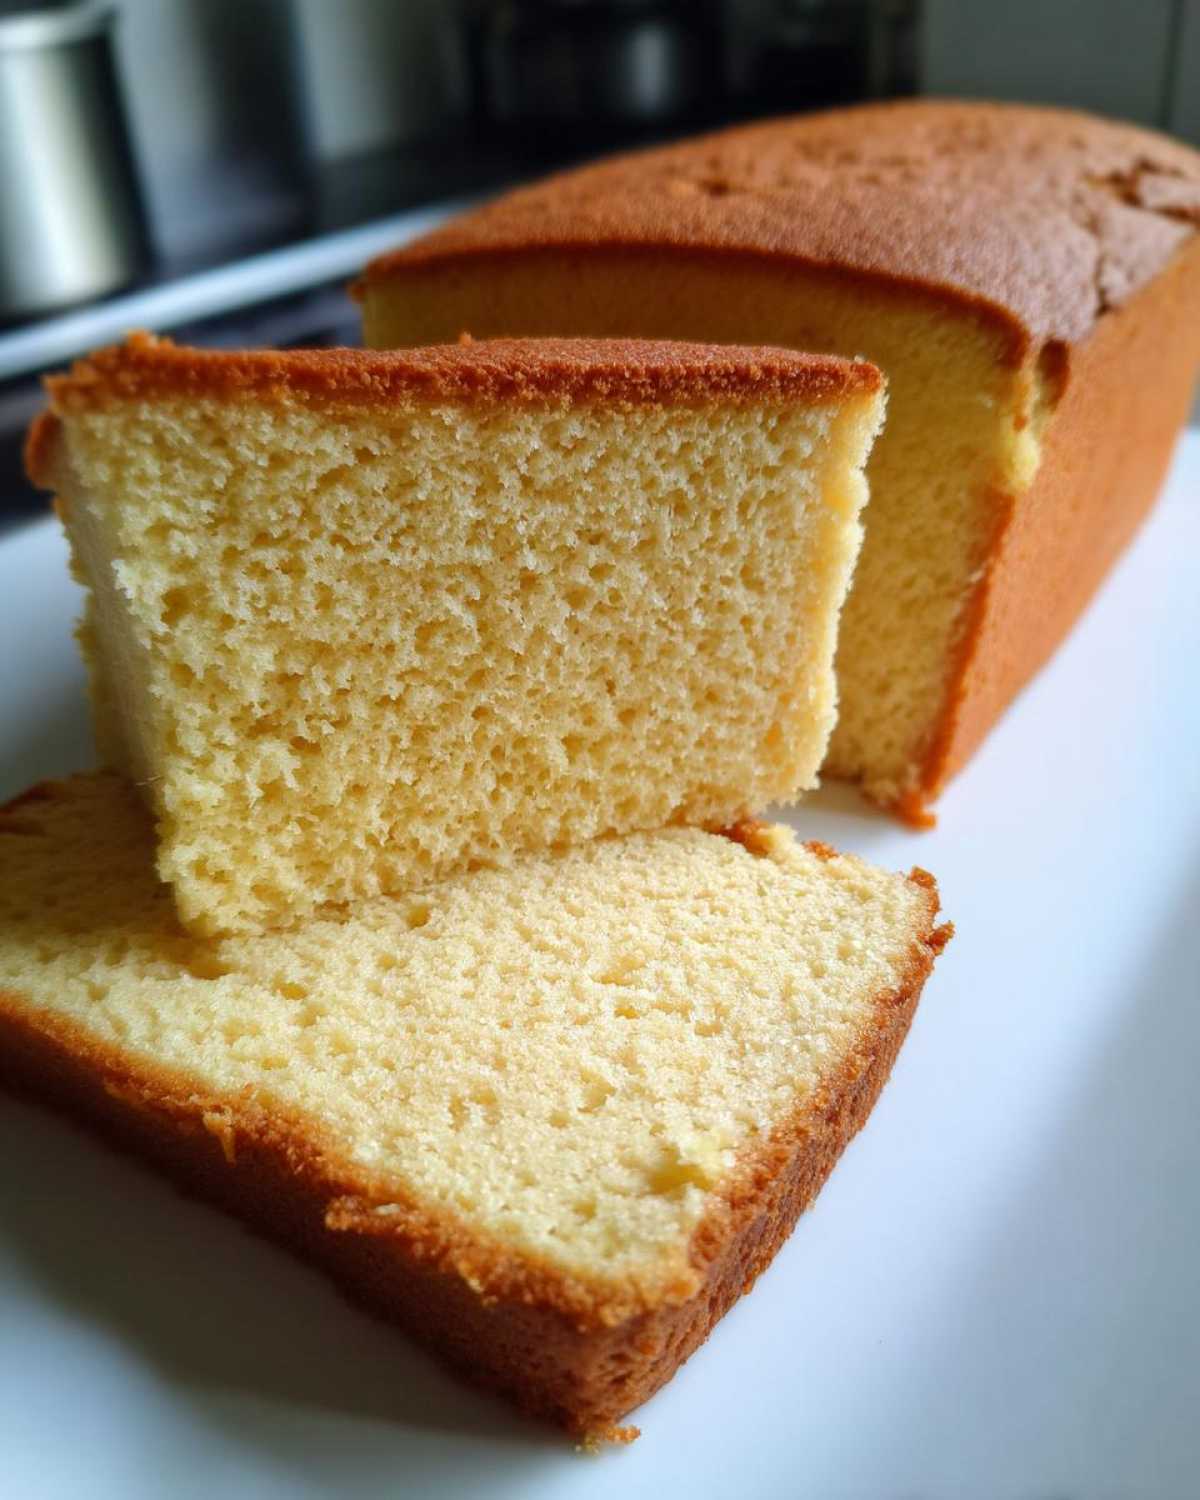
It holds up beautifully, too. It’s dense enough to slice cleanly but still melts in your mouth. Honestly, it’s a total crowd-pleaser and probably the most budget-friendly thing I bake all year.
Achieving a Fluffy Texture Cake with Minimal Effort
People ask me all the time how this simple batter gets so delicious and light. The magic is hiding right there in that can of sweetened condensed milk! Since it’s already packed with sugar and fat, it does most of the heavy lifting for you. That fat content keeps everything incredibly moist, preventing that dry crumb we all hate. It essentially acts like pre-creamed butter and sugar combined!
When you gently fold in the flour and baking powder, you create tiny pockets in the batter. That’s what gives you that beautiful, Fluffy Texture Cake without ever touching a hand or stand mixer. It’s science, but the delicious kind!
Gathering Ingredients for Your Simple 4 Ingredient Cake
Okay, let’s gather our treasures! Since we are aiming for that true Simple 4 Ingredient Cake experience, you don’t need a long shopping list. Keep things simple; it makes the baking process so much smoother. Trust me, these four ingredients work like a charm together. Don’t try to substitute the condensed milk—that’s the star player here!
Here is exactly what you need:
- 1 (14 ounce) can sweetened condensed milk
- 4 large eggs
- 1 cup all-purpose flour
- 1 teaspoon baking powder
That’s it! Isn’t that amazing? You probably have most of this hanging out in your pantry right now. Having these ready is half the battle won for a Quick Dessert Idea.
Essential Equipment for Making Your Condensed Milk Cake
Since this is such a wonderfully simple recipe, you don’t need to stress about hauling out every gadget you own. We are aiming for minimal cleanup, right? That’s another win for this dessert! You only need a couple of basic things to make this happen, which means you can focus purely on enjoying the results.
Make sure you have these items ready to go before you even open that can of milk:
- Two mixing bowls—one medium and one small. We want to keep our wet and dry ingredients separate for a minute.
- A good sturdy whisk. I have this old wire whisk, and honestly, it works better than any electric beater for this specific batter!
- Measuring cups and spoons, because accuracy always matters, even in easy baking.
- An 8×8 inch baking pan. Make sure you have your favorite grease and flour ready to coat it well!
That’s the entire lineup! See? So easy. Having your equipment ready is a huge part of what makes this a genuine No-Fuss Cake Recipe.
Step-by-Step Instructions for the Moist Sweetened Condensed Milk Cake
Now for the fun part! Putting it all together is incredibly fast, which is why this is one of my favorite Desserts Using Condensed Milk. Remember, we are not looking for perfection in mixing—we are aiming for *just combined*. Don’t get carried away with the whisk; that’s how we keep this cake super moist.
First things first: get that oven warming up to 350°F (175°C). While it heats, take your 8×8 inch pan and make sure it’s well-greased and floured. A little extra care here prevents sticking later, which always ruins the mood!
Preparing the Batter for Your Condensed Milk Cake
Grab your medium bowl for the wet stuff. Whisk together that can of sweet, sticky goodness with your four large eggs. You want them totally emulsified, nice and smooth. Now, in your smaller bowl, quickly give a little whisk to your flour and that teaspoon of baking powder. Just a quick blend is all they need.
Here is the crucial bit for your perfect Moist Sweetened Condensed Milk Cake: add the dry mixture to the wet mixture in parts, mixing gently after each addition with a spatula or just the whisk on the lowest setting. Seriously, stop mixing the moment you see the flour disappear. If you see streaks of flour, that’s fine! Overmixing develops gluten, and gluten makes a tough cake, not the light, fluffy texture we are striving for.
Baking and Cooling the Homemade Milk Cake
Pour that smooth but still slightly lumpy batter into your prepared pan. It should settle pretty nicely by itself. Pop it straight into that preheated oven for 30 to 35 minutes. Keep an eye on it after the 30-minute mark. You’re looking for a toothpick inserted near the center to come out clean—not wet batter clinging to it, but maybe a few tiny moist crumbs attached. That’s the sweet spot for this Homemade Milk Cake!
Once it passes the test, pull it out! Don’t rush things here—let the cake chill out in the pan for a good 10 minutes. This lets it firm up just a bit before you tackle the flip. After that quiet time, carefully turn it out onto a wire rack to cool completely. Patience is key for that professional finish!
Tips for Success with Your Condensed Milk Cake Recipe
Even though this is my simplest condensed milk cake recipe, a couple of tiny tips can take it from great to absolutely unforgettable! If you want just that little *extra* something, stir in a half teaspoon of vanilla extract right when you mix the eggs and condensed milk. It really warms up the flavor profile, which is nice since we only have four main ingredients.
Now, be warned: this cake is sweet—it’s supposed to be! The condensed milk has all that sugar baked right in. If you find it almost *too* sweet for your taste, try serving it with a tart side, like some fresh berries or a little dollop of plain, unsweetened whipped cream. That contrast balances everything out perfectly! Don’t worry about baking it longer for a firmer crust; I’ve found the 30-35 minute window gives us the best moist texture.
Ingredient Notes and Substitutions for this Budget Friendly Cake Baking
Because we are keeping things down to only four items, every single ingredient needs to pull its weight, right? This is where we talk about why you can’t cut corners on quality here, even though this is technically a Budget Friendly Cake Baking winner. If you try to swap out the foundation, the whole structure wobbles!
First up: the sweetened condensed milk. You absolutely must use the full-fat, sweetened kind. Don’t even think about grabbing evaporated milk by accident—that stuff is completely unsweetened and will result in a sad, savory disaster! The sweetened version is what gives us the density, the incredible sweetness, and the lasting moisture that makes this recipe famous.
Next, the eggs. Make sure they are large and fresh! When you only have four components, those eggs are responsible for all the lift we get, since we aren’t using commercial cake mixes. They need to be in good shape to trap the air when you whisk them in.
If you totally run out of baking powder, you *could* theoretically use self-rising flour instead of the all-purpose flour plus baking powder combo, but I really caution against it for this specific recipe. Self-rising flour often has salt mixed in, and we want to keep this profile clean and sweet. If you must substitute, just add a tiny bit more self-rising flour and maybe skip any added salt (though this recipe doesn’t call for it!). Check out our site disclaimer before making major swaps, just to be safe!
Storage and Reheating Instructions for Leftover Condensed Milk Cake
The wonderful thing about this cake is how well it keeps its moisture, but keeping it happy means storing it correctly. Since this Deliciously Moist Dessert has a higher natural sugar and milk content than a standard butter cake, you have a couple of options, depending on how hot your kitchen is!
If you plan on eating it all within two days, room temperature is usually fine. Just make sure it’s completely cooled down first, then cover it tightly with plastic wrap or slip it into an airtight container. Keep it somewhere cool, away from any direct sunlight hitting it. It stays perfectly soft and sweet that way.
If you are worried about humidity or just want it around for longer—say, up to five days—then the fridge is your friend. Wrap individual slices tightly before popping them in. It will firm up a little bit in the cold, but don’t worry, we fix that right up!
When you are ready for a slice later on, always, always bring it back to life slightly. Don’t just eat it cold from the fridge! Pop a slice on a microwave-safe plate and give it just 10 to 15 seconds on medium power. That tiny bit of warmth melts the fats back into soft liquid, and suddenly, it tastes freshly baked all over again!
Frequently Asked Questions About This Quick Dessert Idea
I know you probably have a few little questions floating around, especially if this is your first time baking something so wonderfully simple. It’s normal! When you work with only four ingredients, you want to make sure you hit the mark. Here are a few things folks ask me all the time about this super quick bake. If you need to get in touch with me after reading, feel free to use the contact page!
Can I add fruit to this condensed milk cake?
Oh, I love the thought of making this a Tropical Condensed Milk Cake! You absolutely *can* add things like drained crushed pineapple or even chopped fresh mango—but you have to be really careful. Remember, this recipe relies on having a fairly stable batter. If you add wet fruit, it can weigh down the structure and make the middle gummy instead of that lovely fluffy texture we worked so hard for.
If you use canned fruit, drain it until it feels almost dry, and then gently fold it in right at the very end. If you use fresh fruit, chop it small! A little bit of chopped fruit goes a long way here; don’t try to double the fruit amount in place of flour or milk!
Is this cake suitable for Beginner Baking Recipes?
Are you kidding me? This cake practically bakes itself! If you can whisk eggs and fold some flour without making a huge mess, you’ve already mastered the hard parts of this Condensed Milk Loaf Cake variation. It’s truly one of the best Beginner Baking Recipes out there because there’s no creaming, no complex temperature checks, and zero risk of curdling.
You just mix the wet, mix the dry, and fold them together. It is the absolute definition of a No-Fuss Cake Recipe. If you’re just dipping your toes into baking from scratch, start right here. You’ll be amazed at what you can create!
Why is my cake denser than expected?
Usually, if this cake turns out a little too heavy or less fluffy than you hoped, it always comes down to one thing: overmixing! When you combine the flour and baking powder into the wet ingredients, you have to be gentle. Only mix until you no longer see the white streaks of flour. If you beat that batter like you mean it, you’re building gluten strands, which results in a tougher, denser final product. Go easy on the whisk right at the end!
How do I make this cake less incredibly sweet?
As a lover of all things sweet, I usually don’t have this issue, but I totally get it—this is an Incredibly Sweet Cake by design! If you find the sweetness overwhelming, don’t change the core four ingredients that make it work. Instead, focus on your topping or serving suggestion. A big dollop of unsweetened whipped cream, plain Greek yogurt, or even a tart lemon glaze adds wonderful contrast without messing with the structure of what you baked. Sometimes a little tartness is all you need to balance that sugary magic.
Share Your Deliciously Moist Dessert Experience
Alright, you’ve baked it, you’ve smelled that incredible sweet aroma, and now it’s time for the best part: digging in! I honestly can’t wait to hear how this turned out for you. Did it pass the ultimate taste test in your house? Don’t be shy about letting me know!
Did you try serving it with just a sprinkle of powdered sugar, or did you whip up a fancy topping? I always love seeing how everyone personalizes these simple recipes. Drop a comment below and give this Deliciously Moist Dessert recipe a star rating—it really helps other new bakers feel confident giving it a go.
If you snapped a picture of your perfect slice, tag me on social media! Seeing your success stories is what keeps me buzzing in the kitchen every day. Also, just so you know where we stand on privacy, feel free to check out our Privacy Policy anytime.
Happy baking, friends! I’m already taking notes for what simple recipe I should tackle next, all thanks to your feedback!
PrintUltra-Simple 4-Ingredient Moist Condensed Milk Cake
Make a moist and sweet cake using only four basic ingredients. This recipe is perfect for beginners and requires no mixer.
- Prep Time: 10 min
- Cook Time: 35 min
- Total Time: 45 min
- Yield: 9 servings
- Category: Dessert
- Method: Baking
- Cuisine: American
- Diet: Vegetarian
Ingredients
- 1 (14 ounce) can sweetened condensed milk
- 4 large eggs
- 1 cup all-purpose flour
- 1 teaspoon baking powder
Instructions
- Preheat your oven to 350°F (175°C). Grease and flour an 8×8 inch baking pan.
- In a medium bowl, whisk together the sweetened condensed milk and eggs until fully combined.
- In a separate small bowl, whisk together the flour and baking powder.
- Gradually add the dry ingredients to the wet ingredients, mixing gently until just combined. Do not overmix.
- Pour the batter into the prepared baking pan.
- Bake for 30 to 35 minutes, or until a toothpick inserted into the center comes out clean.
- Let the cake cool in the pan for 10 minutes before inverting onto a wire rack to cool completely.
Notes
- For a slightly different flavor, you can add 1/2 teaspoon of vanilla extract with the wet ingredients.
- If you want a slightly firmer crust, bake for an additional 5 minutes.
- This cake is naturally very sweet due to the condensed milk.
Nutrition
- Serving Size: 1 slice
- Calories: 250
- Sugar: 25
- Sodium: 150
- Fat: 6
- Saturated Fat: 3
- Unsaturated Fat: 3
- Trans Fat: 0
- Carbohydrates: 45
- Fiber: 1
- Protein: 5
- Cholesterol: 80