

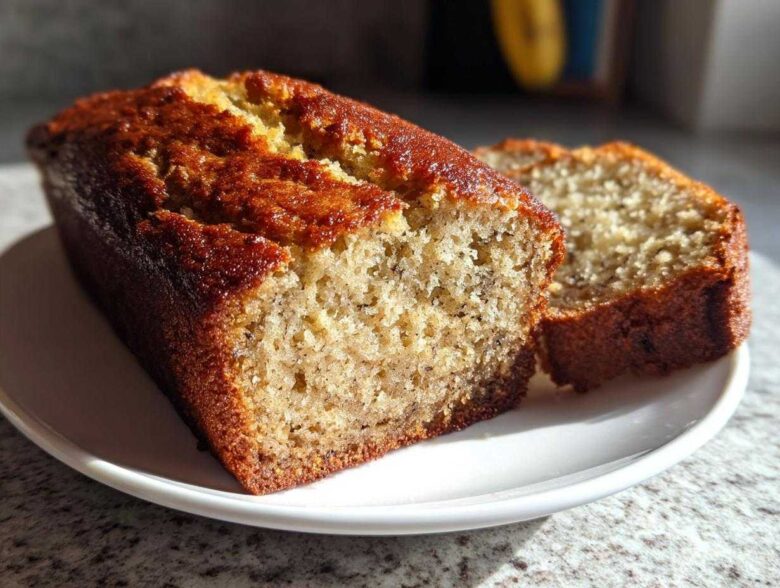
Oh my gosh, when you slice into a piece of bread that is still warm, and that sweet, familiar scent of baked banana and vanilla fills your kitchen? There is just nothing better in the world! I’ve been baking since I was tall enough to reach the counter, and after years of trial and error—and trust me, I’ve made some bricks!
I finally landed on this recipe, and I’m not kidding, this is the super moist and easy classic banana bread recipe you simply have to keep in your rotation. It’s seriously foolproof, which is perfect for those moments when you find those blackened, sad-looking bananas hiding in your fruit bowl and you need to revive them immediately.
The breakthrough for me came when I stopped trying to make it fancy and focused entirely on moisture. Once I figured out the liquid ratio, everything changed. If you want the best banana bread, you need to try this method. I think you’ll love how simple we keep the steps, too. You can check out a bit more about my baking philosophy over on my About Me page if you’re curious!
Why This Is The Best Banana Bread You Will Ever Make
I know, I know, *everybody* has a banana bread recipe. But ours is different because it focuses purely on avoiding that tragic dry crumb! This isn’t just baking; it’s a science experiment perfected over years to make the absolute gooiest, soft tender banana bread possible, even on day three. It genuinely is a foolproof banana bread because it handles small mistakes like forgetting to perfectly soften butter like a champ.
When you follow these steps, you are guaranteed a loaf worthy of bragging rights. We focus on making sure every bite feels like a warm, comforting hug—the perfect quick bread for breakfast or an afternoon treat!
Achieving Maximum Moisture in Your Banana Bread
The secret to moisture starts and ends with the bananas, obviously! You want them black—I mean, truly frighteningly brown on the peel. Those bananas are packed with sugar and water, which keeps everything wonderfully damp during the baking process. We use melted butter instead of creamed butter, too. That melted fat coats the flour particles just right, which helps lock in that gorgeous moisture we are fighting for. It’s all about keeping things supple in the oven!
Simple Baking: A No-Fuss Easy Banana Bread Recipe
Seriously, this is so easy, you barely need any special equipment. I usually just use one big bowl and a whisk—we skip the electric mixer completely. Why dirty extra bowls? This is the definition of easy banana bread recipe simplicity. If you can mash a fruit and stir a few things together, you can master this recipe. It often feels like a true one bowl banana bread situation by the time I’m done; minimal cleanup means more time enjoying that amazing smell!
Gathering Ingredients for Classic Banana Bread
Okay, before we dive into the mixing, we need to make sure we have everything ready to go. Having all your ingredients measured out first is the key to making this a genuine *quick* bread recipe. Nothing ruins the flow like scrambling for the baking soda mid-mix! Remember, these proportions are set for a standard 9×5 inch loaf pan. Don’t try to cram this batter into a tiny tin—it won’t bake through properly!
Here is our simple lineup for achieving that signature texture:
- 3 very ripe medium bananas, mashed
- 1/3 cup melted unsalted butter
- 1 teaspoon baking soda
- Pinch of salt
- 3/4 cup granulated sugar
- 1 large egg, lightly beaten
- 1 teaspoon vanilla extract
- 1 1/2 cups all-purpose flour
Ingredient Notes and Substitutions for Moist Banana Bread
This list gets you the classic banana bread base, but you have a few fun ways to boost the moisture even more! If you want to take the moist factor up a notch—like, ridiculously moist—you can swap out a portion of the flour. Instead of using all 1 1/2 cups of flour, try using 1 1/4 cups of flour and 1/4 cup of plain Greek yogurt. Trust me, that yogurt adds a subtle tang and incredible softness, making this even more of a dream!
If you’re planning on adding mix-ins, this is where you do it. If chocolate is calling your name, gently fold in about 1/2 cup of semi-sweet chips right after you add the flour. If you’re feeling fancy and want that beautiful swirl, save the swirl mix-ins until the very end when the batter is already in the pan—we talk more about that in the variations section!
Step-by-Step Instructions for Foolproof Banana Bread
Alright, here’s where the magic happens! We are making banana bread, and the steps are so straightforward you won’t break a sweat. The goal here is speed and tenderness, which means precision in mixing is key. You don’t need any fancy gadgets, just a good bowl and a reliable spatula or whisk. We’re going to go from fully assembled ingredients to a full loaf ready for the oven in about ten minutes flat. Remember that emphasis on moisture? It all comes down to how you combine these simple ingredients!
First things first: Preheat your oven to a steady 350°F (175°C). Seriously, don’t skip that preheating step! Get your standard 9×5 inch loaf pan ready by greasing it well and giving it a light dusting of flour. This simple prep step prevents sticking later, which is essential for an easy release of your perfect loaf.
Preparing the Batter: Mixing for Tenderness
Once your bananas are mashed up nicely with the melted butter, baking soda, and salt, you’re ready for the wet ingredients: sugar, the egg, and the vanilla. Whisk those until they look happy enough—just combined is fine!
Now comes the most important warning for your entire baking career: the flour. You’re going to add the 1 1/2 cups of flour, and you need to mix it gently. I mean, *gently*. Only stir until you see the last streaks of white flour disappear into the wet mixture. That’s it! If you mix too much, you develop gluten, and gluten turns moist banana bread into tough, chewy cardboard. We are aiming for a soft, tender result, so stop mixing the second you can’t see dry flour anymore. Seriously, a few lumps are better than overmixing!
Baking Times and Testing Your Banana Bread
Pour that gorgeous, thick batter right into your prepared pan. It’s going into that preheated 350°F oven for about 50 to 65 minutes. Now, every oven is a little different, right? So, around the 50-minute mark, you need to start checking it. Pull the loaf out carefully—use good mitts!—and stick a toothpick, or even a thin wooden skewer, right into the very center.
You are looking for the toothpick to come out clean, or maybe with just a few tiny, moist crumbs clinging to it. If you see wet batter, slide it back in for another five minutes and test again. If it’s clean, you nailed it! Let it hang out in the pan for those crucial 10 minutes before you turn it out onto a wire rack to cool. This part helps the bread set up so it won’t collapse when you unmold it.
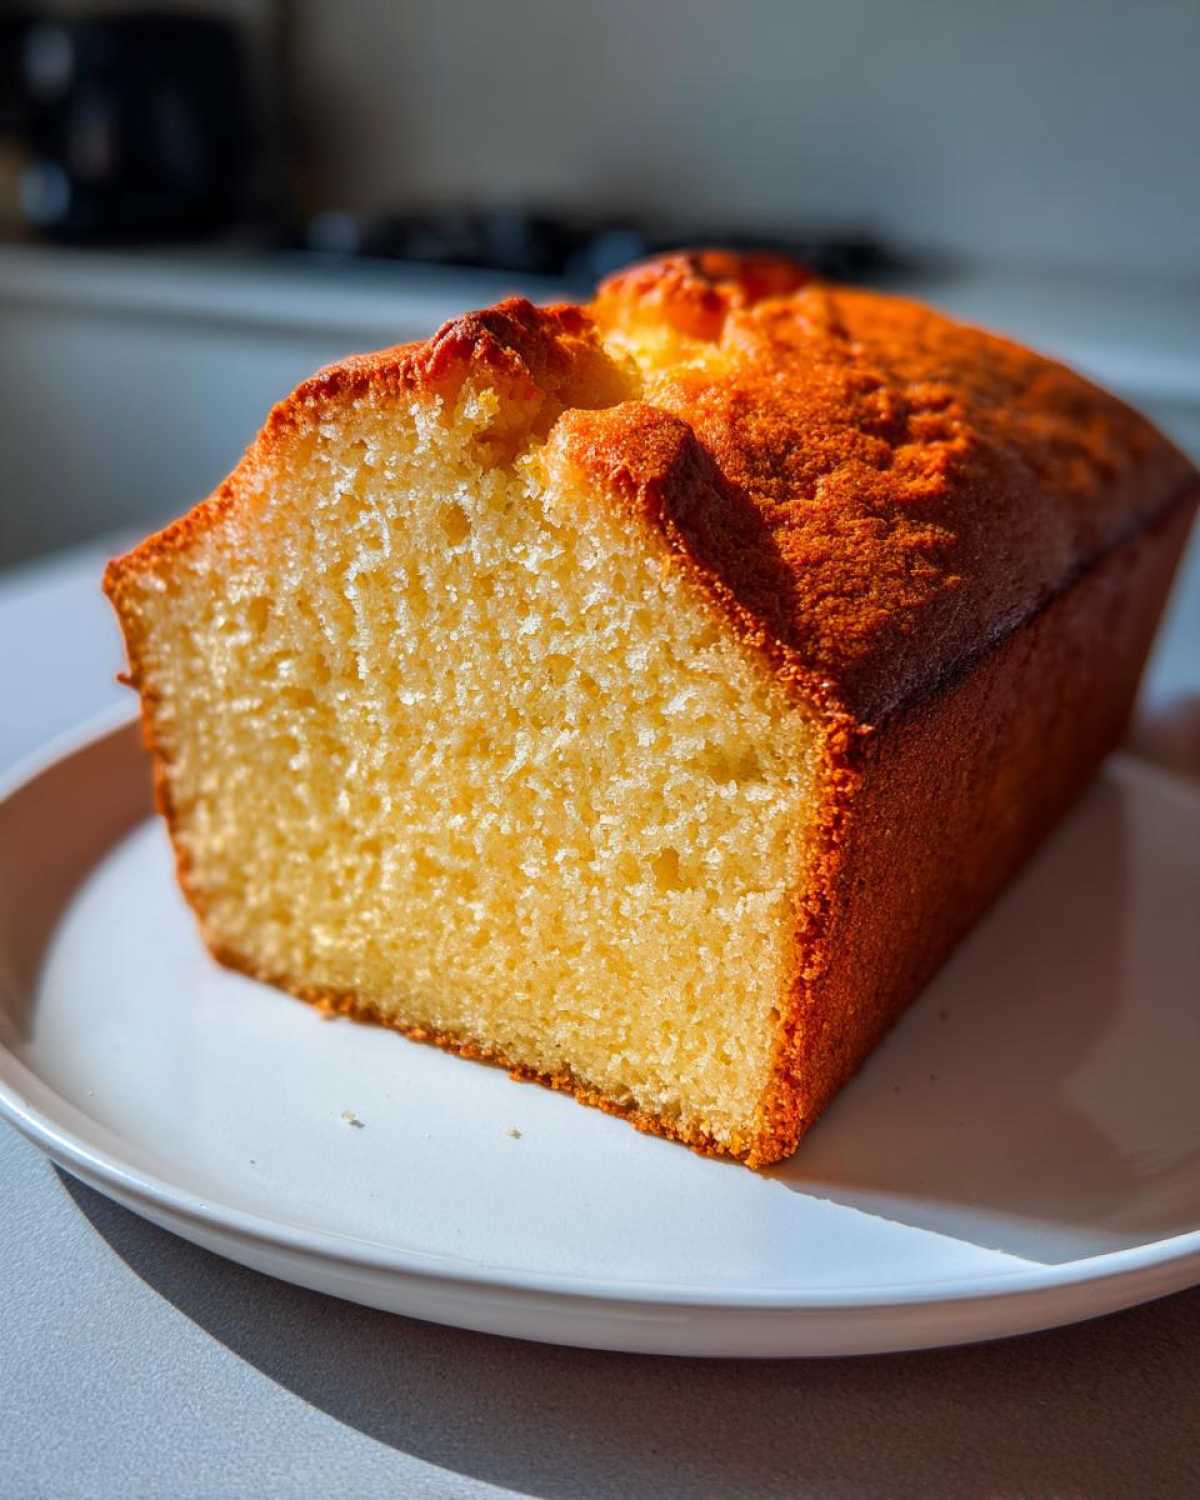
Making Variations: Chocolate Chip Banana Bread and Cinnamon Swirl Bread
While this classic banana bread is perfect all on its own—seriously, try it plain first!—I know some of you are just itching to load it up with extra goodies. And why not? We love customization in our kitchen! This recipe is such a sturdy base that it handles add-ins beautifully without getting too heavy or sinking.
If you want to elevate your loaf from simple comfort food to a real showstopper, you have two fantastic options right here. I’ve gotten so many great comments about both of these flavor combinations, and they are simple enough that they don’t interrupt our lovely, quick method.
Adding Plenty of Chocolate to Chocolate Chip Banana Bread
When I make chocolate chip banana bread, I usually go heavy. Nobody ever complained that there was too much chocolate, right? If you decided in the previous section that you wanted mix-ins, this is where you add them. Right after you finish mixing the flour—and I mean immediately after the last flour streak disappears—gently fold in about a half cup of good quality semi-sweet chocolate chips.
Fold them in just a few times. You are not trying to mix them into the batter; you are just coating them and distributing them evenly. If you stir too much trying to get them all perfectly placed, you risk overworking that delicate batter we worked so hard to keep tender! Pour the whole mixture into the pan and bake as usual.
Creating a Stunning Cinnamon Swirl Bread
This is my favorite trick for making a regular batch feel extra special, especially when serving it with coffee. This variation works best when you are layering the batter, so save the cinnamon swirl step until your batter is already poured into the loaf pan.
To make the swirl mixture, you just need a tiny bowl. Mix together 1 tablespoon of ground cinnamon with 2 tablespoons of dark brown sugar. Once your batter is in the pan, sprinkle about half of that cinnamon-sugar mixture directly over the top. Take a butter knife or a skewer and draw it through the batter—don’t dig all the way to the bottom! Just swirl it across the top layer a few times. Then, sprinkle the remaining half of the sugar mix on top and swirl gently one more time. You’ll get this gorgeous, crunchy, deeply flavored topping that makes this feel like a true bakery treat. It smells divine while baking, which is why this is such a popular cinnamon swirl bread method!
Tips for Using Overripe Bananas in Your Banana Loaf Recipe
Listen, the entire reason this banana loaf recipe exists is because of those bananas that went past their prime! If you see a bunch sitting on the counter getting blacker by the minute, don’t panic and certainly don’t throw them away. Those dark, spotty, almost black bananas are what you want for the best flavor and the most moisture possible. They’re ridiculously sweet!
When I’m using overripe bananas for a quick bread batch, I look for peels that are mostly black but still firm enough to handle without turning to goo instantly. If they are starting to leak on the counter, they are probably perfect for mashing right now. The sugars have totally caramelized inside that banana, which means your final loaf won’t taste like plain bread; it tastes like pure, concentrated banana goodness.
Selecting the Perfect Bananas for Baking Flavor
Don’t get fooled by bananas that are just slightly yellow with a few brown spots. Those are great for eating plain or slicing over cereal. For superior homemade banana bread, you need to wait until the skin looks like it’s had a really rough week. Seriously, the uglier they look on the outside, the better they perform on the inside of your loaf! That deep richness of flavor is impossible to replicate with store-bought banana extract or even slightly ripe fruit.
Freezing Bananas for Future Banana Bread Success
What happens when you have five pounds of black bananas but only time to bake two loaves? You freeze the rest! This is life-saving for busy bakers. Don’t freeze the bananas in the peel, though—that gets messy when you try to unwrap them later. You want to peel them first, put them in a freezer-safe bag or container, and flatten them out a bit in the bag so they don’t take up a giant cube of freezer space.
The trick for freezing is this: When you pull them out to thaw and mash them later, they will be super watery. That’s normal! Just mash them up *right in the bag* or a bowl, and use them exactly as they are in the recipe. If they look a little runnier than mashed bananas you just peeled, don’t sweat it. The melted butter in the recipe handles any extra liquid just fine, ensuring you still get that wonderful, moist bread result later when you finally need a batch!
Serving Suggestions for Homemade Banana Bread
Now that you have this perfectly golden, fragrant loaf of homemade banana bread cooling on the rack, the real question is: When do we eat it? Honestly, this bread is so versatile, it fits into almost any meal plan. I usually make a loaf when I know I need quick options for the week ahead. It’s truly one of the best easy snack recipes you can pull out of the pantry in five minutes!
For me, the ideal way to eat it is warm. Nothing beats that initial slice when the butter hasn’t even totally melted yet. If you serve it warm—maybe about 20 minutes after taking it out of the oven—it feels like a decadent dessert. Seriously, a little pat of salted butter melting right into the surface? Heaven.
But let’s be real, this is my favorite standby for breakfast breads too. Sliced thick and toasted lightly in the toaster oven, it’s perfect alongside a strong cup of coffee. It’s much less sweet than a pastry, so it feels a little more appropriate for the morning rush, even if it’s still packed with that delicious sugar!
If you’re feeling extra fancy, here are a couple of ways to dress up your slices:
- The Cream Cheese Dollop: A cold, thick spread of cream cheese on a room-temperature slice is heaven. The slight tang cuts through the richness of the banana.
- Nutty Crunch: Toast your slice and immediately sprinkle some chopped pecans or walnuts on top. A little crunch is always welcome!
- Honey Drizzle: If you skipped the chocolate chips, a very light drizzle of raw honey or maple syrup on a warm slice is outstanding.
Remember, this moist banana bread stays fresh for ages, so you can enjoy it warm right away and then transition to room temperature snacking for the rest of the week. Don’t feel like you have to rush through the whole loaf in one sitting!
Storage and Reheating Instructions for Banana Bread
Let’s talk longevity, because as much as I want you to eat this entire banana loaf recipe in one sitting (I’ve certainly tried!), you probably need to save some slices for later. The great news about this recipe being so wonderfully moist is that it actually keeps really well! It’s packed with enough natural sugar and fat that mold isn’t a big rush, provided you store it correctly.
If you baked this loaf last night and it’s only been sitting out for a few hours, leaving it on the counter in an airtight container is perfectly fine for the first day. We’re aiming for room temperature goodness for that perfect slice tomorrow morning. But after 24 hours, that natural moisture can sometimes start to invite a little too much humidity, so it’s time to tuck it into the cold storage.
Keeping Your Banana Bread Fresh in the Fridge
For anything lasting longer than a day, the fridge is your best friend. You’ve got to wrap it tight, though! If you just toss it in a plastic bag and leave the top open, you’ll get a hard, dry crust very fast. Trust me, I’ve ruined perfectly good slices that way.
Here’s my routine: Wait until the bread is completely cool—like, totally room temperature—before wrapping anything. If you wrap it warm, condensation builds up inside the wrap, and you get soggy bread, which is the opposite of what we want for our moist banana bread!
Wrap the entire loaf first in plastic wrap, making sure you press out all the air. Then, I usually place that tightly wrapped loaf inside a large zip-top bag or an airtight container. Stored this way, it stays wonderfully soft and fresh for a solid week. If you only have half a loaf left, wrap individual slices tightly before freezing. It freezes beautifully, too!
Restoring That Perfect Warmth and Moisture
Reheating is the *only* way to eat day-three or day-four bread, in my opinion. Popping a slice of room-temperature bread into the microwave just turns it into hot, rubbery mush, and nobody wants that sad texture. We’re going for that just-baked warmth!
To truly restore that soft, fresh-from-the-oven feel, you need two things: gentle heat and a little steam. I love slicing a piece and wrapping that single slice loosely in a slightly damp paper towel—just damp, not soaking wet, we aren’t boiling it!
Pop that wrapped slice into the microwave for about 15 to 20 seconds on half power. The damp towel creates just enough ambient steam in the microwave to rehydrate the crumbs slightly as the bread warms up. It makes it taste almost exactly like when you first pulled it out of the pan. If you’re reheating a big chunk, use a low oven setting (around 300°F) wrapped in foil for about 10 minutes instead. That slow, dry heat gently warms the bread without drying it out further, keeping the integrity of that perfect crumb!
Frequently Asked Questions About Banana Bread
It happens! Sometimes when you’re baking, you run into a snag or you just have a question pop up mid-mix. Don’t worry, I’ve got you covered with some of the things I hear most often from people making this easy banana bread recipe for the first time. If you have a concern about texture or timing, I bet it’s answered right here!
Can I make this easy banana bread recipe without eggs?
That’s a common question, especially when dealing with baking constraints! Eggs are really important here because they act as a binder and add richness to our otherwise very moist loaf. If you absolutely must leave the egg out, you need a reliable substitute to help keep that texture spot-on. I recommend using about 1/4 cup of applesauce or an extra 1/4 cup of those mashed bananas to compensate for the missing binder and moisture. It won’t be *quite* as fluffy as the original, but it will definitely stay moist!
Why did my banana bread sink in the middle?
Oh, the dreaded sinkhole! This is usually caused by one of two things, and it’s almost always related to temperature. First, make sure your oven is truly at 350°F. If it’s too cool, the batter sets on the outside but remains liquid in the center, and when that liquid center finally collapses under its own weight, you get a dip.
The second reason is impatience! Don’t open the oven door before the 50-minute mark, seriously. A blast of cold air hitting that soft, rising center is a guaranteed way to make it fall flat. If you test it and it still seems wet, turn the heat down a tiny bit and give it another 5 minutes before checking again. You want that center fully baked!
Is this considered a quick bread recipe?
Absolutely, yes! This is the perfect example of a quick bread recipe. The term “quick bread” just means something that doesn’t require yeast to rise—we use chemical leaveners like baking soda instead. Because we’re using baking soda and mixing everything by hand without needing to knead or wait for proofing time, you can whip up this whole banana loaf recipe and have it in the oven in under 15 minutes. That speed is why it’s perfect for those last-minute sweet cravings or busy mornings. For more tips related to testing out new recipes, you can always take a peek at our site policies.
Your Thoughts on This Moist Banana Bread Recipe
Well, friends, that’s all there is to it! We’ve taken those sad, spotty bananas and turned them into what I hope will become your favorite, most reliable, and definitely the most moist banana bread you have ever baked. I am so excited for you to try this foolproof banana bread!
Now that you’ve made the loaf, I really want to hear about it! Did you stick to the classic banana bread way, or did you get adventurous with the chocolate chips or maybe brave the cinnamon swirl? Tell me everything!
Please take a moment and rate the recipe below—a quick star rating helps out the blog so much! I also absolutely welcome your detailed comments. If you have any questions about timing or technique, or if you found a new weird trick that worked for you, share it! Let’s help everyone else achieve perfectly soft tender banana bread.
If you loved this simple baking project and you know a friend who always burns their quick bread, please send them the link! There’s nothing better than sharing a truly great recipe for an easy snack recipe. If you want to reach out directly with pictures or feedback, you can always use the Contact page. Happy baking, enjoy every single bite!
PrintSuper Moist and Easy Classic Banana Bread
Make the best homemade banana bread with this simple, foolproof recipe. It guarantees a moist texture perfect for using up overripe bananas.
- Prep Time: 10 min
- Cook Time: 60 min
- Total Time: 70 min
- Yield: 1 loaf (about 8 servings)
- Category: Breakfast
- Method: Baking
- Cuisine: American
- Diet: Vegetarian
Ingredients
- 3 very ripe medium bananas, mashed
- 1/3 cup melted unsalted butter
- 1 teaspoon baking soda
- Pinch of salt
- 3/4 cup granulated sugar
- 1 large egg, lightly beaten
- 1 teaspoon vanilla extract
- 1 1/2 cups all-purpose flour
Instructions
- Preheat your oven to 350°F (175°C). Grease and flour a standard 9×5 inch loaf pan.
- In a large bowl, mix the mashed bananas, melted butter, baking soda, and salt.
- Stir in the sugar, egg, and vanilla extract until just combined.
- Add the flour to the wet ingredients. Mix only until the flour disappears. Do not overmix.
- Pour the batter into the prepared loaf pan.
- Bake for 50 to 65 minutes, or until a toothpick inserted into the center comes out clean.
- Let the bread cool in the pan for 10 minutes before turning it out onto a wire rack to cool completely.
Notes
- For extra moisture, substitute 1/4 cup of the flour with 1/4 cup of plain Greek yogurt.
- If you want chocolate chips, fold in 1/2 cup of semi-sweet chips before pouring the batter into the pan.
- To create a cinnamon swirl, mix 1 tablespoon of cinnamon with 2 tablespoons of brown sugar and sprinkle half over the batter before baking, then swirl gently with a knife.
Nutrition
- Serving Size: 1 slice
- Calories: 250
- Sugar: 15
- Sodium: 150
- Fat: 11
- Saturated Fat: 6
- Unsaturated Fat: 5
- Trans Fat: 0
- Carbohydrates: 38
- Fiber: 2
- Protein: 4
- Cholesterol: 40