

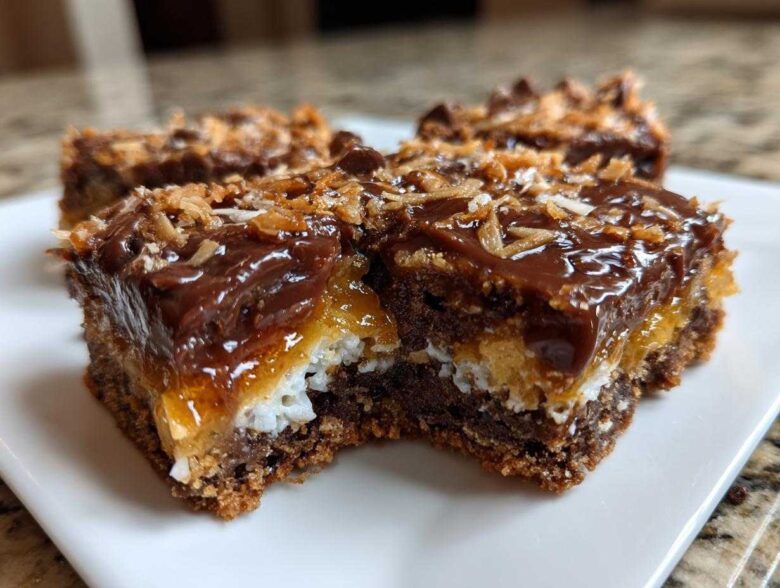
If there’s one dessert that screams ‘easy’ but tastes like true indulgence, it has to be these **magic cookie bars**! Seriously, I don’t even turn on my mixer for these. Forget complicated rolling or chilling; this is my definitive recipe for **magic cookie bars** that guarantees that perfect chewy, gooey texture every single time. I whip up huge batches of these 7-Layer Bars when the holidays roll around, or any time I need a guaranteed crowd-pleaser for a potluck. Trust me, once you try them layered just right, you’ll never look back!
You can find my information about my kitchen adventures over at my ‘About Me’ page if you want to know more about how I ended up loving these simple layered treats so much!
Why You Will Love This Ultimate Cookie Bar Recipe
Honestly, these aren’t just good; they are ridiculously simple, which is why they’ve earned a permanent spot in my rotation. They just work! Here’s why I keep coming back to this recipe:
- They are the definition of an **Easy 7 Layer Bars Recipe**—literally just layering ingredients. No fancy techniques required!
- The texture is unmatched! We are aiming squarely for wonderfully **Chewy Dessert Bars** that practically ooze out of the pan.
- It’s a fantastic way to use pantry staples; you likely have everything you need right now.
- These are the ultimate **Simple Layered Bars**—perfect for beginner bakers who want a show-stopping result.
- When you bring these to a party, they disappear first. They are truly the **Best Magic Bars Ever** because who doesn’t love chocolate, coconut, and nuts all glued together with sweet milk?
Gathering Ingredients for Classic Magic Cookie Bars
The best part about this recipe, besides how gooey they turn out, is that the ingredient list is so short! You don’t need a million things whipping around your kitchen. We’re relying on that beautiful synergy between a crunchy base, yummy toppings, and one very important liquid binder. Everything comes together so fast, which is why these are my go-to **Classic Magic Cookie Bars** when I’m short on time. You’ll need the graham cracker crumbs, butter for melting, the chocolate chips, sweet coconut, and some chopped pecans or walnuts. Oh, and that magical milk!
For more detail on how I run my site and why I share these recipes, please check out my disclaimer policy here.
Ingredient Notes for Perfect Magic Cookie Bars
We absolutely cannot skip the sweetened condensed milk, folks. That is the glue, the moisture, and the sweetness all rolled into one can. Do not try to substitute evaporated milk; it just won’t set properly into those beautiful gooey webs. When it comes to your graham crackers, I always crush mine by hand in a sturdy bag rather than buying the pre-made crumbs. It just seems to result in a better texture for our buttery graham cracker crust!
Essential Equipment for Your Simple Layered Bars
Prep is minimal, but you do need a couple of key pieces. Make sure you have a standard 9×13 inch baking pan ready to go. Lining that generously with parchment paper—letting the edges hang over the sides—is non-negotiable for easy removal later. You’ll also need one sturdy mixing bowl for the crust and a wooden spoon or spatula to press everything down evenly.
Step-by-Step Instructions for Perfect Magic Cookie Bars
Okay, this is where the fun really starts, and I promise you, it’s so simple it feels like cheating! The whole process is really just about making a solid base and then carefully stacking the goodies. Remember to get your oven cranked up to 350 degrees Fahrenheit before you even start mixing anything. We want everything moving fast once we hit that last layer! We’re going to handle this in three easy stages: crust, toppings, and the final sweet blanket.
You can check out my official cookie policy if you are curious about how I handle user information while you’re baking!
Building the Buttery Graham Cracker Crust
First things first, we need a sturdy foundation for our layers. In your bowl, toss together those graham cracker crumbs and the melted butter. You want it looking like coarse, wet sand. Now, dump that into your 9×13 pan that you’ve already lined with parchment paper—that overhang is your future best friend! Use the bottom of a measuring cup or just the back of a spoon to press that mixture down. Press it down hard, like you mean it! We need that crust tight so it holds everything together later.
Layering the Magic Cookie Bars Components
Once the crust is packed, it’s time for the fun sprinkly part! Sprinkle your chocolate chips evenly across the entire surface. Seriously, cover every inch; you don’t want a dry bite of crust peeking through later. Next, scatter on your sweetened flaked coconut, followed by those gorgeous chopped pecans. If you’re feeling extra decadent, toss on those optional butterscotch chips too! The key here is even distribution so that every square of your finished bar gets a little bit of everything.
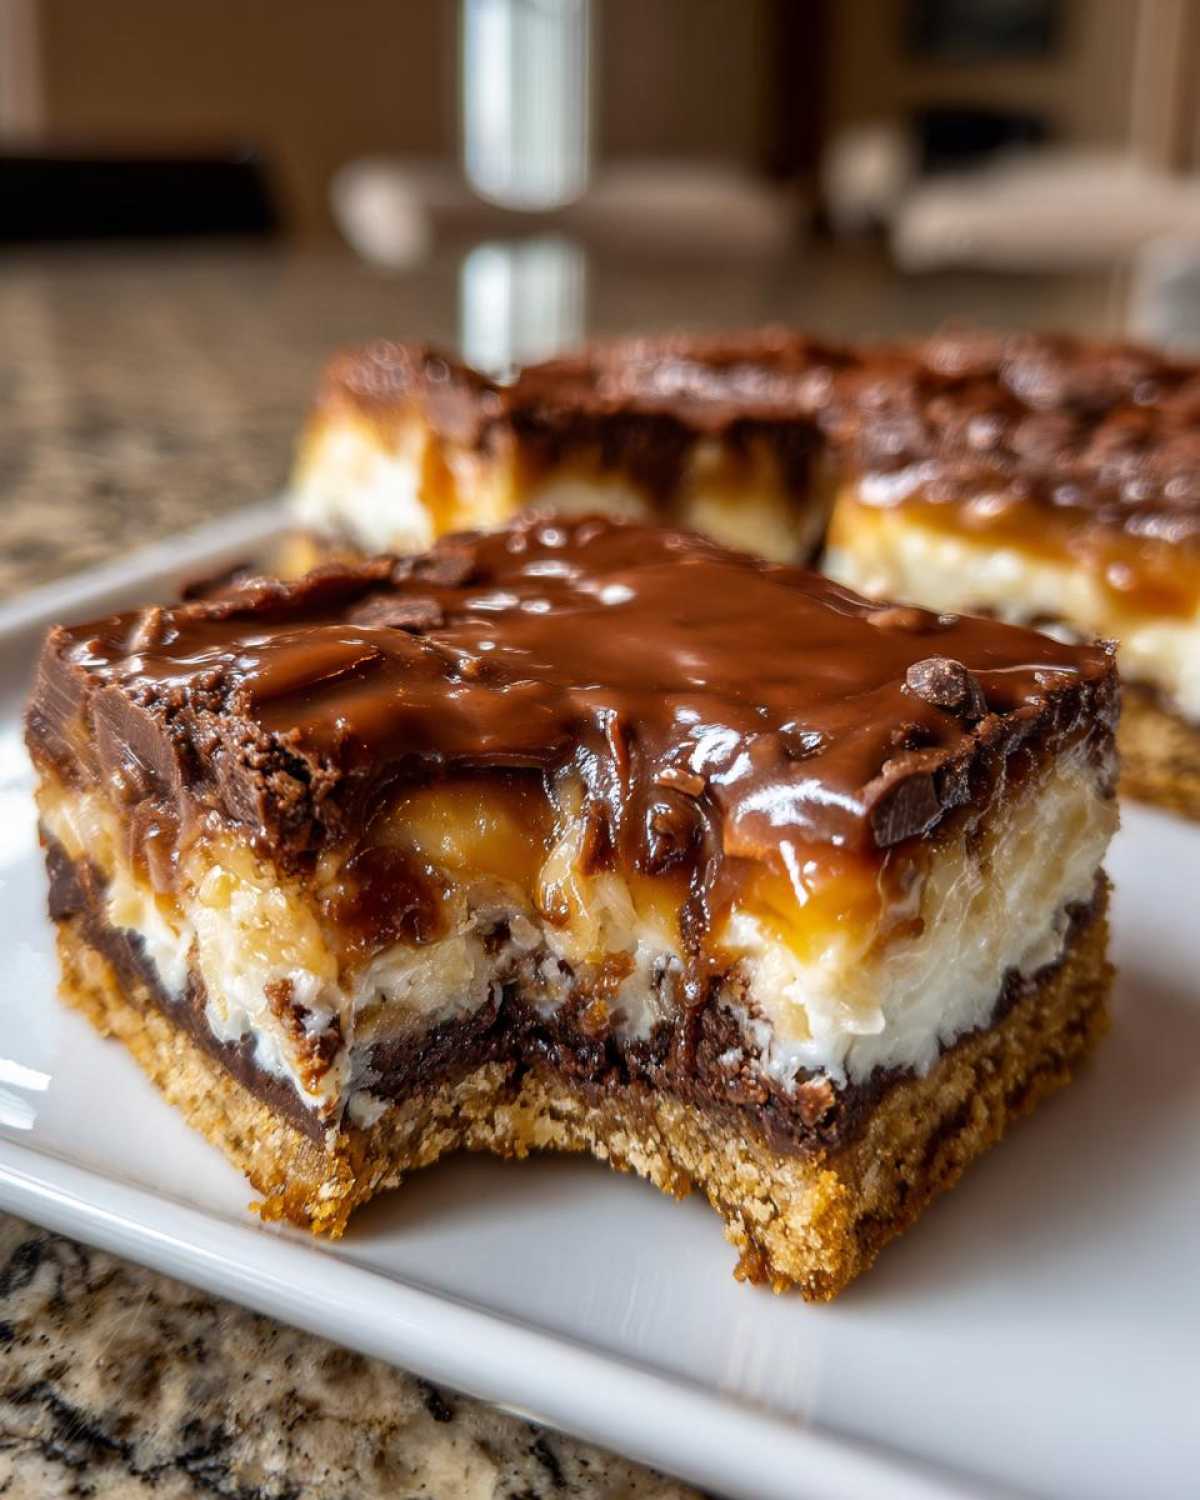
The Final Pour and Baking for Gooey Dessert Bars
Now, take that entire can of sweetened condensed milk and drizzle it slowly and evenly over all those beautiful layers you just made. Don’t worry if it sinks a little; that’s exactly what it’s supposed to do! Slide the whole pan into that preheated 350°F oven. Bake it for about 25 to 30 minutes. You’ll know they are done when the edges look nicely golden brown, and that milk layer is bubbling sweetly all over the top. Resist the urge to take them out too soon underneath the full baking time!
Tips for Success with Your Homemade Magic Cookie Bars
Even though these **magic cookie bars** are super simple, a couple of little secrets I pulled from my notes bag make all the difference between a good bar and an amazing, chewy bar. First up, for a richer crust flavor, try mixing just one tablespoon of granulated sugar into your graham cracker crumbs before you add the melted butter. It gives the base a little something extra!
Also, remember my rule about the pecans? If you absolutely love walnuts, feel free to use those instead; they stand up just as nicely against that gooey milk layer. My personal biggest tip, though, is this: Do not, under any circumstances, overbake them! If you let them go past when the edges are golden and the middle is set but still jiggly, you’ll end up with firm candy instead of gooey dessert bars. Pull them out when they look perfect, and trust that the residual heat will finish the job while they cool!
Storage and Reheating Instructions for Sweetened Condensed Milk Bars
Okay, so you managed to not eat the entire batch in one sitting—bravo! Now, how do we keep these magnificent **Sweetened Condensed Milk Bars** fresh? The absolute key here is cooling. You *must* let these bars cool completely before you even think about wrapping them up or slicing them. If you wrap them while they are warm, you trap steam, and that will make them gummy instead of delightfully chewy.
Once cooled (this takes a couple of hours, be patient!), these bars keep wonderfully right on the counter. Just cover the pan tightly with foil or plastic wrap, or slice them up and store them in an airtight container at room temperature for about four to five days. Because of the high sugar content, they are pretty stable!
If you end up with a huge batch, or if the kitchen is really warm, popping them into the fridge is fine too. Store them airtight in the refrigerator for up to a week. I find that cold bars firm up a little more, which sometimes helps with cleaner cutting if you prefer a super precise square.
Now, the reheating question! Sometimes, after being in the fridge, they lose a tiny bit of that just-out-of-the-oven softness we love. If that happens, just take a square or two and microwave it on a microwave-safe plate for about 10 to 15 seconds. That short blast warms the chocolate chips just enough to bring back that fresh gooey texture. Don’t go too long, or you’ll melt the whole thing into a puddle!
Variations for Your Magic Cookie Bars Recipe
The beauty of these **magic cookie bars** is just how adaptable they are! While I’m obsessed with the classic combo—that amazing chocolate, coconut, and pecan mix—sometimes you just need to mix it up without changing the fundamental structure. Since the sweetened condensed milk acts as the binder for any topping you throw in, you can really play around here. Don’t worry about messing up the ‘magic’ part; it’s super forgiving!
If someone you’re baking for isn’t keen on coconut, just leave it out completely! You’ll end up with a slightly different texture, maybe a bit less chewy overall, but still totally delicious. You can easily make up that space by adding more chocolate chips or maybe throwing in some peanut butter chips.
I absolutely love experimenting with the nut layer. The recipe calls for pecans, which give that nice buttery crunch, but walnuts are a fantastic stand-in and taste just as great when baked up. Sometimes I’ll even skip the nuts entirely if I know I’m serving them to someone with an allergy, and just bulk up the chip count. This way, you still get those satisfying chocolate pockets in your **Coconut Chocolate Pecan Bars** substitution without the nuts!
Another fun little swap is with the chips. If chocolate feels too standard for a party, try switching out half of the semi-sweet chocolate chips for white chocolate chips, or even butterscotch chips (if you didn’t add them in the main recipe!). You can also add a sprinkle of toasted, unsweetened coconut flakes on top right after they come out of the oven for an extra-crispy texture contrast!
Serving Suggestions for Crowd Pleasing Bar Cookies
Because these **Dessert Bars for Parties** are so incredibly rich and sweet, they actually pair beautifully with something simple and slightly bitter. Coffee, whether hot or iced, is my favorite companion for cutting through that intense sweetness. If you’re serving them later in the day, a tall, cold glass of milk is mandatory—it just brings back the childhood joy of these treats!
But if you really want to elevate them for a special gathering, you absolutely have to serve them slightly warm with a small scoop of really good vanilla bean ice cream melting right on top. That hot-and-cold contrast takes these **Crowd Pleasing Bar Cookies** to a whole new level. Trust me, you’ll need a napkin!
Frequently Asked Questions About Magic Cookie Bars
I always get so many questions about these **magic cookie bars** because everyone wants that perfect gooey result! Here are the most common things folks ask me when they are making their first batch of these **Seven Layer Treat Recipes**.
Can I make these Easy 7 Layer Bars without nuts?
Absolutely, yes! You definitely can leave the nuts out if you or your guests aren’t big fans, or if you have allergies. When you skip them, just make sure you compensate a little bit in the other layers. I usually sprinkle on a few extra chocolate chips or a bit more of that sweet coconut to fill the space. It keeps the layering even and ensures you don’t end up with large pockets of just condensed milk sticking to the bottom layer!
How do I get clean cuts when slicing the bars?
This is the biggest hurdle people face with **Gooey Dessert Bars** like these! If you try to cut them while they are even slightly warm, they just smear everywhere, and you end up with a messy pile instead of squares. My number one tip, which I wish I could shout from the rooftops, is patience! You must let these cool completely—and I mean *completely*—for at least two hours, preferably on the counter. If you slice them after they have fully set, the texture of the melted chocolate and milk layers firms up beautifully, allowing you to use a sharp knife for beautiful, clean slices.
If you need to get in touch with me about anything else, you can always shoot me a message over on my contact page!
Estimated Nutrition for This Best Magic Bars Ever
I always try to be transparent about what goes into the food we love, even simple treats like these awesome **magic cookie bars**. Remember that nutrition information is always just an estimate, especially since the crunch of your pecans or the brand of chocolate chips you use can slightly shift things! This estimate breaks down what you can generally expect per square, assuming this recipe makes a full 24 yield.
We know these aren’t exactly health food, weighing in around 220 calories per bar, but wow, are they worth it! The fat content comes mostly from the butter in the crust and the delicious richness of the condensed milk.
- Serving Size: 1 bar
- Calories: 220
- Sugar: 20g
- Fat: 14g (Saturated Fat: 7g)
- Carbohydrates: 22g
- Protein: 3g
I highly recommend checking out my privacy policy if you’re interested in how I manage data collection while you’re enjoying all this deliciousness! Seriously though, when you’re eating something this good, you don’t sweat the small stuff too much, right?
PrintClassic Magic Cookie Bars (7-Layer Bars)
Make easy, chewy Magic Cookie Bars using a simple layering method. This recipe features a graham cracker crust, chocolate chips, nuts, and sweetened condensed milk.
- Prep Time: 15 min
- Cook Time: 30 min
- Total Time: 2 hours 45 min
- Yield: 24 bars
- Category: Dessert
- Method: Baking
- Cuisine: American
- Diet: Vegetarian
Ingredients
- 1 1/2 cups graham cracker crumbs
- 1/2 cup unsalted butter, melted
- 1 (14 ounce) can sweetened condensed milk
- 1 cup semi-sweet chocolate chips
- 1 cup flaked coconut, sweetened
- 1 cup chopped pecans or walnuts
- 1/2 cup butterscotch chips (optional)
Instructions
- Preheat your oven to 350 degrees Fahrenheit. Line a 9×13 inch baking pan with parchment paper, leaving an overhang on the sides for easy removal.
- Combine the graham cracker crumbs and melted butter in a medium bowl. Press this mixture firmly and evenly into the bottom of the prepared pan to form the crust.
- Sprinkle the chocolate chips evenly over the crust layer.
- Sprinkle the flaked coconut over the chocolate chips.
- Sprinkle the chopped nuts over the coconut layer. If using, sprinkle the butterscotch chips over the nuts.
- Slowly pour the entire can of sweetened condensed milk evenly over all the layers. Spread gently if needed to cover the ingredients.
- Bake for 25 to 30 minutes, or until the edges are golden brown and the condensed milk is bubbly.
- Let the bars cool completely in the pan on a wire rack, about 2 hours. Cooling is important for clean cutting.
- Once cool, use the parchment paper overhang to lift the bars out of the pan. Cut into squares.
Notes
- For a richer crust flavor, mix 1 tablespoon of granulated sugar into the graham cracker crumbs before adding the butter.
- If you prefer walnuts, use them instead of pecans.
- Allow the bars to cool fully before slicing; this prevents them from becoming too gooey and falling apart when cut.
Nutrition
- Serving Size: 1 bar
- Calories: 220
- Sugar: 20
- Sodium: 75
- Fat: 14
- Saturated Fat: 7
- Unsaturated Fat: 7
- Trans Fat: 0
- Carbohydrates: 22
- Fiber: 1
- Protein: 3
- Cholesterol: 25