

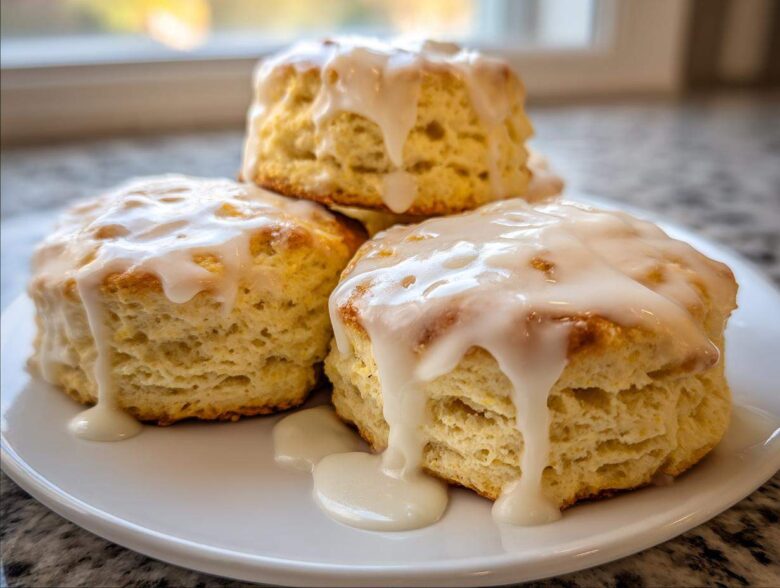
Oh, there is nothing quite like the smell of fresh-baked goods filling your kitchen on a quiet morning. Forget those dry, sad things you sometimes get at the coffee shop—we are going for glory here! I spent years battling flat, crumbly disappointments until I finally cracked the code. This, my friends, is the definitive recipe for achieving **tall, fluffy scones** that are soft right down to the center. Once you master this basic buttermilk method, you’ll never look back. Trust me; these **scones** are game-changing.
Why This Is the Best Scone Recipe for Tender Crumb Scones
I know everyone claims they have the “best scone recipe,” but the reality is that texture separates the good ones from the truly amazing ones. These **buttermilk scones recipe** staples yield an unbelievably tender crumb, almost melting in your mouth. If your past attempts resulted in hockey pucks, don’t stress—I figured out the three magic rules that make these foolproof. They really are that good, making them perfect tea party treats.
- Everything must be ice cold—and I mean ice cold!
- We are hands-off with the mixing; less handling equals tenderness.
- Using buttermilk helps break down the gluten just enough for that fluffy texture.
If you are curious about our editorial standards and how we test these recipes until they are perfect, check out our info page here: Our Commitment to Quality Baking.
Achieving Tall Scones: The Secret to Rise
The height in these **fluffy scones** isn’t luck; it’s chemistry! When you cut ice-cold butter into the flour, those tiny pieces act like little steam pockets during baking. When those pockets hit the 400-degree heat, bam! Instant puff. We use a full tablespoon of baking powder, which gives the dough the necessary lift to push upwards rather than spreading outwards.
The absolute most important thing? Do not, under any circumstances, start kneading this like bread dough. Overworking the dough develops gluten, and gluten means tough, dense results. When we mix, we stop the second it barely comes together. That shaggy look is exactly what we want for that beautiful rise!
Essential Ingredients for Perfect Buttermilk Scones Recipe
To make these fantastic **sweet scones**, you have to follow the shopping list exactly. This base recipe is designed to be straightforward, but the quality of your ingredients—especially the temperature—makes all the difference in the world. We keep the sugar low here because we want that proper pastry flavor to shine through, not just sweetness. Remember, these are designed to be classic afternoon tea treats.
Here’s what you’ll need for 8 servings:
- 2 cups all-purpose flour
- 1/4 cup granulated sugar (we talk about reducing this later!)
- 1 tablespoon baking powder
- 1/2 teaspoon salt
- 6 tablespoons icy cold unsalted butter, diced into tiny cubes
- 3/4 cup very cold buttermilk
- 1 large egg, lightly beaten (this is just for the egg wash on top, optional)
And for the simple sweet topping we love:
- 1/2 cup powdered sugar
- 1–2 tablespoons milk or cream (we use cream for extra richness)
Ingredient Notes and Substitutions for Your Scones
The two must-haves here are the cold butter and the buttermilk. The butter has to be hard and cold so it stays distinct when we cut it in; warm butter melts immediately with the flour, and you end up with dense biscuits, not fluffy **scones**.
If you can’t find buttermilk at the store, don’t panic! Just take 3/4 cup of regular whole milk and whisk in one tablespoon of white vinegar or lemon juice. Let it sit on the counter for 5 minutes until it looks slightly curdled. That’s your homemade substitute!
Also, if you are making savory **scone ideas** or just prefer something much less sweet, you can cut that 1/4 cup of sugar in the dough down to just 1 tablespoon, or even skip it entirely, and definitely leave off the glaze. It still tastes wonderful!
How to Prepare Classic Afternoon Tea Scones From Scratch
Time to get baking! For the best results, go ahead and preheat that oven to 400°F (200°C) right now. And grab your parchment paper to line a baking sheet—we don’t want any sticking disasters! Making excellent **scones from scratch** is all about methodical steps that respect the cold ingredients we just talked about. If you follow these steps closely, you’ll be pulling bakery-style height right out of your own oven.
If you ever have questions about our recipe safety or testing methods, please take a peek at our General Disclaimer before you start!
The Mixing Technique for Tender Scones
First things first: in your biggest bowl, just whisk together the flour, sugar, baking powder, and salt until they look uniform. Now for the butter cubes! Use a pastry blender—or your fingertips if you work fast—to cut those cold chunks into the dry mix. You are aiming for something that looks like coarse sand with some larger, pea-sized bits of butter still visible. That’s the key!
Next, make a little space in the center and pour in your super-cold buttermilk. Mix it gently using just a fork. Stop stirring the *second* the dry bits are incorporated. Seriously, do not try to smooth it out! A shaggy, messy mass is exactly what we need for **tender crumb scones**.
Shaping and Baking These Fluffy Scones
Turn that shaggy mess onto a lightly floured board. Pat the dough out by hand until it’s about 3/4 of an inch thick. Don’t smash it thin! Now, grab your 2-inch round cutter. Here’s the pro tip for **tall scones**: Press the cutter straight down firmly, and then lift straight up. Do *not* twist the cutter, or you seal the edges and stop them from rising high.
Place the cutouts onto your parchment-lined sheet. If you want softer sides, press them close together so they touch gently. Pop them into the hot oven for about 12 to 15 minutes. They’re done when they look gorgeously golden brown on top!
Glazing Your Sweet Scones
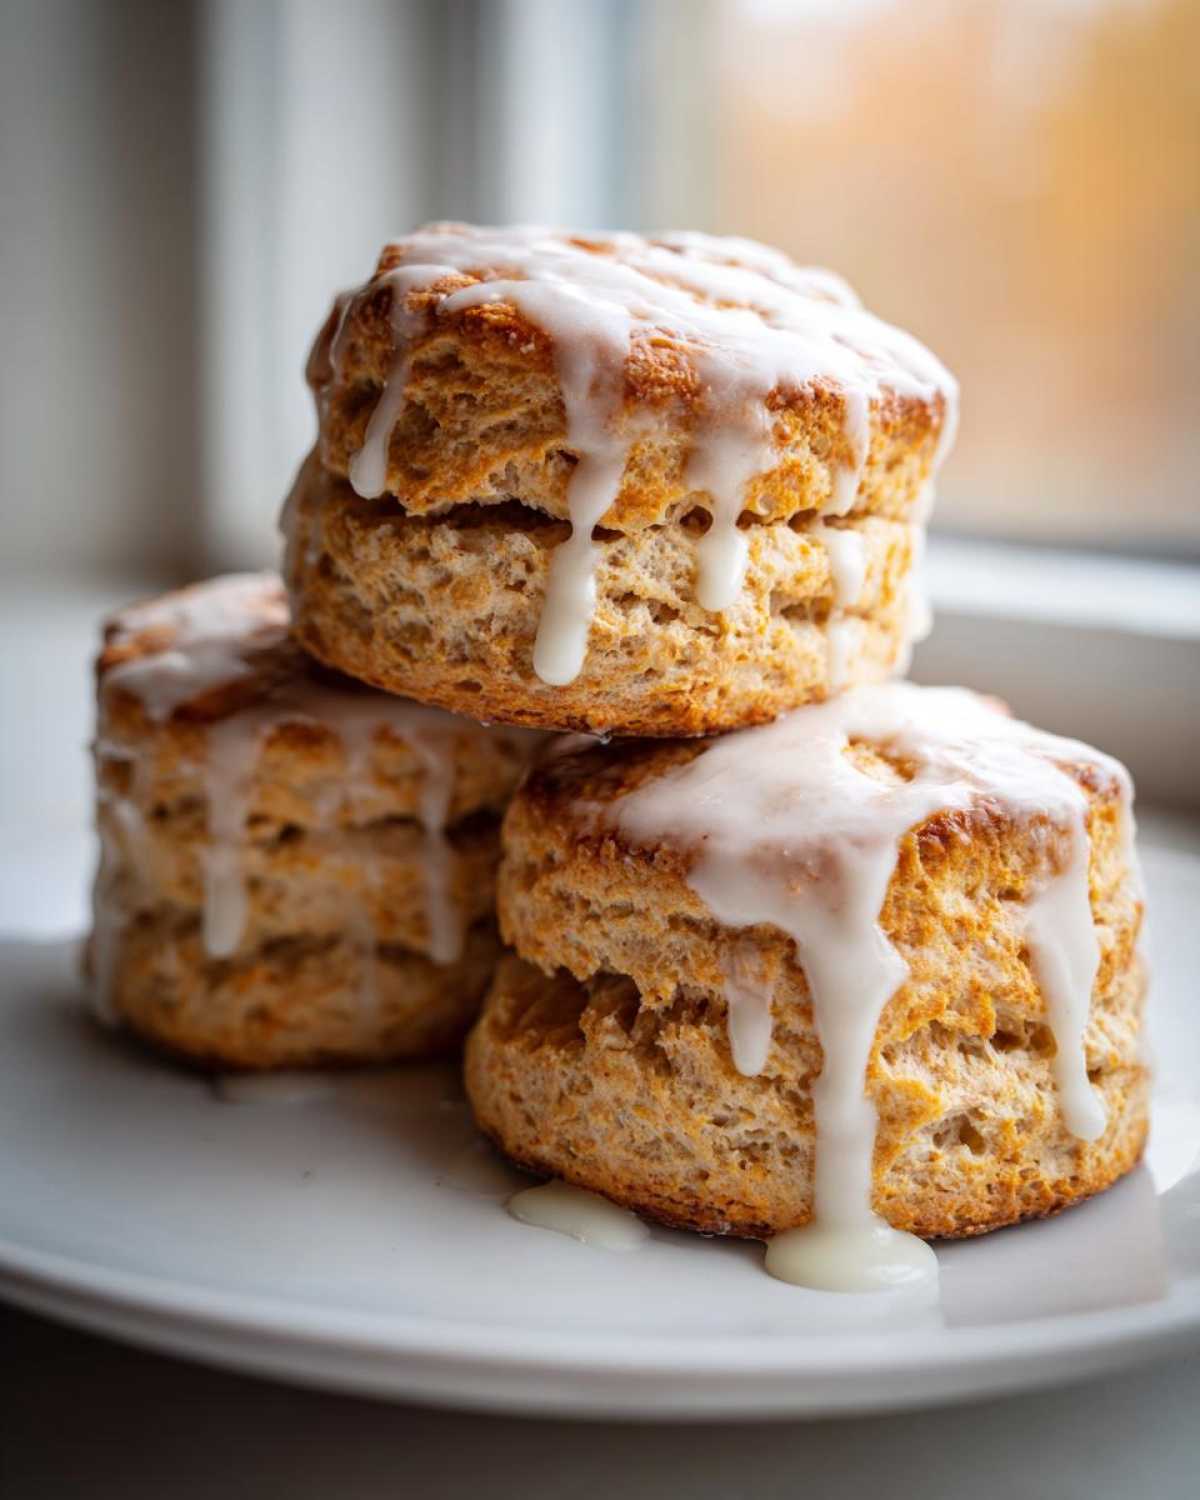
If you like your **sweet scones** kissed with just a little extra sugar for that beautiful bakery look, the glaze is so easy! While the scones are cooling slightly, grab your powdered sugar. Whisk it together super smooth with just a tablespoon of milk or cream. If it looks thick like icing, splash in maybe one more teaspoon of liquid until it’s runny enough to drizzle easily.
You want that lovely slightly opaque sheen—not thick frosting. Drizzle it right over the tops as they are still warm! This glaze sets up quickly and gives you those gorgeous, slightly sticky **glazed scones** that are just perfect for a weekend brunch.
Scone Variations for Brunch Baked Goods
The beauty of this amazing base recipe is how easily it morphs into whatever flavor you happen to be craving! Since we nailed the structure for those **tall scones**, we can now just fold in extras without worrying about wrecking the rise. It’s all about timing so those additions don’t mess up the butter coating that keeps things fluffy.
For sweet options, like Cranberry Orange or Maple Pecan, you want to wait until *after* you pour in the buttermilk and give it that initial light stir. Then, gently fold in your mix-ins.
- Cranberry Orange: Toss in about 1/2 cup of dried cranberries and the zest of one orange. Wow, that wakes things up!
- Chocolate Chip: For decadence, fold in 3/4 cup of mini chocolate chips right at the end. Perfect little afternoon indulgence.
- Savory Cheddar & Herb: To make things savory, cut the sugar down to 1 tablespoon and add 1 cup of sharp cheddar cheese and a teaspoon of dried chives when you mix your dry ingredients.
These **scone variations** mean you can change up your **brunch baked goods** strategy every weekend!
Tips for Success: Your No Fail Scones Guide
Okay, if you take anything away from this entire post, let it be these crucial points for achieving seriously **no fail scones** every single time. I’ve whittled down years of baking attempts into three main things to watch out for. Stick to these **scone baking tips**, and you will be pulling bakery-quality treats out of your oven!
First, I cannot stress enough: Temperature is your boss. Everything—the butter, the buttermilk—must be frigid. If your kitchen is warm, chill your bowl before you start mixing!
Second, when cutting the dough into shapes, please remember the cardinal rule for height: press down hard and straight up. Twisting the cutter is the fastest way to seal those little edges and prevent the glorious puff you want in these **fluffy scones**.
Finally, mix minimally! It should look messy when you are done stirring. That slight unevenness is what guarantees a light, **tender crumb scones** experience.
If you ever need to get in touch with us about ingredients or techniques, feel free to visit our Contact Page!
Storage and Reheating Instructions for Homemade Breakfast Pastries
Now that you’ve made these perfect **homemade breakfast pastries**, you want them to last, right? Luckily, **scones** hold up well, but you have to store them correctly! Keep the un-glazed ones in an airtight container at room temperature for up to two days. If you glazed them, they are happier in the fridge, but only for about three days max.
Don’t bother with the microwave for reheating—it makes them chewy! The best way to bring them back to life is in a toaster oven or a regular oven set to 350°F (175°C) for about five minutes. They come out flaky and warm again, just like they were fresh from the oven!
Frequently Asked Questions About Making Scones
Why are my scones dry and stiff instead of fluffy scones?
This almost always comes down to two things: overmixing or using ingredients that weren’t cold enough. If you handle the dough too much, like kneading it for more than a second, you develop the gluten, which results in that hard, dry texture. Also, if your butter or buttermilk was warm, it melts before it can steam up, and those pockets never form, leading to flat, dense results. Keep everything super chilled!
How can I get that beautiful, high rise for bakery style scones?
It’s all in the cutting! When you use a round cutter, you must press straight down through the dough and lift straight up without any twisting motion. Twisting seals the sides of the dough, preventing it from puffing up vertically in the oven. Make sure your baking powder is fresh, too—that’s your main engine for lift!
Can I make these scones ahead of time?
Yes, absolutely! For the absolute best results, cut the shapes out, place them on the parchment-lined sheet, cover them loosely with plastic wrap, and pop the whole tray into the fridge for up to 24 hours. When you’re ready to bake, just proceed as normal, maybe adding two extra minutes to the baking time since they start colder. Or, you can freeze the raw scone shapes!
For more information on how we handle user data when you browse our site, please review our Privacy Policy.
Estimated Nutritional Data for Classic Scones
Now, I always feel a little strange baking things that are this delicious and then talking numbers, but for those of you keeping track, here are the approximate details for these **sweet scones** based on the recipe above.
- Calories: 250 per scone
- Fat: 12g
- Carbohydrates: 32g
- Protein: 5g
- Sugar: 12g
Just remember, this is based on using the glaze; if you skip that extra sweetness, those numbers will drop a bit! This is just an estimate, so your exact nutritional content will vary depending on the specific brands of butter or milk you use, but it gives you a good baseline for these wonderful **homemade breakfast pastries**.
PrintClassic Buttermilk Scones with Sweet Glaze

A straightforward recipe for making tall, fluffy buttermilk scones with a tender crumb, finished with a simple sweet glaze.
- Prep Time: 15 min
- Cook Time: 15 min
- Total Time: 30 min
- Yield: 8 servings
- Category: Breakfast Pastry
- Method: Baking
- Cuisine: American
- Diet: Vegetarian
Ingredients
- 2 cups all-purpose flour
- 1/4 cup granulated sugar
- 1 tablespoon baking powder
- 1/2 teaspoon salt
- 6 tablespoons cold unsalted butter, cut into small cubes
- 3/4 cup cold buttermilk
- 1 large egg, lightly beaten (for egg wash, optional)
- For Glaze: 1/2 cup powdered sugar
- For Glaze: 1-2 tablespoons milk or cream
Instructions
- Preheat your oven to 400°F (200°C). Line a baking sheet with parchment paper.
- In a large bowl, whisk together the flour, sugar, baking powder, and salt.
- Cut the cold butter into the dry ingredients using a pastry blender or your fingertips until the mixture resembles coarse crumbs with some pea-sized pieces of butter remaining.
- Make a well in the center and pour in the cold buttermilk. Mix gently with a fork until just combined. Do not overmix; the dough will be slightly shaggy.
- Turn the dough out onto a lightly floured surface. Gently pat or press the dough into a 3/4-inch thick circle or rectangle.
- Cut the dough into 8 wedges or use a 2-inch round cutter to cut out shapes. Place the scones onto the prepared baking sheet, ensuring they touch slightly if you want softer sides.
- Brush the tops lightly with the beaten egg, if using.
- Bake for 12 to 15 minutes, or until the tops are golden brown and a toothpick inserted into the center comes out clean.
- While the scones cool slightly, whisk together the powdered sugar and milk/cream until smooth for the glaze. Add milk slowly to reach your desired consistency.
- Drizzle the glaze over the warm scones. Serve warm or at room temperature.
Notes
- Keep all ingredients, especially the butter and buttermilk, very cold for the best rise and texture.
- For taller scones, avoid twisting the biscuit/scone cutter; press straight down and lift straight up.
- If you prefer a less sweet scone, reduce the sugar in the dough to 1 tablespoon and omit the glaze.
Nutrition
- Serving Size: 1 scone
- Calories: 250
- Sugar: 12
- Sodium: 280
- Fat: 12
- Saturated Fat: 7
- Unsaturated Fat: 5
- Trans Fat: 0
- Carbohydrates: 32
- Fiber: 1
- Protein: 5
- Cholesterol: 50