

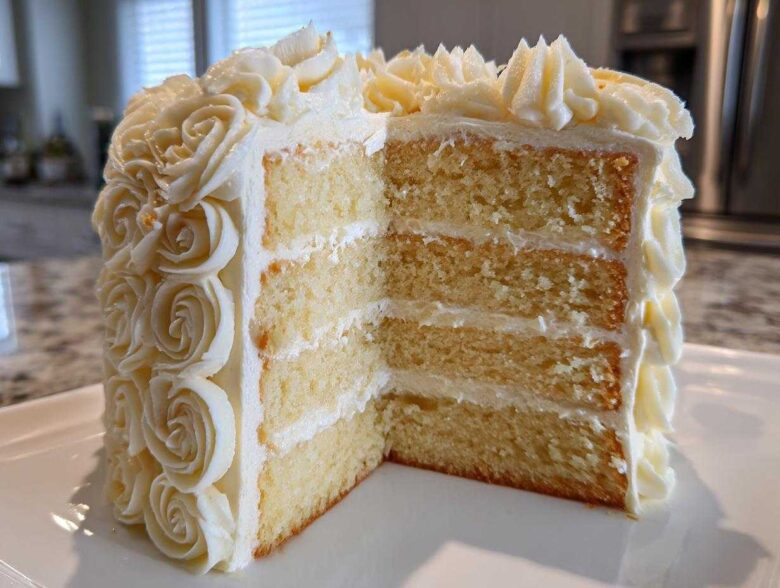
Do you ever look at those incredibly elegant desserts online and think, “That’s lovely, but who has the time?” I used to be that person, Marco and I, always cooking up big, performative feasts for crowds. But honestly, after everyone left, we realized we weren’t actually enjoying the magic we made. Our revolution, the whole point of Eatable Empress, is realizing that *you* deserve that showstopper. You can read a bit more about our little rebellion against saving the best for company over on our About page.
That’s why I’m obsessed with this beautiful buttercream rosette rose cake. It looks incredibly complicated, like something reserved for a major anniversary or a fancy magazine shoot. But trust me—it’s completely achievable for a special evening just for the two of us. We’re going to strip away the fear and show you exactly how to build this stunning dessert, focusing on getting that perfect, moist cake interior beneath the gorgeous swirls. I promise, once you master this, you’ll feel like the Empress you are.
Why This Buttercream Rosette Rose Cake is Your Next Showstopper
If you want an elegant dessert idea that genuinely lives up to the hype, this is the one. We saved the best for last with this design because frankly, it deserves to be the absolute star of your table. Forget stiff, fussy fondant; this cake is all about the pure, creamy magic of expertly piped buttercream, making it a genuine showstopping birthday cake contender.
- It offers high visual impact for relatively low difficulty once you get the hang of the piping.
- The flavor is classic—vanilla or lemon—meaning it pairs beautifully with almost any celebration.
- It feels luxurious because it’s covered head-to-toe in glorious frosting!
Marco always says this design is the perfect marriage of homemade comfort and high-end presentation. If you need an amazing, stable frosting recipe to go with it, check out my favorite creamy vanilla buttercream recipe.
Achieving Perfect Rose Cake Texture and Flavor
The secret here is reliability. Since the decorating takes patience, you don’t want to worry about the flavor falling flat. We use a neutral, buttery base, usually a light vanilla or a bright lemon recipe for the actual layers. This allows the real star—the American Buttercream—to shine! I’ve tweaked this buttercream recipe over years just for piping stability. It holds those gorgeous rosette shapes beautifully, setting up just enough so your rose cake looks freshly frosted hours later. It’s trustworthy, folks; that’s how we build confidence in the kitchen!
Gathering Supplies for Your Elegant Rose Cake
Alright, before we dive into the mixing—and trust me, this is the fun part—we need to make sure our station is ready. When you’re building a tower of rosettes, having the right tools makes the difference between a delightful afternoon project and a frustrating mess near the end. Don’t worry; we aren’t asking for anything too industrial here. These are just the bits and bobs that elevate your cake from ‘homemade’ to ‘hand-crafted.’ Think of it as setting the stage for some truly easy cake decorating ideas!
Essential Equipment for Buttercream Piping Techniques
You’ll need a decent mixer, of course, to get that butter dreamy and fluffy. But for the actual decoration, these three items are non-negotiable if you want that perfect, swooping rose look:
- A Sturdy Stand or Hand Mixer: You need power to cream the butter and sugar correctly. Don’t rush this step!
- Piping Bags: Disposable ones are easiest because cleanup is non-existent, but reusable silicone bags are wonderful too. Make sure they are clean!
- The Right Piping Tip: This is the magic wand! You absolutely want a large open star tip. The Wilton 1M is what I use 99% of the time for big, beautiful rosettes. It creates those lovely ridges that look exactly like edible rose decorations without needing to cut multiple different nozzles.
- Offset Spatula: Essential for getting that perfectly smooth, clean coat on the cake before you even think about piping.
Having these basics ready means when the frosting is perfect, you can jump straight into piping without hunting for the piping bag in the back of the junk drawer. Trust me on this setup—it saves so much hassle!
Ingredients for the Rose Cake and Buttercream
Okay, let’s talk substance! Remember, we’re treating ourselves like royalty here at Eatable Empress, so we are not settling for waxy, subpar frosting. The quality of your butter makes a massive difference in how light and flavorful this buttercream ends up. Please, please, please use high-quality, unsalted butter. It’s the backbone of this whole masterpiece, and you absolutely cannot substitute it in a recipe that relies on that beautiful fat content for structure.
We are going to keep the cake base simple—use your absolute favorite reliable recipe here. If your go-to is a perfectly moist vanilla or a bright, citrusy lemon, that’s what we’re using! If you need a fantastic, fluffy base to start from, I swear by my recipe for moist and fluffy vanilla cupcakes; just bake them as layers instead!
For the American Buttercream Frosting
This frosting needs to be stiff enough to stand up tall when piped, so pay attention to the cream amount. Remember, the butter must be truly softened—leave it on the counter for at least an hour before starting. It should indent easily when pressed, but absolutely cannot look greasy or melted, or your rosettes will turn into sweet puddles!
- 1 1/2 cups unsalted butter, softened (make sure it’s soft, not melted!)
- 4 cups powdered sugar, sifted (Sifting is crucial to avoid lumps in the roses!)
- 1 teaspoon vanilla extract
- 1/2 teaspoon almond extract (This tiny bit of almond makes the whole thing taste gourmet, honestly.)
- 3-4 tablespoons heavy cream
- Pinch of salt
For the Cake Layers
Since the beautiful butter-rosette decoration is the focus here, we are keeping the cake component straightforward. Just make sure you have enough batter for your chosen pans and that those layers are baked, cooled completely, and leveled before we frost them. A warm cake is your enemy!
- Cake layers (your favorite vanilla or lemon recipe, cooled completely)
Step-by-Step Instructions for Your Rose Cake
This is where the artistry happens! It feels a little overwhelming when you look at the list of instructions, but I promise you, if you follow the timing, especially about cooling, you’ll be fine. The most important thing is patience. You cannot frost a warm cake, or you’ll end up with a melted, sloppy mess—and we want a gorgeously structured rose cake, not a vanilla lagoon!
Preparing the Cake Base and Crumb Coat
First thing’s first: your cake has to be room temperature, or ideally, slightly chilled after cooling. If you try to crumb coat a warm cake, it’s game over. I learned that the very hard way, Marco!
- Prepare your cake layers according to your chosen recipe and allow them to cool completely. Level the tops if necessary. If they are dome-shaped, use a serrated knife to gently slice off the top until it’s flat.
- Make the American Buttercream: In a large bowl, beat the softened butter with an electric mixer until creamy, about 2 minutes. This is the aeration step.
- Gradually add the sifted powdered sugar, one cup at a time, mixing on low speed until incorporated. Scrape down the sides of the bowl as needed.
- Add the vanilla extract, almond extract, and salt. Beat on medium speed for 1 minute. Stop and check the flavor—it should smell incredible already!
- Slowly add the heavy cream, one tablespoon at a time, beating until the frosting is light and fluffy. If the frosting is too stiff, add a tiny bit more cream. If it is too soft, add a little more powdered sugar. We want it pliable, not runny.
- Crumb Coat: Place the first cake layer on your serving plate or cake stand. Apply a thin, even layer of buttercream over the entire cake to seal in crumbs. This thin “seal” layer is crucial! Chill the cake for 15 to 20 minutes until the crumb coat is firm. Don’t skip this chill time!
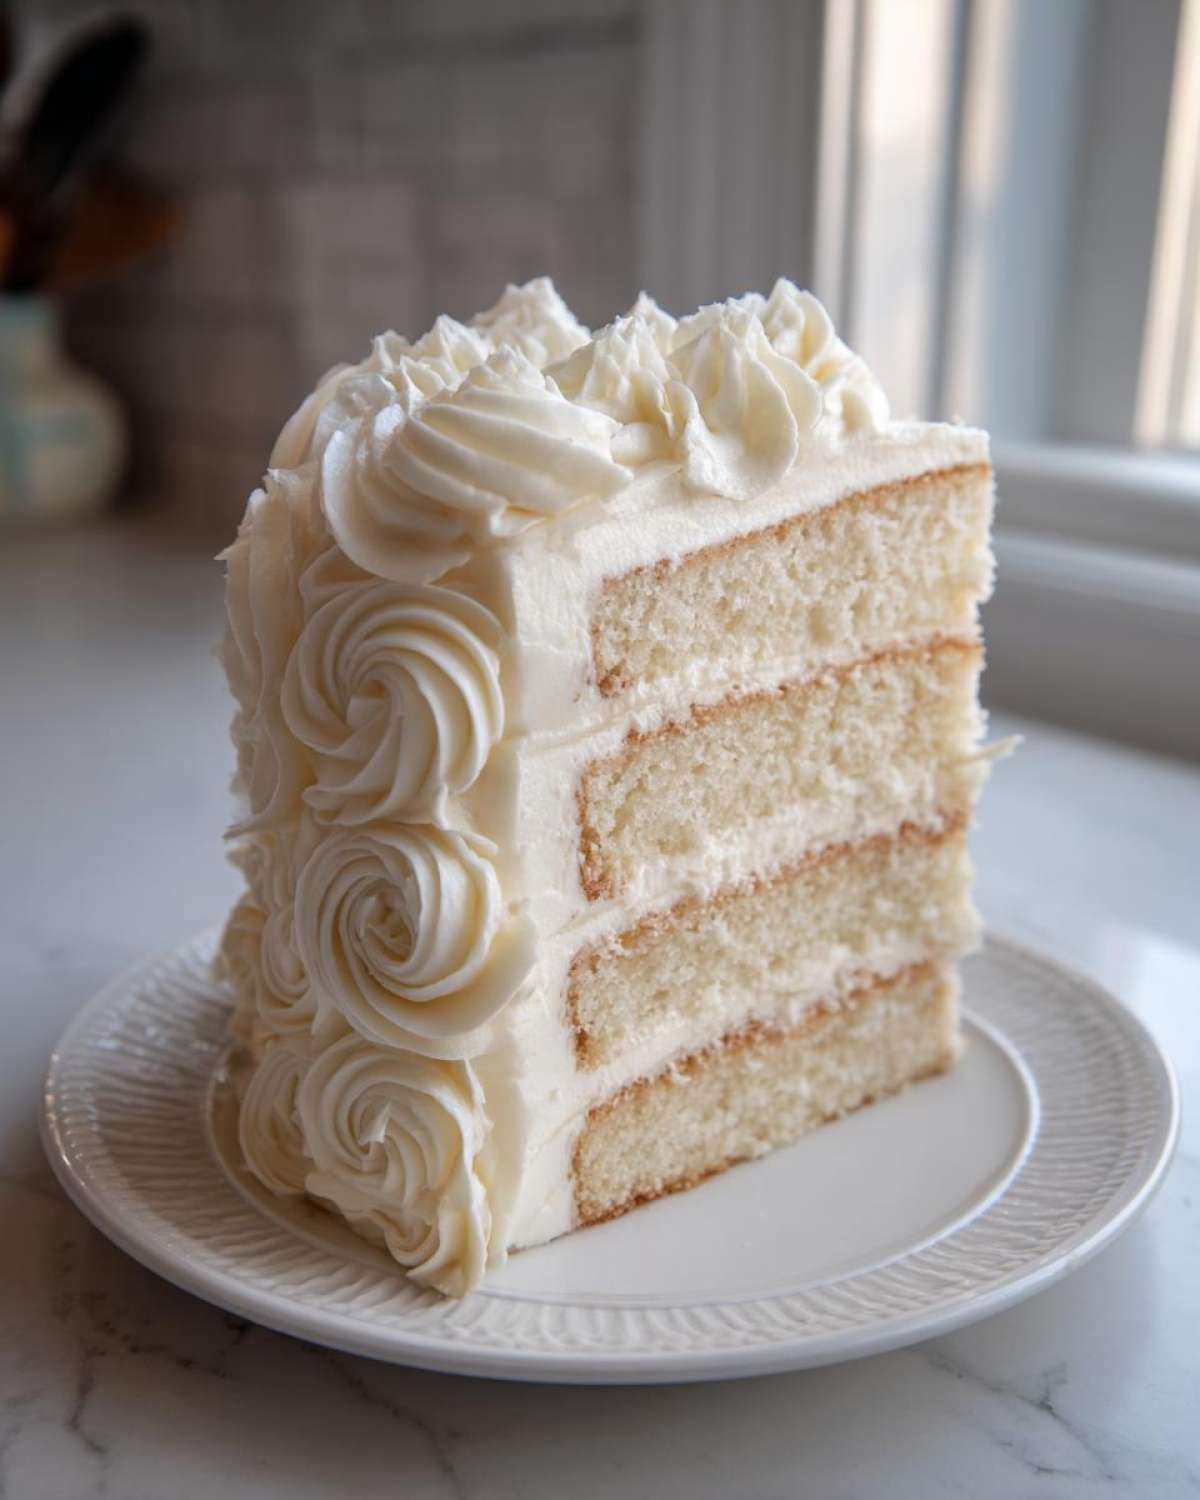
Mastering the Buttercream Piping Techniques for Rosettes
Now that the crumb coat is set, we move to the final, beautiful layer. Fit a piping bag with a large open star tip (like the handy Wilton 1M I mentioned). Fill the bag—but don’t overfill it, or it gets messy squeezing under pressure. Fit the filled bag with a coupler if you want to swap tips later, but for one big decorating job, just filling it works fine.
- Final Frosting: Apply a thicker, final layer of buttercream to the entire cake. Use an offset spatula to smooth the sides and top for a good, clean base. This smooth layer is the canvas for your roses.
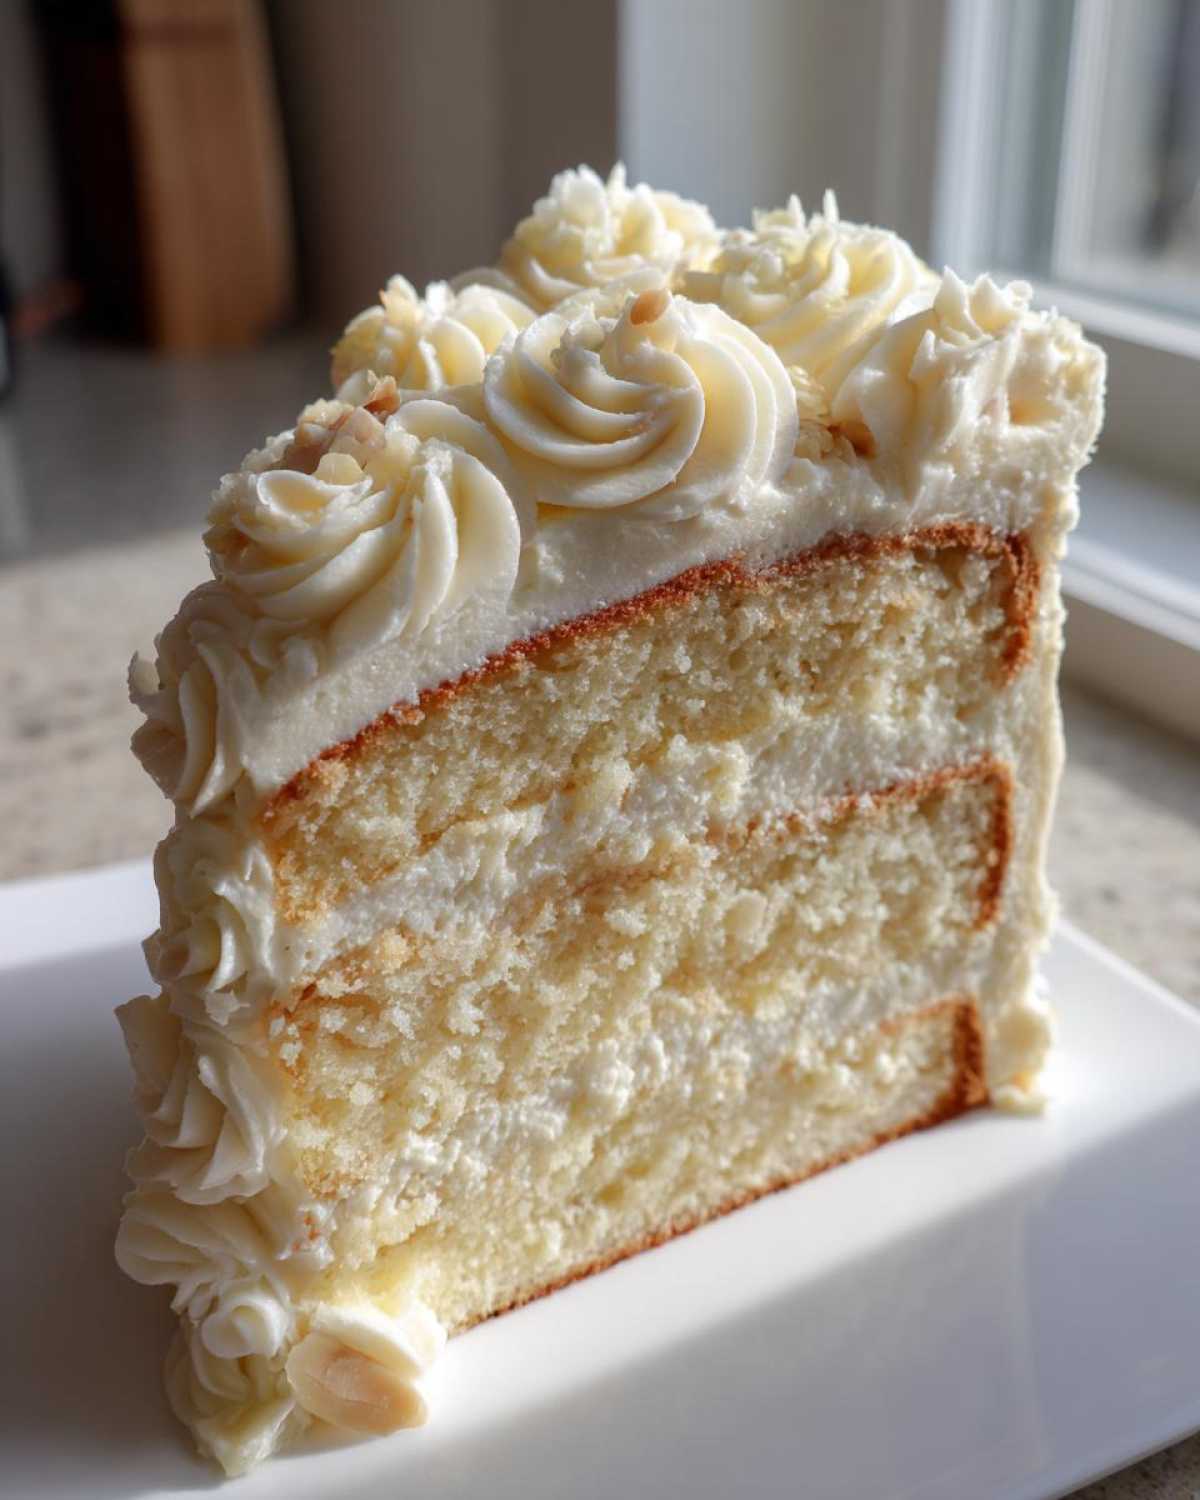
- Pipe the Rosettes: Fill the bag with the remaining buttercream. To get that classic, gorgeous rosette look, hold the bag perpendicular—straight up and down—to the cake surface.
- Start in the center of where you want the rose and pipe steadily in a continuous spiral motion outward until you form a full rose shape. You are essentially drawing an open spiral that curls upward slightly. Just keep that pressure even!
- Continue piping rosettes closely together over the top surface of the cake, or around the base, until you achieve your desired look. You can watch a quick visual walkthrough of this if you need extra help with the movement right here.
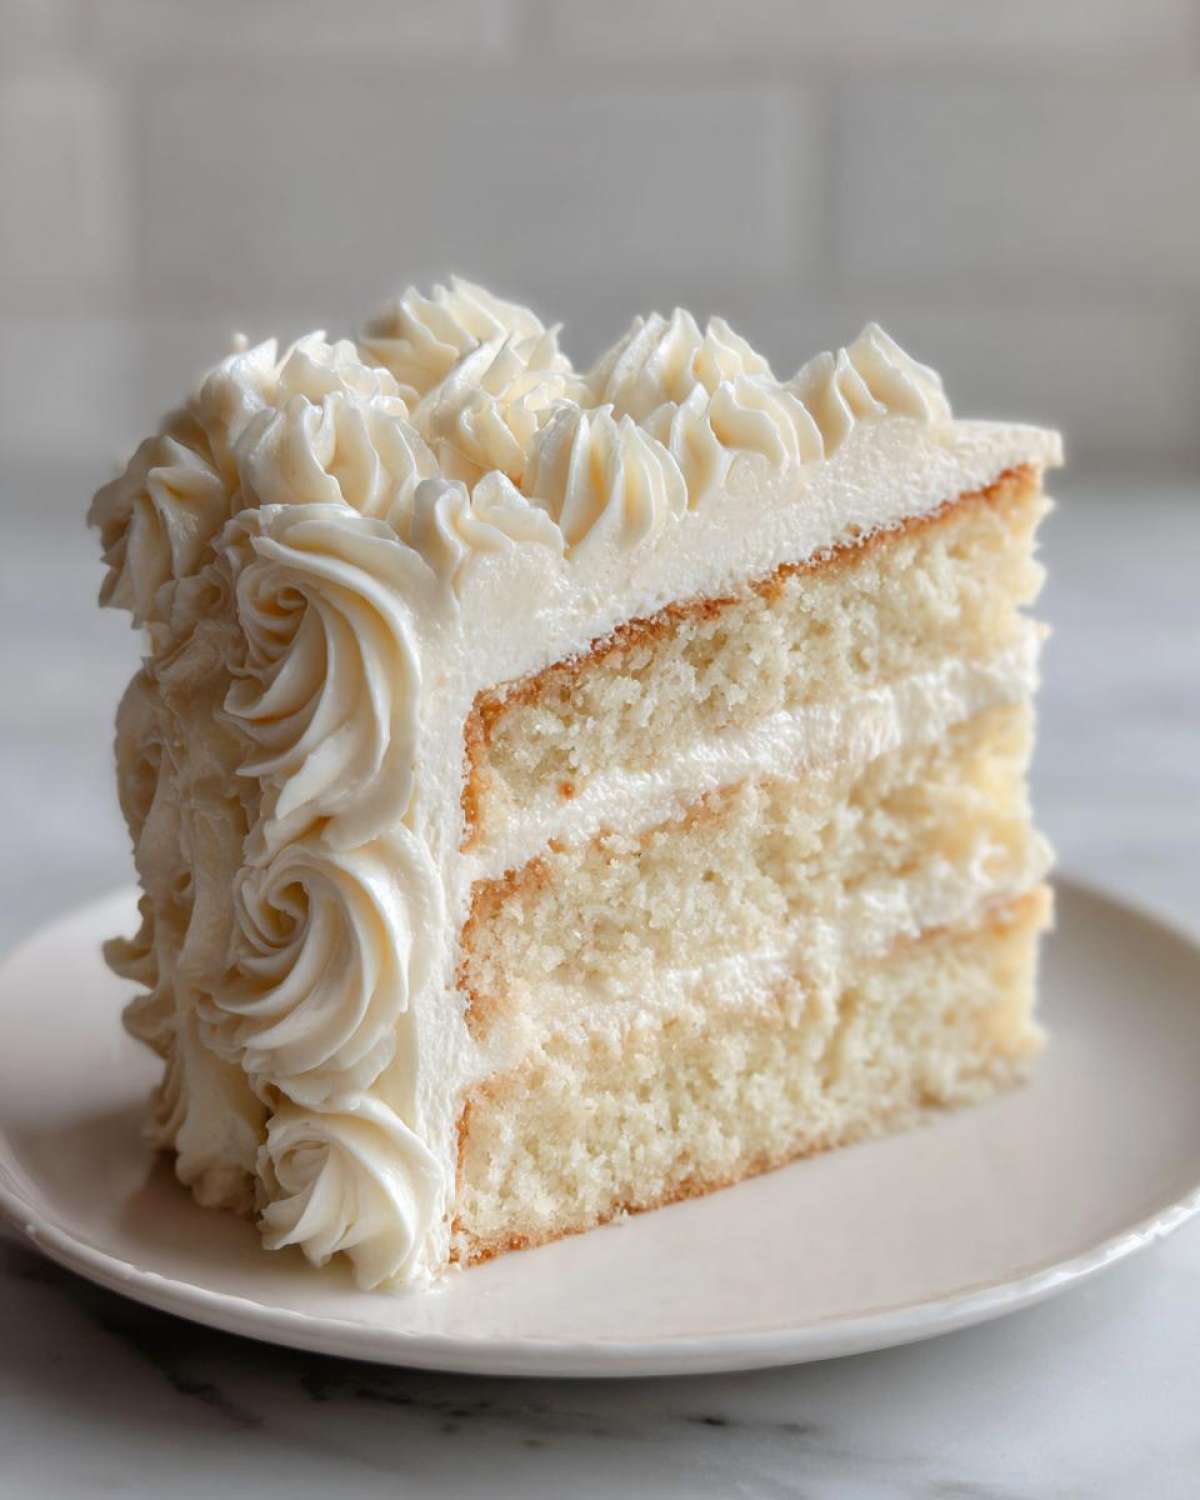
- Chill the finished cake briefly before serving to set the buttercream perfectly so all those beautiful edible rose decorations hold their shape as you move it around!
Tips for Perfect Edible Rose Decorations
When you’ve spent all that time getting the frosting piped just right, the last thing you want is for those beautiful roses to wilt or slide off when the cake moves! Because this is technically a gourmet layer cake, adding these refinement steps really makes all the difference in your final presentation. These little tricks are the difference between a pretty cake and one that looks truly magazine-worthy.
First, let’s talk temperature control, which is essential for any good buttercream piping technique. For the most stable rosettes, ensure your buttercream is slightly cooler than room temperature—but not cold from the fridge, or it gets too stiff to pipe nicely. If you’ve been working with it for a while and it starts looking a little soft or shiny, just pop the entire bowl (or even the filled piping bag!) into the fridge for about 10 minutes. It chills quickly, stiffens up, and you’re ready for another round of piping perfection.
Now, let’s address the flavor profile, which moves us into the realm of true floral cake recipes. If you really want to lean into that romantic theme and create a genuinely fragrant cake recipe, I highly suggest adding rose water. You can add about 1/2 teaspoon of high-quality, food-grade rose water to the buttercream right when you add your vanilla and almond extracts. Be warned: rose water is strong! It gives such a lovely, delicate perfume that works wonders for romantic occasion desserts, but too much and suddenly your cake tastes like Turkish Delight soap. A little bit goes a long way, I promise.
Finally, don’t stress if your first few rosettes look a bit wonky. Marco always tells me, “Sofia, you can pipe over a wonky rose with another one!” It’s not like painting a watercolor. If you mess up the initial swirl, just pipe right over the top with a new layer, or use that slightly imperfect rose for a spot near the bottom edge where it will be less visible. The best way to train your muscle memory is to practice piping on parchment paper first. You can scrape that practice frosting right back into the bag and keep going! It’s essentially free decorating time, and it makes you so much more confident when you approach the actual cake. Once they are set, placing the finished cake in the fridge for 20 minutes guarantees those stunning edible rose decorations stay sharp until serving time.
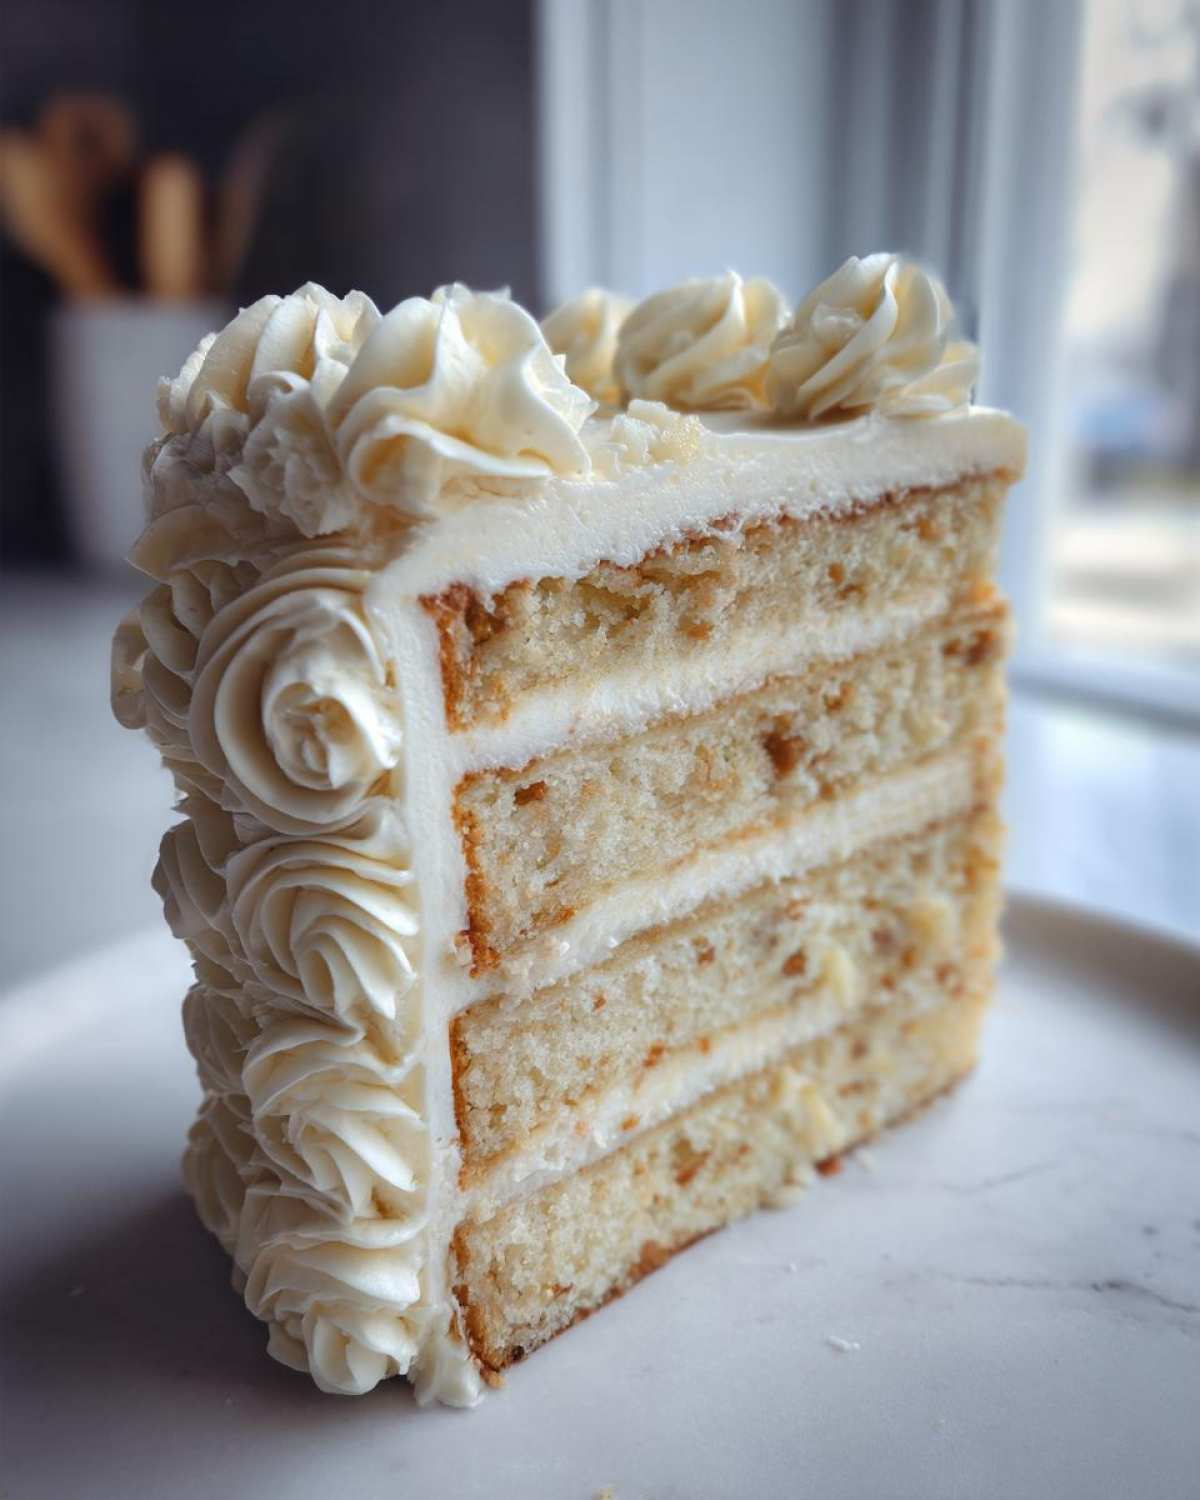
If you love that zesty hint of flavor, I also have a fantastic recipe for meltaway lemon cookies that uses a similar technique if you ever want to pivot from cakes!
Serving and Storing Your Finished Rose Cake
Now, my favorite part! You have this glorious, towering confection, and you need eyes on it before you eat it! Before you bring your magnificent rose cake out to the table—maybe for a romantic occasion dessert or perhaps as the centerpiece for your intimate afternoon tea cakes spread—you absolutely must give it a final chill time. About 20 minutes uncovered in the refrigerator does wonders! This firms up all those beautiful buttercream rosettes so they look crisp and sharp, and they won’t sweat or slumps when they hit room temperature for your guests (or just Marco and me).
When it comes time to serve, pull the cake out about 30 minutes before you slice into it. Buttercream tastes much better when it’s not rock hard straight from the fridge; it lets those buttery notes really sing. You want it cool, but not cold.
As for storing leftovers? Because this is an American-style buttercream finish, it’s quite stable. You can leave the cake covered loosely at cool room temperature for about a day if your house isn’t too warm. However, because the cake layers themselves are so moist, I always feel safer storing it in the refrigerator if we aren’t going to finish it the next day. Cover it well with a cake dome or loosely tent some foil over it—don’t press the foil directly onto the rosettes or you’ll flatten your hard work!
It stays wonderfully fresh like this for up to four days. When you take it out to serve later, just remember that 30-minute temper time again, and you’ll have perfect slices every time. It’s the ideal dessert because it looks fantastic sitting on the counter, tempting you, but it’s totally safe being stored away until the next celebration day!
Variations on This Fragrant Cake Recipe
Once you master the technique for piping those gorgeous roses, the sky is the limit on flavor! We’ve stuck to vanilla or lemon because they provide that crisp, clean background that lets the buttercream truly sing, but this base is begging to be customized for different moods or seasons. Treating yourself with a new flavor combo is the whole point of being the Empress of your kitchen, right?
For spring or summer celebrations, leaning into bright berry flavors turns this into one of those stunning strawberry rose desserts people talk about for weeks. You could gently fold puréed, cooked-down strawberries into the final layer of your cake batter before baking, or infuse your layers with a tiny bit of strawberry extract. Doing this keeps the cake beautifully visual and fragrant without overpowering the delicate rose piping.
Marco is actually a huge fan of that complex, slightly spiced flavor profile you see in some Mediterranean baking. If you’re feeling bold, skip the citrus and look up something truly special. I found this killer recipe for a combination that sounds unbelievably good—it mixes pistachio, rose, and cardamom.
You can explore that fascinating blend using this Pistachio, Rose & Cardamom Cake recipe using the same buttercream technique we used here. That combination moves it from a delicate afternoon tea cake to a much more sophisticated, gourmet layer cake!
If you decide to pivot away from the rose entirely sometimes, but still want that gorgeous, bright look, you could try a Creamsicle variation. That tangy orange zest is stunning under white frosting. You can see how I achieve that bright, moist flavor in my ultimate moist orange layer cake if you’re looking for another showstopper.
Ultimately, think about your favorite fresh fruit. If you love raspberries, folding some fresh raspberry reduction into your batter creates incredible pockets of flavor, turning this into one of those beautiful raspberry rose baked goods that just screams, “I made this for me!”
Frequently Asked Questions About Making a Rose Cake
I know you’re probably ready to rush off and whip up a batch of frosting, but wait just a second! When Marco and I first started tackling these elaborate-looking cakes, we had so many little questions that, once answered, made everything click into place. It’s those small details that turn a good attempt into one of your favorite elegant dessert ideas. Ask me anything, I’ve probably asked myself the same thing while standing over the mixer!
Can I use store-bought cake layers for this recipe?
Oh, you absolutely can! Remember, this entire blog exists because we want to make treating ourselves easier, not harder. If you’re short on time, going for high-quality, store-bought vanilla or lemon cake rounds is perfectly fine. The real magic here—the part that makes it a true showstopping birthday cake—is the homemade buttercream and the decoration. As long as those layers are completely cool and maybe even lightly chilled, the crumb coat will adhere perfectly, and you can jump straight to piping those gorgeous rosettes. It saves you about 40 minutes right there!
How do I prevent the buttercream from melting or drooping?
This is the million-dollar question for any buttercream piping technique enthusiast! The main culprit is usually warm butter in the base, or a very warm kitchen. First, ensure your base buttercream is slightly cool; if it feels soft to the touch, pop the bowl into the fridge for 10 minutes. Second, once you finish piping those beautiful roses, the cake needs to chill! A quick 20-minute rest in the refrigerator after decorating sets the structure so that ambient room temperature won’t cause your beautiful roses to soften too quickly. It keeps your hard work looking sharp for hours.
Can I adapt this frosting to make a *milk cake variation*?
That’s being ambitious, which I love! If you are planning on making a true Tres Leches or Rose Milk Cake, you need to know that the flavor profile changes everything. A traditional milk cake involves soaking the cake layers in a sweet milk mixture, making the cake extremely wet. My American Buttercream, while sturdy, contains a lot of sugar and fat, and will often weep or slide right off a very moist, soaked cake. For a true milk cake variation, I recommend stabilizing your buttercream with a slightly cooled, but not chilled, cake base. Alternatively, if you love the floral notes, you might find a Swiss Meringue Buttercream handles the moisture better, though that’s a whole different set of piping challenges! For now, stick to the moist vanilla or lemon base when using this specific recipe.
What if I want a stronger floral flavor than just the rose water substitute?
If you want that true intoxicating scent that defines a wonderful fragrant cake recipe, plain extracts often don’t cut it, and rose water can be overwhelming. If you are interested in flavor variations—especially something rich and lovely—you must check out the flavor profiles people are using successfully. For example, if you love berry notes, that raspberry element can really enhance the floral quality. You might want to look up some of those amazing other floral cake recipes we feature to see what other extracts or jams work well before committing to the whole cake!
Appreciating Your Creation: A Royal Moment
Well, deep breaths now, Empress! You just created a masterpiece. Seriously, look at that cake. You took simple butter and sugar and transformed it into a vision covered in beautiful buttercream roses. This is exactly what we do here at Eatable Empress—we take something that looks intimidating and make it a beautiful reality, just for you and whoever you choose to share it with.
Now that you’ve done the work, I genuinely want to see what you created! Did you stick to the classic vanilla base, or did you get adventurous with one of those raspberry or lemon swirls we talked about? Did your roses turn out perfectly swoopy, or did you have to practice a few times on parchment paper first? (I definitely did!)
We learn and grow together in this kitchen. So, please, drop a comment below and tell me how the piping went for you. If you’ve got a picture, share it! You can always reach out to us directly through the Contact page if you have a specific question that came up mid-bake.
And if this rose cake made your Wednesday night feel like Saturday morning? Give the recipe a rating right here on the page. Your feedback means the world to Marco and me, and it helps other people feel confident enough to start their own delicious reign. Long live the simple feast, and congratulations on your stunning cake!
PrintElegant Buttercream Rosette Cake Recipe
Create a showstopping layer cake decorated with beautiful buttercream roses. This recipe focuses on achieving perfect texture and mastering essential piping techniques for an elegant dessert.
- Prep Time: 45 min
- Cook Time: 35 min
- Total Time: 80 min
- Yield: 10 servings
- Category: Dessert
- Method: Assembly and Piping
- Cuisine: American
- Diet: Vegetarian
Ingredients
- 1 1/2 cups unsalted butter, softened
- 4 cups powdered sugar, sifted
- 1 teaspoon vanilla extract
- 1/2 teaspoon almond extract
- 3-4 tablespoons heavy cream
- Pinch of salt
- Cake layers (your favorite vanilla or lemon recipe)
Instructions
- Prepare your cake layers according to your chosen recipe and allow them to cool completely. Level the tops if necessary.
- Make the American Buttercream: In a large bowl, beat the softened butter with an electric mixer until creamy, about 2 minutes.
- Gradually add the sifted powdered sugar, one cup at a time, mixing on low speed until incorporated. Scrape down the sides of the bowl as needed.
- Add the vanilla extract, almond extract, and salt. Beat on medium speed for 1 minute.
- Slowly add the heavy cream, one tablespoon at a time, beating until the frosting is light and fluffy. If the frosting is too stiff, add a tiny bit more cream. If it is too soft, add a little more powdered sugar.
- Crumb Coat: Place the first cake layer on your serving plate or cake stand. Apply a thin, even layer of buttercream over the entire cake to seal in crumbs. Chill the cake for 15 to 20 minutes until the crumb coat is firm.
- Final Frosting: Apply a thicker, final layer of buttercream to the entire cake. Use an offset spatula to smooth the sides and top for a clean base.
- Pipe the Rosettes: Fit a piping bag with a large open star tip (like Wilton 1M). Fill the bag with the buttercream.
- To pipe a rosette, hold the bag perpendicular to the cake surface. Start in the center of where you want the rosette and pipe in a continuous spiral motion outward until you form a full rose shape.
- Continue piping rosettes closely together over the top surface of the cake, or around the base, until you achieve your desired look.
- Chill the finished cake briefly before serving to set the buttercream.
Notes
- For the most stable rosettes, ensure your buttercream is slightly cooler than room temperature.
- If you want a floral flavor infusion, add 1/2 teaspoon of food-grade rose water to the buttercream along with the extracts.
- Practice piping on parchment paper first to get comfortable with the pressure needed for consistent edible rose decorations.
Nutrition
- Serving Size: 1 slice
- Calories: 450
- Sugar: 55g
- Sodium: 150mg
- Fat: 24g
- Saturated Fat: 15g
- Unsaturated Fat: 9g
- Trans Fat: 0g
- Carbohydrates: 60g
- Fiber: 1g
- Protein: 4g
- Cholesterol: 75mg