

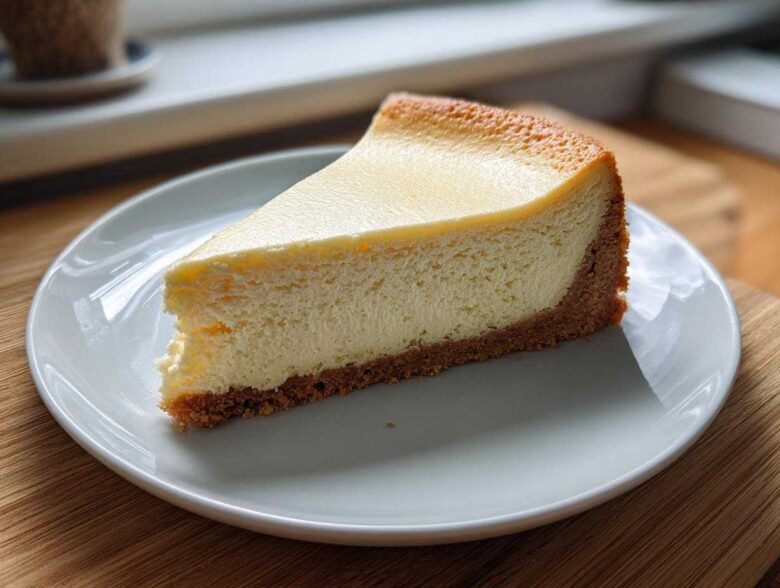
You know the drill: you spend hours whipping up that beautiful, decadent dessert, only to pull it out of the oven and find a giant, sad crack right across the top. Ugh! It happens to the best of us, but I promise you, that won’t happen with this specific cheesecake recipe. After years of battling sunken centers and split surfaces, I finally perfected this version. This isn’t just any cheesecake; it’s the ultimate, sink-your-fork-into-it, absolutely velvety New York Style result. Trust me, after making this a few dozen times for the family, I figured out the humidity secrets. If you’re looking for the best, crack-free, unbelievably smooth cheesecake recipe, you’ve finally found it! You can bookmark this page now, go grab your springform pan, and get ready for the creamiest dessert of your life. For more on my kitchen journey, check out my About Page!
Why This Is the Best Cheesecake Recipe You Will Ever Make
I know there are a million recipes out there, but I want to tell you why you can trust this one, especially if you’ve been burned by cracking cheesecakes before. This recipe delivers that legendary, super-dense but impossibly luxurious New York Style experience. We nail the texture and skip the drama!
- Crack-Free Guarantee: We focus intensely on slow cooling—it’s non-negotiable!
- The Texture: It’s thick, rich, and truly velvety, nothing grainy here.
- Authenticity: This honors the classic, straightforward New York method, no odd additions needed.
Achieving That Signature Velvety Cheesecake Texture
The secret to that smooth, no-lumps filling starts long before the oven. You absolutely must use cream cheese and sour cream that have sat out long enough to come to room temperature. Cold cream cheese never mixes right! Secondly, be gentle once you add the eggs; we want the ingredients combined, not whipped into a meringue. Any trapped air is just waiting to explode into a big crack later on!
Ingredients for Your Perfect Crack-Free Cheesecake Recipe
Getting the ingredients right is half the battle won for this amazing cheesecake recipe. You need quality items here, especially since we’re aiming for that decadent New York richness. Don’t skimp on the main star—full-fat cream cheese is the only way to go for that authentic, creamy taste we are after!
- Crust: 1 1/2 cups graham cracker crumbs
- Crust: 1/4 cup granulated sugar
- Crust: 6 tablespoons unsalted butter, melted
- Filling: 3 (8 ounce) packages cream cheese, softened (this is key!)
- Filling: 1 1/2 cups granulated sugar
- Filling: 1/4 cup all-purpose flour
- Filling: 1 teaspoon vanilla extract
- Filling: 1/4 teaspoon salt
- Filling: 4 large eggs, room temperature
- Filling: 1/2 cup sour cream, room temperature
Ingredient Notes and Substitutions for This Cheesecake Recipe
I can’t stress this enough: if your cream cheese is even slightly cold, you’ll get tiny lumps in your filling, and we simply can’t have that! Pull it out at least two hours before you start mixing. This goes for the eggs and sour cream too. Room temperature dairy blends seamlessly into that rich cheesecake filling, creating that smooth surface we love. Also, please make sure you are using full-fat cream cheese; the low-fat stuff just won’t give you the necessary structure or richness for this dessert.
Step-by-Step Instructions for the Ultimate Cheesecake Recipe
Alright, here we go! This is where the magic happens in our amazing cheesecake recipe. We are going for a baked beauty, and because we’ve prepped our ingredients perfectly, we can skip the tricky water bath most of the time. But remember, timing is everything here, especially when it comes to cooling down!
Preparing the Graham Cracker Crust and Pan
First things first, protect that cheesecake from any rogue drips! I wrap the outside of my 9-inch springform pan super tight—like a mummy—with heavy-duty foil. Then, mix those crumbs, sugar, and melted butter and press it firmly into the bottom. Pop it into a 350-degree oven for exactly 10 minutes. Once it’s done, let it cool while we tackle the filling; don’t forget to drop that oven temp down to 325 degrees!
Mixing the Rich Cheesecake Filling
Now for the good stuff. You want this filling smooth as silk, so use your mixer on medium speed for the cream cheese until it’s totally lump-free. Gradually add the sugar and flour, mixing until *just* combined. Here’s the golden rule: once the eggs go in, slow down! Add them one at a time, only mixing until you see that egg disappear. Stop beating the minute the batter is uniform. Overmixing here is why your cheesecake cracks later, trust me on this one.
The Critical Cooling Phase for a Crack-Free Cheesecake Recipe
Listen closely, because this is the real secret to a crack-free cheesecake recipe. When that baking time hits (the edges should be set, but the middle still jiggles a bit), turn the oven OFF. Don’t open the door yet! Prop the oven door open about two inches with a wooden spoon. We are creating a temperature transition zone. Leaving it in the turned-off oven for a full hour lets the cake slowly relax. Pulling it out too fast is what causes that temperature shock and those terrible surface cracks!
Tips for Success with Your Homemade Cheesecake Recipe
Even with the best instructions, sometimes you need a little extra nudge to make this cheesecake recipe absolutely flawless. My biggest piece of advice from all my practice batches is to be gentle with the batter, especially once the eggs are in. When you pour that gorgeous filling over the crust, give the springform pan a good, solid tap or two on the counter—but be careful, it might splash a little! That tapping releases any big pockets of sneaky air that are hiding in the mix.
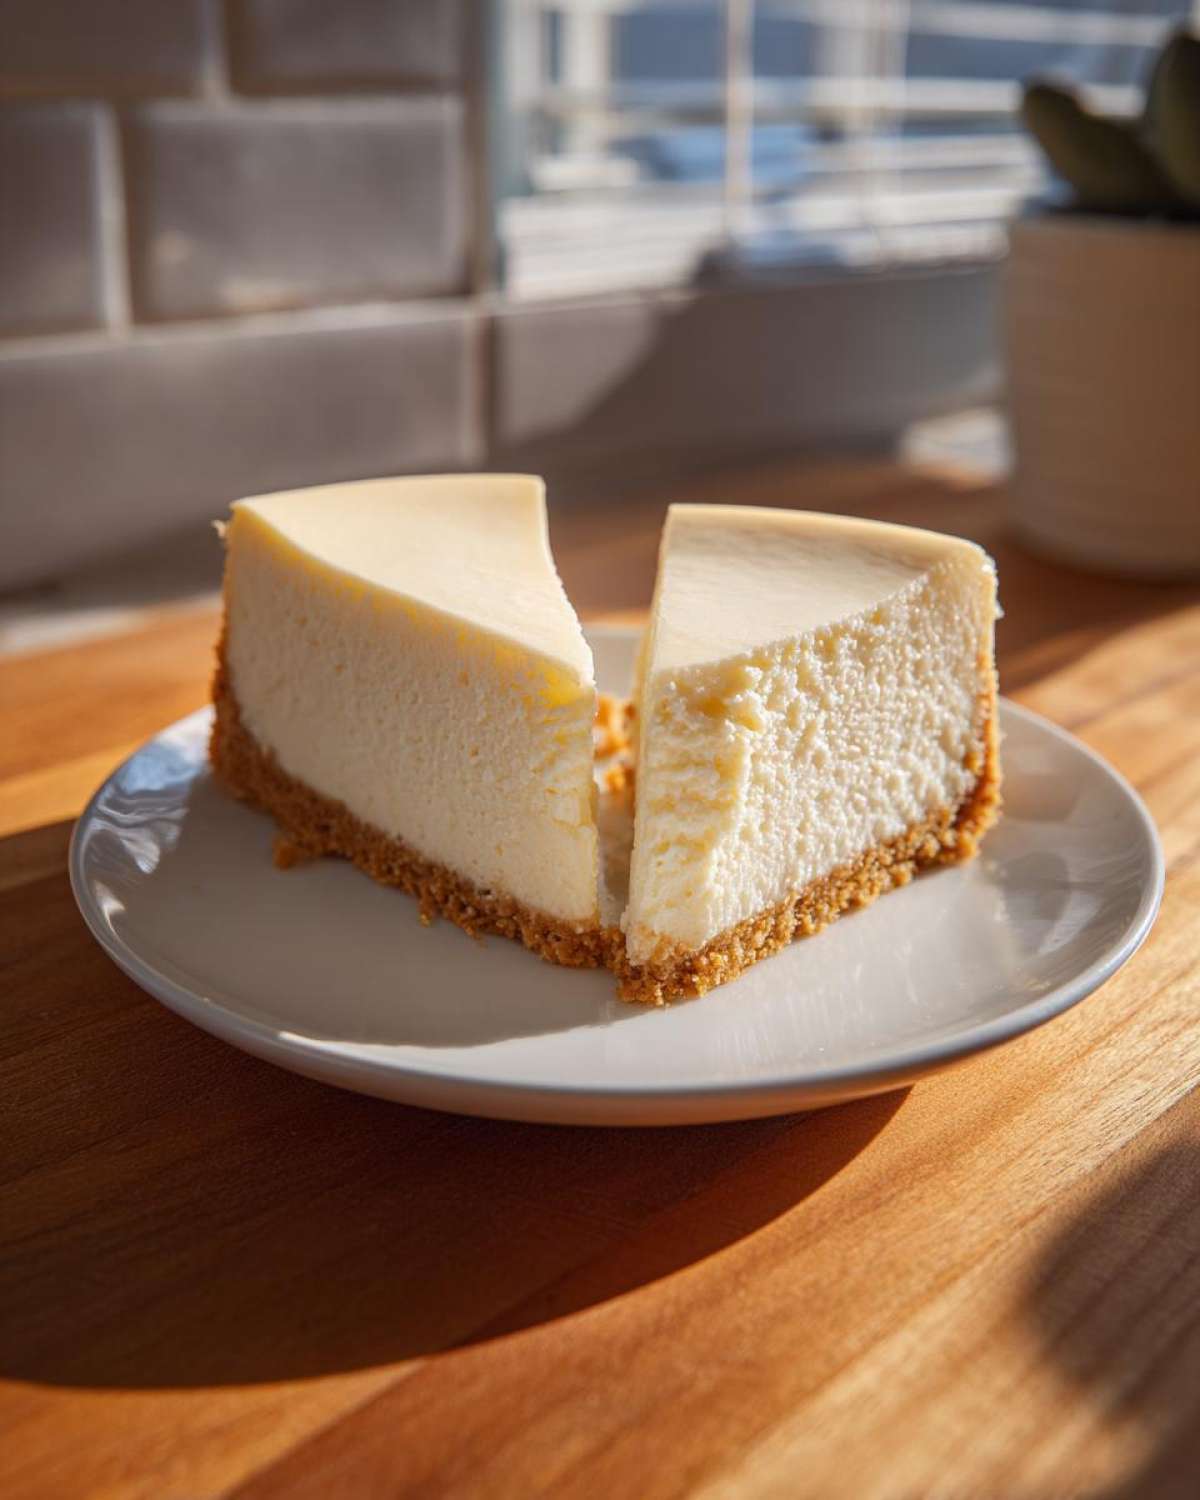
These air bubbles are super problematic because they rise up during baking and pop, leaving pits or cracks on your surface. Also, remember the note about the water bath? If you are paranoid or if your kitchen is super dry, wrapping that pan extra tight and using a water bath is your insurance policy. It just keeps things cozy and humid around the cake while it bakes. Follow these final checks, and your cheesecake recipe will turn out picture-perfect every time!
Serving Suggestions for This Classic Cheesecake Recipe
Now that you’ve mastered the famous crack-free technique, it’s time to think about what goes best on top of your incredible cheesecake recipe! This New York style base is so rich and creamy, it honestly doesn’t *need* much, but a little something extra always feels celebratory. I love keeping it simple to let that tangy cream cheese shine through.
A drizzle of homemade salted caramel is divine—just let it cool a bit first so it doesn’t melt the top. If you want something brighter, a layer of macerated fresh strawberries or raspberries cuts through the richness beautifully. Honestly, even just a light dusting of cocoa powder or shaving some good quality dark chocolate over the top makes this cheesecake recipe look like it came from a fancy bakery!
Storage and Reheating Instructions
Because this is such a luxurious, rich dessert, chilling is absolutely required—patience pays off here! Once the cheesecake is completely cool on the counter, wrap the entire pan (or the leftovers) really tightly with plastic wrap. I usually put down plastic wrap, then aluminum foil over that, just to make sure no fridge odors sneak in. It usually stays fantastic for four or five days in the refrigerator.
If you happen to have any leftovers after that, you can carefully freeze it! Slice it first, wrap each individual slice tightly, and freeze it in an airtight container. It keeps well for about a month. Honestly, though, I’ve never successfully stored one long enough to worry about reheating it; it disappears too fast!
Frequently Asked Questions About This Cheesecake Recipe
I know you might still have a few worries swirling around—it’s a big commitment making a homemade cheesecake! But don’t stress; these quick answers should help clear up anything before you start your baking adventure with this cheesecake recipe. Seriously, once you get the cooling part down, everything else is a breeze!
Can I make this an easy cheesecake recipe by skipping the oven?
That’s a great question if you’re short on time! While this specific New York style version relies on the oven to set that beautiful, dense structure, I do have an alternative for you if baking sounds like too much trouble right now. If you’re looking for a super simple dessert, you should check out my Super Simple No-Bake Cheesecake Recipe later on. It uses gelatin for structure, making it one of my fastest sweet treats, but it just won’t have the same rich, traditional mouthfeel as this baked one here.
What is the best way to get a truly creamy cheesecake without lumps?
This is all about temperature management, darling! The single most important step for getting that flawless, velvety cheesecake texture is making sure your cream cheese is truly softened. I mean *softened*—it should yield instantly when you press it. Beat the cream cheese alone until it’s perfectly smooth and fluffy *before* you introduce the sugar, flour, or most importantly, those eggs. If you try creaming cold cheese, you’ll end up with little gritty white chunks, and nobody wants that in their rich cheesecake filling.
Estimated Nutritional Data for This Dessert Recipe
When you’re enjoying a big slice of this beautiful homemade cheesecake, you are definitely indulging! Based on standard serving sizes, here is what you can generally expect per slice for this dessert recipe. Just remember, since brand variances exist, these are good estimates. For full details on how I calculate these figures, please see my official Disclaimer page.
- Calories: 420
- Fat: 26g
- Carbohydrates: 40g
- Sugar: 35g
- Protein: 7g
Share Your Perfect Cheesecake Recipe Experience
So, did it work? Did you achieve the elusive crack-free top? I truly hope so! Please, please leave me a comment below telling me how your baking adventure went, especially if you managed that slow cooling trick successfully. If you snapped a photo of your gorgeous, creamy dessert, tag me online—I absolutely love seeing your creations! If you have any final questions, don’t hesitate to reach out via my Contact Page!
PrintClassic Crack-Free New York Style Cheesecake
A reliable recipe for a rich, creamy New York style cheesecake with a graham cracker crust, designed to prevent cracking.
- Prep Time: 20 min
- Cook Time: 75 min
- Total Time: 8 hours 35 min
- Yield: 12 servings
- Category: Dessert
- Method: Baking
- Cuisine: American
- Diet: Vegetarian
Ingredients
- 1 1/2 cups graham cracker crumbs
- 1/4 cup granulated sugar
- 6 tablespoons unsalted butter, melted
- 3 (8 ounce) packages cream cheese, softened
- 1 1/2 cups granulated sugar
- 1/4 cup all-purpose flour
- 1 teaspoon vanilla extract
- 1/4 teaspoon salt
- 4 large eggs, room temperature
- 1/2 cup sour cream, room temperature
Instructions
- Preheat your oven to 350 degrees F. Wrap the outside of a 9-inch springform pan tightly with heavy-duty aluminum foil.
- Prepare the crust: Mix graham cracker crumbs, 1/4 cup sugar, and melted butter. Press the mixture firmly into the bottom of the prepared springform pan. Bake for 10 minutes. Remove from oven and let cool slightly. Reduce oven temperature to 325 degrees F.
- Prepare the filling: In a large bowl, beat the softened cream cheese with an electric mixer until smooth. Scrape down the sides.
- Add 1 1/2 cups sugar and flour. Beat until just combined. Mix in vanilla extract and salt.
- Add eggs one at a time, beating only until each egg is incorporated. Do not overmix. Mix in the sour cream until the batter is smooth.
- Pour the filling over the cooled crust. Tap the pan gently on the counter a few times to release large air bubbles.
- Bake at 325 degrees F for 60 to 75 minutes. The edges should look set, but the center (about 2 inches wide) should still jiggle slightly when the pan is gently moved.
- Turn off the oven. Prop the oven door open about 2 inches using a wooden spoon. Leave the cheesecake in the cooling oven for 1 hour. This slow cooling prevents cracking.
- Remove the cheesecake from the oven. Carefully remove the foil. Let it cool completely on a wire rack at room temperature for about 1 hour.
- Chill the cheesecake in the refrigerator for at least 6 hours, or preferably overnight, before serving.
Notes
- Use room temperature ingredients for the filling to ensure a smooth, lump-free texture.
- Do not overbeat the batter once the eggs are added; this incorporates too much air, which causes cracking during cooling.
- If you prefer a water bath, place the foil-wrapped pan inside a larger roasting pan and add hot water halfway up the sides of the springform pan before baking.
Nutrition
- Serving Size: 1 slice
- Calories: 420
- Sugar: 35
- Sodium: 280
- Fat: 26
- Saturated Fat: 16
- Unsaturated Fat: 5
- Trans Fat: 0.5
- Carbohydrates: 40
- Fiber: 1
- Protein: 7
- Cholesterol: 110