

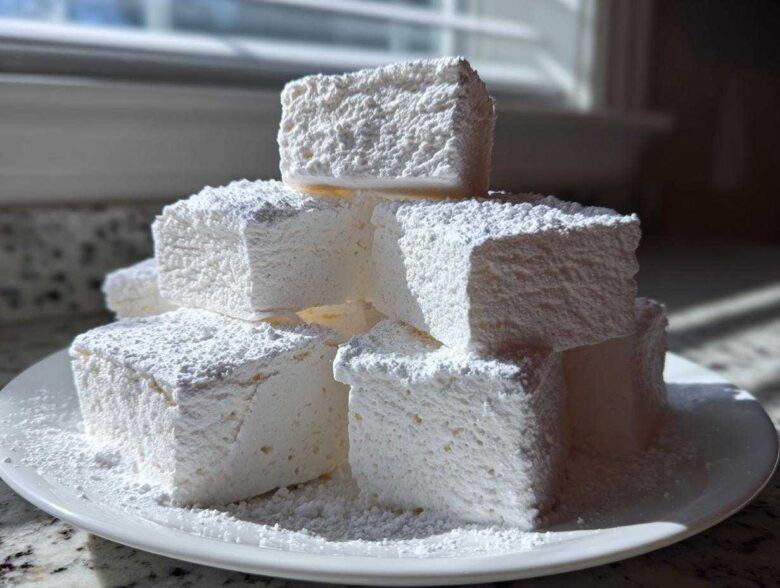
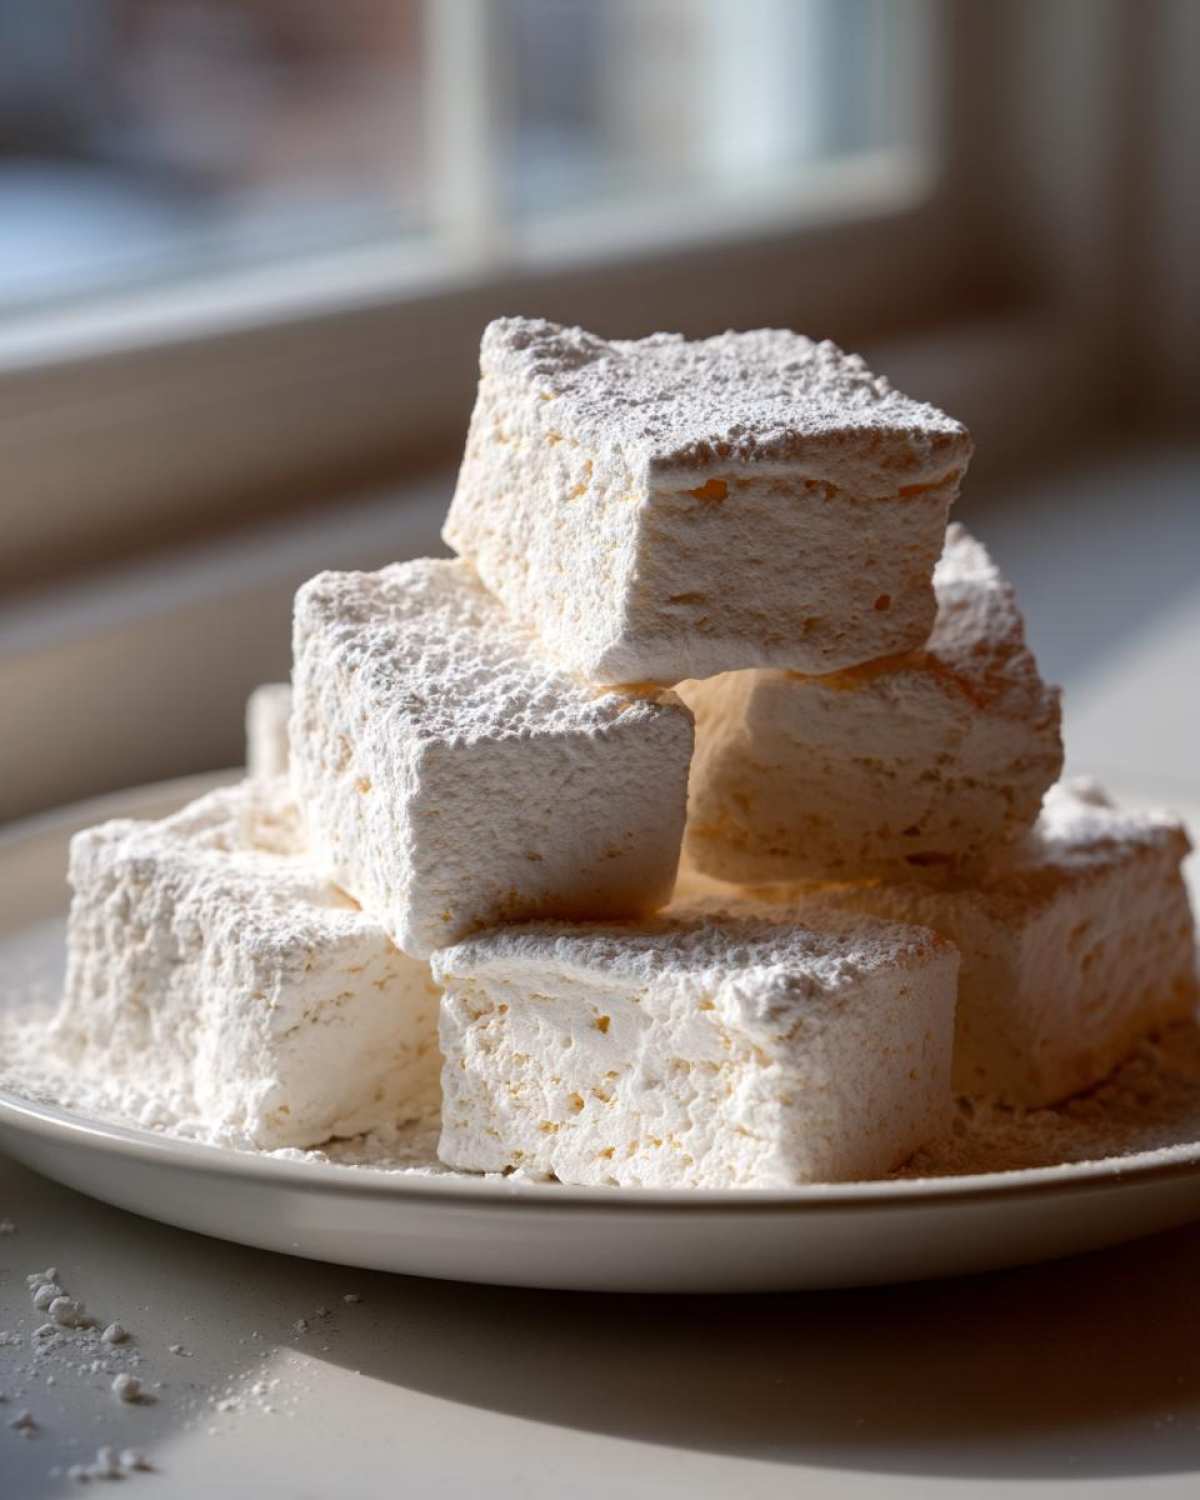
If you think candy making is too fussy or only for professionals, I have a secret to share: making marshmallows from scratch is ridiculously fun, and the results? Wow! Store-bought bags just can’t compare to the airy, melt-in-your-mouth experience of truly homemade marshmallows. I spent years trying to replicate that perfect, light texture until I nailed the science behind this recipe, and now I share it with you. Trust me, once you taste these soft, pillowy squares flavored with real, fragrant vanilla bean, you’ll never look back. It feels like pure magic happening right in your kitchen!
If you want to learn more about my commitment to sharing trustworthy recipes, check out my About Page!
Why You Will Master These Homemade Marshmallows
I hear you! Making candy sounds intimidating, right? But marshmallows are surprisingly forgiving once you know the few spots that need attention. You are going to nail this; I promise. Here’s why this recipe is your ticket to gourmet status without needing a chef’s hat:
- The Texture is Unbeatable: Forget that rubbery chew of the store-bought kind. We are aiming for truly soft, pillowy goodness that just dissolves on your tongue.
- Superior Flavor Profile: We skip that overly sweet, one-note taste. Using real vanilla bean adds an almost smoky, deep aroma that makes every bite special.
- Simplified Equipment Needs: While you need a good mixer, the actual steps are straightforward. There’s no rolling or tricky tempering involved, unlike chocolate making.
- Beautiful Appearance: These look amazing when cut! dusted in that snowy powder, they feel like a special holiday treat even if you whip them up on a Tuesday.
- Confidence Booster: Getting the syrup temperature right is the biggest hurdle. Once you master the soft-ball stage, every other candy recipe looks easy!
- Perfectly Sized for Everything: The 9×13 pan size yields squares that are robust enough for dipping but delicate enough to melt perfectly in your next mug of hot cocoa.
Essential Ingredients for Soft Pillowy Homemade Marshmallows
When we talk about achieving that soft, pillowy texture, the ingredients are non-negotiable. This isn’t the place to start cutting corners if you want the very best results. Think of this as a science project where precise measurements equal soft, marshmallowy heaven. Don’t worry, none of these specialized items are *that* hard to find!
- Gelatin: You need three full packets of plain, unflavored gelatin. This is what gives us the essential structure! We’ll be sprinkling this over cold water first to let it soak, which we call ‘blooming.’
- Sugar and Corn Syrup: We use granulated sugar combined with light corn syrup. The syrup is crucial; without it, the sugar crystallizes way too fast when we heat it. Don’t skip the syrup unless you’re trying the special substitution mentioned later!
- Water and Salt: Very simple—cool water for the gelatin bloom, and a little bit of water to help dissolve the sugar for the syrup. Salt just balances out all that sweetness.
- Vanilla Bean Power: Okay, this is my splurge item. If you can get a vanilla bean, split it open, and scrape out those magical black seeds, do it! That speckled look and deep flavor are exactly what makes these gourmet candy making worthy.
- The Dusting Mix: Don’t just grab powdered sugar! We need equal parts powdered sugar and cornstarch. This little combination is the secret weapon for keeping the final slab from becoming one giant sticky mess.
Ingredient Notes and Substitutions for Homemade Marshmallows
Let’s talk substitutions, because sometimes you need a plan B:
Gelatin Strength: Most standard packets are about 1/4 ounce each. If your brand weighs differently, just make sure you have about 2 1/4 teaspoons total. This is the protein structure holding your fluff aloft, so don’t guess!
The Corn Syrup Question: If you insist on trying a Marshmallow Recipe Without Corn Syrup—maybe for dietary reasons or a pantry shortage—you absolutely must substitute it with an equal amount of glucose syrup or invert sugar. Granulated sugar alone will crystalize immediately when boiled, leaving you with crunchy glue instead of soft fluff. Trust me, using corn syrup is the easiest path to success here.
Flavor Swap: If a vanilla bean is unavailable or too pricey, don’t fret! You can use 2 teaspoons of pure, high-quality vanilla extract. Just make sure you add the extract *after* you stop the mixer from beating the high-speed syrup. If you add it too early, the heat can sometimes knock the flavor right out!
Equipment Needed for Perfect Homemade Marshmallows From Scratch
Honestly, getting the right tools makes this recipe feel so much closer to our goal of easy marshmallows from scratch. You don’t need a giant commercial kitchen, but there are two pieces of equipment I insist you use. If you skip these, you severely risk ending up with sticky disappointment, and nobody wants that!
First up, you absolutely must have a reliable stand mixer. I know, it’s an investment, but this process requires beating the hot syrup mixture for a solid 12 to 15 minutes on high speed. Doing this by hand? I’ve tried, and my arm gave out long before the fluff doubled in volume!
The critical pieces of kit are:
- A large capacity Stand Mixer: Must have a whisk attachment. This machine does all the heavy lifting!
- A Candy Thermometer: This is the absolute make-or-break tool. You need to hit exactly 240 degrees Fahrenheit—not 235, not 245. A digital thermometer clipped right to the side of your saucepan is easiest.
- 9×13 Inch Baking Pan: This standard size gives us the ideal thickness for great squares. Bigger pans mean thin, fast-setting marshmallows, and smaller pans mean they might take days to set up!
- Heat-Safe Spatula: You need this for scraping down that incredibly thick mixture at the very end. Silicone is your best friend here.
- Medium Saucepan: Needs to be sturdy enough to handle boiling sugar syrup evenly. Don’t use your thinnest pan!
Using the right thermometer ensures that when we pour that liquid gold into the gelatin, it sets up perfectly light and airy, which is the whole point of making these DIY Gourmet Marshmallows ourselves!
Step-by-Step Instructions: How To Make Homemade Marshmallows At Home
Okay, the time has come to assemble our magnificent confection! Don’t get nervous when you see the hot syrup coming into play; just follow these steps closely, and you’ll be staring at an amazing batch of fluffy marshmallows tutorial perfection. Precision matters most when it comes to liquid sugar, so have your thermometer ready to go and don’t walk away!
Preparing the Gelatin Base for Homemade Marshmallows
First things first, we get our pan ready! Lightly grease that 9×13 pan. Next, mix your powdered sugar and cornstarch together—that’s your non-stick insurance policy. Dust the pan heavily and set it aside. Now, look at your stand mixer bowl. Sprinkle that gelatin right over the 1/2 cup of cold water. We let this sit for a good 10 minutes so it can ‘bloom.’ It swells up and turns into a jiggly mass—this is what traps all the air we’re about to whip in!
Cooking the Sugar Syrup for Fluffy Marshmallows Tutorial
This is where we need focus! In your saucepan, combine the granulated sugar, corn syrup, the other 1/2 cup of water, and that tiny pinch of salt. Stir constantly over medium heat just until the sugar dissolves. Don’t let it boil yet! Once it’s smooth, stop stirring, clip on your candy thermometer, and bring this mixture to a hard boil. You MUST cook this until the thermometer reads exactly 240 degrees Fahrenheit—that’s the soft-ball stage. The second you hit 240°F, pull it off the heat immediately! Seriously, every second counts here.
Whipping and Flavoring Your Homemade Marshmallows
While the syrup is cooking, turn your mixer on low speed with the bloomed gelatin in the bowl. Once the syrup hits 240°F, you slowly, slowly pour it down the side of the bowl into the gelatin—try not to hit the spinning whisk, or you’ll have syrup everywhere! After it’s all incorporated, kick that speed up to high. Now, scrape in those gorgeous vanilla bean seeds (or the extract). You need to whip this mixture for a solid 12 to 15 minutes. It will transform from soupy to pale white, incredibly thick, and glossy. When you lift the whisk and the mixture holds a stiff peak, you’re done! Work fast, scrape it into your prepared, dusted pan, smooth the top, and then we let science take over for a few hours.
If you want to look over my liability information before diving into high-temperature cooking, you can review my Disclaimer Here.
Setting and How To Cut Homemade Marshmallows
The waiting game! I know, I know, you just made the most beautiful, fluffy mound of homemade marshmallows heaven, and you want to eat it right now. But patience truly is a virtue in the candy-making world. We need to let that structure fully stabilize under room temperature conditions.
Gently dust the top of your freshly spread marshmallow slab with a little more of that cornstarch/powdered sugar mix we made earlier. This prevents any condensation from making the top weep. Then, leave it alone! Seriously, covering it or putting it in the fridge is a huge mistake. We let it sit on the counter, untouched, for at least four hours, but I really, really prefer letting it sit overnight. This ensures a firm base for cutting.
Preparing for the Big Cut
Once the marshmallow is set—it should feel firm and slightly tacky, not wet at all—it’s time to flip it out onto a clean workspace. Make sure your cutting board is generously coated with the dusting mixture. Seriously, coat it like you are frosting a very sticky cake!
Lightly dust the top of the slab (which is now facing up) again. This is your final barrier against stickiness. If you skip this dusting step, you might as well have just left the slab in the pan because cutting it will be chaos!
Expert Tips for Cutting Clean Homemade Marshmallows
Cutting is often where people get frustrated with their homemade marshmallows, but once you use an oiled tool, everything changes. A dry knife drags and melts the texture, leaving you with sad, misshapen piles.
Here’s the trick I use every time:
- Grab a big, sharp, long knife. Think of the knife you use for carving roast.
- Lightly coat the blade with a neutral oil—I use vegetable oil or a very light coating of coconut oil on a paper towel. You aren’t dipping the knife in oil; you are just giving the metal a super thin film.
- Press straight down firmly to cut through the slab. Don’t try to saw back and forth! A clean downward press is the goal.
- As you cut each piece, use lightly oiled kitchen scissors or just your fingers (covered in the dusting mix!) to pull the sticky edges of the cut away from the next piece.
If you are cutting a huge batch, you might need to re-oil your knife every three or four cuts. It makes the slicing process much smoother and guarantees those pillowy sides stay beautifully straight. Toss all your finished squares immediately into a large bowl containing the remaining dusting mixture and gently toss until every single side is coated. Now, they are ready for roasting over a campfire!
Storage and Serving Suggestions for Your Homemade Vanilla Treats
Now that you’ve mastered the art of making fluffy homemade marshmallows, the biggest challenge is keeping your hands out of the jar! Good news: storage is pretty simple, which is another win for making candy at home over buying it pre-made.
If you’ve cut and dusted your marshmallows well (remember that cornstarch/powdered sugar coating?), they are actually quite stable. You want to keep them at room temperature. Resist the temptation to put them in the fridge! Cold temperatures can actually make them sweat or weep later when they warm up, leading to that dreaded stickiness we worked so hard to avoid.
In an airtight container, these beautiful homemade vanilla treats will stay perfectly soft and delicious for about two weeks. If they happen to dry out just a tiny bit after that first week, don’t panic! They might firm up slightly, but that’s actually perfect for a different kind of use.
The Ultimate Uses for Your Soft Pillowy Marshmallows
The primary reason I make giant batches of these is because they elevate simple things into something extraordinary. Forget the sad, dense little cylinders you get in the bag; these are luxurious!
For hot chocolate—oh my goodness. These are the best marshmallows for hot chocolate you will ever taste. They melt slowly, adding a creamy vanilla richness that regular white puffs just can’t match. Make sure to serve them right on top of a steaming mug of rich cocoa.
If you’re making s’mores, you are entering another realm of deliciousness. Think about it: gooey, vanilla-scented molten centers sandwiched between chocolate and graham crackers. These are truly essential homemade s’mores ingredients. If they’ve been sitting for a couple of weeks and are a tiny bit firmer, they actually roast up beautifully over the campfire because they hold their shape better on the stick!
And don’t forget things like topping homemade fudge, stirring them into a batch of popcorn, or making the most decadent Rice Krispie treats you’ve ever eaten. They are wonderful just sitting out on a platter for guests to snag!
Variations on the Best Marshmallow Recipe Ever
Once you’ve mastered the basic technique for making homemade marshmallows—getting that syrup just right and whipping until it’s impossibly fluffy—the fun really begins! My base recipe is fantastic for vanilla flavor, but honestly, once you’re comfortable with the process, you can start treating this like a blank canvas for gourmet flavors. It’s so much easier than figuring out complicated base recipes, so don’t be afraid to experiment a little!
The key to success when adding flavors is always to remember that you are adding them in at the very end of the whipping process, right after you finish the long 15-minute beat time. This ensures the added ingredients don’t interfere with the structure building.
Making Incredible Chocolate Marshmallows Recipe
If you are anything like me and feel like chocolate should be involved in everything, this variation is a must-try! This makes for fantastic homemade candy gifts, too, especially when you dust them with a little cocoa powder instead of the white mixture. To get a rich chocolate flavor, you need a good quality cocoa powder.
You will want to use about 1/2 cup of good quality unsweetened cocoa powder. Sift it really well before you use it, because cocoa powder loves to clump up into tiny dry mountains when you mix it in. Add the sifted cocoa powder along with the vanilla bean seeds right at the very end of that 12 to 15-minute whipping cycle. Mix just until it’s evenly incorporated and you have beautiful, light brown fluff. Don’t overmix here, or you drop the air you just spent 15 minutes building!
Fun Extracts and Zests for Homemade Vanilla Treats
If chocolate isn’t your thing, there are so many simple extracts that transform these homemade vanilla treats totally! This is where you can tailor them perfectly for different holidays or moods.
- Peppermint Magic: Swap the vanilla for 2 teaspoons of pure peppermint extract. These are amazing around Christmas, especially dipped in melted dark chocolate. Just use that extract at the very end of the whip!
- Citrus Zests: Adding zest from one whole orange or lemon into the mixture when you add the vanilla is simple and bright. The zest oils add a gorgeous complexity that tastes so fresh. I love citrus marshmallows for sprinkling on top of pound cake or eating alongside fruit.
- Almond Delight: A teaspoon of pure almond extract gives these a lovely, nutty depth. This pairs beautifully if you ever decide to dip them in white chocolate coating!
Remember, extracts are incredibly potent. Stick to about 1 to 2 teaspoons total, depending on the strength of the product you buy. A little goes a very long way when you’re flavoring something this light and airy!
Natural Sweetener Explorations for Homemade Marshmallows
I know some of you are dedicated to finding alternatives to corn syrup and refined sugar. While I really stick to the classic combination for my main recipe because it guarantees that soft pillowy marshmallow texture, I have experimented successfully with maple syrup for a more natural approach whenever I want a distinct autumnal flavor.
If you want to try using pure maple syrup instead of corn syrup, you need to substitute it 1:1, so use 1 cup of maple syrup instead of the light corn syrup listed in the main recipe. Because maple syrup has more water content than corn syrup, you often need to cook your syrup slightly longer to reach that magic 240°F mark. Keep a close watch on that thermometer, though! Maple syrup can go from perfect to burnt very fast, so watch the boil carefully. The resulting marshmallows have a wonderful, caramelized flavor that is perfect for autumn s’mores!
Frequently Asked Questions About Homemade Marshmallows
I’ve fielded a ton of questions over the years about my famous recipe, and honestly, most issues come down to tiny details in the process. Don’t worry if your first batch is a little funny; that’s normal when you are diving into gourmet candy making! Here are the most common things folks ask me when they are learning how to make marshmallows at home.
If you ever have a question that I haven’t covered here, feel free to send me a note via my Contact Page!
Can I make homemade marshmallows without corn syrup?
This is probably the biggest question I get! The truth is, for this specific recipe—the one designed to give you that ultimate soft pillowy marshmallow texture without resorting to tricky techniques—no, I really don’t recommend skipping the corn syrup or substituting it with all white sugar. Corn syrup is an invert sugar that physically prevents the granulated sugar crystals from locking together into a hard, brittle mass. If you omit it entirely, you will almost certainly end up with a hard, grainy sugar mass rather than easy marshmallows from scratch.
If you absolutely cannot use corn syrup, your best bet is to substitute it 1:1 with liquid glucose or pure maple syrup. Just remember that maple syrup cooks differently and adds its own flavor, so it’s a flavor trade-off, not a structural neutral one!
Why are my homemade marshmallows sticky?
Oh, the stickies! I’ve been there, fighting a melting blob of goo. Usually, stickiness comes down to one of two places, and both are fixable on the next go around. First, did you whip long enough? If you stop the mixer before the mixture is truly thick, white, and holding stiff peaks, it hasn’t stabilized correctly, and it will stay soft and sticky.
Second, and this is the more common culprit: did you dust enough? After you cut the slab, you need to toss every individual square in that powdered sugar and cornstarch mix. If you leave any surface area bare, that spot will aggressively seek moisture from the air and become tacky within an hour. Make sure you’re heavy-handed with that dusting mixture, especially if you live in a humid area!
How long do these marshmallows last?
These are so much fresher than the ones from the store, but that means they don’t have all those stabilizers! Kept in a completely airtight container at room temperature—away from heat and sunlight—they stay super soft and springy for about two weeks. After that, they might start to dry out a bit around the edges, but they are still perfectly edible for several weeks beyond that. If they get a little firm, they make amazing additions to crushed dessert toppings!
Can I use a hand mixer instead of a stand mixer?
You absolutely can, but I want to give you a huge word of caution: grab a chair and set a timer! You need to mix that hot syrup base with the gelatin for a sustained 12 to 15 minutes on high speed. Most hand mixers do not have the power or the cooling system to run that long on high without overheating. If you use a hand mixer, you might need to run it in 3-minute intervals, letting the motor rest for 2 minutes in between those 15-minute cycles total. It’s doable, but it’s a commitment for this Best Marshmallow Recipe Ever!
What is the right temperature for that candy syrup?
This is the single most important number for making homemade marshmallows successfully. You are aiming for the soft-ball stage, which is exactly 240°F (115°C). If you stop early, the mixture won’t hold its air, and you get soup. If you go too high, the sugar starts to burn or crystallize, and you get hard candy disks instead of fluffy squares. Clip that thermometer on securely and pull the pan off the heat the *instant* the first bubble hits that 240 mark!
Estimating Nutritional Information for Homemade Marshmallows
I’m not a nutritionist, of course, so please take these numbers as an educated guess based on the bulk ingredients used in this recipe. When you are making gourmet candy at home, you know exactly what’s going in—which is a huge benefit over mystery ingredients in packaged goods! This estimate is based on cutting the yield into about 48 squares, which is a generous amount for a 9×13 slab.
The good news is that unless you coat them heavily in chocolate after cutting, these are naturally fat-free, as they are mostly sugar and protein from the gelatin.
Here is a quick breakdown per serving (about 4 squares):
- Calories: Approximately 150
- Sugar: 35g (Yes, it’s sugar, but it’s fluffy sugar!)
- Sodium: Just 5mg
- Fat: 0g
- Protein: 3g
Since you are making these treats yourself, you have full control over the dusting, which is where most of the hidden calories sneak in! For full transparency on what ingredients I use in my kitchen, please review my Privacy Policy.
PrintThe Best Easy Homemade Vanilla Bean Marshmallows
Make soft, fluffy marshmallows from scratch using this straightforward recipe. These homemade vanilla bean marshmallows have a superior texture perfect for hot chocolate or s’mores.
- Prep Time: 20 min
- Cook Time: 15 min
- Total Time: 4 hours 35 min
- Yield: About 4 dozen squares
- Category: Dessert
- Method: Candy Making
- Cuisine: American
- Diet: Vegetarian
Ingredients
- 3 packets unflavored gelatin (about 2 1/4 teaspoons each)
- 1/2 cup cold water (for blooming gelatin)
- 1 1/2 cups granulated sugar
- 1 cup light corn syrup
- 1/2 cup water (for syrup)
- 1/4 teaspoon salt
- 1 vanilla bean, split and scraped (or 2 teaspoons pure vanilla extract)
- 1/2 cup powdered sugar (for dusting)
- 1/4 cup cornstarch (for dusting)
Instructions
- Lightly grease a 9×13 inch baking pan. Mix the powdered sugar and cornstarch together in a small bowl. Dust the bottom and sides of the prepared pan generously with this mixture. Set aside.
- In the bowl of a stand mixer, sprinkle the gelatin over 1/2 cup of cold water. Let it sit for 10 minutes to bloom.
- While the gelatin blooms, combine the granulated sugar, corn syrup, 1/2 cup water, and salt in a medium saucepan. Stir over medium heat until the sugar dissolves.
- Attach a candy thermometer to the saucepan. Bring the mixture to a boil without stirring. Cook until the syrup reaches 240 degrees Fahrenheit (soft-ball stage). Remove from heat immediately.
- Turn the stand mixer on low speed. Slowly and carefully pour the hot syrup down the side of the bowl into the bloomed gelatin mixture. Avoid pouring directly onto the whisk attachment.
- Once all the syrup is added, increase the mixer speed to high. Add the vanilla bean seeds (or extract). Beat for 12 to 15 minutes until the mixture is very thick, white, glossy, and holds stiff peaks.
- Working quickly, scrape the marshmallow mixture into the prepared pan. Dust the top lightly with more of the powdered sugar/cornstarch mixture. Use a lightly oiled spatula to smooth the top surface.
- Let the marshmallows set uncovered at room temperature for at least 4 hours, or preferably overnight.
- Once set, dust a cutting board with more of the powdered sugar/cornstarch mixture. Invert the marshmallow slab onto the board. Dust the top surface.
- Use a large, sharp, oiled knife or pizza cutter to cut the slab into squares. Toss the cut edges in the remaining dusting mixture to prevent sticking.
Notes
- For a cleaner cut, lightly oil your knife blade before slicing each piece.
- Store homemade marshmallows in an airtight container at room temperature for up to two weeks.
- If you skip the vanilla bean, use 2 teaspoons of high-quality vanilla extract added at the end of the whipping time.
Nutrition
- Serving Size: 4 squares
- Calories: 150
- Sugar: 35
- Sodium: 5
- Fat: 0
- Saturated Fat: 0
- Unsaturated Fat: 0
- Trans Fat: 0
- Carbohydrates: 38
- Fiber: 0
- Protein: 3
- Cholesterol: 0