

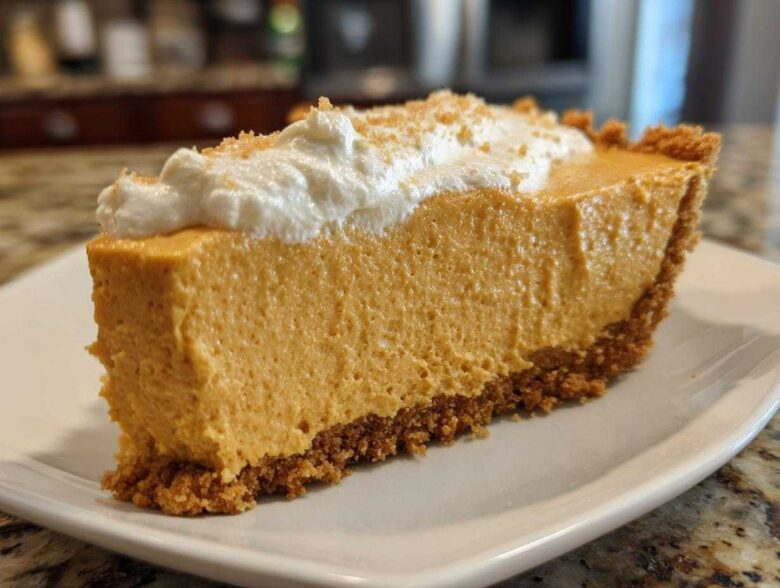
Listen, when the holidays roll around, the last thing I want to do is fight over oven space! Seriously, something has to give when you’re trying to roast a turkey *and* bake three different things. That’s why I perfected my absolute favorite, go-to stunner: the incredibly easy, unbelievably creamy no bake pumpkin pie. Trust me, this chilled beauty is quicker to whip up than my toaster takes to warm bread!
I first made this recipe back when I had zero patience but a huge craving for fall flavors. It turns out you don’t need to turn the oven on to get that rich, spiced pumpkin flavor you love. Instead, we use cream cheese and heavy cream to create a light, mousse-like filling that just melts in your mouth. If your Thanksgiving dessert lineup is already packed, this recipe is your secret weapon. You can find out a little more about my philosophy in the kitchen right here.
Why This Creamy No Bake Pumpkin Pie is Your Go-To Fall Dessert
Why mess with perfection when you can skip the entire baking drama? Honestly, this might even outshine the traditional baked version because there’s zero fuss. It’s designed for the busy cook, which makes it perfect for those hectic holiday days. We’re talking about a dessert that screams autumn comfort without the high heat. This is truly the ideal Quick Thanksgiving Pie.
When you need a stunning centerpiece without needing that precious oven real estate, this recipe is the answer. It’s my favorite No Oven Dessert for good reason!
Effortless Preparation for a No Bake Pumpkin Pie
Active prep time is a mere 25 minutes—can you believe it? Mix the crust, whip the cream, fold it all together, and you’re done! It requires no heating element whatsoever. This makes it the definition of an Easy Pumpkin Pie Recipe. Even if you usually stick to box mixes, you’ve got this in the bag. There’s nothing complicated here; just simple mixing!
Achieving the Perfect Creamy Pumpkin Dessert Texture
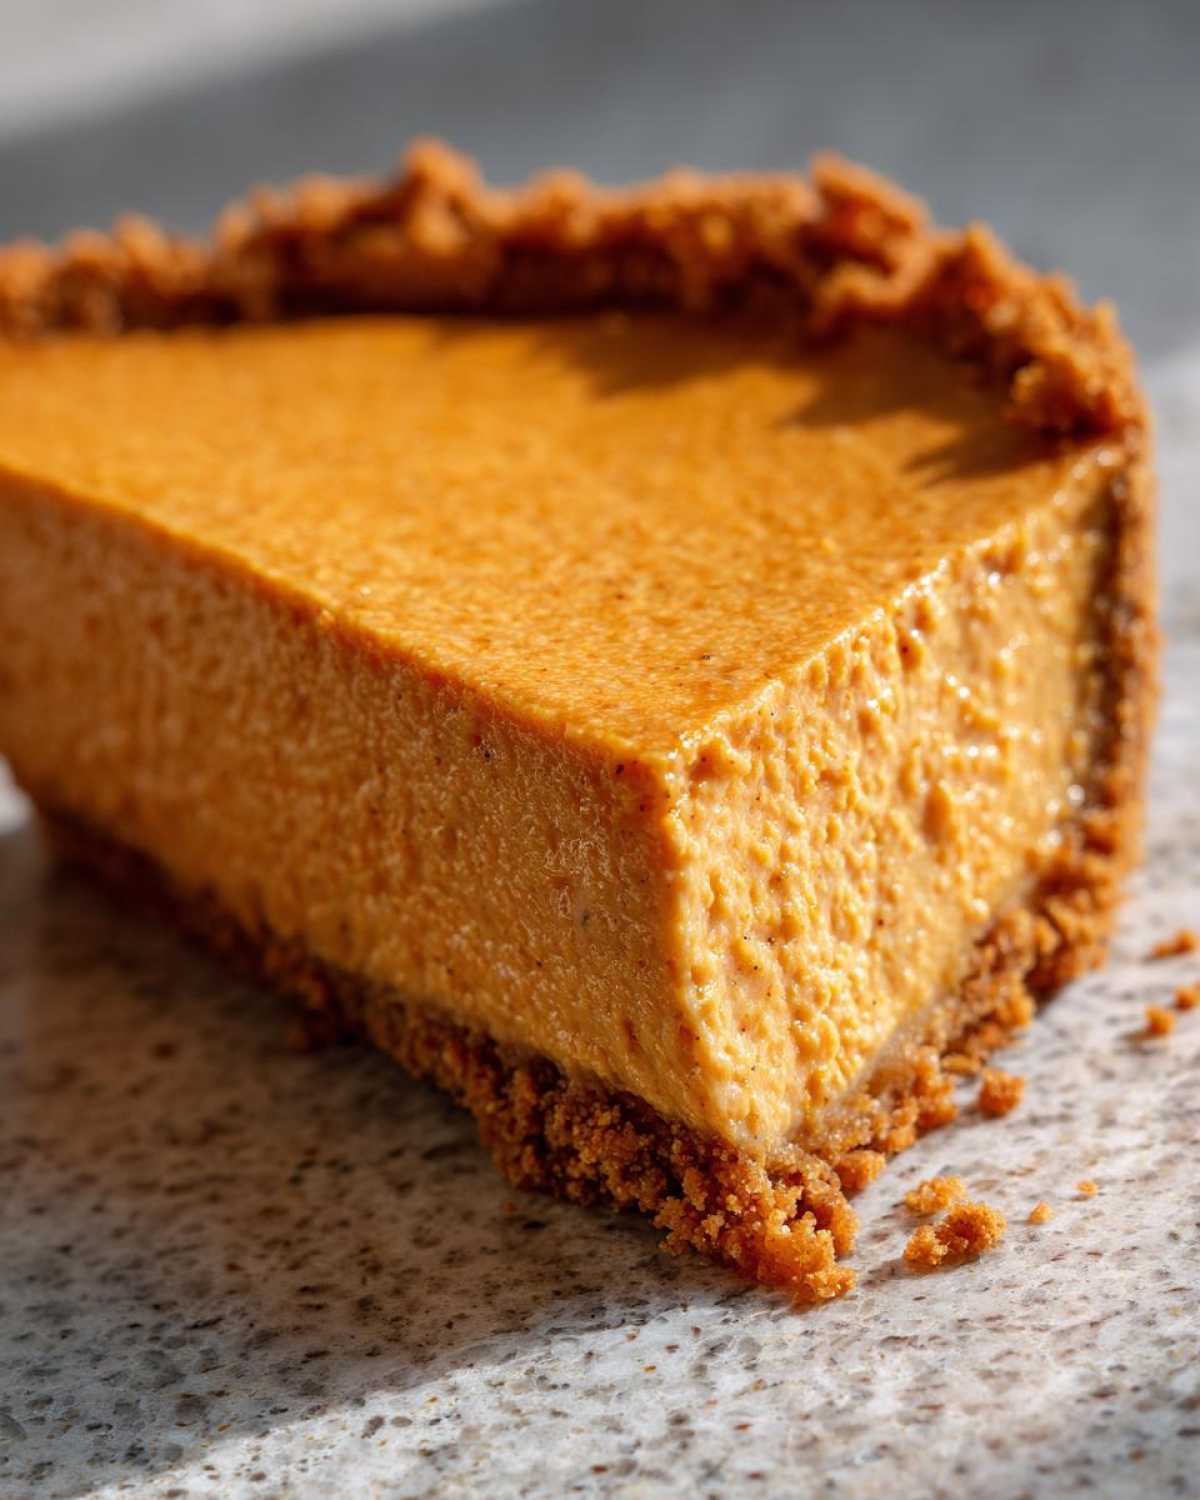
Forget those dense, sometimes eggy slices you sometimes get from baked pies. Our filling is light! We use softened cream cheese, which gives it incredible structure, but then we fold in freshly whipped heavy cream. This technique aerates the whole thing, giving you this beautiful, cloud-like texture. It’s a Light Pumpkin Pie experience that feels decadent but isn’t heavy at all.
Gathering Ingredients for Your No Bake Pumpkin Pie
Okay, ingredients! This is where precision really helps, especially since we aren’t using the oven to fix any mistakes later on. Everything has to blend perfectly to set up right. We are essentially prepping two parts here: the crunchy base and the smooth, spiced filling. Don’t stress about special equipment—just grab your mixer!
The flavor profile is all about those gorgeous fall spices, so make sure your cinnamon and nutmeg are fresh. I always check that my cream cheese is truly softened to room temperature, and conversely, the heavy cream needs to be ice cold for whipping. Those two details make all the difference in getting that perfect texture we talked about!
For the Graham Cracker Crust Pie Base
This part is almost too simple, which is why I love it. We need the fine crumbs left over from about 12 full graham crackers. You’ll combine this with a small amount of sugar to keep it sweet, and then that crucial melted butter to hold it all together into one beautiful, compact Graham Cracker Crust Pie base.
- 1 1/2 cups graham cracker crumbs
- 1/4 cup granulated sugar
- 6 tablespoons unsalted butter, melted
For the Simple Pumpkin Filling
This creamy mixture is where the magic happens! Make sure you grab pure pumpkin puree—that’s the stuff straight from the can, often sold next to the evaporated milk. If you grab the pre-spiced ‘pumpkin pie filling,’ you’ll end up with something way too sweet. We are building the spice layers ourselves for that signature Classic Pumpkin Flavor Treat.
- 1 (15 ounce) can pure pumpkin puree
- 1 (14 ounce) can sweetened condensed milk (Don’t substitute this—it’s the binder!)
- 1 teaspoon vanilla extract
- 1 teaspoon ground cinnamon, 1/2 teaspoon ground ginger, and 1/4 teaspoon ground nutmeg
- 1/4 teaspoon salt
- 8 ounces cream cheese, fully softened
- 1/2 cup powdered sugar
- 1 cup heavy whipping cream, cold
Step-by-Step Instructions for Your No Bake Pumpkin Pie
Alright, time to put those beautiful ingredients to work! Since nothing goes into the oven, our success hinges entirely on proper layering and chilling time. Follow these exactly, and you’ll have that perfect slice ready when your guests arrive. Remember, we are aiming for that luxurious, light texture!
Creating and Chilling the Crust
First up, that crumbly gold! You need to combine your graham cracker crumbs, that little bit of granulated sugar, and the melted butter until it looks like wet sand—no dry spots allowed. Press this mixture firmly into your 9-inch pie plate. I mean firmly! Use the bottom of a measuring cup to really pack it down along the bottom and up those sides for a sturdy structure. Once it’s packed tight, pop that crust into the freezer or fridge for at least 15 minutes while you start on the filling. This chill time keeps the butter firm so the whole thing doesn’t crumble when you slice it later. Oh, and a quick tip: if you use a springform pan instead of a regular pie plate, release is a snap!
Whipping the Cream and Mixing the Simple Pumpkin Filling
Now for the texture secret! Before you do anything else, grab your softened cream cheese and beat it with your electric mixer until it is completely smooth and fluffy. This is key for avoiding any lumps in your final amazing Simple Pumpkin Filling. Once it’s smooth, beat in that powdered sugar. Then, you incorporate the pumpkin, the condensed milk, vanilla, and all those wonderful spices—cinnamon, ginger, nutmeg, the works—until it’s uniform and beautiful. Next, in a totally separate, clean bowl, whip your cold heavy cream until you get firm peaks. You know it’s ready when you pull the beaters out and the cream stands straight up, not flopping over!
Assembling and Setting the Chilled Autumn Dessert
This is the delicate part, so take your time here! You are going to gently fold the stiff whipped cream into your smooth pumpkin mixture. It’s called folding for a reason—use a big spatula and gently cut down through the middle and scoop up the bottom layer. You just want to incorporate it until you don’t see white streaks anymore. Overmixing here will deflate all that lovely air we just whipped in! Pour that airy filling right into your chilled crust. Cover it loosely with plastic wrap, but listen carefully: this dessert needs time to set up properly. You absolutely must chill this Chilled Autumn Dessert for a minimum of six hours, but honestly? Let it chill overnight. That’s how you guarantee the dreamiest slice of your no bake pumpkin pie in the morning.
Tips for Making an Expert No Bake Pumpkin Pie
You’ve got the recipe down, but making it expert level means paying attention to the little details that prevent sad, soupy holiday desserts. Since we aren’t using heat to solidify things, the temperature of your ingredients is basically your oven!
These tips are what keeps my no bake pumpkin pie firm and fabulous every time, making it the ultimate Make Ahead Pumpkin Dessert you can rely on for any gathering.
Ingredient Temperature and Handling
Seriously, don’t cheat on the cream cheese temperature! If it’s too cold, you’re going to end up with little cream cheese lumps in your filling, and they won’t melt away once the cold hits. Let that block sit out on the counter for at least an hour until it yields easily to a gentle poke. It needs to be soft enough to seamlessly incorporate with the powdered sugar.
Now, for the flip side: the heavy whipping cream! It needs to be ice cold—bonus points if you chill your mixing bowl and whisk attachments in the freezer for ten minutes before you start. Cold cream whips up faster and holds those stiff peaks much longer, giving your pie the stability it needs to slice beautifully.
Make-Ahead and Storage for Fall Holiday Desserts
This is where this recipe truly saves the day! It’s the perfect candidate for a Make Ahead Pumpkin Dessert. You really want to give it that full six hours to set up, but the flavor actually deepens if you make it the day before serving. It holds beautifully in the fridge, covered loosely with plastic, for up to four or five days. That means you can cross one major item off your list the day before Thanksgiving!
If you need to freeze it, go ahead! Wrap that chilled pie tightly in plastic wrap, then follow it up with a layer of foil. It lasts great for about a month in the deep freeze. Just make sure you thaw it overnight in the refrigerator before you plan to serve it up for your Fall Holiday Desserts spread.
Variations on the Classic No Bake Pumpkin Pie
Now, I know some of you look at this recipe and think, ‘That sounds amazing, but what if I want it even fluffier?’ Totally get it! This creamy base is super versatile. If you’re looking to mimic one of those amazing **Marshmallow Topped Pies**, gently fold in one cup of thawed, frozen whipped topping right along with the heavy cream near the end. It makes the texture even more airy—almost like a mousse!
And if you love those rich, slightly tangy **No Bake Cheesecakes**, you can easily turn this into a layered treat. I keep half of the cream cheese mixture separate, stir in about a quarter cup of mini marshmallows into that half, and spread it across the bottom of the crust first. Then, pour the spiced pumpkin layer right on top. It’s surprisingly easy to assemble and tastes incredibly indulgent!
Serving Suggestions for Your Easy Pumpkin Pie Recipe
The pie is set, firm, and ready to impress! Since the filling is already so rich and creamy, you don’t need to overload the top, but a little something extra always elevates a dish from great to unforgettable. I find that textural contrast is key here. A simple dusting of extra cinnamon or nutmeg goes a long way, keeping that gorgeous orange color visible.
If you want something decadent—and hey, it’s the holidays, right?—a light drizzle of homemade caramel sauce is heavenly against the cool pumpkin. Another huge hit that makes this a true Crowd Pleaser Fall Dessert? Sprinkle some toasted pecans or walnuts around the edge right before you serve it. That little crunch against the smooth filling is just heaven. Serve slices cold directly from the fridge for the best experience!
Frequently Asked Questions About This No Oven Dessert
I know you’re going to love this recipe, but sometimes logistics just pop up, right? Whether it’s about swapping ingredients or just figuring out the best way to handle leftovers, I’ve tried to answer the big ones here. This way, your experience making this no bake pumpkin pie is totally stress-free. If you have other legal concerns about recipes, you can check out my full site disclosure here.
Can I use pumpkin pie filling instead of pure pumpkin for this no bake pumpkin pie?
Oh, please don’t go that route if you can avoid it! You absolutely need to use pure pumpkin puree here, not the pre-mixed pumpkin pie filling. That canned filling is already loaded up with sugar and all the spices—cinnamon, ginger, nutmeg, you name it. Since our recipe already relies on sweetened condensed milk for sweetness and we are adding our own spices for that perfect balance, throwing in the pre-spiced mix will make your filling incredibly sweet and messy. It just won’t set correctly. Stick to the plain puree!
How long does this Creamy Pumpkin Dessert last in the refrigerator?
This chilled dessert does fantastic in the fridge because it’s all dairy-based and needs that chill to stay firm. You can safely keep it covered tightly for about four to five days. However, here’s the little catch—the graham cracker crust! While the filling stays perfect, the crust starts to soften up after day three because it absorbs moisture from the filling. For the absolute best texture where the crust still has a little snap, try to enjoy your slices within the first 72 hours!
What is the best way to cut a clean slice of Simple Autumn Sweets?
This is the ultimate trick for any creamy, chilled pie, especially one with a crumb crust. You need a very sharp, thin-bladed knife. Before you make the first cut into the pie, dip that knife into a glass of hot water—like, seriously hot—and then quickly wipe the blade dry with a paper towel. Then, *slice*! The heat melts the cold filling just enough to glide cleanly through it without sticking or dragging the ingredients. Rinse, dip, wipe, and cut again for every single slice. This simple trick gives you beautiful, professional-looking wedges of your Simple Autumn Sweets every single time!
Estimated Nutritional Data for a Slice of No Bake Pumpkin Pie
Okay, let’s talk numbers for just a second. Because this is a rich, creamy dessert packed with cream cheese, condensed milk, and butter in that crust, it definitely falls into the ‘indulgent’ category! But since you’re not working with a traditional pastry dough or eggs baked in, the composition is a little different from your standard baked pie.
I want to be totally upfront: these numbers are just my best estimates based on the standard versions of the ingredients listed in the recipe card. They can shift slightly depending on the brand of cream cheese or the exact amount of butter you use pressing down that crust. But this gives you a great idea of what you’re enjoying when you take a slice of this magnificent no bake pumpkin pie!
Here is the breakdown for one generous serving, based on 8 slices:
- Serving Size: 1 slice
- Calories: approximately 380
- Sugar: 35g
- Fat: 20g (with about 12g Saturated Fat)
- Carbohydrates: 45g
- Protein: 6g
- Cholesterol: 65mg
Since we aren’t baking, there’s zero cholesterol added from cooking the eggs, which is a small win! It’s what makes this a wonderful No Oven Dessert choice when you’re watching the stove heat up elsewhere. Enjoy every delicious, creamy bite!
Share Your Thoughts on This Quick Thanksgiving Pie
Now that you’ve successfully whipped up the easiest, creamiest no bake pumpkin pie imaginable, I’m dying to hear what you think! Honestly, when I make this for family gatherings, it vanishes first—it’s always a huge hit for those needing a Quick Thanksgiving Pie that doesn’t involve last-minute oven juggling.
Did it set up perfectly in your fridge? Was the graham cracker crust crumbly just how you like it? Please drop a comment below and let me know how it went! If you can manage it, snap a picture of your beautiful, chilled dessert and tag me on social media. Seeing your gorgeous slices of this No Bake Cream Pie honestly makes my entire day.
If you tried this recipe and it saved your holiday dessert plans, please leave me a star rating right here on the recipe card! Your feedback helps me know which recipes to keep perfecting for you. And if you have any specific questions that popped up while you were chilling that beauty, feel free to shoot me a message on my contact page!
PrintCreamy No Bake Pumpkin Pie with Graham Cracker Crust
Make a simple, creamy pumpkin pie without turning on your oven. This chilled dessert uses a graham cracker crust and sets up quickly.
- Prep Time: 25 min
- Cook Time: 0 min
- Total Time: 6 hr 25 min
- Yield: 8 servings
- Category: Dessert
- Method: Chilling
- Cuisine: American
- Diet: Vegetarian
Ingredients
- 1 1/2 cups graham cracker crumbs
- 1/4 cup granulated sugar (for crust)
- 6 tablespoons unsalted butter, melted (for crust)
- 1 (15 ounce) can pure pumpkin puree
- 1 (14 ounce) can sweetened condensed milk
- 1 teaspoon vanilla extract
- 1 teaspoon ground cinnamon
- 1/2 teaspoon ground ginger
- 1/4 teaspoon ground nutmeg
- 1/4 teaspoon salt
- 8 ounces cream cheese, softened
- 1/2 cup powdered sugar (for filling)
- 1 cup heavy whipping cream, cold
Instructions
- Prepare the crust: Mix graham cracker crumbs, 1/4 cup granulated sugar, and melted butter until evenly moistened. Press the mixture firmly into the bottom and up the sides of a 9-inch pie plate. Chill the crust for 15 minutes.
- Beat the cream cheese: In a large bowl, use an electric mixer to beat the softened cream cheese until smooth. Add the powdered sugar and beat until combined.
- Mix the pumpkin base: Add the pumpkin puree, sweetened condensed milk, vanilla extract, cinnamon, ginger, nutmeg, and salt to the cream cheese mixture. Beat until completely smooth.
- Whip the cream: In a separate, clean bowl, whip the cold heavy cream until stiff peaks form.
- Fold together: Gently fold the whipped cream into the pumpkin mixture in two additions until just combined. Do not overmix.
- Fill and chill: Pour the filling into the chilled graham cracker crust. Cover the pie loosely with plastic wrap.
- Refrigerate for at least 6 hours, or preferably overnight, until the pie is firm.
- Serve cold.
Notes
- For a lighter texture, you can substitute 1 cup of frozen whipped topping (thawed) for the heavy whipping cream. Fold this in gently at the end.
- You can press the crust mixture into the bottom of a springform pan instead of a pie plate for easier slicing.
- If you prefer a double layer, reserve half of the cream cheese mixture, mix it with 1/4 cup of mini marshmallows, and layer it on the bottom before adding the pumpkin layer.
Nutrition
- Serving Size: 1 slice
- Calories: 380
- Sugar: 35
- Sodium: 250
- Fat: 20
- Saturated Fat: 12
- Unsaturated Fat: 8
- Trans Fat: 0
- Carbohydrates: 45
- Fiber: 2
- Protein: 6
- Cholesterol: 65