

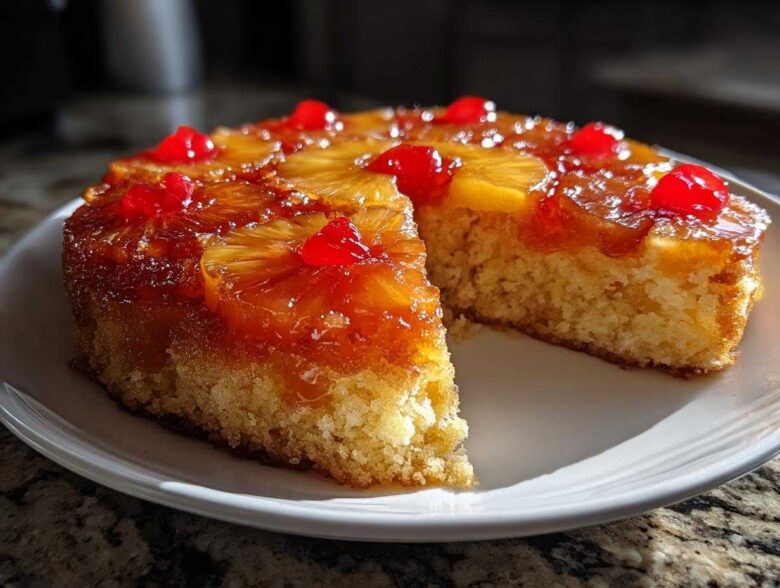
Oh, honestly, are there any desserts that bring back better memories than the classics? Think about those vibrant, slightly sticky, over-the-top retro desserts we all secretly love—and my absolute favorite has to be the pineapple upside down cake. It just screams summer picnics and holiday gatherings all at once. I spent years trying to nail that perfect balance where the fruit caramelizes just right without burning the whole operation, and I finally landed on what I truly think is the definitive, from-scratch guide. Trust me, once you see those beautiful, glossy rings come out, you’ll never go back to the quick shortcuts again. This recipe is pure, buttery sunshine baked right into a wonderfully moist cake base. If you want to know more about our kitchen philosophy, feel free to check out our About Us page!
Why This Classic Pineapple Upside Down Cake Recipe Works
So many recipes promise the world, but this one truly delivers that nostalgic punch while giving you superior texture. I’ve tweaked and tested this for years until I was certain I had everything locked down. It isn’t just a dessert; it’s a statement!
- The caramel layer doesn’t just sit there; it soaks slightly into the top layer of the cake, giving you that amazing gooey texture right where you need it.
- We achieve that perfect, *moist pineapple cake* crumb because we use the reserved juice in the batter—don’t throw that liquid away!
- It’s completely from scratch, which means you control the richness. That’s why the flavor of the caramelized fruit is so deep and authentic.
- It travels like a dream, which is why it became a staple at all our big family summer parties.
Gathering Ingredients for Your Pineapple Upside Down Cake
Okay, stop everything! Before we even think about preheating the oven, we need to make sure our pantry is stocked correctly. This is where the magic starts, and gathering the right ingredients is seriously half the battle won, especially when we are making this cake from scratch.
You need to be precise here, don’t eyeball that brown sugar! The richness of the caramel really dictates how good this pineapple upside down cake turns out. And remember that pineapple juice—we need it for the batter to keep things super moist!
Topping Components: Pineapple Ring Topping and Caramel Base
This is the star of the show, so let’s make sure we have the right bits ready to go before we even mix the batter. Have your pan ready to go, too, because timing is everything once we start melting that sugar over the butter.
- 1/2 cup unsalted butter (this will be melted right in the pan).
- 1 cup packed light brown sugar—get that nice, dark molasses flavor in there!
- 1 (20 ounce) can pineapple slices in juice—we need the slices AND we need to reserve that juicy liquid!
- 14 maraschino cherries, drained well. Don’t skimp on these; they fill the center of the rings perfectly.
For the Moist Pineapple Cake Batter
This cake base is buttery and tender, but it needs to hold up to all that gooey fruit on top. Notice we use a mix of granulated sugar and that brown sugar from the topping. It really adds depth!
- 1 3/4 cups all-purpose flour.
- 1 1/2 teaspoons baking powder—that’s our lift friend!
- 1/2 teaspoon salt.
- 1/2 cup unsalted butter, softened to room temperature. This has to be soft!
- 3/4 cup granulated sugar.
- 2 large eggs, straight from the fridge is fine.
- 1 teaspoon vanilla extract—use the good stuff if you have it!
- 1/2 cup milk.
- 1/4 cup reserved pineapple juice—remember that liquid we saved? This is why!
Step-by-Step Instructions for the Best Pineapple Upside Down Cake
Alright, you have your beautiful fruit ready, and your wet and dry ingredients are separated. Now comes the fun part—putting it all together to create the best pineapple upside down cake you’ve ever made. Pay close attention to how we handle the topping, because that’s the secret sauce for delicious caramelization!
Creating the Caramelized Fruit Layer
I want you to leave that 9-inch round cake pan naked—no grease, no parchment yet! We are building the sauce right on the bottom. First, grab that small saucepan and melt the 1/2 cup of butter over medium heat. As soon as it’s liquid, pour it right into the bare pan. Sprinkle that cup of packed brown sugar evenly over the melted butter. It’s going to look a little rustic, but trust the process!
Next, carefully arrange your drained pineapple slices right on top of the sugar. I usually fit five slices in a ring, maybe six if they snuggle up. After that, pop one drained maraschino cherry right into the center of *every* single pineapple ring. See? Easy!
Mixing the Pineapple Cake From Scratch Batter
Now it’s time for the cake part! In a separate big bowl, take your softened 1/2 cup of butter and that granulated sugar and cream them together until they are super light and fluffy. Beat in your eggs one at a time—don’t rush this creaming part! Stir in the vanilla.
For the dry goods in your medium bowl—the flour, baking powder, and salt—whisk them up quickly. Now, switch back to the main bowl. Add the flour mixture alternately with the milk *and* that reserved pineapple juice. I always start and end with flour. My biggest tip here, and this is key for a tender crumb, is to mix it ONLY until you don’t see any more white streaks. Seriously, stop mixing when it’s *just* combined. Over-mixing means a tough cake, and we want airy fluffiness for this pineapple cake from scratch!
Baking and Inverting Your Pineapple Upside Down Cake
Gently pour all that beautiful batter right over your fruit topping in the pan. Make sure it covers everything evenly. It goes into the preheated 350-degree oven for about 40 to 45 minutes. You’ll know it’s done when a pick comes out clean!
Wait just five fleeting minutes—no more, no less—and have a serving plate ready. Wearing oven mitts (safety first!), place the plate upside down over the cake pan, hold them tightly together, and flip! Carefully lift the pan off. If a cherry sticks, just gently coax it back into place. You did it! Check out our full recipe disclaimer if you have any questions about ingredient substitutions!
Tips for Perfect Homemade Caramelized Pineapple
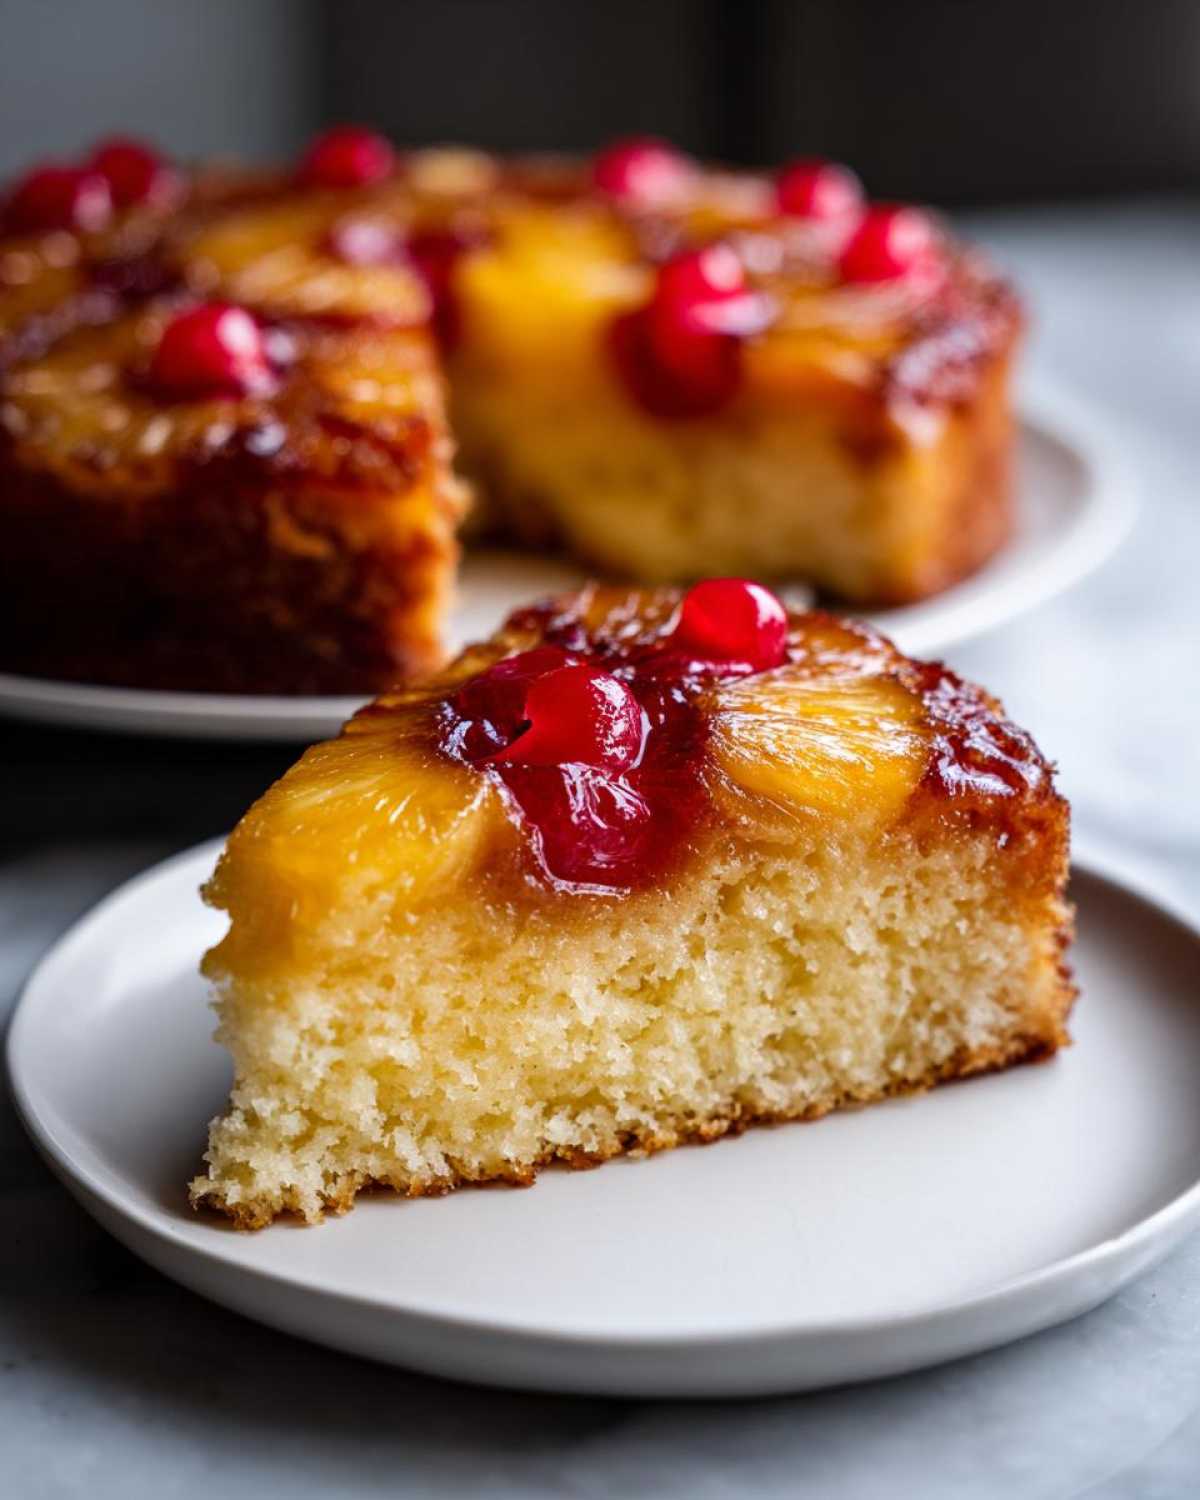
Listen, the topping is the make-or-break moment for any pineapple upside down cake. You want that dark, molten caramel, not black, burnt sugar. The trick is managing the heat when you melt that initial butter and brown sugar mixture.
Because we are melting the butter and sugar together right in the baking pan, you have to watch it like a hawk before you even add the fruit! Keep the heat on medium or medium-low. You want the sugar to dissolve completely into the butter until it’s smooth and bubbly—that’s your sign to stop cooking it and immediately arrange the fruit. If it starts smelling acrid, it’s too late!
Another thing about the fruit: make sure those pineapple rings aren’t dripping wet when they hit the sugar. If they are too juicy, they steam instead of caramelize, and you won’t get that beautiful, crunchy-chewy edge. A quick pat down with a paper towel after draining goes a long way toward achieving that incredible homemade caramelized pineapple topping.
Variations on the Classic Pineapple Upside Down Cake
I know, I know, sometimes you want the classic, but sometimes life is hectic, and you just need a delicious, sweet victory without washing a million bowls! Don’t worry; this lovely pineapple upside down cake recipe is incredibly flexible. While I swear by the from-scratch version, I’ve done the legwork on making sure variations come out just as tasty.
Whether you need something that looks amazing coming out of a fancy pan or something you can whip up in thirty minutes flat, we’ve got you covered. These swaps don’t compromise the gooey topping, which is the whole point, right?
Making a Bundt Pineapple Upside Down Cake
If you have one of those gorgeous Bundt pans lying around, you absolutely should use it! That gorgeous fluted shape makes for the most stunning presentation, especially around the holidays. If you want to use a standard 10-cup Bundt pan, you’ll need to scale up the entire recipe by half.
That means doubling your butter/sugar topping ingredients *and* doubling your entire cake batter mixture. Because the batter is deeper in a Bundt pan, you absolutely must plan for a longer baking time. I usually start checking it around 60 minutes, but you might need up to 75 minutes depending on your specific pan. Just test it with that wooden pick in the thickest part!
Easy Pineapple Dessert Using Box Mix
This is my secret weapon for times when the craving hits hard and fast—the ‘I need this now’ emergency! You can totally use a box of yellow cake mix. It cuts out the whole creaming butter/sugar and alternating wet/dry steps. It really is a no fuss pineapple dessert.
If you go this route, you’ll skip everything from whisking the flour to pouring the reserved pineapple juice. Just follow the cake mix instructions on the box, but swap out whatever liquid they call for. Instead of water or milk, use the milk from the recipe, the reserved pineapple juice, and the two eggs. That’s it! Mix everything together according to the box directions, pour it over your pre-set caramel topping carefully, and bake it exactly as you would the scratch version in your 9-inch pan.
Serving Suggestions for Your Caramelized Fruit Cake
This caramelized fruit cake is decadent all on its own, I won’t lie. The combination of molten brown sugar and tangy pineapple is almost perfect straight out of the oven. But, if you’re serving this for a special occasion—or you just really love toppings like I do—you have to embrace the cool contrast.
When this cake is served warm, which I think is the only way to truly appreciate that gooey layer, you absolutely need something cold and creamy next to it. It cuts through the richness of the butter and the deep caramel flavor so beautifully.
Accompaniments We Love
- The classic pairing is a big dollop of freshly whipped cream. Don’t use the stuff from the can unless you absolutely must! Beat heavy cream with just a tiny bit of powdered sugar and a drop of vanilla until stiff peaks form. It’s light and fluffy and doesn’t compete with the pineapple.
- Vanilla bean ice cream is my go-to, especially if I’ve made this for a holiday gathering like Christmas. The temperature difference—hot, gooey cake meeting frozen ice cream—is just heaven.
- If you want a little zing to play off the tropical flavors, try serving it with a very light dollop of crème fraîche. It offers that slight sourness that makes the sweet fruit pop even more.
No matter what you choose, make sure you serve it relatively soon after flipping. The shine on that topping is best when it’s still warm and slightly soft. Enjoy every sticky, fruity bite!
Storage and Reheating Instructions for Pineapple Upside Down Cake
Now, let’s talk about the aftermath, because sometimes these perfect cakes last longer than one day—though I can rarely guarantee that promise! This pineapple upside down cake is, without a doubt, at its absolute peak the day it comes out of the oven. That warm, molten caramel layer is simply unbeatable when it’s fresh.
However, if you’ve got leftovers (perhaps you showed great restraint!), you need to treat that sticky topping gently so it doesn’t get weird. You absolutely should not store this cake uncovered at all, or you’ll wake up to rock-hard fruit and a stale cake!
For short-term freshness, cover the serving plate loosely with plastic wrap or foil. If you made this in the original 9-inch pan, you can just use the bottom of another pan to cover it loosely. Keep it on the counter at room temperature for up to two days. It doesn’t love the cold!
If you need to keep it longer—say, for packing up after a holiday party—then yes, you should refrigerate it. Wrap the cake tightly in a layer of plastic wrap, then another layer of foil to keep the moisture in. When you store it in the fridge, the caramel topping *will* firm up quite a bit, almost like a thick fudge layer. Don’t panic!
Reheating the Cake for That Fresh-Baked Taste
We never eat this cake cold from the fridge, though! That firm caramel turns rock solid. If you’ve refrigerated it, let it sit on the counter for an hour to come back to room temperature first. Then, you have two options for bringing back that gooey goodness.
- The Oven Method (Best Results): Pop a slice onto a small, oven-safe plate. Heat it low and slow at about 300 degrees F for about 8 to 10 minutes. This gentle heat warms the cake through and melts that caramel right back to its luscious, drippy state.
- The Microwave Dodge (If You’re In A Rush): If you just need a quick bite, zap a slice for about 15 to 20 seconds. It warms fast, but you’ll want to watch it closely so the cake doesn’t get tough. A quick microwave softens that topping up just enough to be enjoyable!
Honestly, making this classic pineapple cake fresh guarantees the best texture, but proper storage keeps those tropical flavors locked in for a surprisingly good second-day treat!
Frequently Asked Questions About Pineapple Upside Down Cake Recipe
I get so many questions about this recipe, which just proves how much people love a good, classic baked treat! It seems like everyone has a memory attached to that beautiful, sticky fruit pattern. Here are some of the most common things people ask me when they are getting ready to bake this amazing tropical cake recipe.
Can I use fresh pineapple instead of canned for this pineapple upside down cake?
Oh, absolutely you can, and if you have stunning, ripe fresh pineapple, go for it! But here’s the big catch you need to remember: the canned rings come packed in juice and they are thin, which lets them cook right in the caramel layer. Fresh pineapple is usually thicker and holds more water.
If you use fresh, you have to slice it and caramelize it separately in a skillet with butter and brown sugar *before* you lay it in the cake pan. You don’t want a layer of watery pineapple sitting on top of your batter; we need that beautiful, concentrated flavor, so do the work up front!
What makes this a Retro Dessert Idea?
It’s such a fun throwback! This cake really gained massive popularity right after World War II, in the late 1940s and 1950s in America. Why? Well, canned pineapple became much more accessible thanks to canning technology and marketing efforts. Suddenly, people had access to these exotic-looking, perfectly uniform rings and bright red cherries!
It was visually stunning, easy to make (especially when people started using cake mixes later on), and it made *any* weeknight dinner feel like a special occasion. That’s why it’s pegged as a classic retro dessert idea—it embodies that era of home baking glamour!
If you have more questions about how we put this recipe together or need help navigating the baking times, please don’t hesitate to reach out through our Contact page!
Estimated Nutritional Data for This Pineapple Upside Down Cake
I always feel a little funny putting numbers next to a passion project like this pineapple upside down cake, but since we are using solid measurements from scratch, I wanted to give you a general idea of what you are looking at per slice. Remember, this is baked with real butter and lots of sugar, because that’s what makes it so good!
These figures are based on the recipe yielding 8 servings, using standard supermarket ingredients. If you use lighter margarine or skip the cherries, the totals will shift. Think of this as a helpful guide, not a strict dietary requirement for a wonderful dessert!
- Serving Size: 1 slice
- Calories: 380
- Sugar: 35g (Yep! That glorious caramel!)
- Sodium: 250mg
- Fat: 18g
- Saturated Fat: 11g
We also get a bit of protein and carbs in there to keep you going, too. It racks up to about 54g of carbohydrates per slice.
It’s really important you take this information with a grain of salt, though. Since we are making this at home with our own ingredients, the actual breakdown might vary quite a bit based on the brand of butter or sugar we use. For our detailed thoughts on ingredient sourcing and how we handle data privacy on the site, you can always read up on our Privacy Policy. Enjoy this sweet retro treat!
PrintClassic Pineapple Upside Down Cake From Scratch

Make a moist, classic pineapple upside down cake featuring caramelized pineapple rings and maraschino cherries baked into a buttery vanilla cake base.
- Prep Time: 20 min
- Cook Time: 45 min
- Total Time: 65 min
- Yield: 8 servings
- Category: Dessert
- Method: Baking
- Cuisine: American
- Diet: Vegetarian
Ingredients
- 1/2 cup unsalted butter
- 1 cup packed light brown sugar
- 1 (20 ounce) can pineapple slices in juice, drained (reserve juice)
- 14 maraschino cherries, drained
- 1 3/4 cups all-purpose flour
- 1 1/2 teaspoons baking powder
- 1/2 teaspoon salt
- 1/2 cup unsalted butter, softened
- 3/4 cup granulated sugar
- 2 large eggs
- 1 teaspoon vanilla extract
- 1/2 cup milk
- 1/4 cup reserved pineapple juice
Instructions
- Preheat your oven to 350 degrees F (175 degrees C). Do not grease a 9-inch round cake pan.
- Melt 1/2 cup butter in a small saucepan over medium heat. Pour the melted butter into the bottom of the ungreased cake pan.
- Sprinkle the brown sugar evenly over the melted butter.
- Arrange the pineapple slices on top of the brown sugar mixture. Place one cherry in the center of each pineapple ring.
- In a medium bowl, whisk together the flour, baking powder, and salt. Set aside.
- In a large bowl, cream together the 1/2 cup softened butter and granulated sugar until light and fluffy.
- Beat in the eggs one at a time, mixing well after each addition. Stir in the vanilla extract.
- Gradually add the flour mixture to the wet ingredients, alternating with the milk and reserved pineapple juice, beginning and ending with the flour mixture. Mix until just combined. Do not overmix.
- Carefully pour the cake batter over the pineapple and cherry layer in the pan.
- Bake for 40 to 45 minutes, or until a wooden pick inserted into the center comes out clean.
- Let the cake cool in the pan on a wire rack for 5 minutes.
- Place a serving plate upside down over the cake pan. Wearing oven mitts, carefully invert the pan and plate together. Lift the pan off the cake. If any fruit sticks, gently place it back onto the cake.
- Serve warm or at room temperature.
Notes
- For a Bundt cake variation, use a 10-cup Bundt pan and increase the recipe by half. Adjust baking time as needed.
- If you prefer a quicker version, you can substitute the dry ingredients and wet ingredients (except eggs, milk, juice) with one box of yellow cake mix.
- Use fresh pineapple rings if available, but you must caramelize them separately before assembly.
Nutrition
- Serving Size: 1 slice
- Calories: 380
- Sugar: 35
- Sodium: 250
- Fat: 18
- Saturated Fat: 11
- Unsaturated Fat: 7
- Trans Fat: 0.5
- Carbohydrates: 54
- Fiber: 1
- Protein: 4
- Cholesterol: 85