

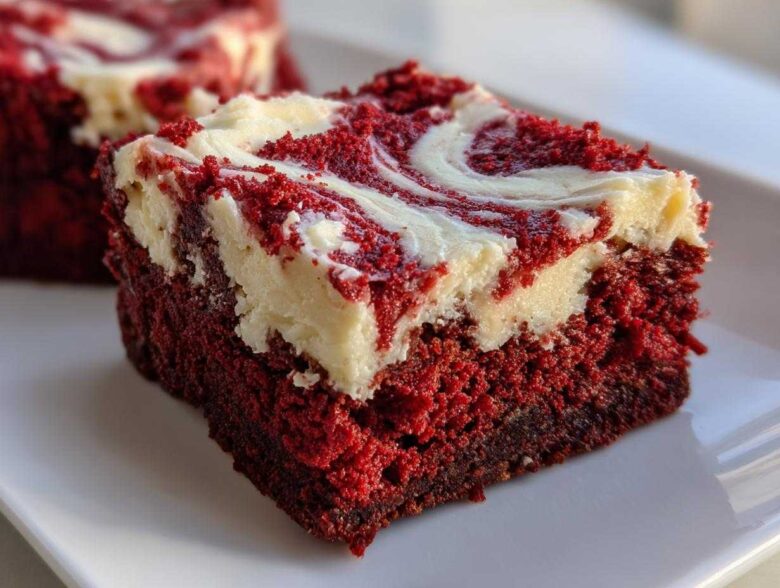
Oh, let’s talk decadent treats! If you’re looking for something truly show-stopping for dessert tonight—especially if you need something gorgeous for Valentine’s Day—you have to try these. Forget dry, crumbly squares; I spent months perfecting these red velvet brownies until they achieved that perfect, rich, fudgy bite.
I mean, seriously, these are the ultimate! We’re layering deep, cocoa-rich chocolate with that iconic red tint and topping it all off with a mandatory, tangy cream cheese swirl baked right in. It’s honestly the *best* brownie recipe I’ve ever developed, and trust me when I say I finally nailed the chewy-yet-gooey texture!
Why This Is the Best red velvet brownies Recipe You Will Make
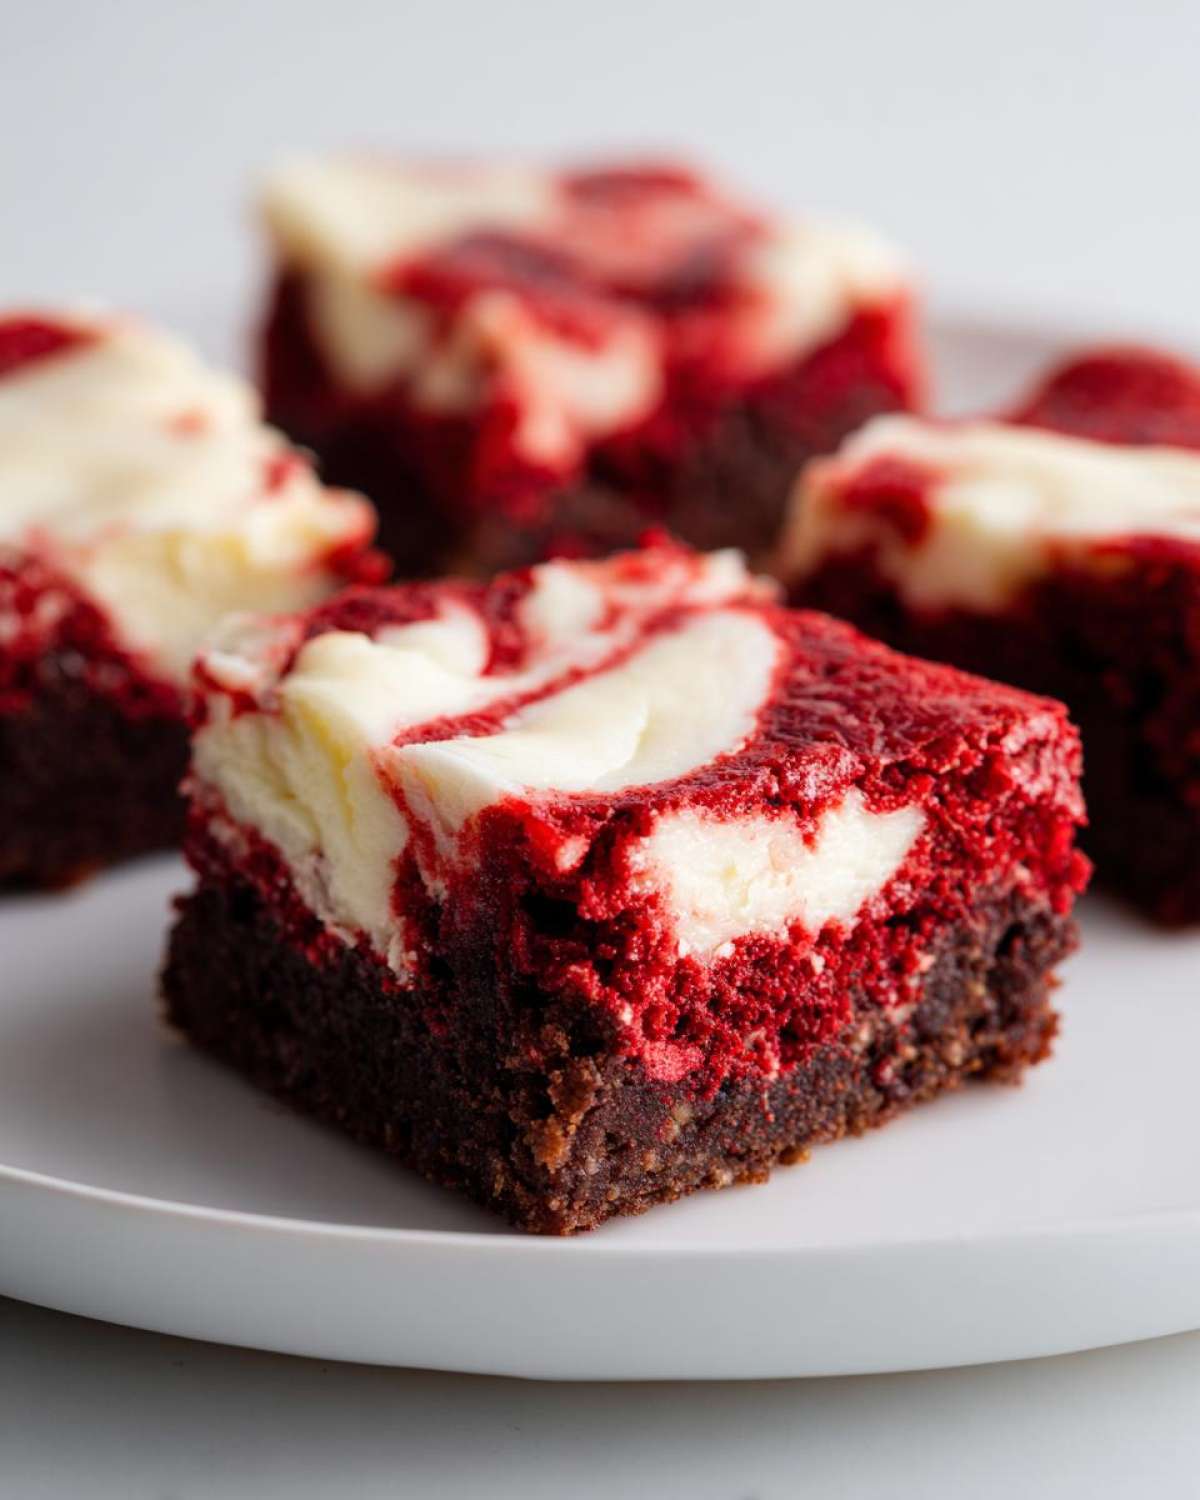
When I say this is the best red velvet brownies recipe, I mean it comes from a place of deep, repeated testing! So many brownie recipes end up tasting cakey, but not these. We engineered this recipe to hit that perfect balance between rich chocolate depth and that tangy red velvet flavor you crave.
Here’s why you should ditch every other recipe you have saved:
- The texture is pure fudge—chewy edges, gooey center.
- The color is brilliant without tasting like food dye.
- The creamy cheesecake swirl is non-negotiable!
Achieving Peak Fudgy Texture in red velvet brownies
The secret to fudgy results, rather than cakey ones, is all about the fat ratio we use. By relying on melted butter instead of creaming softened butter, we introduce less air initially. That means less lift, which keeps these bars dense and wonderfully chewy. Remember, the absolute key here is to stop mixing the flour in as soon as it disappears. Overmixing activates the gluten, and gluten equals cake. We don’t want cake!
Tips for Gorgeous Red Desserts
If you want that gorgeous, deep hue that photographs beautifully and screams “red velvet dessert ideas,” you have to use gel food coloring. Liquid coloring is mostly water, and adding too much of it throws off the balance of your dry-to-wet ingredients. A high-quality gel paste gives you vibrant color saturation using just a teaspoon or two. You get that stunning visual appeal without thinning out the batter or adding unnecessary liquid to what should be a very rich base.
Gathering Your Ingredients for Fudgy red velvet brownies
Okay, let’s get our ingredients lined up because when you’re making something this decadent, preparation is everything! I’ve listed every single thing you’ll need below. Seriously, measure everything out beforehand; it makes the whole “easy indulgent baking project” actually easy.
You’ll see the main list covers the rich chocolate base, but the star ingredient—the cream cheese—needs special attention. Make sure that block of cream cheese is sitting out on the counter long enough to be totally soft before we even think about mixing!
Cream Cheese Swirl Components
This small section is vital for that creamy cheesecake swirl brownies look. You need:
- 8 ounces cream cheese—and I mean softened, like butter!
- 1/4 cup granulated sugar
- 1 large egg yolk (just the yolk, that’s important!)
- 1/2 teaspoon vanilla extract
Having these ready to go prevents you from over-mixing the main batter when you finally get to the swirling part. Trust me on this prep work!
Step-by-Step Instructions for the Ultimate red velvet brownies
Alright, time to get messy! This is where the magic happens, and I promise, even if you’re new to baking, these steps are incredibly straightforward. Don’t worry about rushing; rushing is how you end up with cakey bars! First things first, get that oven preheated to 350°F (175°C). I always line my 9×13 pan with parchment paper, making sure I leave an overhang on the sides. That overhang is your best friend for liftoff later!
We’ll start by mixing the wet stuff: whisk your melted butter and sugar, then beat in those four eggs one by one until they’re happy. Then comes that gorgeous red color, along with the vinegar and vanilla. Once that’s vibrant and mixed, gently fold in your dry ingredients—flour, cocoa, salt—just until you don’t see white streaks anymore. If you’re adding those optional white chocolate chips, slip them in right at the end. That’s your base!
Preparing the Batter and Achieving the Perfect red velvet swirl brownies
Remember, we are aiming for fudgy, so mix that flour in gently! We layer the batter in the pan to get that fantastic look. Spread about two-thirds of the red batter down first. Then, take your pre-made cream cheese mix and just dollop spoonfuls evenly over the top. Now for the showstopper: pour the rest of the red batter over the top of all those cream cheese dollops.
Take a knife—a skewer works too—and gently run it through the layers a few times, making wide S-shapes. Don’t overdo it! We want defined ribbons, not a uniform pink mess. That technique ensures you get those stunning red velvet swirl brownies every single time you pull them out of the oven. Bake them for about 30 to 35 minutes, keeping a close eye on Step 10, because pulling them out at the exact right time seals in that fudgy goodness!
Tips for Success with Your red velvet brownies
Listen, these are amazing, but a few sneaky details can turn glorious into just ‘okay.’ The biggest rookie mistake when making these red velvet brownies is overbaking them. Seriously, yank them out when the toothpick still has moist crumbs clinging to it. They keep setting up as they cool, so pulling them early guarantees that fudgy center.
Also, and this is non-negotiable for clean squares: you MUST chill them. Let them cool down to room temperature on the counter, and then pop the whole thing—still in the paper sling—into the fridge for at least an hour, or maybe even two if you have the patience. Cutting warm brownies? Total disaster. They’ll smear everywhere.
Here’s my secret bonus tip for consistency: Always check your oven temperature with an inexpensive oven thermometer. Ovens lie! If your oven runs hot, you’ll scorch the edges before the center is fudgy. Getting that calibration right is how you achieve *bakery style brownies* repeatability.
Making red velvet dessert ideas for Special Occasions
These aren’t just for a Tuesday night indulgence, although they totally work for that! Because they are so gorgeous and richly colored, these red velvet dessert ideas really shine during holidays. If you chill these brownies completely, you can use heart-shaped or even small Christmas cookie cutters to make tiny, perfect squares for a party platter. That’s how I make them look effortlessly elegant for special gatherings.
The bright red color pairs beautifully with holiday sprinkles—think shimmery gold or silver for New Year’s, or lots of deep reds and pinks for Valentine’s Day brownies. Because we made them so sturdy and fudgy, they hold their shape much better than a standard cakey brownie when you start cutting them into fancy shapes.
Brownie Variations: White Chocolate Chip red velvet brownies
If you want to switch things up without messing with the swirl, just toss in some white chocolate chips! The creamy, sweet flavor of those chips plays so well against the slight tang we get from the vinegar and the cream cheese. It adds a gorgeous pop of color contrast, too, making them look even more like gorgeous red desserts. Just fold them in at the very end with your spatula!
Storage and Reheating Instructions for Moist red velvet squares
So, you’ve made these magnificent, rich chocolate red velvet bars. Congrats! Now we have to keep them that way. To maintain that perfect moisture, you must store them correctly. Keep your cooled moist red velvet squares in an airtight container. I prefer keeping mine at room temperature for the first couple of days because the texture stays slightly softer that way. If you need them to last longer—like if you’re making these ahead for Christmas dessert recipes—pop them in the fridge.
If you do chill them, just let them sit on the counter for about 20 minutes before serving. If you want that perfect decadent chocolate treat warm again? Cover a square loosely with a paper towel and microwave it for just 10 to 15 seconds. Seriously, that’s all it takes to bring back that just-baked gooey factor!
Frequently Asked Questions About red velvet brownies
It’s totally normal to have a few questions when you’re tackling what I promise is the best red velvet brownie recipe! Baking these fudgy bars is simple once you know the little tricks behind the texture and color. Here are some common things I hear when friends try this out for the first time.
Why are my red velvet brownies cakey instead of fudgy?
Ugh, that’s the worst! If your homemade red velvet bars turned out cakey, it almost always comes down to one of two things. First, you might have overmixed after adding the flour; remember, we want dense and fudgy, so stop mixing the second those dry streaks disappear. Second, check your ratio—if you added too much flour or too little fat (butter), the chemical reaction leans toward cake structure instead of that glorious chewy brownie texture we are after!
Can I skip the white vinegar?
I really wouldn’t recommend it! The vinegar isn’t there for the flavor, I promise; it actually reacts with the cocoa powder and the dark red food coloring to help deepen and brighten that classic red color. For those gorgeous, vibrant moist red velvet squares, you need that little bit of acid. It makes a surprising difference in the final look!
How do I make sure the brownies look like they came from a professional bakery?
Ah, you want that bakery style brownies look! That comes down to two things. First, use the parchment paper overhang and chill the bars completely before cutting—that ensures super clean edges that don’t crumble. Second, for the swirl, don’t swirl too much! Just a couple of figure-eights with a butter knife will give you those beautiful creamy veins that make everybody ask where you bought your brownies with cream cheese frosting.
Estimated Nutritional Data for Your Decadent Chocolate Treats
I know we bake for flavor, not for tracking calories, but it’s good to know what we’re enjoying! Here is the nutritional breakdown for one square of these incredible red velvet brownies. Keep in mind, since we bake from scratch, these numbers are just estimates, and they’ll shift a tiny bit based on the exact brand of butter or chocolate chips you use.
- Serving Size: 1 square
- Calories: 350
- Sugar: 35g
- Fat: 22g
- Protein: 4g
- Carbohydrates: 38g
You can find more details on our policy page regarding how we calculate these figures. Enjoy this truly decadent chocolate treat responsibly!
Share Your Homemade red velvet bars Experience
Now that you’ve successfully baked up these rich, fudgy red velvet bars, I absolutely need to know how they turned out! Seriously, don’t be shy. Head down to the comments section below and give this recipe a rating—I shoot for five stars, of course!
I’m dying to hear all the details. Did your cream cheese swirl come out perfectly marbled? Did you use white chocolate chips, or stick to the dark cocoa base? Tell me everything!
And please, please share photos! Tag me when you post your beautiful creations on social media. Seeing your gorgeous, rich red desserts makes all the testing and tweaking worth it. If you have any last-minute questions or just want to share a baking win, you can always reach out through my contact page. Happy baking, everyone!
PrintUltimate Fudgy Red Velvet Brownies with Tangy Cream Cheese Frosting
Make rich, fudgy red velvet brownies with a bright red color and a creamy, tangy cream cheese swirl baked right in.
- Prep Time: 20 min
- Cook Time: 35 min
- Total Time: 55 min
- Yield: 16 squares
- Category: Dessert
- Method: Baking
- Cuisine: American
- Diet: Vegetarian
Ingredients
- 1 cup (2 sticks) unsalted butter, melted
- 2 cups granulated sugar
- 4 large eggs
- 1 tablespoon vanilla extract
- 1 teaspoon white vinegar
- 1 teaspoon red food coloring (high-quality gel recommended)
- 1/2 cup unsweetened cocoa powder
- 1 1/2 cups all-purpose flour
- 1/2 teaspoon salt
- 1 cup white chocolate chips (optional)
- For the Cream Cheese Swirl:
- 8 ounces cream cheese, softened
- 1/4 cup granulated sugar
- 1 large egg yolk
- 1/2 teaspoon vanilla extract
Instructions
- Preheat your oven to 350°F (175°C). Line a 9×13 inch baking pan with parchment paper, leaving an overhang on the sides for easy removal. Lightly grease the paper.
- In a large bowl, whisk together the melted butter and 2 cups of sugar until combined.
- Whisk in the 4 eggs one at a time until fully incorporated. Mix in the vanilla extract, white vinegar, and red food coloring until the batter is a uniform red color.
- In a separate bowl, whisk together the cocoa powder, flour, and salt.
- Gradually add the dry ingredients to the wet ingredients, mixing only until just combined. Do not overmix. Fold in the white chocolate chips if using.
- Prepare the cream cheese swirl: In a medium bowl, beat the softened cream cheese and 1/4 cup sugar with an electric mixer until smooth. Beat in the egg yolk and 1/2 teaspoon vanilla until just blended.
- Spread about two-thirds of the red velvet batter into the prepared pan. Dollop spoonfuls of the cream cheese mixture over the batter. Pour the remaining red batter over the top.
- Use a knife or skewer to gently swirl the cream cheese mixture into the batter to create a marbled effect.
- Bake for 30 to 35 minutes. The edges should look set, and a toothpick inserted near the center should come out with moist crumbs attached, not wet batter.
- Let the brownies cool completely in the pan on a wire rack before lifting them out using the parchment overhang. Cut into squares.
Notes
- For the best fudgy texture, avoid overbaking. The center should remain slightly underdone when you remove them from the oven.
- Chill the brownies for at least one hour before cutting for cleaner slices.
- You can substitute the white chocolate chips with semi-sweet chocolate chips for a richer chocolate flavor.
Nutrition
- Serving Size: 1 square
- Calories: 350
- Sugar: 35
- Sodium: 150
- Fat: 22
- Saturated Fat: 14
- Unsaturated Fat: 8
- Trans Fat: 0.5
- Carbohydrates: 38
- Fiber: 1
- Protein: 4
- Cholesterol: 80