

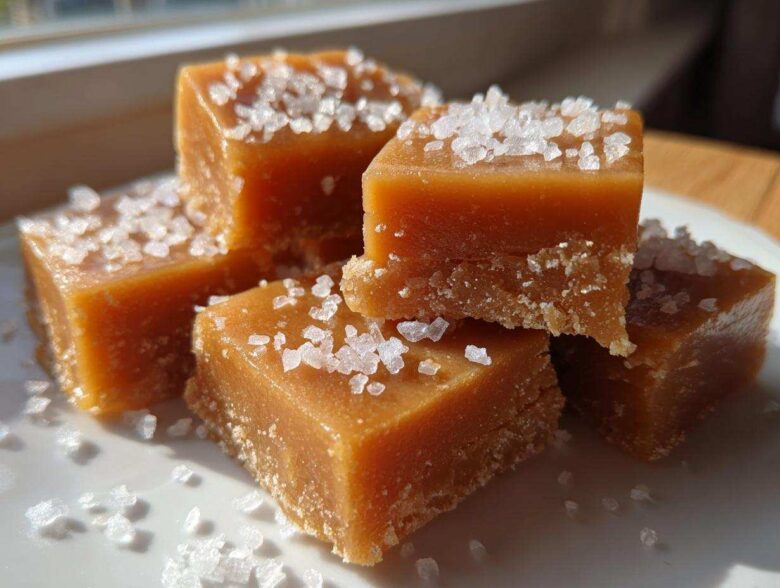
Oh my goodness, there is just nothing better than the smell of genuine, buttery candy floating through the house, right? Forget those waxy store-bought things! I have finally cracked the code on truly perfect, melt-in-your-mouth homemade caramels. The first time I tried making them, I ended up with a sticky, burnt mess that required scraping tools. Total disaster! But I kept trying, and I promise you, this recipe nails that amazing soft and chewy texture every single time. This isn’t just candy; it’s an experience!
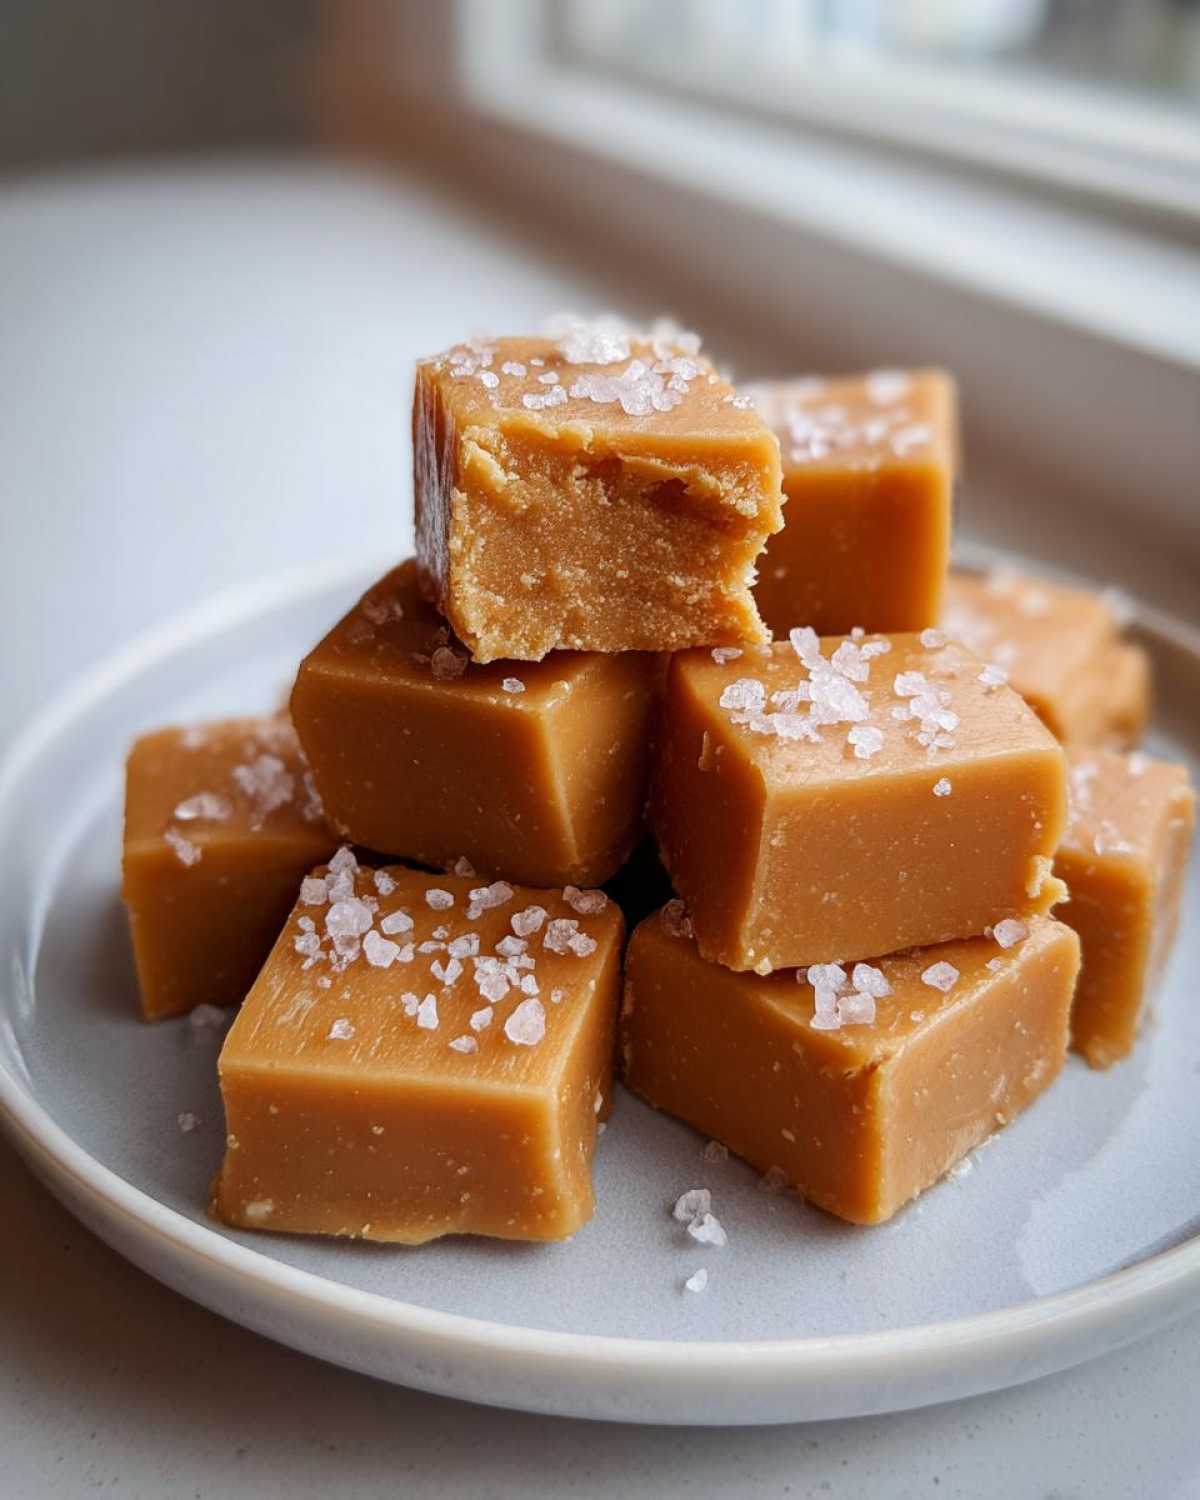
I know it feels intimidating, but trust me, after you nail that temperature, you’ll be whipping these out for every holiday. We are making the absolute best Soft and Chewy Sea Salt Caramels, and I even figured out a sneaky microwave trick if you’re in a real rush. You absolutely need to see how easy these become once you conquer the sugar thermometer!
If you’re curious about where I learned all my kitchen shortcuts, you can check out my little story over on the About Page!
Why This is the Best Homemade Caramels Recipe
I stand by telling you this is the ultimate recipe for homemade caramels. It beats any store-bought version because of the pure, deep flavor you get from working with real cream and butter. I’ve tried simplifying it too many times, and I always come back to this tried-and-true method because the results are just unmatched in chewiness and taste.
- These never turn hard or brittle on me. They stay perfectly tender!
- The depth of flavor from cooking the sugar just right is incredible.
- They are flexible, making them fantastic for holiday candy-making marathons.
Achieving Perfect Soft and Chewy Caramels Texture
The secret to that beautiful chewiness that makes your jaw happy? It all comes down to the temperature of your candy thermometer. You absolutely must hit 245 degrees Fahrenheit, no excuses! That specific temperature is what candy makers call the firm ball stage. If you pull it off the heat too soon, you’ll have gooey sauce instead of candy. Cook it too long, and you’ll be chewing on something closer to a jawbreaker!
Flavor Profile of These Buttery Caramel Treats
When you cook down the sugar and heavy cream, you create this intense, nutty depth that vanilla alone can’t achieve. Then, we hit it with the sea salt right at the end. That contrast between the intensely sweet, rich, buttery base and that final sprinkle of flaky sea salt on top is what makes these caramels addicting. Seriously, it’s the perfect flavor balance.
Ingredients for Your Soft and Chewy Caramels
Okay, let’s talk about what you need. Gathering your ingredients ahead of time is super important when you’re dealing with boiling sugar—it moves fast once it gets going! Don’t try substituting the heavy cream for half-and-half; trust me, you need that fat content for the right texture here. Have everything measured out and ready to go by the stove before you even turn the heat on!
This list might look long, but these are mostly pantry staples. Make sure you grab that candy thermometer; it’s non-negotiable for achieving that perfect chewiness we talked about.
- 1 cup granulated sugar
- 1 cup light corn syrup (This is what keeps our caramels from crystallizing!)
- 1 cup heavy cream
- 1/2 cup unsalted butter (Make sure this is cut into cubes so it melts evenly!)
- 1 teaspoon vanilla extract
- 1/2 teaspoon fine sea salt (This goes right into the batch for seasoning.)
- Flaky sea salt (This is critical for sprinkling on top for that gorgeous, gourmet finish.)
Step-by-Step Instructions for Homemade Caramels
Alright, this is where the magic happens, but we need to work swiftly and safely once things heat up! When you are working with boiling sugar, you have to respect it—it gets extremely hot. Please, please, please make sure you have your thermometer ready and your pan set up before the stove even comes on. I know it looks intense, but trust me, these instructions will guide you to incredible, chewy caramels every time. Safety first, though—read up on handling hot sugar if you’re new to candy making, because I won’t cover that entire safety spiel here! You can always read more about general disclaimers on my site disclaimer page.
Preparing the Pan and Initial Mixture for Caramels
First things first: the pan. Grab an 8×8 inch baking dish. You need to line it completely with parchment paper, but leave a big overhang on two sides—these become your handles later when we pull the whole block out! Lightly grease that parchment paper; this stops the sugar from grabbing onto it when it cools. Now, into your heaviest saucepan, add your sugar, corn syrup, heavy cream, and all that gorgeous butter.
Put it on medium heat and stir constantly until the butter melts and you can’t see any more distinct sugar granules floating around. It should look smooth before it even thinks about bubbling. This initial merging step is important for a smooth end product, so don’t rush this part!
Cooking the Caramel to the Right Temperature
Okay, time to stop stirring! Clip your candy thermometer right onto the side of the pan, making sure the tip is definitely submerged but not kissing the bottom where it can give you a false high reading. Turn the heat up slightly and let this mixture come to a steady, rolling boil. Seriously, *do not stir* once it starts boiling hard. If you stir, those sugar crystals will grow and turn your mixture grainy instantly.
We are cooking until that thermometer reads exactly 245 degrees Fahrenheit. It takes ages—maybe 15 to 20 minutes—but you have to trust the heat and the thermometer. Ignore everything else! This temperature is the absolute sweet spot for achieving that perfect firm-ball stage that guarantees chewiness.
Finishing and Setting Your Chewy Homemade Candy
As soon as that needle hits 245°F, yank the pan right off the burner! Immediately, but carefully, stir in your vanilla extract and that first half teaspoon of fine sea salt. Stir slowly just until everything is blended—think gentle swirls, not frantic whipping, or you risk splashing hot sugar outside the pan. Pour that impossibly hot liquid right into your prepared pan. Be strong and resist the urge to scrape the sides of the pot; we only want the smooth stuff!
Now for the best part: grab your flaky sea salt and sprinkle it generously all over the top. This creates those beautiful, gourmet bursts of salty flavor in every piece of your caramels. Let it sit undisturbed on the counter for at least three hours. No peeking, and definitely no fridge time! It needs to cool slowly to set up right into those perfect, chewy homemade candy squares.
Tips for Making Perfect Sea Salt Caramels Every Time
I swear by that stovetop method, but I know sometimes you just don’t have an extra 20 minutes to watch a pot boil! Good news: I figured out an almost foolproof microwave caramels tutorial method that gives you results remarkably close to the real deal. It’s perfect for when you need a quick fix of caramels!
If you decide to use the microwave, you still need that candy thermometer, even more so sometimes because microwaves heat unevenly. Just combine your sugar, syrup, cream, and butter in a really large, microwave-safe bowl—it foams up huge! Microwave it on high for five minutes, then stir really well. After that, you microwave it in one-minute blasts, stirring thoroughly between each one, until you hit 245°F. Watch it like a hawk during those last few minutes, because it can go from perfect to scorched in literally ten seconds!
How to Stop Your Caramels From Crystallizing
Crystallization is the absolute enemy of a smooth batch! It’s what happens when tiny sugar crystals form too quickly and ruin that lovely, smooth texture. The biggest culprit is stirring while the mixture is boiling hard—don’t do it! Also, make sure the sides of your pot are clean before you start boiling vigorously. If you see any sugar residue clinging high up the sides of the pan after adding your main ingredients, grab a pastry brush, dip it in plain water, and just gently wash those stray bits down into the liquid.
Using corn syrup in the recipe is our main defense here, as it acts as an “interfering agent,” keeping the pure sugar molecules from grouping up and getting sandy. If you follow that temp rule (245°F!) and keep the sides clean, your sea salt caramels should stay beautifully smooth and shiny.
My Rule on Scraping the Pot
This next tip is something I learned the hard way: when you pour the finished caramel into your prepared pan after adding the vanilla and salt, *do not* scrape the bottom or sides of the saucepan. I know, it’s wasteful, but those last few sticky bits that bake onto the cooling sides are often slightly hotter or slightly burnt. If you scrape them in, they contaminate the whole batch with a slightly bitter note or, worse, introduce those tiny crystals we were trying so hard to avoid. Just let the main smooth mixture flow out, and sacrifice the last little bit stuck to the metal for the sake of perfect buttery caramel treats.
Why You Must Let Them Cool At Room Temperature
Resist the urge to rush the cooling process by sticking them in the fridge! When something hot hits a cold surface fast, it can cause moisture condensation to happen inside the candy, which makes them sticky when you finally try to wrap or cut them days later. For the best texture in your finished caramels, just let that pan sit totally alone on the counter for three or more hours. You want them completely firm to the touch before you attempt cutting. Patience earns you the chewiest payoff!
Ingredient Notes and Maple Variations for Caramels
I want to talk a little more about *why* we use certain things in this recipe for our caramels. Understanding the role of an ingredient makes you a much better baker, or in this case, a better candy maker! For example, some people see corn syrup on the list and think, “Can’t I just swap that out for more sugar?” Nope! Corn syrup is actually our secret weapon against grainy texture because its unique glucose chains stop the pure granulated sugar from clinging onto itself and crystallizing when it gets hot.
It keeps these candies wonderfully smooth and pliable. If you skip it, you’re risking a batch of hard, crumbly treats instead of the beautiful, soft caramels we are aiming for here.
The Role of Butter and Cream Quality
Seriously, don’t skimp on the butter or the heavy cream! Because there are so few ingredients in these caramels, they all have to shine. High-quality, unsalted butter gives you that signature rich flavor that makes people ask, “Wow, did you buy these?” Using heavy cream, which has that required 36% fat minimum, ensures a higher fat content that slows down the setting process slightly, which keeps things softer for longer.
Low-fat dairy alternatives don’t have the structure to handle the high cooking temperature we need to hit for perfect texture. Think of the fat as the insurance policy for soft, melt-in-your-mouth candy!
Simple Maple Syrup Substitution
If you love that hint of fall flavor, I have a little trick up my sleeve for creating maple-accented caramels without totally changing the structure of the recipe. Remember how I mentioned we use 1 cup of granulated sugar? You can swap out 1/4 cup of that white sugar for 1/4 cup of pure maple syrup. You should use Grade A Dark Robust flavour if you can find it, because it has the best maple punch!
When you make this swap, make sure you still cook the mixture to the full 245°F. The maple syrup actually adds moisture, so you might find it takes just a minute or two longer to reach the correct temperature, but the flavor payoff is absolutely worth the extra monitoring time. It makes for phenomenal gourmet gifts, too!
Storing and Gifting Your Gourmet Caramel Gifts
Once these gorgeous candies are cut, the next big step is making sure they stay perfect until you decide to eat them—or, even better, until you decide to give them away! These are honestly the kind of treats that make people rethink every single **holiday candy recipe** they’ve ever bought. People always ask me how I keep mine from sticking together in the big tins, and the secret lies entirely in the wrapping!
Never, ever store these unwrapped. They will fuse into one giant, sugary mass, and then you’ll be sad. You need individual wrapping to protect that perfect, slightly tacky outer layer and keep them fresh.
The Best Way to Wrap Soft Caramels
You absolutely must wrap each little square individually. I prefer using squares of wax paper—the kind you use for separating cookies—because it peels away without tearing off any of the caramel surface. Cut the wax paper into squares that are maybe twice the size of your finished candy. Lay the caramel in the center, pull the opposite sides up like you’re wrapping a piece of hard candy, and twist the ends tightly so it seals in that buttery flavor.
If you want something a bit fancier for gifting, cellophane bags work wonderfully, too. You can get clear cello bags, drop in about 10 to 15 pieces, tie the top with some pretty kitchen twine, and suddenly, you have professional-looking **gourmet caramel gifts** ready for the neighbors or teachers!
Where to Store Your Homemade Treats
Here is another crucial point where people mess up their hard work: storage temperature! These candies are designed to be soft and chewy, which means they hate the fridge! Do not store that container in the refrigerator. The cold temperature actually alters the internal structure a little, and while they might firm up too much, the main issue is condensation when you bring them back out to room temperature.
Keep them in a truly airtight container—a rigid tin works best—at a cool room temperature. Think kitchen cabinet, not over the stove! If you store them correctly, they stay absolutely perfect and fresh for up to two full weeks. Trust me, they usually don’t last that long around here!
Making Large Batches for the Holidays
If you are planning on making a huge batch for Christmas, Easter, or just a big family party, you’ve timed this perfectly because this recipe scales up wonderfully! When you double or triple the recipe, though, the cooking time will increase significantly, sometimes by as much as 10 minutes, because you have more volume heating up. Always watch that thermometer rather than the clock!
If you’re making a massive amount, plan on dedicating an entire afternoon just to cutting and wrapping. It’s tedious, but worth it. I play an audiobook or a favorite podcast while I wrap everything; it makes the time fly by, and before you know it, you have a huge stash of wonderful **buttery candy** ready to go!
Frequently Asked Questions About Making Caramels
I always get so many questions once people start experimenting with making their own sweet treats! Since this recipe is technically an old fashioned caramels method cooked on the stovetop, there are a few things people are always wondering about before they start. Hopefully, these common queries clear up any final doubts about making these wonderful caramels!
Can I skip the corn syrup and just use more sugar for an easy caramel candy?
Oh, I really wouldn’t recommend that! That’s one of the biggest mistakes people make when trying to find a super quick or easy caramel candy variation. Corn syrup is essential because it’s what’s called an invert sugar. It keeps the pure granulated sugar you’re using from grabbing onto itself and crystallizing when it gets hot. If you replace it all with sugar, you’ll likely end up with a grainy, gritty texture rather than the smooth, soft results you want from my recipe.
Why did my homemade caramels turn out so soft and sticky instead of chewy?
Nine times out of ten, this means your heat didn’t stay on long enough! For the perfect soft and chewy caramels, you absolutely *must* hit 245 degrees Fahrenheit. If you pull the mixture off the stove at, say, 240°F, it’s going to be sauce-like or just too soft to cut neatly. It needs that extra few degrees of cooking to allow enough moisture to evaporate so it firms up nicely when it cools down correctly at room temperature.
Can I make these caramels ahead of time for the holidays?
Yes, you totally can! These are fantastic for making in large batches, which is why I call them great holiday candy recipes. The only catch is storage. Once you cut and wrap them individually (which is the most time-consuming part!), they store beautifully at cool room temperature for about two weeks. Store them in a good, airtight container. Do not freeze them, and seriously, keep them out of the fridge!
Is the microwave method truly a good alternative for these caramels?
It’s a good *alternative* if time is your enemy, but I’ll be honest—the stovetop method provides a much richer, deeper flavor because the slow, steady heat caramelizes the butter and cream a little more evenly. The microwave method is faster for sure, and you can still get a decent chew with careful monitoring, but if you’re aiming for the absolute best, richest flavor profile, stick to the heavy saucepan. If you want a quick fix, though, the microwave version is much better than giving up and buying store-bought ones!
If you have any concerns about how I handle your data after reviewing these recipes, please take a moment to look over my privacy policy.
Estimated Nutritional Information for These Caramels
I always get asked about the damage these delightful little squares will do, and while I’m not a nutritionist, I did run the numbers based on standard ingredient weights so you have a general idea. Keep in mind, since we are using real butter and heavy cream, these are certainly rich treats!
This estimate is based on getting about 64 pieces from a single batch. Since these are so flavorful, cutting them small means a little bit goes a long way, thank goodness. Please remember this is just an estimate, especially if you swap out ingredients for your own caramels!
- Serving Size: 4 squares
- Calories: 220
- Fat: 9g (Saturated Fat: 5g)
- Carbohydrates: 36g
- Sugar: 35g
- Protein: 1g
- Sodium: 95mg
Just a quick reminder that figures can vary based on the exact brands of butter or sugar you use, so this information should be considered a basic guide for these homemade caramels. You can read more detailed site-wide terms and conditions here.
Share Your Experience Making These Homemade Caramels
I really hope you felt brave enough to try these stovetop babies! Making candy from scratch is such a rewarding feeling. When you pull that block out of the pan and sprinkle on that final note of sea salt, you’ll understand why I love this recipe so much.
Did you stick to the classic recipe, or did you try that maple syrup variation? I want to know! Please, please leave me a rating below letting me know how soft and chewy your homemade caramels turned out. If you snap a picture of your finished, perfectly wrapped squares, tag me online! It makes my whole week to see your success. If you ever have questions or feedback about the recipe itself, don’t hesitate to reach out using my contact form!
Estimated Nutritional Information for These Caramels
I always get asked about the damage these delightful little squares will do, and while I’m not a nutritionist, I did run the numbers based on standard ingredient weights so you have a general idea. Keep in mind, since we are using real butter and heavy cream, these are certainly rich treats!
This estimate is based on getting about 64 pieces from a single batch. Since these are so flavorful, cutting them small means a little bit goes a long way, thank goodness. Please remember this is just an estimate, especially if you swap out ingredients for your own caramels!
- Serving Size: 4 squares
- Calories: 220
- Fat: 9g (Saturated Fat: 5g)
- Carbohydrates: 36g
- Sugar: 35g
- Protein: 1g
- Sodium: 95mg
Just a quick reminder that figures can vary based on the exact brands of butter or sugar you use, so this information should be considered a basic guide for these homemade caramels. You can read more detailed site-wide terms and conditions here.
Share Your Experience Making These Homemade Caramels
I really hope you felt brave enough to try these stovetop babies! Making candy from scratch is such a rewarding feeling. When you pull that block out of the pan and sprinkle on that final note of sea salt, you’ll understand why I love this recipe so much.
Did you stick to the classic recipe, or did you try that maple syrup variation? I want to know! Please, please, leave me a rating below letting me know how soft and chewy your homemade caramels turned out. I’m dying to hear about your success!
If you snap a picture of your finished, perfectly wrapped squares, tag me online! It makes my whole week to see your success out there. If you ever have questions or feedback about the recipe itself, don’t hesitate to reach out using my contact form!
PrintSoft and Chewy Homemade Sea Salt Caramels
A recipe for making soft, chewy, buttery caramels from scratch, with an option for microwave preparation.
- Prep Time: 10 min
- Cook Time: 20 min
- Total Time: 3 hours 30 min
- Yield: About 64 pieces
- Category: Candy
- Method: Stovetop Cooking
- Cuisine: American
- Diet: Vegetarian
Ingredients
- 1 cup granulated sugar
- 1 cup light corn syrup
- 1 cup heavy cream
- 1/2 cup unsalted butter
- 1 teaspoon vanilla extract
- 1/2 teaspoon fine sea salt (for the mixture)
- Flaky sea salt (for topping)
Instructions
- Line an 8×8 inch pan with parchment paper, allowing excess paper to hang over the sides for handles. Lightly grease the paper.
- Combine sugar, corn syrup, heavy cream, and butter in a heavy-bottomed saucepan.
- Stir constantly over medium heat until the butter melts and the sugar dissolves.
- Attach a candy thermometer to the side of the pan, making sure the tip does not touch the bottom.
- Stop stirring and bring the mixture to a boil. Cook until the mixture reaches 245 degrees Fahrenheit (firm ball stage). This usually takes 15 to 20 minutes.
- Remove the pan from the heat immediately. Carefully stir in the vanilla extract and 1/2 teaspoon of fine sea salt. Stir slowly to avoid splashing.
- Pour the hot caramel mixture into the prepared pan. Do not scrape the sides of the pan.
- Sprinkle the top evenly with flaky sea salt.
- Let the caramel cool completely at room temperature for at least 3 hours, or until firm. Do not refrigerate.
- Once firm, use the parchment paper handles to lift the block of caramel out of the pan.
- Cut the block into 1-inch squares. Wrap each square individually in wax paper or cellophane for storage.
Notes
- For a microwave method: Combine sugar, corn syrup, cream, and butter in a large, microwave-safe bowl. Microwave on high for 5 minutes. Stir well. Microwave in 1-minute intervals, stirring after each, until the mixture reaches 245 degrees Fahrenheit. Watch carefully as boiling can happen quickly.
- If you prefer a maple flavor, substitute 1/4 cup of the granulated sugar with 1/4 cup of pure maple syrup.
- Store wrapped caramels in an airtight container at room temperature for up to two weeks.
Nutrition
- Serving Size: 4 squares
- Calories: 220
- Sugar: 35
- Sodium: 95
- Fat: 9
- Saturated Fat: 5
- Unsaturated Fat: 4
- Trans Fat: 0
- Carbohydrates: 36
- Fiber: 0
- Protein: 1
- Cholesterol: 30