

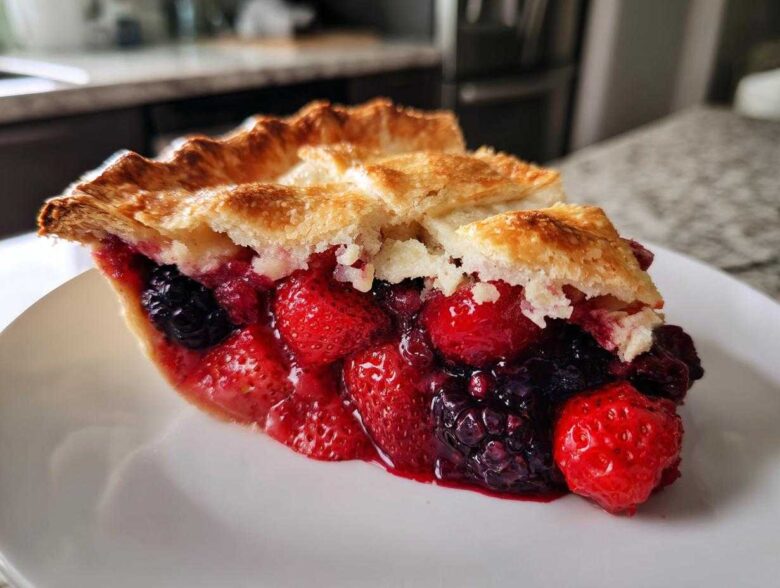
Forget those sad, watery fruit pies you see sometimes; we’re making something truly spectacular here! When the summer berries hit their peak – you know, those perfect strawberries, tart raspberries, and sweet blueberries – there’s only one thing that matters: the triple berry pie. This isn’t just any recipe; this is the one that finally cracked the code on flavor balance and, more importantly, that impossibly flaky crust. I spent so many Fourth of Julys testing butter temperatures and doing endless folds to get the crust just right. If you want to know a little more about where my baking journey started, check out my About Me page! Trust me, after years of practice, this version of the classic American pie is unbeatable. Get ready for the best summer dessert you’ll ever make!
Why This Is the Best Triple Berry Pie Recipe You Will Ever Make
People ask me all the time what makes this Best Triple Berry Pie Recipe so much better than others, and honestly, it comes down to dedication to simplicity. We aren’t using fancy, obscure ingredients; we are just using the *right* combination of our summer favorites. The magic is in that specific mix of strawberries, raspberries, and blueberries working together. It hits that perfect spot between sweet and tangy that commercial pies never manage to capture.
The Perfect Sweet and Tart Berry Filling
When you combine those three berries, you get layers of flavor, see? The strawberries bring the sweetness, the raspberries add their distinct tartness, and the blueberries offer that earthy depth. The secret weapon here is just the right amount of cornstarch mixed in with the sugar. This guarantees you a thick, glossy, and perfectly set filling every single time. Say goodbye to pouring out a stream of runny juice! We want a Juicy Berry Pie Filling that actually holds its shape when you cut it.
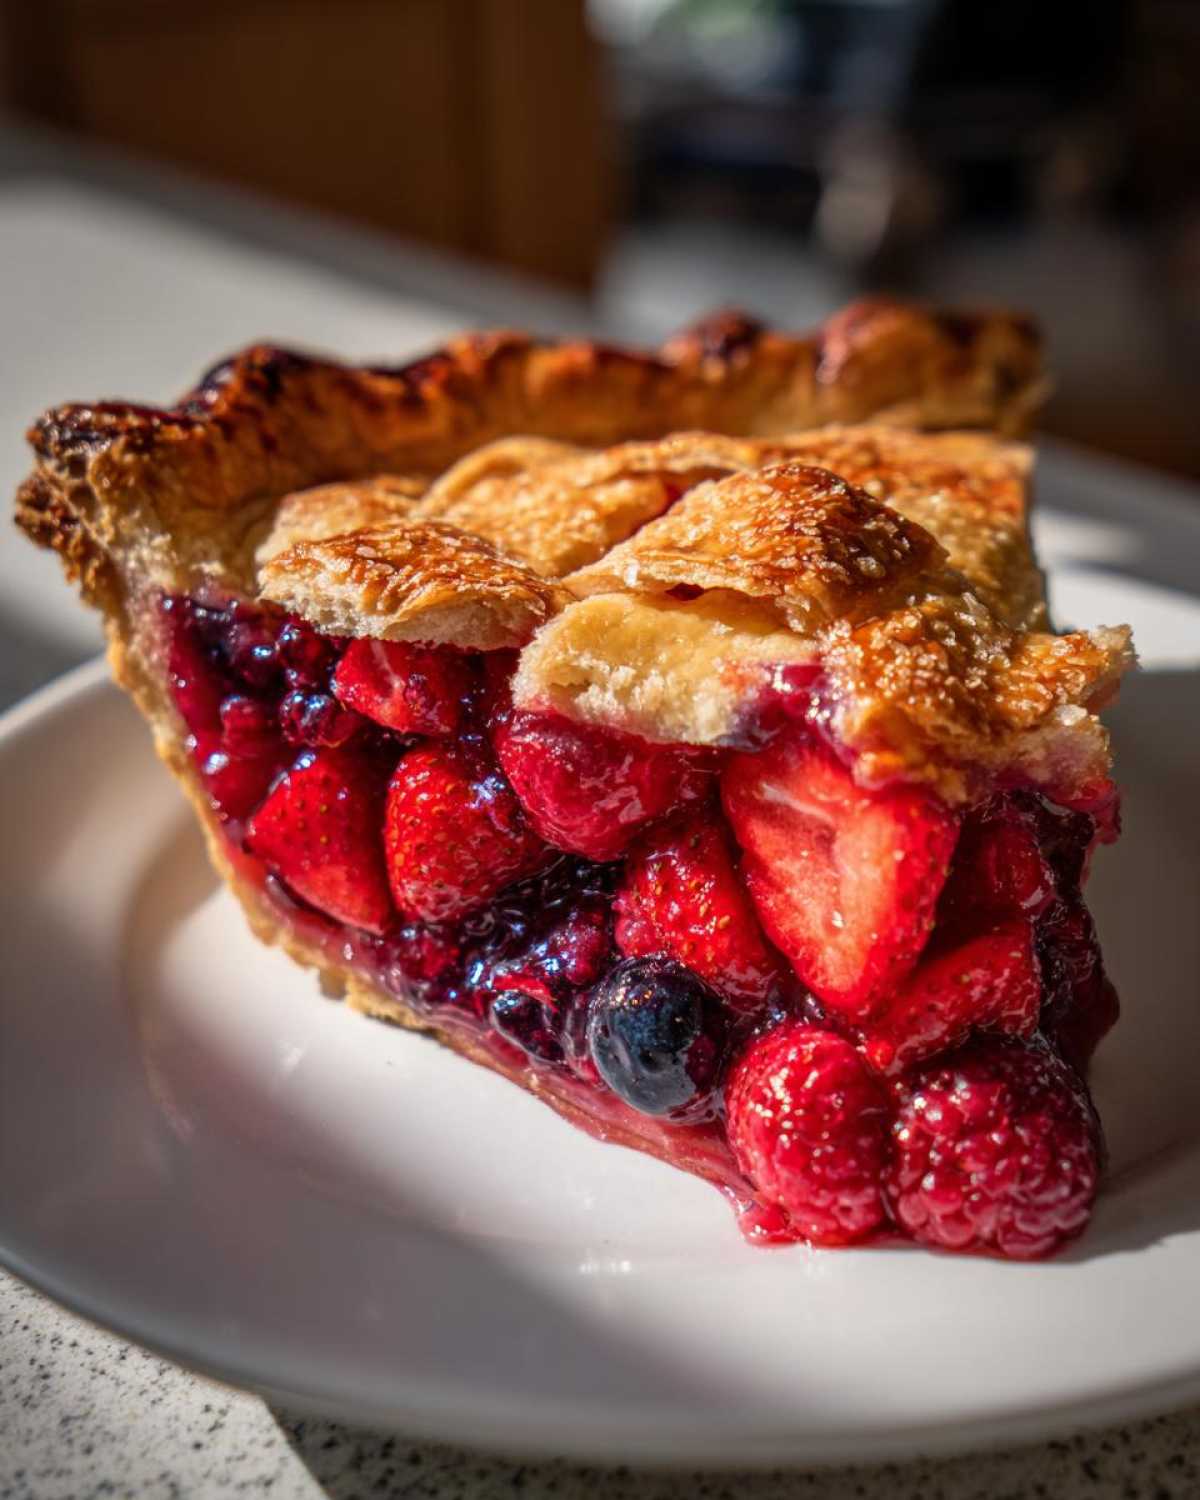
Achieving the Ultimate Flaky Pie Crust Secrets
Look, you can have the best berries in the world, but if your crust is tough or soggy, you’ve messed up the whole experience. I swear by the absolute necessity of ice-cold butter for this crust. If the butter stays in distinct little pieces when you mix it, those pieces create steam pockets in the oven, which means flaky layers! Mastering these Flaky Pie Crust Secrets is what separates an okay pie from an amazing one. Don’t rush the chilling time—it’s absolutely important!
Ingredients for Your Homemade Fruit Pie Crust
Okay, let’s talk foundation—the crust! This is where the structure of your Homemade Fruit Pie Crust comes from, and cold, cold, cold butter is non-negotiable. Seriously, you want that butter to feel like a rock pulled straight from the freezer. We need that temperature difference when it hits the dry stuff to create those beautiful, shatteringly flaky layers we are after!
- 2 1/2 cups all-purpose flour
- 1 teaspoon salt
- 1 cup (2 sticks) cold unsalted butter, cut into small cubes
- 1/2 cup ice water, plus more if needed
Make sure you have just enough ice water to bring it together—no more! We are aiming for a shaggy dough, not a pancake batter, which is why chilling this dough afterwards is so important to let the gluten relax.
Assembling the Sweet and Tart Berry Filling for Your Triple Berry Pie
Now that the crust dough is chilling away, we can focus on the star of the show: the berries! Remember, we need a glorious total of 6 cups of fruit to fill that deep dish. This mixture of strawberries, raspberries, and blueberries is crucial for that perfect Sweet and Tart Berry Filling we talked about earlier.
Here are the bits you need for the inside goodness:
- 6 cups mixed berries (strawberries, raspberries, blueberries), hulled and halved if large
- 1 1/2 cups granulated sugar
- 1/4 cup cornstarch (This is our thickening superhero!)
- 1 tablespoon lemon juice
- 1 teaspoon vanilla extract
Put these all into a big bowl and gently mix them with a spatula. You don’t want to smash the raspberries into jam before they even hit the oven! Just stir until everything gets coated in that sugary shimmer. Let that sit while your dough finishes chilling—it helps the juices start to flow a tiny bit before baking.
Step-by-Step How to Make Berry Pie From Scratch
Alright, deep breath! This is where we bring everything together. Making a proper fruit pie from scratch might sound intimidating, but if you follow these steps closely, you’ll see that this How to Make Berry Pie From Scratch is actually super straightforward. Think of this as your personal, Easy Berry Pie Tutorial that guarantees success. We’ve got the perfect filling ready, now it’s time to deal with the dough we chilled!
Making and Chilling the Homemade Fruit Pie Crust
Remember our dough disks? Time to wake them up! Take one disk out of the fridge. I usually let it sit on the counter for maybe five minutes—just long enough so it’s not rock hard, but still quite cold. Flour your surface lightly, and use your rolling pin to gently coax that disk into about a 12-inch circle. Don’t wrestle with it! If the dough starts cracking annoyingly, just let it rest for two minutes. We are aiming for that rustic, hand-rolled look, so don’t stress inches!
Carefully drape that circle over your 9-inch pie plate. Now, gently ease it into the bottom without stretching it—stretching causes shrinkage later! Trim the edges, leaving about an inch hanging over the side. Get that bottom crust nestled in nicely, and then dump all that beautiful berry mix right on top. If you want a little extra richness, dot the top with a few tiny knobs of butter—I always do that!
Assembling and Baking the Triple Berry Pie
This is the fun part where we decide on the look! Get your second dough disk out. Are you going to weave a beautiful lattice top, or are you going for the classic single sheet? If you go classic, you absolutely must cut steam vents—three or four good slits right down the middle. If you do a lattice, the slits are naturally built in!
Place the top crust (or lattice) over the filling and seal those edges. I like to crimp mine by pinching the top and bottom dough edges together with my fingers, making a nice, thick border. Now for the glow-up: Mix your egg (that’s the wash) and paint it all over the top crust. Then, sprinkle that coarse sugar on top—this makes the crust sparkle and helps it brown beautifully. Don’t forget that little bit of butter we diced for the top earlier!
We start hot! Oven goes to 400°F (200°C). Bake for 20 minutes. This burst of initial high heat sets the bottom crust structure so it doesn’t turn soggy. After 20 minutes, you need to drop the heat down to 375°F (190°C) for another 35 to 45 minutes. This is essential for the Triple Berry Pie filling to bubble and thicken slowly. If you see the edges getting too dark before the filling looks gooey, just tear off a small piece of foil and loosely drape it over the rim. When it’s done, the crust is golden, and you can see thick bubbles wiggling deep inside!
Tips for a No Fail Berry Pie Recipe
Okay, so you pulled your pie out, and it looks gorgeous—golden brown and smelling like pure summer heaven! But we have to talk about the hardest part of baking any fruit pie: letting it breathe! When you pull this No Fail Berry Pie Recipe out of the oven, do not, I repeat, do NOT slice into it immediately. You have to let it cool for at least four hours!
I know it’s torture, but that time lets the cornstarch do its magic and firm up the filling. If you cut it too soon, you get soup! Also, a quick note on berries: if you have to use frozen ones—maybe you only caught the very first berries of the season—just don’t thaw them first. Toss them in frozen. You might need an extra tablespoon of cornstarch, but they bake up beautifully if you keep them cold.
For that perfect golden top, remember the egg wash and coarse sugar sprinkle we added before baking? That’s your ticket to a professional-looking finish. It really makes this pie shine among all your other Seasonal Fruit Desserts.
Triple Berry Pie Topping Ideas and Serving Suggestions
So, you’ve got your gorgeous, thick filling tucked under that bottom crust. Now comes the fun part where you get to be artistic! While a simple top crust with beautiful vents works wonders, sometimes you want to show off a little, right? This is where we elevate your pie from great to showstopper status.
If you decided to go for a lattice weave—which results in a stunning Triple Berry Pie with Lattice Top—make sure your strips are uniform. It takes practice to get those clean overlaps, but the payoff is worth it because you get to peek right through at those bubbling blueberries and raspberries.
Another fantastic option that cuts down on some of the pastry work is a streusel! Oh my goodness, the texture contrast is just heavenly. You whip up a simple crumble using flour, sugar, oats if you like, and plenty of cold butter until it looks like chunky gravel. Sprinkle this generously over the filling before baking. It creates a wonderfully crunchy top that contrasts beautifully with the soft, juicy berries underneath. It’s fantastic for casual gatherings.
When it comes to serving these incredible Summer Berry Desserts, you can’t go wrong classic style. A scoop of good quality vanilla bean ice cream melting slowly over that warm slice? Perfection. Or, if you’ve had a big meal, sometimes just a dollop of freshly whipped cream offers the perfect light counterpoint to all that wonderful fruit richness. Honestly, whatever you choose, just make sure you have a fork ready!
Storage and Reheating Instructions
Okay, if you somehow manage to have leftover slices of this amazing pie—and I highly doubt you will, but we plan for contingencies!—you need to know how to store it properly so that crust stays somewhat crisp.
Since our filling sets up beautifully, leaving it on the counter at room temperature is usually fine for the short term, maybe half a day if your kitchen isn’t too warm. However, for anything longer than that, or if we’re having a very hot summer day, sealing it up tight and putting it in the fridge is the safest bet. A slice of this Classic American Pie will keep happily under plastic wrap or in an airtight container for about three to four days in the refrigerator. Just know that the pastry will soften a bit in the cold—that’s just physics!
Now, for reheating! If you let that pie sit in the cold fridge, you absolutely have to warm it up to bring that buttery crust back to life. You do *not* want to microwave a slice—it turns the crust into chewy rubber, and we worked too hard on that flakiness!
The best way to revive a slice is in the oven. Preheat your oven to about 350°F (175°C). Place the slice directly on a rimmed cookie sheet or wrap the slice loosely in foil if you are worried about the edges getting too dark. Pop it in for about 10 to 12 minutes. This warms the filling through gently and dries out those crust edges just enough so they snap instead of bend when you bite in. Serve it warm with a little extra whipped cream, and honestly, it tastes almost freshly baked!
Frequently Asked Questions About This Classic American Pie
I get so many questions after folks try out this recipe for the first time, which is wonderful! It just shows how much people love a good fruit pie. Sometimes the little details trip people up, so let me tackle the most common concerns I see people asking, especially over on my contact page!
Can I use pre-made crust for this recipe?
Oh, honey, you absolutely *can* use store-bought crust if you are in a huge rush! I won’t tell anyone, I promise. But here’s the thing: if you want the incredible, shatteringly flaky results we discussed, you really need that homemade dough. Our detailed instructions for the Homemade Fruit Pie Crust ensure those cold butter chunks survive the mixing process, giving you those distinct layers. Pre-made crusts are often softer and don’t achieve that sturdy, buttery structure needed to hold up against all this glorious berry filling.
How long must the pie cool before slicing?
This is the hardest rule in pie baking, but you absolutely must follow it! You need to let your beautiful Triple Berry Pie cool for a minimum of four hours after it comes out of the oven. If you slice into it after an hour because you just can’t wait, I guarantee you’ll end up with a messy plate of cooked berries swimming in juice because the cornstarch hasn’t had the time and temperature gradient to fully set the filling. Patience here means perfect slices later!
What is the best way to thicken a berry pie filling?
Cornstarch is the workhorse for thickening, hands down, especially in a mix this juicy. We use a quarter cup because it’s exactly the right amount to gel up around the berries as they bake and cool. But don’t forget the lemon juice! While the cornstarch does the heavy lifting structurally, that squeeze of lemon juice brightens everything up. It cuts through the sweetness of the sugar and really makes the natural tartness of the raspberries pop. It’s flavor magic, not just science!
Nutritional Estimates for Your Slice of Pie
Now, I have to be super honest with you all here. I’m a baker, not a certified nutritionist! I’ve run the numbers based on the sugar ratios and the butter content in this deep-dish beauty, but these figures are just an estimate for one slice. If you make this decadent dessert for huge gatherings, remember that enjoying food is what it’s all about!
For the most precise information, you should always check standard nutritional calculators, but based on my best calculations for a single serving using standard pantry ingredients, here’s what you can expect:
- Serving Size: 1 slice
- Calories: 450
- Sugar: 45g (Yep, it’s a dessert!)
- Sodium: 250mg
- Fat: 25g
- Saturated Fat: 15g
- Unsaturated Fat: 10g
- Trans Fat: 0g
- Carbohydrates: 58g
- Fiber: 4g
- Protein: 5g
- Cholesterol: 60mg
This is definitely your special occasion dessert, meant to be savored! If you want to read more detailed breakdowns about how I handle ingredient sourcing and dietary notes on my recipes, please take a peek at my official disclaimer page. Enjoy every single bite of that flaky crust and juicy filling!
PrintClassic Homemade Triple Berry Pie with Flaky Crust

A recipe for a classic deep-dish pie featuring strawberries, raspberries, and blueberries, made with a buttery, flaky homemade crust.
- Prep Time: 45 min
- Cook Time: 65 min
- Total Time: 110 min
- Yield: 8 servings
- Category: Dessert
- Method: Baking
- Cuisine: American
- Diet: Vegetarian
Ingredients
- 2 1/2 cups all-purpose flour
- 1 teaspoon salt
- 1 cup (2 sticks) cold unsalted butter, cut into small cubes
- 1/2 cup ice water, plus more if needed
- 6 cups mixed berries (strawberries, raspberries, blueberries), hulled and halved if large
- 1 1/2 cups granulated sugar
- 1/4 cup cornstarch
- 1 tablespoon lemon juice
- 1 teaspoon vanilla extract
- 1 large egg, beaten (for egg wash)
- 1 tablespoon coarse sugar (for topping)
Instructions
- Prepare the crust: In a large bowl, whisk together the flour and salt. Cut in the cold butter using a pastry blender or your fingers until the mixture resembles coarse crumbs with some pea-sized pieces of butter remaining. Gradually add the ice water, mixing until the dough just comes together. Divide the dough in half, flatten each half into a disk, wrap in plastic, and chill for at least 1 hour.
- Prepare the filling: In a separate bowl, gently combine the mixed berries, granulated sugar, cornstarch, lemon juice, and vanilla extract. Set aside while you roll out the dough.
- Preheat your oven to 400°F (200°C).
- Roll out one dough disk on a lightly floured surface to a 12-inch circle. Carefully transfer the dough to a 9-inch pie plate. Trim the edges, leaving a 1-inch overhang.
- Pour the berry filling into the crust. Dot the top of the filling with a few small pieces of leftover butter, if desired.
- Roll out the second dough disk. You can cut strips for a lattice top or place the whole sheet over the filling. If using a full top, cut several slits in the top crust to allow steam to escape. Crimp the edges of the top and bottom crusts together to seal.
- Brush the top crust with the beaten egg wash and sprinkle evenly with coarse sugar.
- Bake for 20 minutes at 400°F (200°C). Reduce the oven temperature to 375°F (190°C) and continue baking for another 35 to 45 minutes, or until the crust is golden brown and the filling is bubbling thickly. If the edges brown too quickly, cover them loosely with foil.
- Cool the pie completely on a wire rack for at least 4 hours before slicing to allow the filling to set properly.
Notes
- For a flakier crust, keep all ingredients, especially the butter and water, very cold.
- If you use frozen berries, do not thaw them first; increase the cornstarch slightly (to 5 tablespoons) to absorb extra moisture.
- Serve slices warm or at room temperature with vanilla ice cream or fresh whipped cream.
Nutrition
- Serving Size: 1 slice
- Calories: 450
- Sugar: 45
- Sodium: 250
- Fat: 25
- Saturated Fat: 15
- Unsaturated Fat: 10
- Trans Fat: 0
- Carbohydrates: 58
- Fiber: 4
- Protein: 5
- Cholesterol: 60