

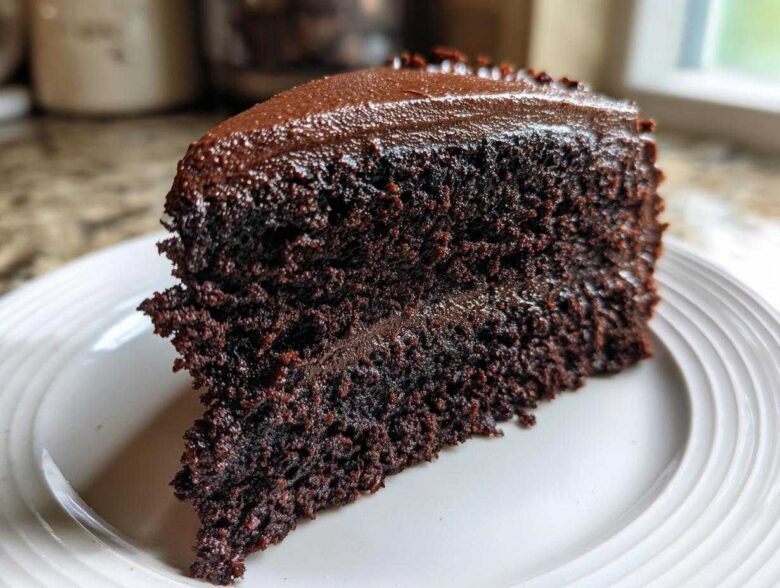
Listen, if you’re dreaming about sinking your fork into a slice of chocolate cake so moist it practically melts, and you think whipping up a real homemade chocolate cake is too complicated? Think again! I’m going to let you in on the absolute easiest, most foolproof recipe I’ve ever used. This isn’t some dry, crumbly mess; this is the real deal—deeply chocolatey and wonderfully tender.
I remember the sheer panic when my little brother turned ten—he demanded a chocolate cake that didn’t taste like cardboard. I whipped this one up, and honestly, it was a lifesaver. We frosted it high and it vanished before the candles were even blown out! That’s the power of this specific homemade chocolate cake recipe; it makes you look like a total baking genius, even if you’re just starting out.
We’re talking about a cake that comes together so quickly, often in just one big bowl, yet it delivers that rich, fudgy flavor you usually only find in expensive bakeries. Stick with me, and I’ll show you the tricks to making this the go-to cake for birthdays, celebrations, or just a Tuesday night when you need some serious chocolate therapy.
I learned a few things over the years, especially about using coffee instead of water—wow, game changer! Seriously, if you want to explore more about my baking philosophy and why simple ingredients treated right make all the difference, you can check out my About Me page, but first, let’s get this chocolate fix started!
Why This Homemade Chocolate Cake is the Best Chocolate Cake Ever
So, why do I keep coming back to this specific recipe when I need a show-stopper? Simple. It hits every requirement for the perfect dessert. It’s shockingly beginner friendly chocolate cake territory, but the flavor is undeniably rich and decadent.
If you’ve ever chased that elusive, perfectly moist crumb, this is it. Forget dry edges or dense centers! I call this my secret weapon because it consistently delivers a chocolate experience that makes people ask for the recipe immediately. It’s proof that you don’t need fifty steps to create the best chocolate cake ever.
Achieving Ultimate Moisture in Your Homemade Chocolate Cake
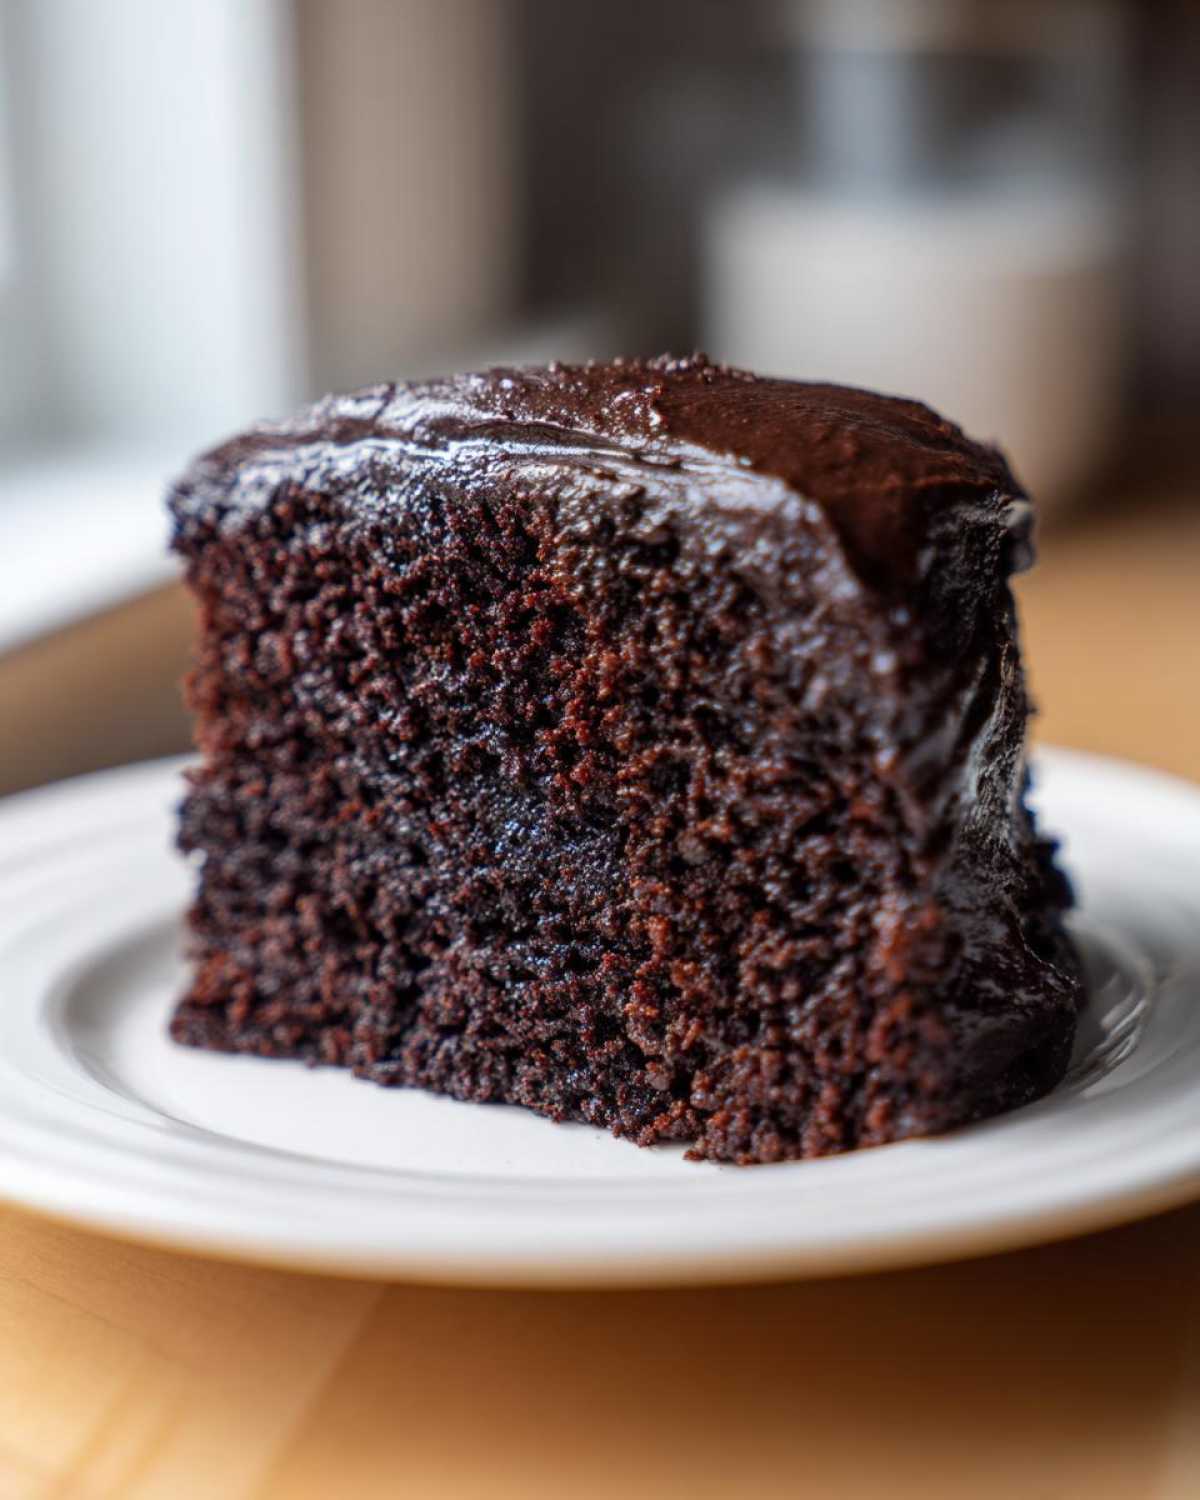
The secret behind this being the ultimate moist chocolate cake recipe lies in two things working together in harmony: the buttermilk and the hot liquid. Buttermilk is acidic, and that acid reacts beautifully with the baking soda, giving us a rise that is light yet sturdy.
Then, we pour in hot water or, even better, hot coffee. That heat blooms the cocoa powder! It dissolves those tiny cocoa particles, releasing intense chocolate flavor we otherwise wouldn’t get. It’s that combination that guarantees a tender crumb that stays moist for days. Seriously, that hot liquid step is non-negotiable!
Gathering Ingredients for Your Easy Chocolate Cake From Scratch
Okay, now that we’ve established that this is the simplest, most reliable homemade chocolate cake out there, let’s run through what you need. The magic of this recipe is that most of this stuff isProbably already hanging out in your pantry. We’re keeping it real, keeping it simple, yet keeping the flavor totally over the top!
For the cake itself, you’ll need:
- 2 cups all-purpose flour
- 2 cups granulated sugar (don’t skimp on the sugar; it helps with moisture!)
- 3/4 cup unsweetened cocoa powder
- 2 teaspoons baking soda
- 1 teaspoon baking powder
- 1 teaspoon salt
- 1 cup buttermilk
- 1/2 cup vegetable oil
- 2 large eggs
- 1 teaspoon vanilla extract
- 1 cup hot water or hot brewed coffee
And for the frosting, because what’s a chocolate cake without a thick layer of buttercream?
- 1 cup (that’s 2 sticks!) unsalted butter, softened just right
- 3 cups powdered sugar
- 1/2 cup cocoa powder
- 1/2 cup milk
- 1 teaspoon vanilla extract
Quick note here, because this matters for that deep, rich flavor: If you’re using coffee instead of hot water, be brave! You won’t taste coffee, I promise. What you *will* taste is a darker, more intense chocolate flavor. I picked up this trick years ago when I needed to salvage a weak-tasting batch, and now I never skip it. For more on how I approach ingredient quality, check out my favorite baking philosophies.
Ingredient Notes and Substitutions for Your Homemade Chocolate Cake
If you’re staring blankly at your fridge when you see “buttermilk,” don’t panic! I always keep regular milk on hand because I can quickly mimic buttermilk. Just mix 1 cup of regular milk with 1 tablespoon of white vinegar or lemon juice and let it sit for five minutes. It gets that perfect curdled texture needed for this cake.
Also, about the cocoa powder: quality matters here. Since this is a chocolate cake through and through, grab the best unsweetened cocoa you can find. Dutch-processed gives a darker color, but any good quality unsweetened powder will shine through because of that hot liquid helping it bloom. This is one of the few times I insist you use real butter for the frosting, too. Margarine just doesn’t cream up with the same fluffy texture!
Step-by-Step Guide to Your Simple Homemade Cake Recipe
This is where the magic happens, and trust me, it’s incredibly straightforward. I want you prepared right from the start: preheat that oven to 350°F (175°C) first thing. Get those two 9-inch round pans greased and floured, or use your favorite cake release spray—don’t let this beautiful batter stick!
Next, we tackle the dry ingredients. In your biggest bowl, whisk together the flour, sugar, cocoa powder, baking soda, baking powder, and salt. Whisking them well right now is key so you don’t end up with random pockets of baking soda later on.
Now, add the wet stuff—except for the hot liquid! Pour in your buttermilk, the oil, those two eggs, and the vanilla extract. Mix this all up with your electric mixer on medium speed for a full two minutes. That two-minute beat time is important for setting up the structure!
Here comes the important part that worries new bakers: Carefully stir in that hot water or coffee. The batter will suddenly look super thin, almost watery. I’m telling you, DO NOT Freak out! This thin batter is exactly what you want. It’s what makes this cake the best homemade chocolate cake because that liquid helps bloom that cocoa!
Divide that thin batter evenly between your two pans. Smooth the tops quickly, and slide them right into the hot oven. You’ll smell how rich it is before they even finish baking.
Baking Times and Testing Doneness for the Homemade Chocolate Cake
We’re looking at about 30 to 35 minutes of bake time. Keep an eye on them, especially around the 30-minute mark. You’re testing for doneness by sticking a wooden pick or thin knife right into the center. If it comes out clean, you’re golden!
But here’s my big tip for keeping this a genuinely moist chocolate cake recipe: Pull them out right when that pick comes out clean, even if it has just a few tiny, moist crumbs clinging to it. If you wait until it’s totally bone dry coming out, you’ve already baked too long, and your cake will suffer later. We pull them out slightly early because they continue to cook in the pan.
Let them cool in those pans for ten minutes—no more, no less! Then, flip them out onto a cooling rack to get totally cold before we even think about frosting. If you try to frost warm layers, you’ll end up with melted chocolate soup, and nobody wants that sad sight!
Crafting the Rich Chocolate Frosting Tutorial
We made the cake—a triumph in moisture and deep cocoa flavor—but now we have to top it, right? A great homemade chocolate cake demands an equally magnificent topping, and this chocolate buttercream is incredibly simple while tasting like pure decadence. This is where you get to practice what I call the “slow and steady” mixing method to avoid making a disaster zone out of your kitchen!
Grab that 1 cup of butter. It absolutely must be softened, nice and pliable, but not melted and oily. Put that into your mixer bowl and beat it until it’s creamy and pale. This helps build the foundation of fluffy air that makes the frosting light.
Now, here’s the moment where most people ruin their rich chocolate frosting tutorial: the dry ingredients. Do NOT dump the 3 cups of powdered sugar and 1/2 cup of cocoa powder in all at once. Seriously, you’ll end up with a brown dust cloud covering every surface of your kitchen. Trust me, I learned that the hard way making my first birthday chocolate cake.
I add them in two or three additions, mixing on the absolute lowest speed until the powder is mostly incorporated into the butter. Once it looks like thick mud, then I can turn the speed up a little. After the sugar and cocoa are mostly mixed in, drizzle in the 1/2 cup of milk and the vanilla extract.
Finally, once everything looks combined, crank that mixer up to medium-high! Beat it for a solid minute or two until it gets light, fluffy, and visibly increases in volume. That’s the air incorporating, and that’s what gives you the perfect texture for spreading smoothly over your cooled layers. Look at that shine! You just nailed the official Rich Chocolate Frosting Tutorial!
Assembling Your Decadent Chocolate Layer Cake
We did the hard part—baking the moist layers and whipping up that gorgeous frosting! Now, for the structure. I cannot stress this enough: these layers absolutely MUST be completely cool before you even think about frosting them. If you rush this, the heat from the cake will instantly turn your beautiful buttercream into a sliding disaster zone.
Once the layers are cool to the touch, place your first cake layer right onto your serving plate. Don’t be like my niece and forget the plate underneath! Spread about a third of your rich chocolate frosting evenly over the top. Then, carefully place the second layer right on top. Use the rest of that frosting to cover the top and the sides of your homemade chocolate cake.
It’s that simple! No fancy techniques needed to turn this into a stunning decadent chocolate layer cake centerpiece.
Tips for Success with Your Homemade Chocolate Cake
You’ve got the recipe, you’ve mixed the batter, and you’ve made amazing frosting. But baking is about habits, right? If you want to guarantee that every single homemade chocolate cake you bake from this recipe knocks it out of the park, here are a few little non-negotiable tips that I live by in my kitchen.
First up, let’s talk temperature again. I know I mentioned it, but it bears repeating! Your eggs and your buttermilk should not be fridge-cold when you mix them in. Cold ingredients really fight against the creamed butter/sugar mixture, and it can affect how everything emulsifies together, leading to a slightly less tender crumb. Leave those two out on the counter while you gather everything else.
Secondly, when it comes to that hot liquid—and I’m serious about this—using hot brewed coffee adds a depth of flavor that water just can’t match. You aren’t making a mocha; you are just enhancing the chocolate notes! If you absolutely hate coffee, use hot water, but try the coffee once, trust me. It makes this an incredible fudgy chocolate dessert.
One final thought specific to storage: If you’re planning this for a weekend party, resist the urge to frost it until the day before, or even the morning of! The cake layers are so moist they hold up beautifully at room temperature under a dome. But if you do refrigerate frosting layers, remember to pull the whole cake out about an hour before serving. Cold cake tastes dense, so letting it warm up just a bit brings back that perfect tenderness.
For more transparency on the ingredients and processes I use, especially regarding cross-contamination or potential allergens in commercial settings, please take a quick look at my baking disclaimer page. It’s important to know where your baker (that’s me!) stands on labeling and ingredient sourcing!
Storage and Reheating Instructions for Leftover Homemade Chocolate Cake
Nobody anticipates having leftovers of the homemade chocolate cake, right? But if, by some miracle, you do end up with extra slices, we need to talk about how to keep that glorious moisture locked in. Since this cake is so wonderfully moist thanks to the oil and buttermilk, how you store it really does affect the next-day experience.
If you plan on eating the rest within two days, room temperature storage is actually your best friend! Keep the frosted cake tightly covered with a cake dome or in an airtight container. Because it has oil instead of just butter in the cake base, it keeps incredibly well on the counter. A sealed container on the counter is perfect for up to two days.
Now, if you’re looking to save it for longer than that, you’ll need the fridge. While the fridge is great for preserving, it’s terrible for texture—it sucks the moisture right out of baked goods! If you chill it, make sure every slice or the entire cake is wrapped really thoroughly in plastic wrap, and then maybe wrap that again in foil. Think of it as building a moisture barrier against that cold, dry air.
When you pull that chilled beauty out, don’t dive right in! That’s the mistake everyone makes. You need to let a slice sit on the counter for at least 45 minutes, maybe an hour if it was wrapped tight. As it comes back up to room temperature, the fats soften again, and you get that fluffy, tender texture back. If you’re in a major rush, you can carefully microwave a single slice for about 10 or 15 seconds—just long enough to take the chill off!
Frequently Asked Questions About This Cocoa Cake Recipe
Can I use regular milk instead of buttermilk in this homemade chocolate cake?
Yes, you absolutely can! I gave you the quick hack above, but let me reinforce it: for every 1 cup of buttermilk this cocoa cake recipe calls for, just take 1 cup of regular whole milk and stir in 1 tablespoon of white vinegar or fresh lemon juice. Give it a gentle stir and let it sit on the counter for about 5 to 10 minutes. It will look slightly curdled, and that’s exactly what you want! That little bit of acid is essential for working with the baking soda, making this an ideal beginner friendly chocolate cake even if you’re missing one ingredient.
Can I easily turn this into a sheet cake instead of a layer cake?
You sure can! If you’re making this for a big crowd or just want fewer layers, pouring this batter into a good quality 9×13 inch pan works perfectly. Since the pan is much shallower than two 9-inch rounds stacked, the baking time will decrease slightly. You’ll want to start checking around the 25-minute mark. Just remember to grease and flour that pan really well, maybe even lining the bottom with parchment paper, because we want an easy release for this famously moist cake!
How do I stop my cake layers from doming or getting a huge hump on top?
Ah, the dreaded dome! That usually happens when the outside edges of the batter set and rise faster than the center. While letting your batter cool down slightly before pouring (around 15 minutes after mixing) helps, the best trick is using ‘baking strips.’ They’re just thick strips of towel soaked in water and wrapped around the outside of your cake pans before baking. They insulate the edges, forcing the cake to cook more evenly from edge to center, which results in a much flatter top. It’s a classic trick for any homemade chocolate cake.
Is it really necessary to use hot coffee or water?
Yes, I would say it’s one of the most important steps for achieving that deep, dark chocolate color and intense flavor. This isn’t just for moisture; it’s about blooming the cocoa powder. When cocoa hits hot liquid, the flavor compounds wake up! You get a much richer, more intense taste than if you just mixed the dry cocoa with room temperature milk. It’s the secret weapon that earns this cake the title of the Best Chocolate Cake Ever, hands down.
If you have any other questions about technique or substitutions after you’ve tried this recipe, feel free to reach out! You can find my contact information here; I love hearing about your baking successes!
Estimated Nutritional Data for This Homemade Chocolate Cake
I always like to give you an idea of what’s in the glorious slice of chocolate heaven you’re about to enjoy! Now, I want to be totally upfront here: I’m not a registered dietitian, and the exact numbers change depending on the brand of flour, the exact size of the eggs, and exactly how thick you spread the frosting. But based on the standard ingredients listed, especially when dividing into 12 servings, here’s a rough estimate of what you’re looking at.
This is a rich cake, folks! We’re using real butter and sugar, so it’s definitely a treat. Remember, these numbers are just a guideline, but they show you why this classic homemade chocolate cake feels so satisfying!
- Serving Size: 1 slice
- Calories: 450
- Sugar: 55g
- Fat: 24g (14g Saturated)
- Carbohydrates: 60g
- Protein: 5g
As you can see by that sugar count, this is reserved for celebrations—it’s not exactly a light snack! But that’s the price of true, decadent chocolate flavor, right?
Just a quick reminder as you plan your indulgences: the nutritional breakdown here is purely an estimate based on common ingredient databases. If you’re tracking intake very strictly, you might want to calculate it based on the specific labels you used. For more general information about my site’s policies regarding data shared on recipe posts, please review my privacy policy. Now go enjoy that beautiful cake!
PrintMoist Homemade Chocolate Cake
A simple, step-by-step recipe for a rich and moist chocolate cake from scratch, complete with a decadent chocolate buttercream frosting.
- Prep Time: 20 min
- Cook Time: 35 min
- Total Time: 55 min
- Yield: 12 servings
- Category: Dessert
- Method: Baking
- Cuisine: American
- Diet: Vegetarian
Ingredients
- 2 cups all-purpose flour
- 2 cups granulated sugar
- 3/4 cup unsweetened cocoa powder
- 2 teaspoons baking soda
- 1 teaspoon baking powder
- 1 teaspoon salt
- 1 cup buttermilk
- 1/2 cup vegetable oil
- 2 large eggs
- 1 teaspoon vanilla extract
- 1 cup hot water or hot brewed coffee
- For Frosting: 1 cup (2 sticks) unsalted butter, softened; 3 cups powdered sugar; 1/2 cup cocoa powder; 1/2 cup milk; 1 teaspoon vanilla extract
Instructions
- Preheat your oven to 350°F (175°C). Grease and flour two 9-inch round cake pans.
- In a large bowl, whisk together the flour, sugar, cocoa powder, baking soda, baking powder, and salt.
- Add the buttermilk, oil, eggs, and vanilla extract to the dry ingredients. Beat with an electric mixer on medium speed for two minutes.
- Carefully stir in the hot water or coffee until the batter is smooth. The batter will be thin.
- Pour the batter evenly into the prepared cake pans.
- Bake for 30 to 35 minutes, or until a wooden pick inserted into the center comes out clean.
- Let the cakes cool in the pans for 10 minutes before inverting them onto a wire rack to cool completely.
- To make the frosting, beat the softened butter until creamy. Gradually add the powdered sugar and cocoa powder, alternating with the milk. Mix until smooth, then add vanilla and beat until light and fluffy.
- Once the cakes are completely cool, frost and stack them.
Notes
- Using hot coffee instead of hot water deepens the chocolate flavor without making the cake taste like coffee.
- Buttermilk helps create a tender crumb; if you do not have buttermilk, mix 1 cup of regular milk with 1 tablespoon of white vinegar and let it sit for 5 minutes.
- For a layer cake, ensure the layers are completely cool before frosting to prevent the frosting from melting.
Nutrition
- Serving Size: 1 slice
- Calories: 450
- Sugar: 55g
- Sodium: 320mg
- Fat: 24g
- Saturated Fat: 14g
- Unsaturated Fat: 10g
- Trans Fat: 0g
- Carbohydrates: 60g
- Fiber: 3g
- Protein: 5g
- Cholesterol: 75mg