

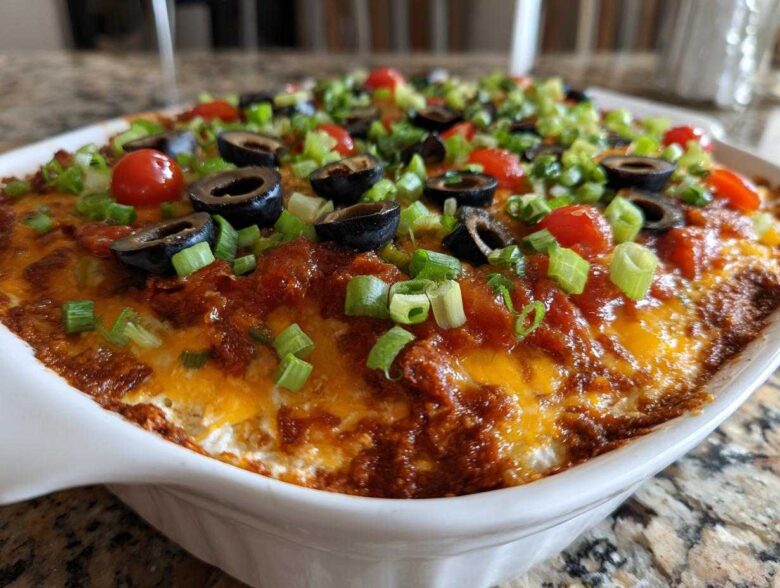
Okay, LISTEN UP! When it comes to party food, if you don’t have a show-stopping, dip-in-the-middle-of-the-table situation going on, what are you even doing? Forget those sad little bowls of chips and salsa; we are leveling up to the ultimate layer dip! I swear, the first time I brought my Classic Seven Layer Dip to a neighborhood BBQ, people abandoned the burgers just to see what it was. Honestly, making this ultimate appetizer is crazy easy, and trust me, it always disappears first. You absolutely need this foolproof recipe in your life. You can check out a little more about how we do things around here at our kitchen HQ!
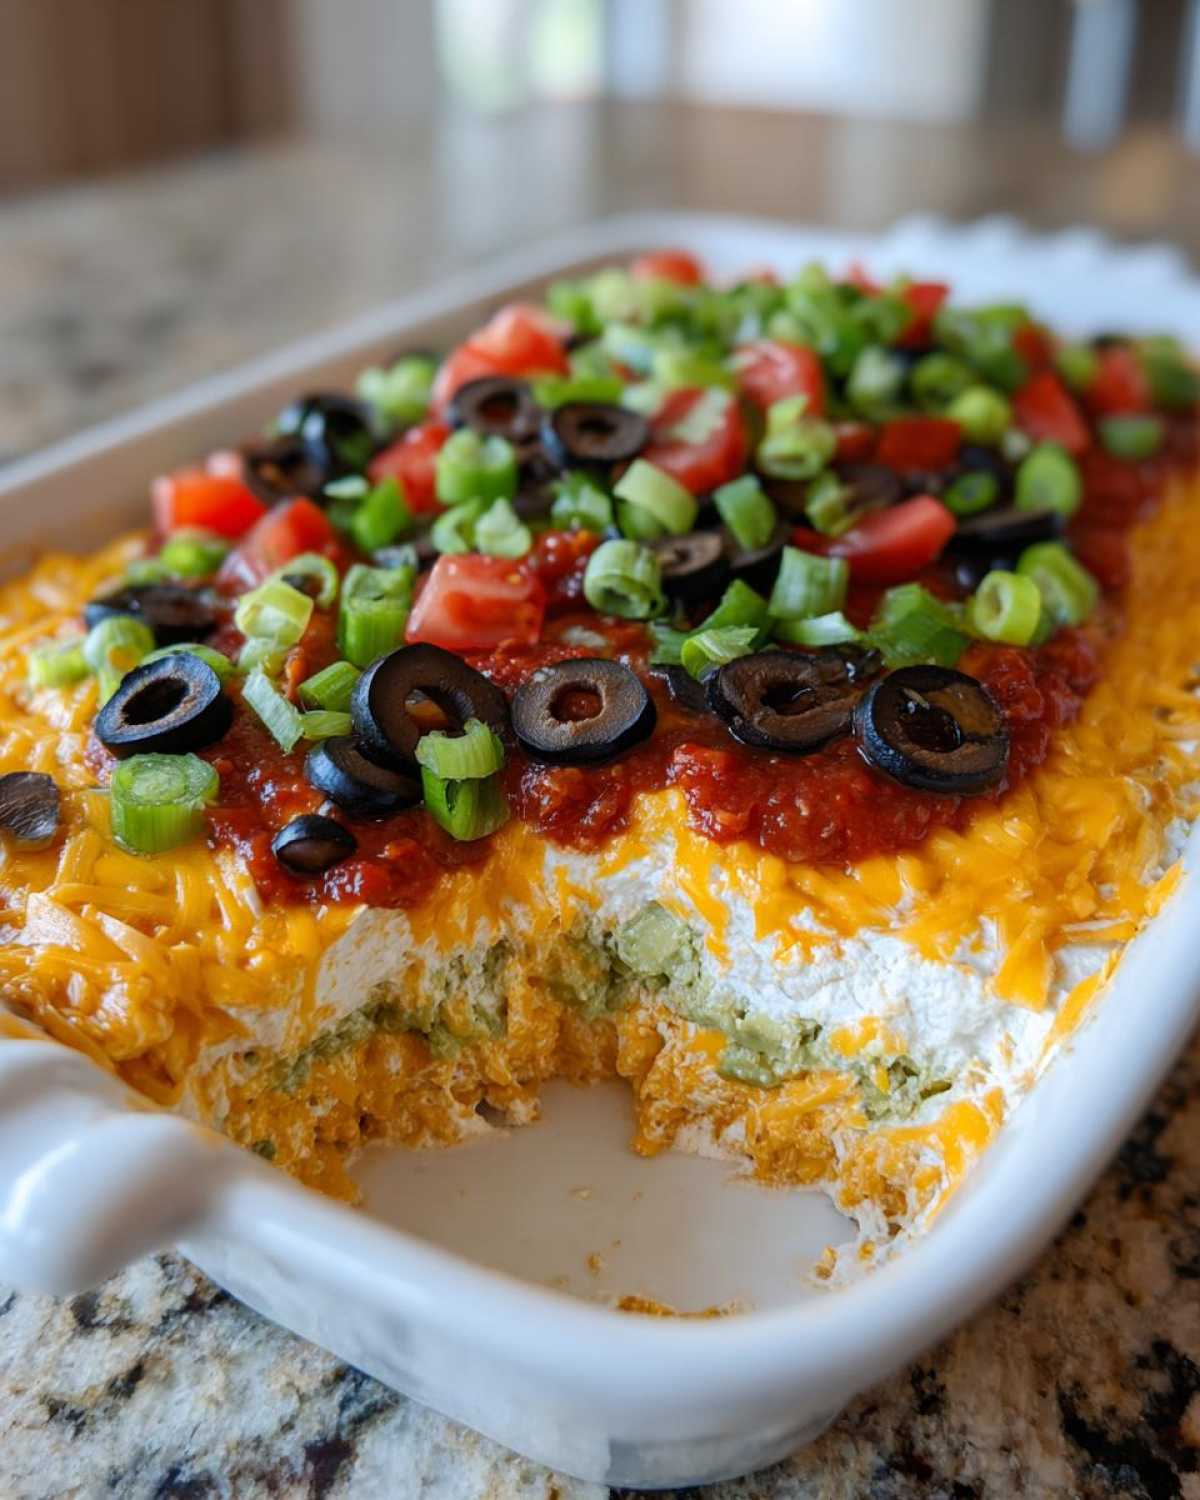
Why This Classic Seven Layer Dip is the Best Party Appetizer Dip
This isn’t just any dip; this is *the* centerpiece for your spread. Seriously, watch people gravitate toward the beautiful colors! It checks every box you need for a successful gathering. It’s vegetarian-friendly, incredibly colorful, and everyone loves digging through all those amazing layer dip flavors.
- It’s practically guaranteed to be the first thing gone.
- It tastes incredible, even when served cold after sitting out a bit.
- It requires absolutely zero oven time, which is a blessing during big holiday cooking sessions!
Quick Assembly for Easy Layered Dip
Prep time clocks in at only about 20 minutes, and guess what? The cook time is zero! That’s right, this classic dip is totally no-bake. This speed makes it the ultimate Easy Layered Dip for those times you need a substantial crowd pleaser fast. Just mix, spread, and chill!
Assembling Your Ultimate Seven Layer Taco Dip
Now we get to the fun part: building this absolute flavor tower! Putting together your Seven Layer Dip is like building with edible bricks—it’s satisfying, and you need to make sure each layer is perfectly placed so it holds up for your party. I always grab my prettiest 9×13 dish for this because presentation is half the fun with this cold dip.
Essential Ingredients for a Perfect Layer Dip
You need the right stuff, treated right! We start with one full package of cream cheese that must be softened—no skipping this, or your base layer will be lumpy, guaranteed. Then you need that savory taco seasoning mix combined with sour cream for that creamy base. The next layers follow: a standard can of refried beans, a cup of guacamole (buy the good stuff, please!), and most importantly, one cup of salsa that you have thoroughly drained. Nobody wants a watery dip! Finish it off with a generous cup of shredded cheddar or Mexican blend cheese, sliced black olives, and a sprinkle of chopped green onions for color.
Step-by-Step Instructions for the Creamy Layered Dip
This is where precision pays off. First, you absolutely have to mix that softened cream cheese, sour cream, and the entire packet of taco seasoning until it’s totally smooth. That’s Layer One! Spread that gorgeous, seasoned cream cheese mixture right across the bottom of your dish. Next, gently spread your refried beans right over that base—try not to mush them together too much. Then comes the guacamole, followed by the drained salsa—make sure everything is evenly spread so every chip gets a taste of everything in this fantastic layer dip.
Finally, top it off with the cheese blend, the olives, and those bright green onions. And here is the non-negotiable step for any Cold Dips for Parties: you must cover it and let it chill out in the fridge for at least an hour. That chilling time lets all those amazing Tex-Mex flavors really get to know each other!
Tips for Success Making Your Favorite Layer Dip Recipes
Okay, so you’ve got the layers assembled, but trust me, a little extra patience here makes all the difference! This layer dip is so much better after the flavors get friendly in the fridge. If you’re planning a big Gameday spread, this is the perfect appetizer because you can totally get it ready the day before. It holds up beautifully, as long as it stays covered tight!
Achieving Firm Taco Dip Layers
If you hate when your layers slightly slide into each other—and who doesn’t?—I have my secret trick for keeping those layers looking super sharp for hours. Right after you mix that cream cheese base, stick it in the fridge for about 30 minutes until it firms up a tiny bit. Do the same thing with the refried beans before you spread them on top! When the layers are slightly chilled and firmer, they stack up so much cleaner. It’s a small step, but for presentation points, it’s everything when serving this amazing Taco Dip Layers.
Make Ahead Dips: Preparing Your Layer Dip in Advance
Planning a huge party or just want to get ahead of the chaos? That’s why this layer dip is my absolute favorite appetizer to make! You can totally prepare this up to 24 hours in advance, which is a lifesaver when you’re trying to juggle mains and sides.
The key is proper coverage. Once you’ve finished assembling all the layers—that great cream cheese base, the beans, the guac, everything—cover the whole dish super tightly with plastic wrap. I mean, really seal those edges! This keeps things fresh and stops any funny fridge smells from sneaking into your perfect taco dip.
When you pull out your Make Ahead Dips the next day, they might look a little more settled, but don’t worry! Let it sit on the counter for about 15 to 20 minutes while you finish setting up your snacks. That little bit of warming allows the flavors to fully bloom again before anyone dives in. It’s the easiest way to serve a gorgeous, fresh-tasting dip without lifting a finger on party day!
Serving Suggestions for This Crowd Pleasing Dip
Presentation is fun, but how you serve this amazing layer dip matters for maximum enjoyment! Since this is a cold dip, you want sturdy dippers that can handle all those creamy, chunky layers.
You can never go wrong with classic tortilla chips—I mean, it’s practically mandatory for a Mexican Dip. But don’t stop there! Having a variety makes everyone happy. I always include sturdy crackers—the kind you find near the cheese section work great. And for those folks trying to keep it a little lighter, I wash and chop up some crisp sturdy veggies like bell pepper strips, celery sticks, and even jicama slices. It makes for a great mix!
Storage and Reheating Instructions for Leftover Layer Dip
Okay, if you actually have any of this incredible layer dip left over—which, honestly, I rarely do because it vanishes the second I set it out—you need to know how to store it right. Since this classic recipe is meant to be served cold, we are definitely not going to reheat it! Putting this through the microwave would just turn those beautiful layers into a hot, cheesy mess, and we worked too hard on the presentation for that.
The best way to keep any leftover Seven Layer Dip is to treat it like a giant tub of sour cream and cheese dip: tightly covered storage in the fridge is the key. You want to make sure you use an airtight seal. I usually press a layer of plastic wrap directly onto the surface of the dip before covering the entire dish with its lid or more wrap.
It will stay perfectly fine and fresh for about three to four days in the refrigerator. The longer it sits, though, the more liquid might seep up from the salsa or the sour cream layers, which is normal for a cold dip. If you notice it’s getting a little watery on day four, just give it a gentle stir right before serving it again, or you can try carefully blotting off any excess moisture on top with a few paper towels. It’ll still be delicious, just maybe slightly less architecturally perfect than when you first made it!
Frequently Asked Questions About Layer Dip Recipes
I get so many questions about this dish because everyone wants their own perfect version of the layer dip! It’s true that once you master this basic structure, you can play around with flavors and spices. But I always tell people to stick close to the core ingredients, especially the base, to keep it structurally sound for party time.
Can I substitute ingredients in this Easy Layered Dip?
You totally can play around, but be smart about it! If you want a spicier kick in your Easy Layered Dip, definitely mix in some finely diced jalapeños or a dash of hot sauce into the cream cheese layer—that’s an easy win. Now, if you skip the beans, you risk your guacamole sinking straight into your cheese base, so I suggest replacing that refried bean layer with something thick like hummus or an avocado mash stabilized with a little lime juice. Please don’t substitute the sour cream with something too thin like regular yogurt; that will make the whole structure weep right there on the platter! We want this to be a fantastic Crowd Pleasing Dip, not a puddle!
If you want to read up on general ingredient rules we follow in the kitchen, check out my kitchen disclaimer for more on substitutions!
Nutritional Information Estimate for Seven Layer Taco Dip
Now, I know what some of you are thinking: is this delicious masterpiece completely off-limits? Well, because this layer dip is full of cheese, beans, and sour cream, it’s definitely a rich appetizer, meant for sharing! We always consider this a hearty party snack, not a diet food, but it’s great to know what you’re diving into.
Keep in mind these numbers are just an estimate based on the standard ingredients listed for the whole batch, divided by 10 servings. Your actual counts might shift based on the brand of cheese or how much salsa you manage to drain off!
- Serving Size: 1/10 of recipe
- Calories: 250
- Fat: 18g
- Saturated Fat: 10g
- Carbohydrates: 15g
- Protein: 8g
- Sodium: 450mg (Watch this one, chips add up!)
- Fiber: 3g
- Sugar: 4g
See? Not too bad for what is essentially a giant, flavorful Mexican Dip Recipe! Just be mindful of the chips you use for dipping, because that’s usually where the calorie count decides to really run wild!
Share Your Game Day Dips Experience
So there you have it! You’ve got the blueprint for what I truly believe is the most reliable, crowd-pleasing, and frankly easiest layer dip in existence. It’s designed to feed a good group—we got about 10 solid servings out of my last batch!
Now, I absolutely need to know what you think! Did you take this Seven Layer Dip to your next big game day? Did you switch out the olives for corn, or maybe add some fresh cilantro on top? Every time someone makes this Mexican dip recipe, I get so excited to hear how it went!
Please, please, please leave me a rating down below—let me know if it was a five-star masterpiece! And if you took a gorgeous picture of your layered creation before everyone demolished it, share it with me! You can always reach out to me directly if you have questions or want to brag about how fast it disappeared. Happy dipping, my friends!
PrintClassic Seven Layer Dip

A popular, easy-to-make, cold layered dip perfect for parties and gatherings.
- Prep Time: 20 min
- Cook Time: 0 min
- Total Time: 20 min
- Yield: 10 servings
- Category: Appetizer
- Method: Chilling
- Cuisine: Tex-Mex
- Diet: Vegetarian
Ingredients
- 1 (16 ounce) package cream cheese, softened
- 1 cup sour cream
- 1 packet (1 ounce) taco seasoning mix
- 1 (16 ounce) can refried beans
- 1 cup guacamole
- 1 cup salsa, drained
- 1 cup shredded cheddar or Mexican blend cheese
- 1/2 cup sliced black olives
- 1/4 cup chopped green onions
Instructions
- In a medium bowl, mix the softened cream cheese, sour cream, and taco seasoning until smooth. This is your first layer.
- Spread the cream cheese mixture evenly over the bottom of a 9×13 inch serving dish or pie plate.
- Spread the refried beans evenly over the cream cheese layer.
- Spread the guacamole over the bean layer.
- Pour the drained salsa over the guacamole layer.
- Sprinkle the shredded cheese evenly over the salsa.
- Top with sliced black olives and chopped green onions.
- Cover the dish and refrigerate for at least 1 hour before serving to allow flavors to meld and layers to set.
Notes
- You can prepare this dip up to 24 hours in advance. Keep it covered tightly in the refrigerator.
- For a firmer layer, chill the cream cheese mixture and the refried beans separately for 30 minutes before assembling.
- Serve with tortilla chips, crackers, or vegetable sticks.
Nutrition
- Serving Size: 1/10 of recipe
- Calories: 250
- Sugar: 4
- Sodium: 450
- Fat: 18
- Saturated Fat: 10
- Unsaturated Fat: 8
- Trans Fat: 0.5
- Carbohydrates: 15
- Fiber: 3
- Protein: 8
- Cholesterol: 45