

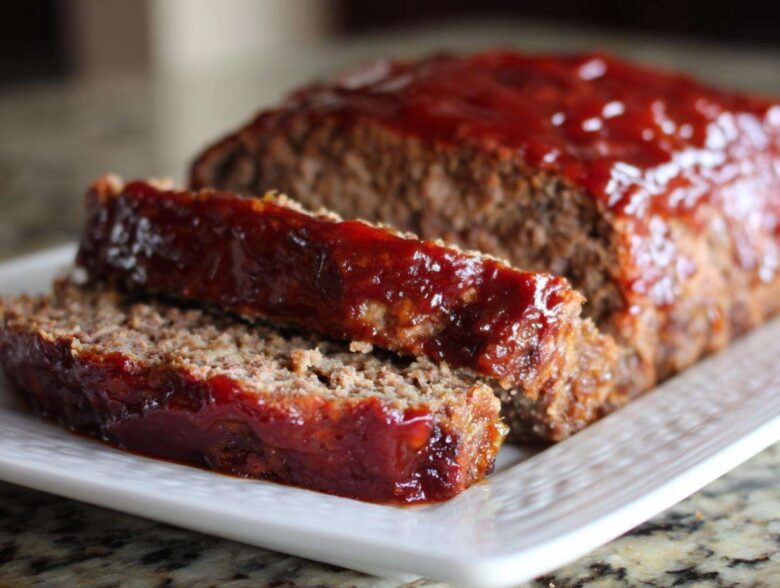
Oh, let’s talk about true comfort food, shall we? Nothing screams “home” quite like a thick slice of meatloaf sitting next to creamy mashed potatoes. I swear, for years, I bounced between dry, crumbly messes and mushy disappointments. I tried all the tricks I saw online—the rubber band method, the baking dish full of water—but nothing worked consistently. So, naturally, I went deep into testing mode!
This isn’t just another recipe; this is the *Best Meatloaf Recipe* I have ever perfected after what felt like a hundred batches. I’ve learned so much about what makes a perfect savory loaf recipe, which you can read more about over on our mission page. Trust me when I say this one is unbelievably moist and so wonderfully tender. It’s my reliable family staple now, and it’s all down to a few little secrets I picked up along the way. You’re going to love how simple this classic meatloaf is to bring together for a weeknight dinner.
Why This Is The Best Meatloaf Recipe You Will Ever Make
If you’re searching for that legendary, can’t-stop-eating-it, fork-tender kind of meatloaf, you found it! This isn’t just another recipe pulled from the pile; this is tried-and-true home cooking that reliably ends up juicy and bursting with flavor. Seriously, people ask for the recipe every single time I serve it.
- It’s unbelievably juicy—no more sad, dry slices here!
- The glaze cuts through the richness perfectly.
- It comes together so fast, making it perfect for any weeknight dinner.
Achieving Peak Tender Meatloaf Texture
The key to a tender meatloaf is all in what you *don’t* do. First off, you absolutely need that 80/20 ground beef—don’t skimp on the fat! Fat is what keeps things moist. Second, and this is crucial, you must mix it gently. I mean it! As soon as you see the ingredients just barely come together, stop mixing immediately. Overworking those ground beef proteins is the fastest way to get something chewy instead of melt-in-your-mouth.
The Secret to a Juicy Meatloaf
Everyone talks about the meat, but the real secret weapon in this meatloaf is the pre-soak. We soak the bread crumbs in milk long before the beef even enters the bowl. This step turns those dry crumbs into little moisture sponges! When everything bakes, those little sponges release all that lovely liquid right back into the loaf. It’s a game-changer for getting that juicy meatloaf result you see on those popular Pinterest pins.
Ingredients for Your Classic Meatloaf
Okay, now we get to the fun part: gathering our components for this beautiful savory loaf recipe! I’ve kept this list short because when you’re making a **classic meatloaf**, you want that pure, homestyle flavor to shine through. No crazy additions needed here, though I’ll give you some wiggle room in the notes below.
Here’s what you’ll need to gather up. Remember, most of this goes into the actual loaf, and a tiny bit goes onto the topping.
- 2 lbs ground beef (I always stress the 80/20 blend here—it’s non-negotiable for that richness!)
- 1 cup dry bread crumbs (Or, if you’re feeling frisky, go ahead and use a packet of Stove Top Stuffing mix for extra flavor! I won’t tell anyone.)
- 1/2 cup milk
- 1/2 cup finely chopped onion (Make sure it’s small, we don’t want big chunks!)
- 1/4 cup ketchup (Yes, for the mix *and* the glaze!)
- 1 large egg, lightly beaten
- 1 teaspoon salt
- 1/2 teaspoon black pepper
- 1/4 teaspoon garlic powder
- Glaze: 1/4 cup ketchup, 2 tablespoons brown sugar, and 1 tablespoon apple cider vinegar
Ingredient Notes and Substitutions for Meatloaf
Knowing *why* you use what you use makes you a better cook, right? That’s how I learned! Here are a few things I insist on for the best results in this **meatloaf**.
First, let’s talk beef. If you use leaner beef—say, 93/7—your loaf is going to be dry, it’s just science. The 80/20 ratio gives you the necessary fat to keep everything bound and moist. That little bit of rendered fat is what makes this a real comfort food dinner.
What about the milk? If you forget the milk, your bread crumbs won’t hydrate properly, and you’ll end up with a slightly crumbly, tough loaf. It’s the key binder that keeps things soft. If you don’t have milk for some reason? Use water, but milk adds just a touch of richness we love.
Finally, the glaze! The apple cider vinegar gives that lovely tang that cuts through the richness of the beef. But if you happen to be out, swap it for an equal amount of Worcestershire sauce. It adds a different depth, but it still works perfectly to balance the sweetness of the brown sugar. These little tweaks are what let you turn this into *your* perfect homemade meatloaf.
Step-by-Step Instructions for Easy Meatloaf
Getting this amazing **meatloaf** in the oven is surprisingly quick—seriously fast for such a satisfying meal! We are aiming for maximum flavor with minimum fuss here, which is why this makes my list for the best **weeknight dinner ideas**.
First things first, crank that oven up to 350 degrees Fahrenheit! You also need to decide on your pan. I usually skip the loaf pan because cleaning baked-on meat sludge is just no fun. I prefer lining a baking sheet with parchment paper and shaping the meat right there. That way, the edges get a little crispier—win-win!
Now for the mixing. Remember what I said about not overworking it? It bears repeating! In a big bowl, mush your bread crumbs into the milk first. Let that sit for about five minutes so they get nice and soggy. Then, toss in your gorgeous ground beef, the onions, the egg, salt, pepper, garlic powder, and that first 1/4 cup of ketchup. Use your hands, but mix just until you don’t see any dry streaks left. Stop stirring right there! That gentle touch keeps things super moist.
Shape that mixture into your loaf shape and get it on that prepared sheet. Now we move on to the final flourish before baking!
Preparing the Perfect Meatloaf with Glaze
This glaze is what takes us from “good” to “absolutely mandatory” territory. While the meat is resting for a second after you shape it, grab a tiny bowl. Whisk together the final 1/4 cup of ketchup, that brown sugar, and the apple cider vinegar until it’s smooth. The brown sugar helps it caramelize beautifully, and the vinegar keeps it from being too sickly sweet.
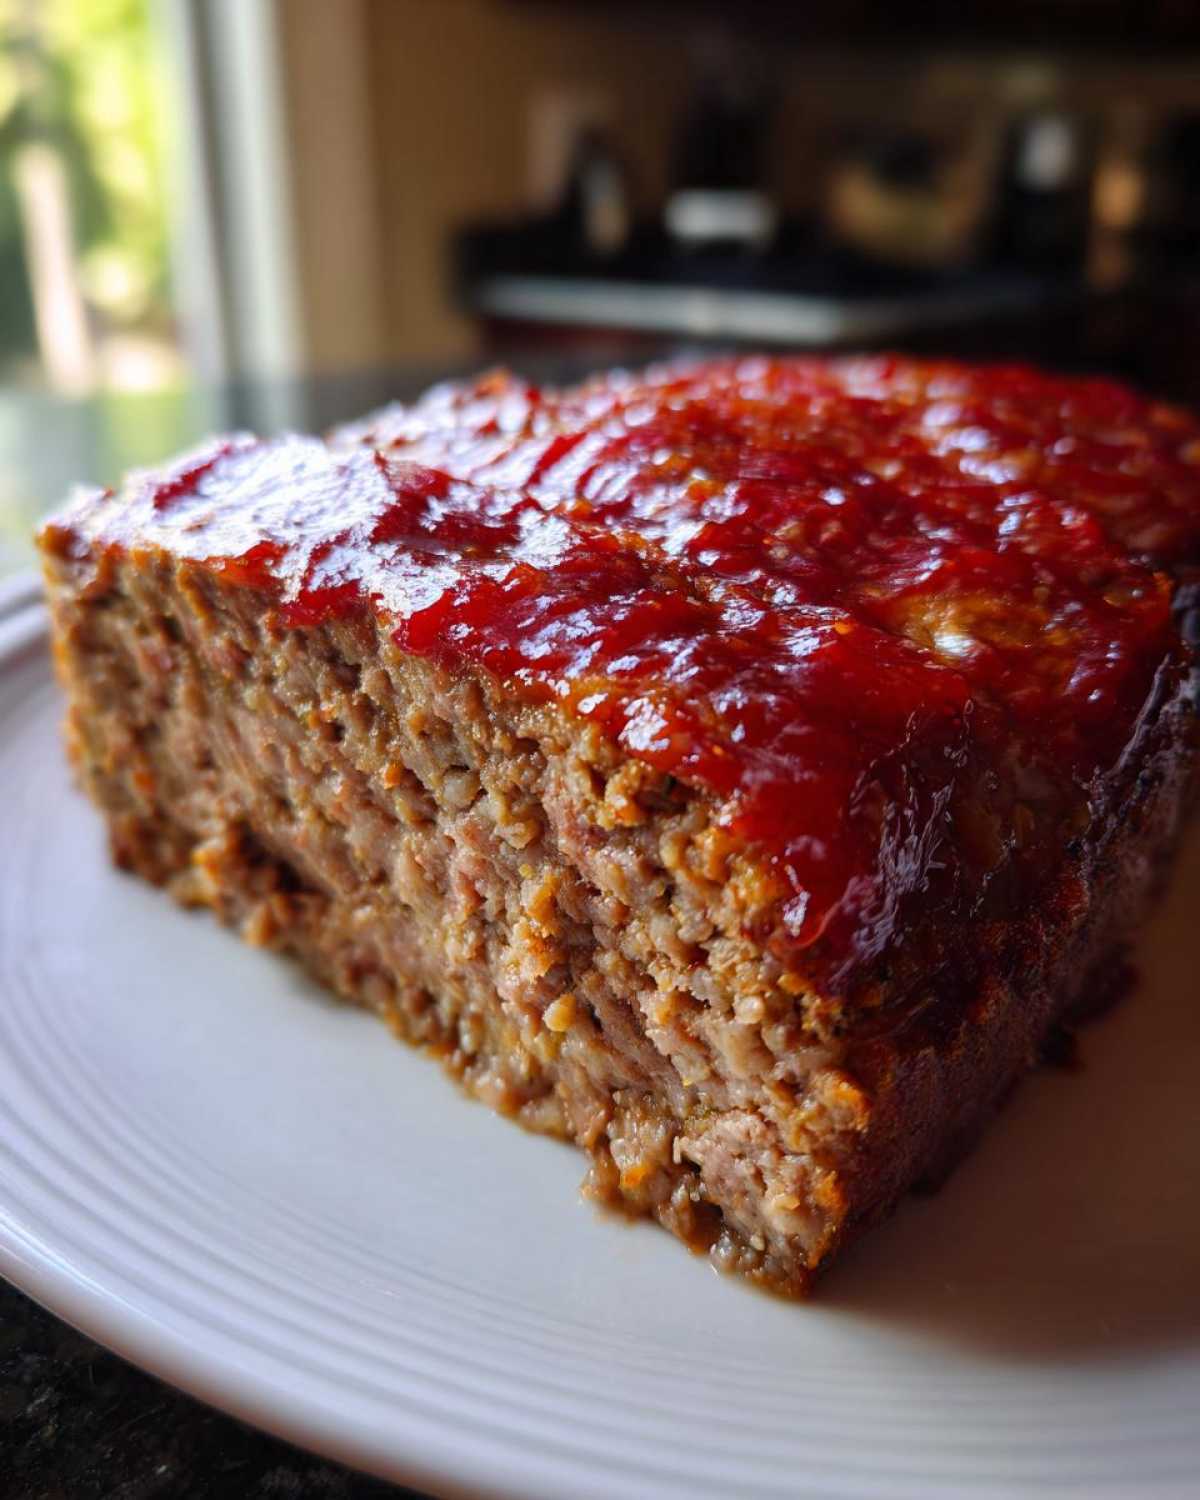
Don’t add it yet! This is important for an easy meatloaf that stays juicy. Slather that sweet and tangy mixture right over the top of your raw loaf. Make sure it’s coated nicely. Then, slide it right into that preheated oven for 60 to 70 minutes. You’ll know it’s done when a thermometer reads 160 degrees F. Don’t forget to let it rest for 10 minutes when it comes out! That resting time helps the juices settle back in, guaranteeing a tender meatloaf when you slice into it.
Baking and Resting Times for Homemade Meatloaf
So, your beautiful **homemade meatloaf**, glistening with that sweet and tangy glaze, is ready for the oven! I always tell people that this part takes the longest, but honestly, it’s just hands-off time where you can whip up some mashed potatoes or steam some green beans.
We are baking this at a steady 350 degrees Fahrenheit. Don’t try to rush it by cranking the heat up; that’s a fast track to burning the glaze and drying out the inside! Depending on whether you used a loaf pan or shaped it free-form on a sheet, you’re looking at about 60 to 70 minutes of baking time. I always keep a digital thermometer handy because sight isn’t enough when we are aiming for that perfect internal temperature of 160 degrees Fahrenheit. Pulling it out at exactly 160 degrees is how we guarantee a truly **tender meatloaf**.
But hold on—when it comes out, do *not* slice it immediately! I know the smell is intoxicating, and you want to dig in right away. Resist that urge! This is another one of my non-negotiable rules for that incredible texture. You have to let the **meatloaf** rest for a solid 10 minutes on the counter before you even think about slicing it.
Why the wait? Because while that loaf sits, all those wonderful juices that the heat pushed to the center—the moisture from the milk-soaked crumbs and that beef fat—redistribute back throughout the meat. If you slice it early, all that liquid runs out onto your cutting board, and suddenly, your **moist meatloaf** becomes a little drier than you hoped. Ten minutes is all it takes to seal in the moisture and get that perfect, sliceable texture. Trust me on this resting step; it’s the final touch that guarantees success!
Tips for the Ultimate Comfort Food Dinner
Listen, making this **meatloaf** is easy, but making sure the *experience* is easy—from cooking to cleanup—that’s where a little expertise comes in handy! I’ve learned a few things over the years that really level up this classic dish, especially when you’re sitting down for a cozy **comfort food dinner** with the family.
First, let’s talk about cleanup because honestly, that’s half the battle after dinner. I mentioned ditching the loaf pan earlier, and I want to double down on that. If you bake this **savory loaf recipe** free-form right on a rimmed baking sheet, use parchment paper!
You can find a link to our general site disclaimer page here, but the real tip is this: parchment paper acts like a built-in shield. The drippings bubble up, the glaze caramelizes, and when the whole thing is done resting, you just lift the parchment paper right off the pan. No scrubbing needed! If you *must* use a loaf pan, make yourself some cake goop (that paste of oil, shortening, and flour) and brush it on generously. Anything to avoid soaking a pan for an hour later!
Also, let’s revisit doneness. I know maybe you don’t have a fancy instant-read thermometer, but if you’re serious about getting that perfect **juicy meatloaf** every single time, I really suggest investing in one. Eyeballing the center is risky business. We are aiming for an internal temperature of 160 degrees Fahrenheit right in the center of the thickest part. If you pull it out when the juices run clear but you aren’t sure about the temp, you risk it being slightly undercooked, which nobody wants with **ground beef recipes**.
Checking that temperature is the fastest way to ensure you get that beautiful, fluffy, **tender meatloaf** texture without any guesswork. It takes the stress right out of making **family dinner ideas** when you know the hard science backs up your delicious cooking!
Serving Suggestions for Your Meatloaf
The best **meatloaf** deserves the best supporting cast, right? You can’t serve up this masterpiece of **homemade meatloaf** with just, well, air! This recipe is the centerpiece of so many wonderful **family dinner ideas** at my house, and the sides are just as important for making it a truly satisfying meal.
When I make this **classic meatloaf**, I always go for the traditional route because it just pairs so perfectly with that sweet-tangy glaze. You absolutely cannot go wrong with creamy, buttery mashed potatoes. Seriously, those potatoes are just waiting for some of that wonderful meatloaf juice and glaze to drizzle right over them. Instant upgrade!
For the green vegetable, keep it simple so it doesn’t compete with the main event. I usually steam some fresh green beans until they are bright green and tender-crisp, maybe tossing them with a tiny bit of salt and pepper. Sometimes, if I’m feeling fancy, I’ll quickly sauté some asparagus with garlic. Anything bright and green helps cut through the richness of the beef perfectly.
And honestly? Sometimes I just serve it with a simple salad when I’m trying to keep things lighter. But for a true **comfort food dinner**, you need those comforting starch components. Mac and cheese totally works too if you’re feeding a crowd of kids (or hungry adults!). Whatever you pick, just make sure you have enough gravy or extra glaze handy. You’ll need it for dipping!
Storage and Reheating Instructions for Leftover Meatloaf
Oh, the glorious dilemma of having leftovers! If you’re anything like me, you actually *hope* there’s some of this **meatloaf** left over, because honestly, sometimes it tastes even better the next day once the flavors have really settled in. But we have to treat those leftovers right so they don’t turn into a dry brick the next afternoon!
The key to enjoying this magnificent **savory loaf recipe** later is all in the storage. Once the loaf has completely cooled down after resting (don’t put warm food straight into the fridge; it messes up the temperature!), you need to seal it up tight. Use an airtight container. If you don’t have one big enough, just wrap the slices really well in plastic wrap first, and then slip them into a zip-top bag. We want to keep all that hard-earned moisture locked inside.
This **homemade meatloaf** will keep beautifully in the refrigerator for about three to four days. That gives you plenty of wiggle room for a **quick dinner** later in the week!
The Best Way to Reheat Your Moist Meatloaf
When it comes time to reheat, forget the microwave if you want *incredible* results. The microwave is fast, yes, but it heats unevenly and can make even the **juiciest meatloaf** a little chewy. If you’re only reheating a single slice or two, the microwave is fine, but you have to cheat the system a little bit.
If you have time, I swear by the gentle reheat method. Slice your portion, place it in a small, oven-safe dish, and here’s the trick: splash just a teaspoon of chicken broth or even a tiny bit of water right next to the slice—not directly on top, just next to it. Cover that dish tightly with foil, and pop it into a 300-degree oven for about 15 minutes, or until it’s heated all the way through. That little bit of steam trapped under the foil keeps the loaf from drying out! It brings back that wonderful **tender meatloaf** texture perfectly.
Quick Microwave Reheating Trick
Look, sometimes you just need food in five minutes, and that’s okay! If you have to use the microwave, do what I do to keep it from stiffening up. Place your slice on a microwave-safe plate and put a damp paper towel right over the top of the slice before heating. The dampness steams the meat slightly as it warms up, helping to rehydrate it just a touch. Use 50% power in short 30-second bursts. It won’t be *as* good as the oven, but it’s a solid, fast fix for your leftover **meatloaf**!
Frequently Asked Questions About Meatloaf
I totally get it—when you’re whipping up **family dinner ideas** on a busy night, you need answers fast! Over the years, I’ve had so many friends ask me questions about my **meatloaf** technique, so I compiled the most common ones right here for you. Hopefully, this clears up any last-minute panic when you’re making this **quick dinner**!
Can I use ground turkey or chicken instead of beef?
Yes, you absolutely can, but you have to adjust your expectations and ingredients! If you swap the 80/20 beef for leaner poultry like turkey or chicken, you lose a ton of fat, which is our main source of moisture. To prevent a guaranteed dry loaf, I highly recommend you up the liquid content slightly. Maybe add another tablespoon of milk, or sneak in a little extra finely grated onion or even some sautéed mushrooms for bonus moisture. Also, remember, if you’re experimenting with different **ground beef recipes** using poultry, you are going to need a thicker glaze because the flavor profile is much milder!
What if I run out of bread crumbs? Can my meatloaf still be moist?
That is a classic kitchen crisis! If you’re totally out of dry bread crumbs, you can use leftover plain crackers, even crushed corn flakes work in a pinch. But if you have absolutely no dry filler, the bread crumbs are serving two vital purposes: binding and moisture absorption. Without them, the meat won’t hold its shape well after baking, and you’ll struggle to get that **tender meatloaf** texture.
To save it, try mashing up oats (rolled oats, not instant) or even quickly toasting and crushing some plain white bread on a baking sheet until it’s dry. Do this quickly; you need something dry to soak up that milk. If you skip the binder entirely, you’re likely looking at a **crumbly meatloaf** that falls apart when you try to slice it.
Why is my meatloaf always crumbly, even after resting?
Ugh, the dreaded crumble! This usually means you either didn’t use enough binder (the bread crumbs/milk combo) or you didn’t mix it enough *initially*. I know I preach “don’t overmix,” but you have to mix *enough* so that the proteins in the meat have a chance to grab onto that moisture and binding agent. If you stop mixing too soon, the clumps just break apart when you transfer the loaf to the pan.
Also, check your egg. The egg is the glue that holds everything together once it cooks. If your egg was tiny, or maybe you accidentally left it out, the structure just won’t set up properly for that perfect slice of **classic meatloaf**. Give me a shout if you’re still having trouble; we can troubleshoot your specific kitchen!
Can I make this ahead of time for a busy evening?
Absolutely, this is one of the best parts about making a big **homemade meatloaf**! You can assemble the entire thing—meat, seasonings, everything—up until the glaze application. Shape the loaf, put it on your baking sheet, cover it tightly with plastic wrap (maybe even foil over that), and store it in the fridge for up to 24 hours. When you’re ready for that **quick dinner**, just pull it out, spread the glaze on top, and bake it following the instructions! You might need to add about 5 to 10 minutes to the bake time since it’s going in cold, so keep that internal thermometer handy!
I’m always happy to chat more about **meatloaf** recipes or anything else bubbling in your kitchen! Feel free to pop over to the contact page if you have questions I didn’t cover here.
Share Your Meatloaf Experience
Now it’s your turn! I’ve poured all my secrets for the **best meatloaf recipe** into these steps, and I really want to know how it worked out for you at your dinner table. This **savory loaf recipe** is a keeper, but every kitchen adds its own little charm, doesn’t it?
Please, please, please come back here and leave a star rating. If you had a roaring success and finally achieved that legendary moist meatloaf I bragged about, let me know! If you tried substituting the vinegar for Worcestershire sauce, tell me how that tasted! I live for these kitchen stories.
If you snapped a picture of your beautifully glazed creation, share it in the comments section below or tag me on social media. It makes my whole week to see this **classic meatloaf** sitting next to someone else’s mashed potatoes. Seriously, hearing that this helped make your **weeknight dinner** successful is the best compliment I can get!
And hey, if you’ve got a moment after you’ve devoured your portion, take a quick peek at our site policies. Happy cooking, and I can’t wait to read all about your perfectly **tender meatloaf**!
PrintThe Best Classic Juicy Meatloaf
A simple recipe for a moist, tender, and flavorful classic meatloaf with a simple sweet and tangy glaze, perfect for a weeknight dinner.
- Prep Time: 15 min
- Cook Time: 70 min
- Total Time: 85 min
- Yield: 6 servings
- Category: Dinner
- Method: Baking
- Cuisine: American
- Diet: Low Fat
Ingredients
- 2 lbs ground beef (80/20 recommended)
- 1 cup dry bread crumbs (or Stove Top Stuffing mix)
- 1/2 cup milk
- 1/2 cup finely chopped onion
- 1/4 cup ketchup (for the mix)
- 1 large egg, lightly beaten
- 1 teaspoon salt
- 1/2 teaspoon black pepper
- 1/4 teaspoon garlic powder
- 1/4 cup ketchup (for the glaze)
- 2 tablespoons brown sugar (for the glaze)
- 1 tablespoon apple cider vinegar (for the glaze)
Instructions
- Preheat your oven to 350 degrees Fahrenheit. Lightly grease a loaf pan or line a baking sheet with parchment paper.
- In a large bowl, combine the bread crumbs and milk. Let stand for 5 minutes to soften.
- Add the ground beef, chopped onion, 1/4 cup ketchup, beaten egg, salt, pepper, and garlic powder to the bowl.
- Mix all ingredients gently with your hands until just combined. Do not overmix, or the meatloaf will become tough.
- Shape the mixture into a loaf shape and place it on the prepared baking sheet or into the loaf pan.
- In a small bowl, whisk together the glaze ingredients: 1/4 cup ketchup, brown sugar, and apple cider vinegar.
- Spread the glaze evenly over the top of the meatloaf.
- Bake for 60 to 70 minutes, or until the internal temperature reaches 160 degrees Fahrenheit.
- Remove from the oven and let the meatloaf rest for 10 minutes before slicing and serving.
Notes
- For an extra moist meatloaf, use 80/20 ground beef.
- If you prefer a crispier exterior, bake the meatloaf directly on a baking sheet instead of in a loaf pan.
- For a different flavor, substitute Worcestershire sauce for the apple cider vinegar in the glaze.
Nutrition
- Serving Size: 1 slice
- Calories: 350
- Sugar: 12
- Sodium: 550
- Fat: 18
- Saturated Fat: 7
- Unsaturated Fat: 11
- Trans Fat: 0.5
- Carbohydrates: 18
- Fiber: 1
- Protein: 30
- Cholesterol: 95