

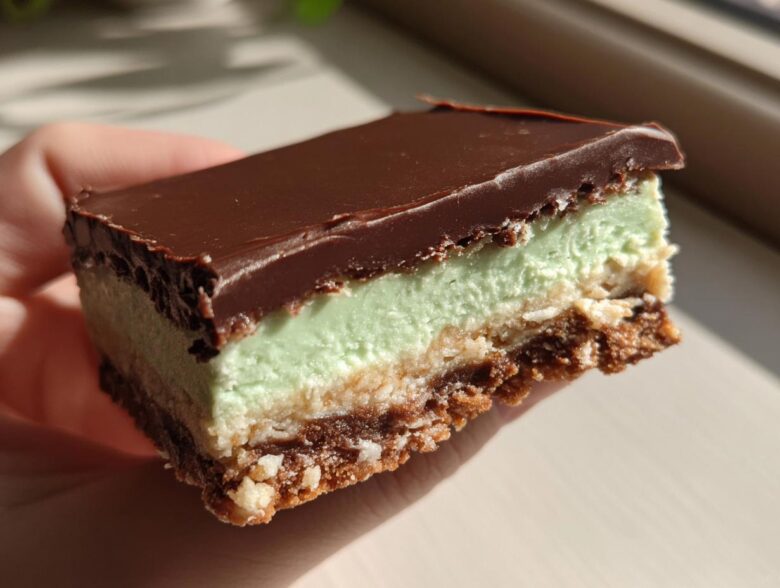
Listen, sometimes you just need a showstopper dessert, right? But the thought of firing up the oven when it’s already blazing hot outside? Forget it! That’s why I’m obsessed with this recipe for No-Bake Chocolate Mint Icebox Bars. Seriously, they are my absolute go-to when company shows up unexpectedly or when that deep, dark chocolate-mint craving hits me hard this time of year.
I mean, who doesn’t love that cool, creamy mint flavor against rich, dark chocolate? The best part is the assembly is pure joy—you’re just mixing, pressing, and layering. No tricky baking times to worry about! We just need patience for the chilling time, which is honestly the hardest part. If you head over to my main recipe index, you’ll see I’m a sucker for anything chilled and layered, and these bars are definitely at the top of the list.
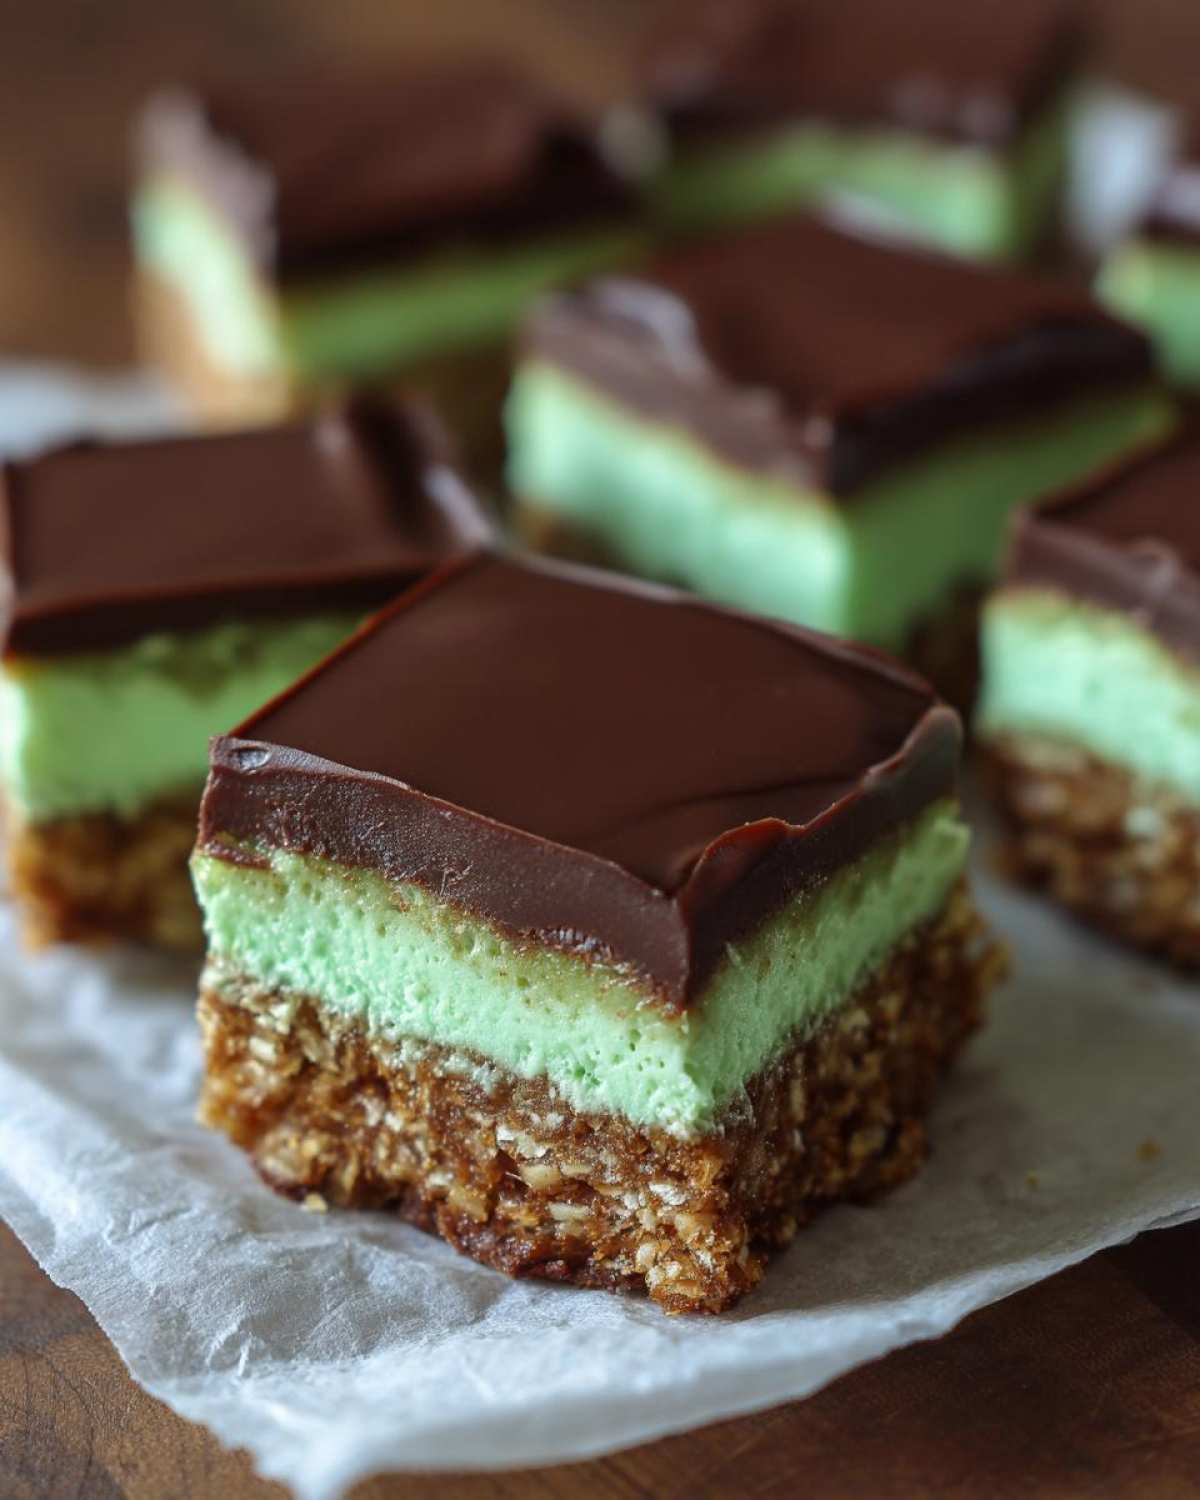
Why You Will Love These No-Bake Chocolate Mint Icebox Bars
I bake for pleasure, not for stress, and these bars deliver maximum reward for minimal effort. Seriously, you don’t need to be a professional to nail this recipe. Here’s why I think these No-Bake Chocolate Mint Icebox Bars deserve a spot in your regular rotation:
- Zero Oven Time Needed: This is the big one! Perfect for summer, or honestly, any day you don’t want to heat up the kitchen. Everything comes together with just stirring and chilling.
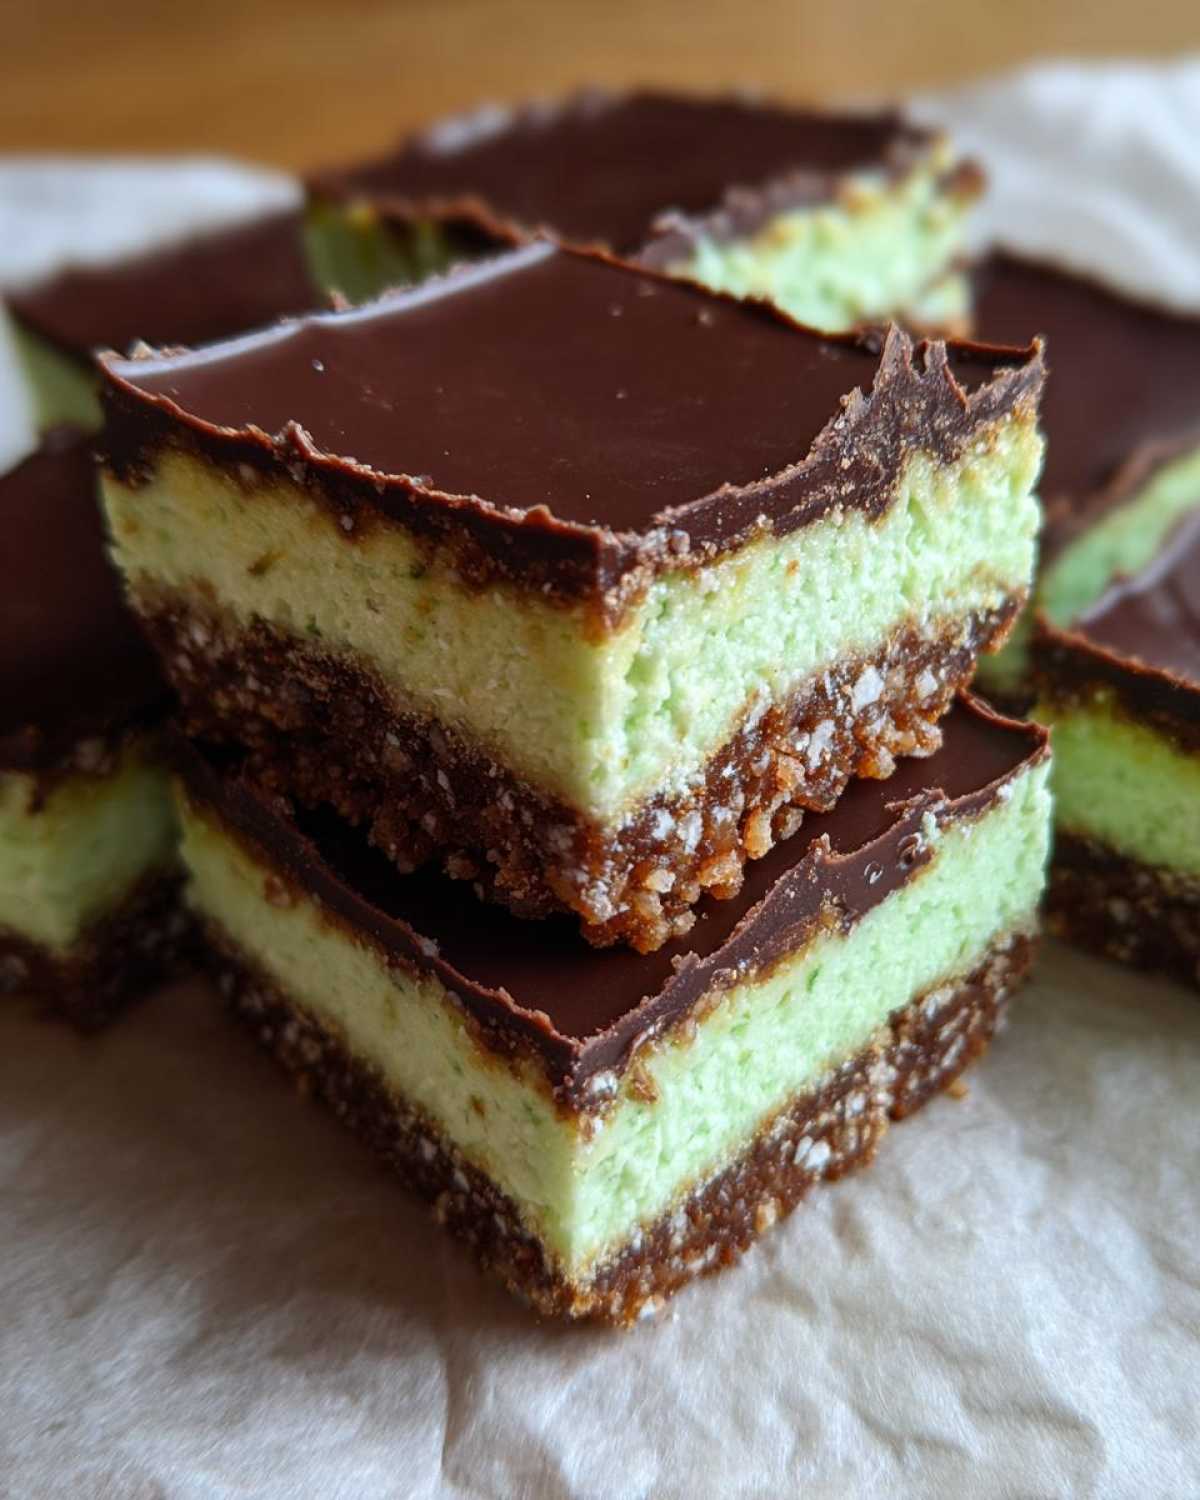
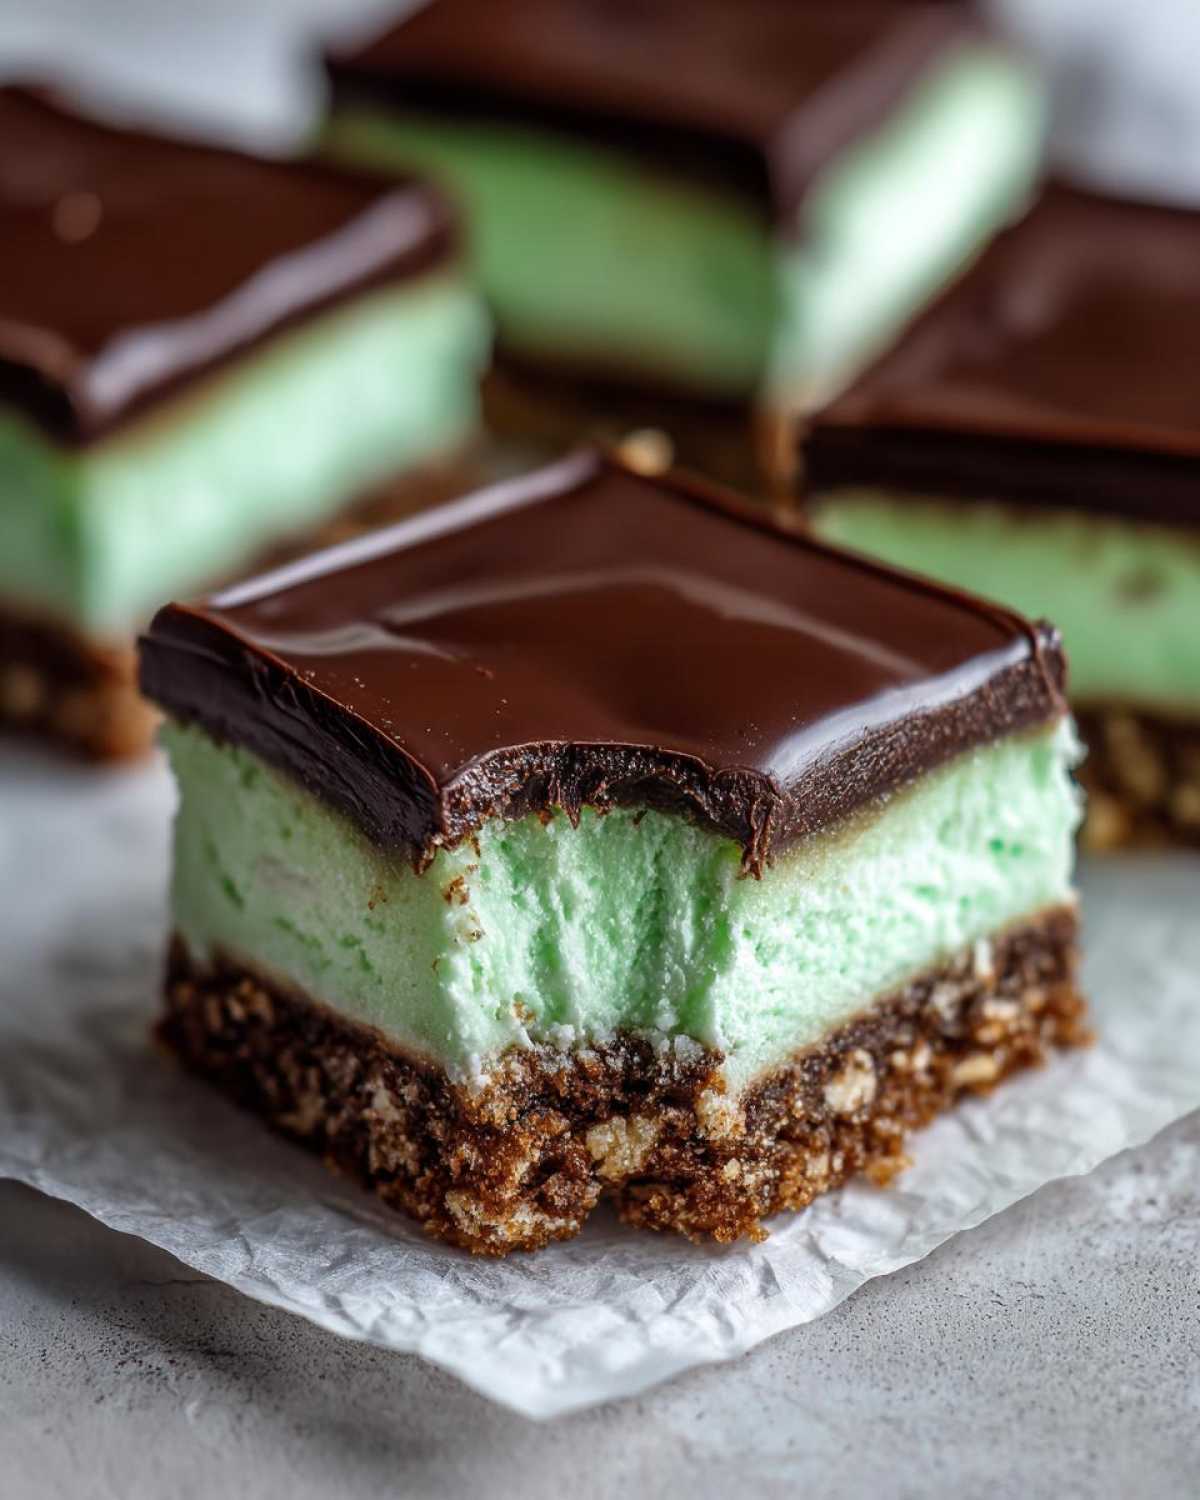
- Incredible Layered Texture: You get three distinct bites in one square! We go from a crisp, buttery graham cracker base right into that unbelievably smooth, cool mint layer, all finished with a shiny chocolate hat. It’s textural heaven.
- They Are Make-Ahead Champions: These aren’t just good the next day; they are *better* the next day. They travel well and hold up beautifully in the fridge, making them perfect for potlucks or holiday make-ahead planning.
- Flavor Profile is Classic Perfection: Mint and chocolate? It’s a pairing that never fails. The coolness of the peppermint cuts through the richness of the cream cheese filling and the dark chocolate topping beautifully. It’s refreshing but still satisfyingly rich.
- Simple Ingredients, Impressive Results: You’re using common ingredients—cream cheese, chocolate chips, graham crackers—but the way they layer up makes everyone think you spent hours fussing over a fancy pastry!
Essential Ingredients for No-Bake Chocolate Mint Icebox Bars
When you’re depending on chilling time to do the heavy lifting, the quality of your ingredients really matters, even in something as simple as these No-Bake Chocolate Mint Icebox Bars. I’ve listed everything you need below using the recipe I know works like a dream. Don’t try to skimp on the cream cheese texture or the quality of your mint extract!
You’ll notice we use heavy whipping cream twice—once cold for making the fluff in the filling, and again hot for melting that gorgeous chocolate topping. That little trick is key for a smooth ganache finish!
- 1 1/2 cups graham cracker crumbs (I prefer the plain ones, not cinnamon!)
- 1/4 cup granulated sugar (Just a touch for the crust to help it bind up nicely.)
- 6 tablespoons unsalted butter, melted (Make sure it’s cooled just slightly so it doesn’t melt your crumbs too fast.)
- 1 (8 ounce) package cream cheese, softened (This is NON-NEGOTIABLE—put it on the counter early so it’s completely soft and spreadable.)
- 1 cup powdered sugar (Sifted if it’s clumpy, please!)
- 1 teaspoon vanilla extract
- 1/4 teaspoon peppermint extract (Start here! It’s potent, and you can always add more, but you can’t take it out.)
- 1/2 teaspoon green food coloring (Totally optional, but who doesn’t love that bright St. Patty’s day green contrast?)
- 1 cup heavy whipping cream, cold (For making the light, fluffy filling.)
- 1 cup semi-sweet chocolate chips (Use good quality ones; they melt smoother!)
- 1/2 cup heavy whipping cream (For the easy, glossy topping—you can check out my method for chocolate mousse if you want to see how I handle chocolate and cream together!)
Gathering these bits and pieces ahead of time makes the actual assembly fly by. Trust me, once everything is prepped, you’re looking at maybe 20 minutes of hands-on time before these beauties head off to the fridge!
Step-by-Step Assembly of Your No-Bake Chocolate Mint Icebox Bars
Okay, time to bring out the mixing bowls! This is where the magic happens, and since we aren’t baking, we have to be smart about layering to make sure these No-Bake Chocolate Mint Icebox Bars set up perfectly firm. Don’t rush the chilling parts; that waiting is what makes these bars so delicious!
Preparing the Graham Cracker Crust Base
First things first, you need a solid foundation. Grab an 8×8 inch pan—and trust me on this—line it with parchment paper, making sure you leave some extra paper hanging over two sides like little handles. This overhang is your best friend later when you need to lift the whole slab out!
In a bowl, combine your graham cracker crumbs and that 1/4 cup of granulated sugar. Pour in the melted butter and mix everything together until it looks like wet sand. It should hold its shape when you squeeze a bit. Press that mixture down *firmly* and evenly into the bottom of your lined pan. I usually use the bottom of a glass or measuring cup for this job because you need serious pressure here to make sure those bars don’t crumble when we slice them later. Slip this crust into the freezer while you get the mint mixture ready.
Creating the Creamy Mint Filling Layer
Now for the cool center! Get your softened cream cheese beating until it’s smooth—we don’t want any lumps hiding in there. Slowly mix in the powdered sugar, vanilla, and your peppermint extract. If you’re going for that vibrant green color, stir in your food coloring now until everything looks perfectly minty.
This next step is crucial for texture: whip your cup of heavy cream in a separate bowl until you get stiff peaks. You want firm cream! Now, gently fold that whipped cream into the cream cheese base. I mean *gently*! If you beat it in, you deflate all the air, and suddenly your filling turns into a dense brick instead of a creamy cloud. Once it’s just combined—a few faint streaks are fine—spoon that lovely mint layer evenly over your chilled crust and pop it all back into the freezer for just 30 minutes to firm up a bit before topping.
Finishing with the Rich Chocolate Topping for No-Bake Chocolate Mint Icebox Bars
We need a rich, non-fudgy topping that sets beautifully, and the simple hot cream method is the ticket! Place your chocolate chips in a bowl. Heat up that last 1/2 cup of heavy cream until it’s just simmering, but don’t let it boil over! Pour that hot cream right over the chips and just walk away for about five minutes. Let the residual heat do the work.
After those five minutes, whisk it until it’s smooth, glossy, and decadent. Pour this dreamy chocolate topping right over that slightly firm mint layer. Use an offset spatula to spread it to the edges. Now, we cover it loosely and let patience take over. These No-Bake Chocolate Mint Icebox Bars need a minimum of four hours in the refrigerator—ideally overnight—until that chocolate topping is totally set and firm to the touch!
If you want to see another fantastic no-bake recipe that uses chilling time to its advantage, check out my easy peanut butter pie sometime!
Tips for Perfect No-Bake Chocolate Mint Icebox Bars Texture
Getting the texture right in a no-bake dessert can sometimes feel like walking a tightrope, especially with something layered like these No-Bake Chocolate Mint Icebox Bars. Since we rely purely on chilling, if we mess up the ratio of fat to liquid, things can go south fast and turn into a soupy mess! But don’t panic; I’ve learned a few tricks over the years to guarantee that perfect balance of firm crust, creamy middle, and snappy top.
First off, let’s talk about the crust. If you’re worried about a crumbly base—which is super annoying when you try to cut neat squares—you have two options. Either press that crust down like you mean business (seriously, use a heavy glass!) or, if you want ultimate firmness, take my little note from the recipe card: bake it! Just 8 minutes at 350°F gives the butter time to truly set around the crumbs. Let it cool completely, even pop it in the freezer for 15 minutes, before you layer the mint filling over it.
The mint layer is where most people lose that beautiful airiness. Remember how I stressed folding in the whipped cream gently? That’s to keep those air bubbles! If your filling seems a little too soft after the 30-minute chill time, don’t worry; just extend the freeze time for the final set. A fully frozen mint layer acts like a better support structure for the chocolate top.
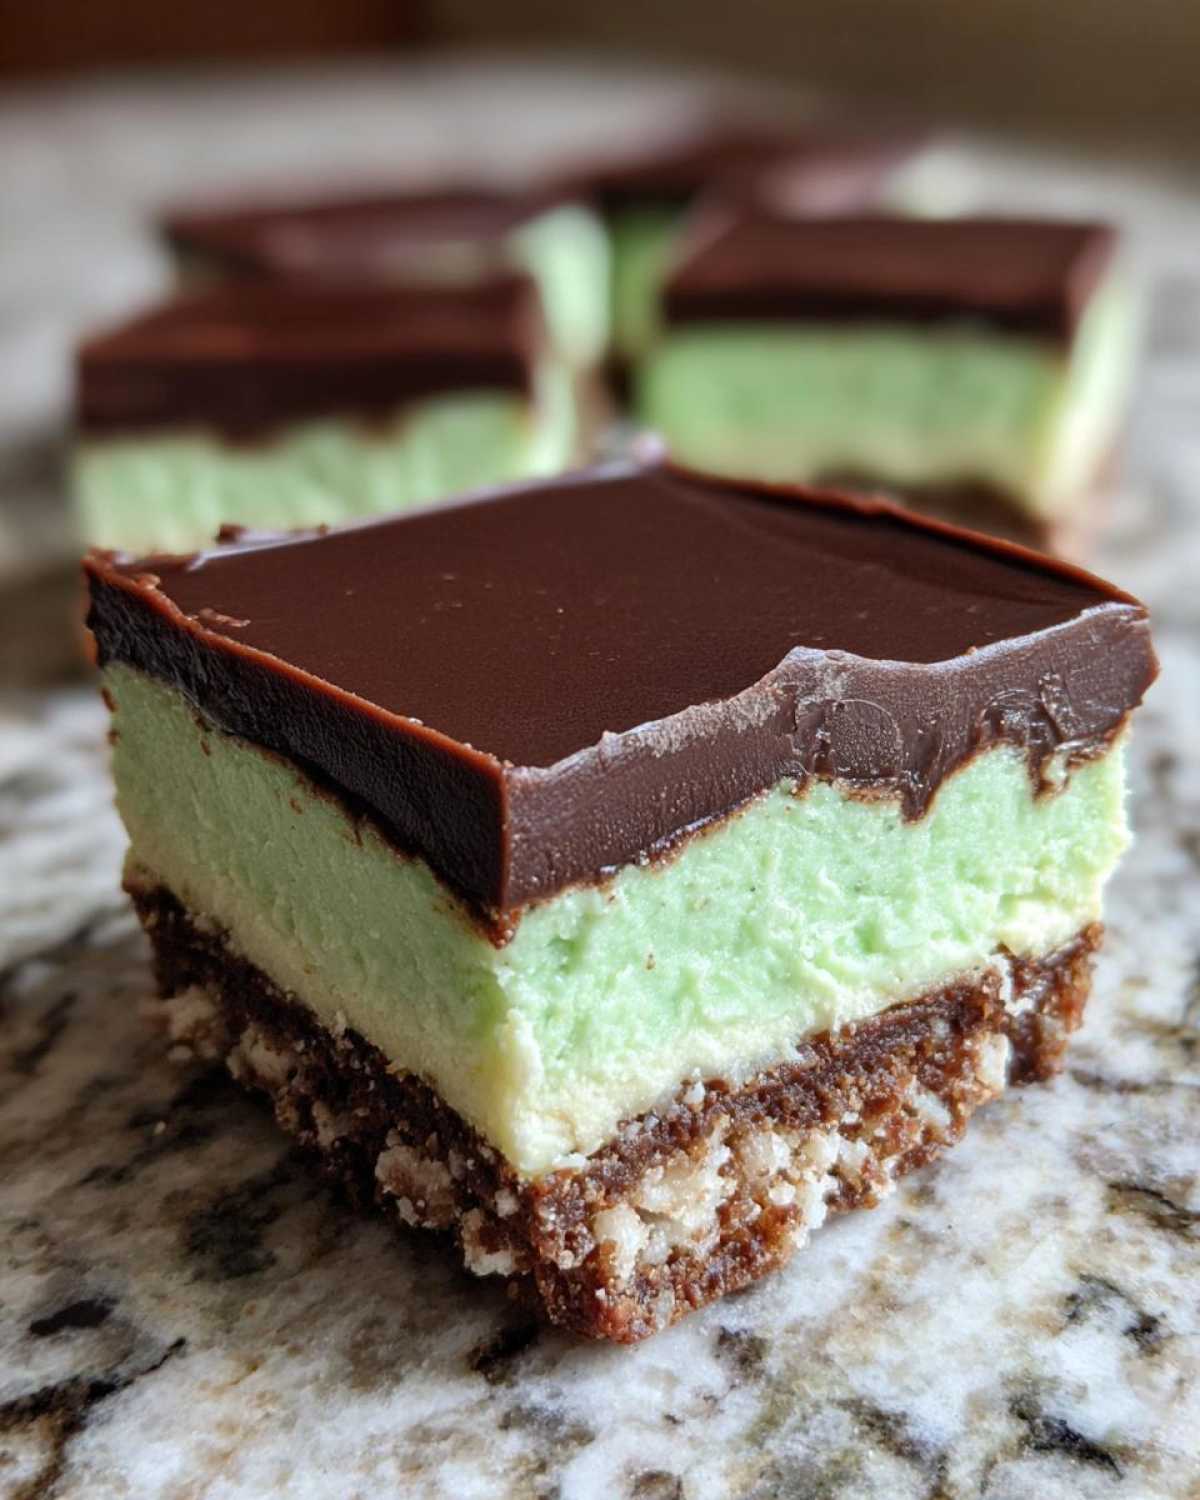
Now, the chocolate topping. If your topping is too runny when you pour it on, it will bleed into the mint layer, and you’ll lose that lovely definition between the layers. The key is the temperature contrast! Make sure that mint layer is quite firm—I said 30 minutes in the freezer, but if your kitchen is hot, go closer to 45. Pouring warm ganache onto a cold, firm surface helps it set quickly on contact. If your ganache cools down before you pour it all, just pop the bowl over a pan of hot water (a makeshift double boiler) for thirty seconds to loosen it up again before spreading. This ensures you get a beautiful, non-cracking finish every time you cut into those incredible No-Bake Chocolate Mint Icebox Bars. Don’t forget, treating yourself to a really good quality chocolate makes the topping richer, too; you can see how I build flavor even in the simplest toppings over in my guide to creamy frostings!
Ingredient Notes and Substitutions for Layered Mint Chocolate Confection
I always get emails asking what happens if they don’t have green food coloring, or if they can just use regular mint extract instead of peppermint. Yes, yes, and yes! Part of loving home baking is learning how to adapt when you’re missing one tiny thing. These Layered Mint Chocolate Confections are very forgiving, but there are a couple of spots where you need to be careful about making substitutions.
Regarding the color: that bright green is just for fun, honestly! If you skip the food coloring, you’ll end up with a gorgeous, pale, creamy off-white mint layer. It tastes exactly the same, which is the important part! If you want that vibrant look, a few drops of gel coloring work better than liquid, but if that’s all you have, just start with half a teaspoon and mix until you get the shade that makes you happy.
The extract substitution requires a bit more respect! Peppermint extract is different from plain mint extract (which is often used in, say, peppermint tea). Peppermint gives you that true candy cane coolness. If you only have standard mint extract on hand, dial it way back. Start with just a tiny drop—maybe 1/8th of a teaspoon—and taste the mix before you add more. Mint extract can be much sharper than peppermint, and we don’t want to accidentally make our filling taste like toothpaste!
If you’re looking for an easy crust swap, especially if you have some leftover chocolate cookies lying around, feel free to use those! Just toss about 2 cups of crushed Oreos (filling and all!) in your food processor and skip the added sugar in the crust step. The melted butter will bind those chocolate cookie crumbs up just as easily as graham crackers. It just makes these bars into a double-chocolate treat, which I certainly never complain about! For extra chocolate fun, you can check out how I make quick homemade chocolate milk to pair with these bars!
Storage and Make-Ahead Guide for No-Bake Chocolate Mint Icebox Bars
One of the absolute best features of these No-Bake Chocolate Mint Icebox Bars is how well they keep. They are absolutely perfect for making ahead, which is a lifesaver when you’re hosting a big dinner or trying to get ahead for a holiday bake-a-thon. Because we aren’t using eggs or traditional baking powder/soda, chilling time actually improves the whole experience!
You absolutely *can* make these a day or two in advance. In fact, I highly recommend it! The flavors—that cool mint mixing with the sweet chocolate and the buttery crust—tend to meld together beautifully overnight in the fridge. They become this cohesive, intensely flavored bite. Just make sure they are covered tightly with plastic wrap or tin foil. If you leave them uncovered, the cream cheese layer can sometimes pick up any funky fridge odors. Not ideal!
If you are preparing these further out, freezing is an option, too. They freeze like a dream because they are already mostly firm from chilling. Once the bars are completely set—after that 4-hour minimum chill—lift the whole block out of the pan using those parchment paper handles. Wrap the whole slab tightly in plastic wrap, and then maybe another layer of foil just to be safe against freezer burn. They should hold up perfectly in the deep freeze for about a month. When you want to serve them, just pull the whole log out and let it thaw on the counter for about an hour before slicing.
Speaking of slicing, here’s my absolute top tip for getting those clean, perfect squares we all want to see on a platter. If you try to cut them while they are rock solid straight from a long chill or thaw, the chocolate topping will likely crack everywhere! It drives me crazy!
So, here’s the secret: Once the bars are fully set, let them sit on the counter for about 15 to 20 minutes before you touch a knife to them. Bring them just slightly closer to room temperature—enough to soften the chocolate just a hair, but not enough that the mint layer gets squishy. Then, use a long, sharp knife warmed under hot water and wiped dry between every single cut. That hot blade slices right through the chilled layers cleanly. You can see more of my strategies for prepping desserts ahead of time over in my guide to make ahead chilled chocolate desserts!
Frequently Asked Questions About Quick Chocolate Mint Slices
I get so many notes and DMs after people try this recipe, and usually, the questions revolve around texture—which, let’s be honest, is the make-or-break point for any great quick chocolate mint slice! Here are the things I hear most often when people are making this simple layered icebox dessert.
Can I make these No-Bake Chocolate Mint Icebox Bars firmer?
Oh, absolutely! If you prefer a dessert that’s almost frozen-solid, more like an ice cream cake consistency—which is great if you live somewhere super hot—you have two easy levers to pull. First, you can extend the final chilling time significantly. While the recipe calls for four hours minimum, leaving these in the fridge overnight guarantees a significantly firmer bar. Second, and this is the real trick, reduce the heavy whipping cream used in the mint filling by about 1/4 cup. Less liquid whipped into the cream cheese means a denser structure overall, helping them set up much harder without becoming icy. It’s a great option if you’re looking for last minute no bake dessert ideas that need to be stiff enough to slice quickly!
What is the best way to prevent the chocolate topping from cracking?
That beautiful chocolate topping cracking when you try to serve it is the bane of my existence! It usually happens when the cold mint layer is *too* cold or frozen solid when that warm chocolate hits it; the rapid temperature change makes the top shrink and split. To avoid this entirely, make sure that mint layer has gone past being frozen solid and has actually chilled nicely—about 40 minutes should do it, or until it’s firm but not rock-hard.
When you pour your chocolate topping over, make sure the topping itself is still warm and pourable, not starting to cool and thicken in the bowl. If it seems too thick, gently warm the bowl over a pan of hot water for just a moment to loosen it up before spreading. This ensures that when it sets, it sets smoothly, giving you those gorgeous, clean squares we all want to see on a platter of rich mint chocolate squares.
If you’re looking for other easy make-ahead options like this, you should definitely browse my roundup of last minute no bake dessert ideas!
Serving Suggestions for Your Creamy Mint Dessert Bars
Once you finally cut into these perfect creamy mint dessert bars—and I know you’ve waited long enough after all that chilling!—it’s time to think about how to serve them up. While they are absolutely perfect all on their own (honestly, they should be called an all-in-one dessert!), sometimes a little something extra elevates the whole experience, especially if you’re taking them to a party or presentation really matters.
The strongest flavors here are bright mint and deep chocolate, so we want pairings that either echo those cool notes or provide a soft, creamy contrast. Trust me, these bars need nothing more than a sturdy dessert plate, but an extra flourish never hurt anyone!
For a truly decadent experience, serve a square alongside a scoop of high-quality vanilla bean ice cream. The slight melted edge of the ice cream meeting the firm, cool bar is just heaven. If you prefer something warm, a small cup of strong, hot coffee is the perfect foil to cut through the sweetness of the chocolate topping.
If you want to add a little color pop, fresh raspberries or strawberries are my absolute favorite companion. Mint pairs so naturally with that bright tartness from berries. You don’t need a sauce, just place three or four fresh berries right on the edge of the plate! It gives it a fresh look, making it seem lighter than the rich dessert it truly is.
Presentation-wise, since these are two layer no bake bars that are so clean when cut correctly, try dusting the plate lightly with powdered sugar right before you set the bar down—use a small sieve or tea strainer for the best snow-like finish. If you’re doing a dessert buffet and have a little extra time, a tiny drizzle of caramel sauce across the plate offers a lovely third flavor dimension. If you love rich, creamy chocolate, you should really check out my recipe for white hot chocolate sometime; it’s like a cozy cousin to these bars!
Nutritional Estimates for One No-Bake Chocolate Mint Icebox Bar
Okay, let’s talk numbers briefly! I know we come to these No-Bake Chocolate Mint Icebox Bars for the pure, blissful indulgence, but I always get asked about the calorie count, the sugar, etc. I’ve put together the estimates based on the standard amounts used in the recipe above. Remember, this is just a guideline, as the exact brand of chocolate chips or the amount of butter you use in your crust can shift these figures up or down!
These estimates are calculated for one serving size, assuming you cut the 8×8 pan into 16 even squares. Because these bars have that rich chocolate topping and the cream cheese filling, they definitely fall into the treat category, but they are worth every single bite!
- Serving Size: 1 bar
- Calories: 285
- Sugar: 24g
- Sodium: 110mg
- Fat: 18g
- Saturated Fat: 10g
- Unsaturated Fat: 8g
- Trans Fat: 0g
- Carbohydrates: 30g
- Fiber: 1g
- Protein: 3g
- Cholesterol: 45mg
If you’re watching your intake, remember that the biggest components driving the fat and sugar come from the melted chocolate topping and the cream cheese filling. You can always lighten things up by using bittersweet chocolate (which is lower in sugar) or by using Neufchâtel cheese instead of full-fat cream cheese, though I personally prefer the richness!
As always, please remember that these figures are estimates based on my standard measurements and ingredient choices. For the most accurate data regarding your own pantry staples, you should always refer to the packaging for things like chocolate chips and crackers. You can always read more about how I handle data and measurements over on my official disclaimer page!
PrintNo-Bake Chocolate Mint Icebox Bars
Make these simple, layered chocolate and mint bars without using your oven. They feature a crisp crust, a creamy mint filling, and a rich chocolate topping.
- Prep Time: 25 min
- Cook Time: 0 min
- Total Time: 4 hr 25 min
- Yield: 16 bars
- Category: Dessert
- Method: Chilling
- Cuisine: American
- Diet: Vegetarian
Ingredients
- 1 1/2 cups graham cracker crumbs
- 1/4 cup granulated sugar
- 6 tablespoons unsalted butter, melted
- 1 (8 ounce) package cream cheese, softened
- 1 cup powdered sugar
- 1 teaspoon vanilla extract
- 1/4 teaspoon peppermint extract
- 1/2 teaspoon green food coloring (optional)
- 1 cup heavy whipping cream, cold
- 1 cup semi-sweet chocolate chips
- 1/2 cup heavy whipping cream (for topping)
Instructions
- Line an 8×8 inch baking pan with parchment paper, leaving an overhang on two sides for easy removal.
- Combine graham cracker crumbs and 1/4 cup granulated sugar in a medium bowl. Pour in the melted butter and mix until the crumbs are evenly moistened.
- Press the crumb mixture firmly and evenly into the bottom of the prepared pan. Place the crust in the freezer while you prepare the filling.
- In a large bowl, beat the softened cream cheese until smooth. Gradually beat in the powdered sugar, vanilla extract, and peppermint extract until combined.
- Add the green food coloring, if using, and mix until the color is uniform.
- In a separate bowl, whip the 1 cup of cold heavy whipping cream until stiff peaks form. Gently fold the whipped cream into the cream cheese mixture until just combined. Do not overmix.
- Spread the mint filling evenly over the chilled crust. Return the pan to the freezer for 30 minutes to firm up slightly.
- Prepare the topping: Place the chocolate chips in a heatproof bowl. Heat the remaining 1/2 cup of heavy whipping cream in a small saucepan until it just begins to simmer. Pour the hot cream over the chocolate chips. Let stand for 5 minutes, then whisk until smooth and glossy.
- Pour the chocolate topping over the set mint layer. Spread evenly.
- Cover the pan loosely with plastic wrap and refrigerate for at least 4 hours, or until the bars are completely firm.
- Use the parchment paper overhang to lift the bars from the pan. Cut into 16 squares before serving.
Notes
- For a firmer crust, you can bake the crust at 350 degrees Fahrenheit for 8 minutes, then cool completely before adding the filling.
- If you do not have peppermint extract, you can substitute with 1/4 teaspoon of pure mint extract, but use sparingly as it is stronger.
- Store leftovers tightly covered in the refrigerator for up to 4 days.
Nutrition
- Serving Size: 1 bar
- Calories: 285
- Sugar: 24
- Sodium: 110
- Fat: 18
- Saturated Fat: 10
- Unsaturated Fat: 8
- Trans Fat: 0
- Carbohydrates: 30
- Fiber: 1
- Protein: 3
- Cholesterol: 45