

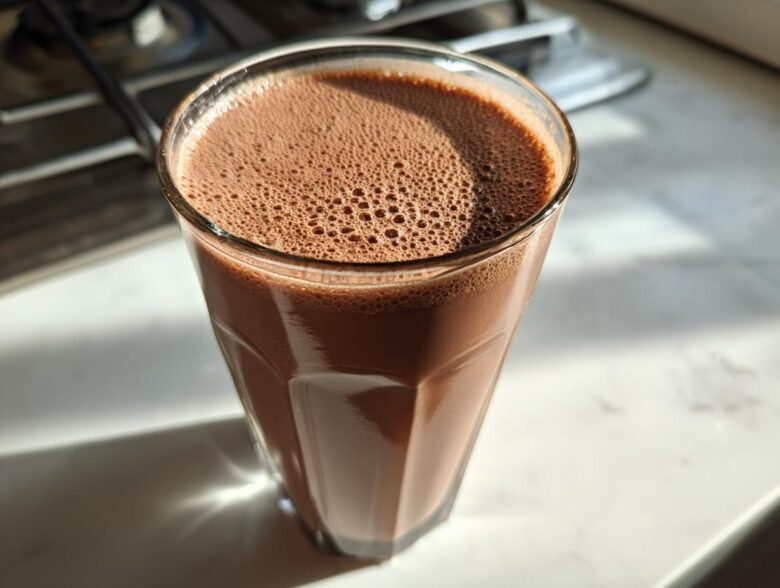
Honestly, do you ever crave that rich, deep chocolate flavor, but the store-bought carton just tastes… thin? I spent entirely too long chasing that perfect, creamy cup of chocolate milk. Trust me, that search is over now. This is hands-down the ultimate quick homemade chocolate milk recipe, and I promise you, once you use cocoa powder this way, you’ll never go back to syrups again. My main focus was getting absolutely zero lumps and that dense, velvety texture you usually only find in fancy cafés. Ready in under five minutes? Absolutely!
We talk a lot about community here on the blog, and that’s why exploring different ideas with you is so important. If you’re curious about my journey, you can read more about us right here.
Why This Homemade Chocolate Milk Recipe Works So Well
This isn’t just another glass of milk with brown powder dumped in, I promise! The genius of this method is how fast it comes together while tasting incredible. Here’s what you gain by making this quick chocolate milk:
- Speed for Real: You get amazing flavor in about two minutes flat. Perfect for a quick breakfast drink when you’re running late.
- Texture Upgrade: By mixing the cocoa powder first, we guarantee a creamy chocolate milk recipe result without any grainy bits lingering anywhere.
- Total Control: Since we’re using chocolate milk with cocoa powder, you decide how healthy or sweet it becomes! Say goodbye to artificial stuff.
Gathering Ingredients for Your Creamy Chocolate Milk Recipe
Okay, let’s pull out the essentials. Because this recipe is so simple—barely five ingredients—the quality of what you use really shines through. You only need milk, cocoa powder, sugar, vanilla, and a tiny whisper of salt. That’s it! I always recommend starting with a full cup, but you can easily scale this up if you’re making a batch.
For the richest taste, I reach for whole milk or, if you prefer non-dairy, oat milk seriously gives you the best body for a truly luxurious cup of chocolate milk. Don’t reach for anything light or watery here; we are aiming for creaminess!
Ingredient Notes and Substitution for Perfect Chocolate Milk
Listen, the cocoa powder is everything here. Make sure you are using unsweetened cocoa powder, not hot chocolate mix—that’s the secret for a pure, deep chocolate baseline. Using a higher quality, darker cocoa powder really delivers on the ‘best homemade chocolate milk’ promise.
When it comes to sugar, use what tastes good to you. If you want a less sugar chocolate milk version, swap the granulated sugar for a teaspoon of stevia or monk fruit sweetener. It sounds simple, but those little touches—like the pinch of salt to balance the sweetness—are what make this one of my favorite simple milk recipes.
Step-by-Step Guide to Making Quick Chocolate Milk
This whole process is designed around speed and avoiding that dreaded grainy texture. Remember, we are not just stirring powder into cold milk; that sets you up for failure because the cocoa clumps up immediately! We start by treating our dry items like they are going to become fudge.
First, grab a small bowl or just use the glass you plan to drink out of—I like using a bowl for a better mix, honestly. Combine that cocoa powder, sugar, and that tiny pinch of salt. Next comes the secret weapon: only two tablespoons of milk. Stir that mixture like you mean it!
You’ll mix until it looks like dark, shiny chocolate paint. Once you have your beautiful, thick paste, you toss in the vanilla extract, and *then* you introduce the rest of your cold milk. A good, vigorous whisk, and boom! You have instant, rich chocolate milk ready to go.
Mastering the Cocoa Paste for Smooth Chocolate Milk
This is the non-negotiable step for anyone wanting a truly creamy chocolate milk recipe. Creating that initial sludge—the cocoa paste—is critical. Cocoa powder doesn’t dissolve well in cold liquid, but it dissolves like a dream in a little warm fat or liquid.
When I stir this paste together, I go hard. I want zero dry pockets hiding anywhere. If you see a speck of dry sugar or cocoa clinging to the bottom of your bowl, keep going! Once this bit is perfectly smooth, adding the rest of the cold milk is easy breezy, and you’ll never have to worry about serving lumpy chocolate milk for kids ever again.
Expert Tips for the Best Homemade Chocolate Milk Recipe
Now that you have the basic steps down for that perfect homemade chocolate milk recipe, I want to share the little tricks that take it from great to absolutely unforgettable. These aren’t in the basic instructions because they are shortcuts for days when you have just three minutes, but they make a real difference if you have an extra moment!
If you want that extra deep chocolate hit, try this: take your cocoa powder, salt, and sugar, and mix them with just one tablespoon of milk—but heat that milk up slightly first! Warming it up helps the cocoa bloom and releases so much more flavor. Once it’s fully dissolved into a thick, gorgeous sludge, then you proceed by adding your cold milk. Wow! It takes longer, maybe 30 extra seconds, but the flavor payoff is huge.
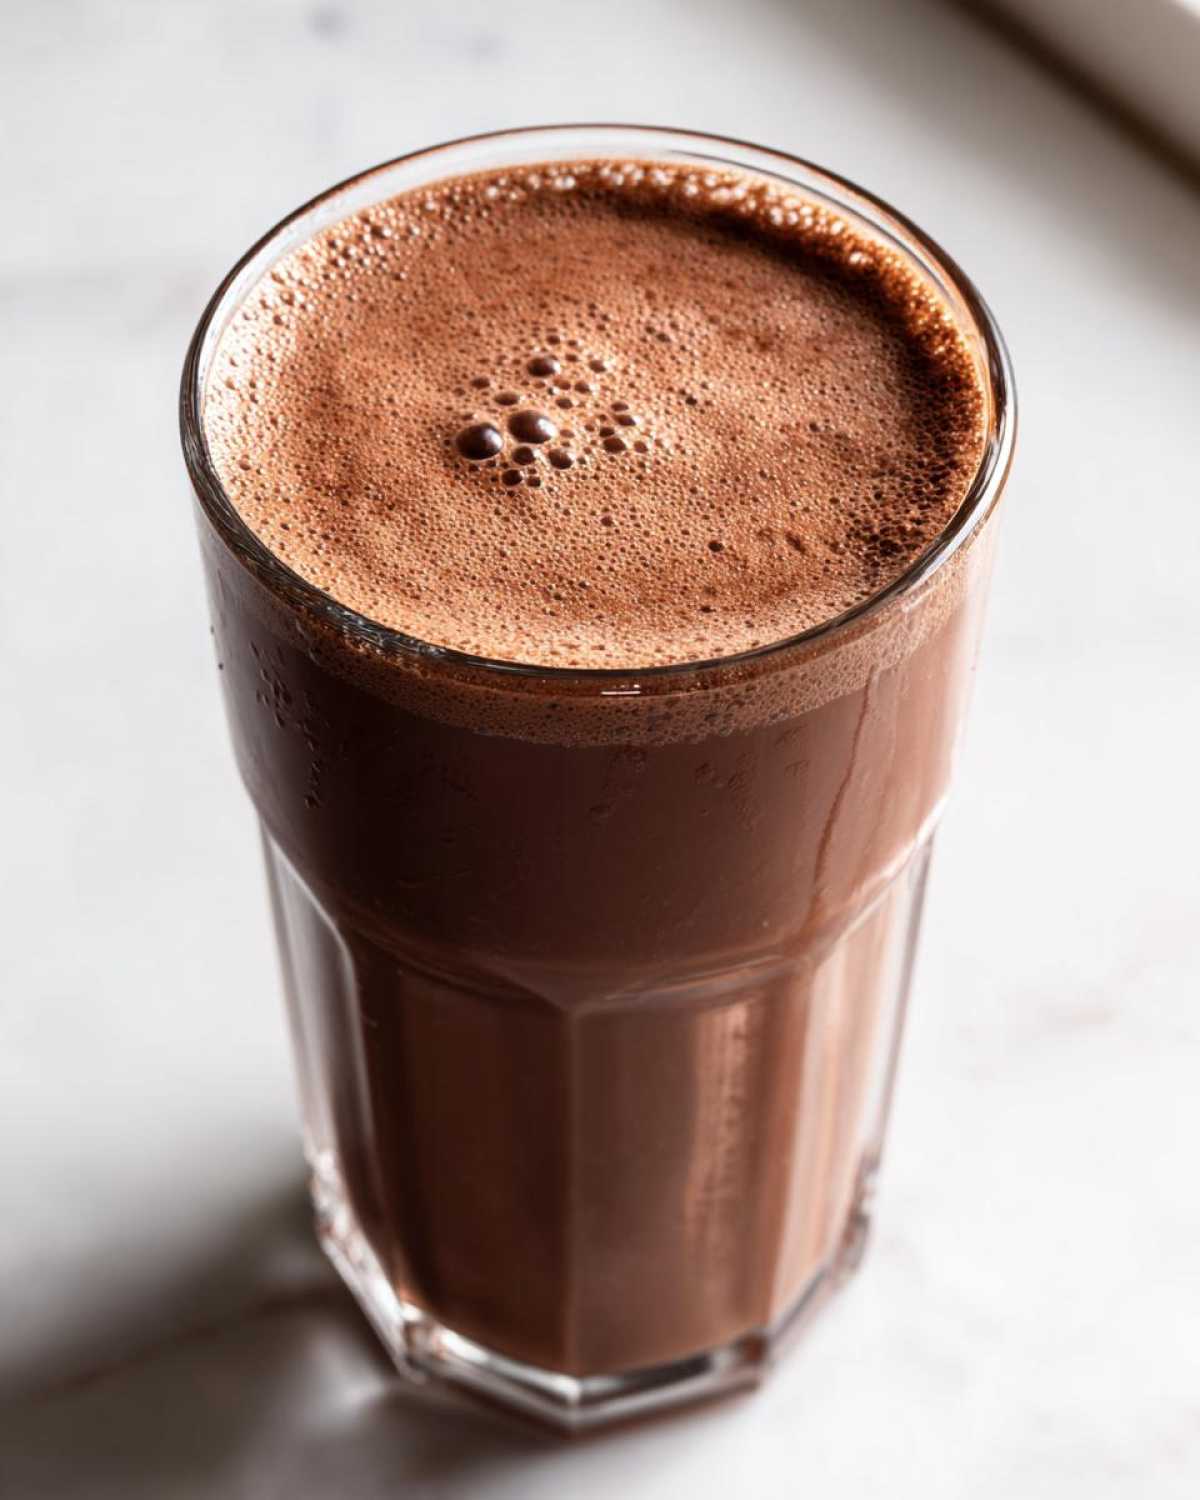
Speaking of texture, if you want to elevate this beyond just cold milk, you absolutely need to try making whipped chocolate milk tutorial style! Once your drink is mixed, grab one of those cheap little handheld battery-powered frothers—you know, the kind you use for fancy coffee drinks. Whisk the finished drink briskly for about 15 seconds. It whips air right into it, making a beautiful foam cap. It’s luxurious, fun for the kids, and makes this feel like a special occasion drink!
Remember, if you’re using this recipe often, please check out my full disclaimer statement regarding recipe testing and ingredients!
Variations on Your Classic Chocolate Milk Recipe
While this recipe nails the classic vibe, sometimes you want to shake things up, right? That’s the beauty of starting with a pure base like this! We aren’t trapped by some pre-made syrup flavor here; we can get creative. This is how we turn a simple glass of chocolate milk into something totally new for a fun evening treat or a cold chocolate drink idea.
For starters, if you love Mexican hot chocolate flavors, try adding just a tiny pinch of cayenne pepper along with your cocoa powder. It doesn’t make it spicy, but it deepens the chocolate flavor beautifully. Another simple addition that always works is cinnamon—it adds warmth that makes this feel cozy, even when served ice cold.
If you need a little afternoon pick-me-up, why not go for a mocha twist? Pour half your milk, mix it up with the cocoa paste until smooth, and then stir in about a quarter cup of cooled, strong brewed coffee. Suddenly, you have an adult-friendly, sweet chocolate beverage guide entry that is miles better than anything you’d buy!
Storage and Making DIY Chocolate Milk Powder Mix
I always make a double batch of the dry ingredients because I know I’ll be back for more! If you find yourself with leftover liquid chocolate milk, don’t just leave it sitting; it won’t last long because we didn’t add any stabilizers. Seriously, try to drink it the same day. If you must store it, seal it tight and keep it in the coldest part of the fridge for maybe 24 hours tops, but it definitely loses that fresh, crisp taste.
Now, for my favorite time-saver: turning this into a ready-to-go mix. This is how you nail that “make-ahead” intent for those mornings when you have zero time! Take the dry components—the cocoa powder, the sugar, and that essential salt—and multiply them by four or six, depending on how much you want to store. Whisk them together really well. I love using my immersion blender for a minute just to ensure everything is perfectly homogenized.
Store this DIY chocolate milk powder mix in an airtight container, like one of those glass jars with fancy clamps. It stays perfect on the counter for weeks. When morning hits, just scoop two tablespoons of the mix into your glass, add your vanilla, add two tablespoons of milk to make the paste (don’t forget that crucial step!), and finish with the rest of your cold milk. Easy, right? It’s genius for packing in lunchboxes too! If you ever need to get in touch about substitutions or ideas, my contact page is always open!
Frequently Asked Questions About Homemade Chocolate Milk
I get so many messages asking for clarity on a few things, so let’s tackle those last-minute worries right here. It’s amazing how powerful a simple glass of chocolate milk can be when you finally make it yourself!
How do I make this a healthy chocolate milk recipe?
That’s such a great question! Since we aren’t using any syrups full of high-fructose corn syrup, we are already miles ahead toward a healthy chocolate milk recipe. To keep the sugar low, simply swap out the granulated sugar for a zero-calorie sweetener like erythritol or monk fruit. Also, if you really want to optimize it, stick to skim milk or an unsweetened non-dairy option like almond milk. The primary focus remains on using pure cocoa powder, which is full of antioxidants!
Can I use different types of milk for the best homemade chocolate milk?
Yes, absolutely! The recipe is so flexible. While I personally adore the richness of whole dairy milk or creamy oat milk for that perfect texture we talked about, this works fine with 2%, skim, soy, or even rice milk. Just be aware that lighter milks will result in a less ‘creamy chocolate milk recipe’ finish, but the cocoa flavor will still shine through. It’s all about what you prefer for your simple milk recipes!
How fast is this quick chocolate milk preparation, really?
Look, I timed it when I was writing the instructions! If you are already clean-up-ready and just stirring the paste quickly, you can be sipping that quick chocolate milk in about two minutes. If you are making the paste in a separate bowl, maybe give yourself three minutes. It’s truly built for speed in the morning. I hope this helps you keep up with your privacy policy on healthy eating habits!
Why is my chocolate milk separating after I stir it?
That’s usually because you skipped the middle step—the magical cocoa paste! If you dump the powder into a full glass of cold milk, the powder just floats around like dust because the cold liquid doesn’t let it dissolve properly. You must create that initial thick slurry with just a splash of milk. That paste step ensures everything stays incorporated once the rest of the cold milk goes in, guaranteeing a uniform, rich color.
Serving Suggestions for Your Simple Milk Recipes
Because this is such a pure, classic flavor, it pairs beautifully with almost anything! If you’re making this right away in the morning, it’s fantastic alongside pancakes or waffles—much better than plain milk. When I whip it up for an afternoon treat, I always serve it with something crunchy like salty pretzels or a simple sugar cookie.
It’s also amazing as a light, cool chocolate dessert drink after dinner instead of something heavy. Just serve it over extra ice, maybe with a tiny dusting of extra cocoa powder on top. So satisfying!
Nutritional Estimate for This Chocolate Milk
I always get asked about the numbers, so here they are for a standard single serving using whole milk and regular sugar. Keep in mind these are just estimates, right? If you swap whole milk for skim or switch out refined sugar for a zero-calorie sweetener, those values are going to shift quite a bit!
- Calories: About 180
- Sugar: Roughly 22g (This is highly variable based on your sweetener choice!)
- Protein: Near 8g
- Fat: Around 6g
This is a great baseline for our classic recipe, but remember, you have the power to adjust it to fit your needs perfectly!
PrintQuick Homemade Chocolate Milk with Cocoa Powder
Make creamy, rich chocolate milk at home in minutes using simple ingredients and cocoa powder. This recipe tastes better than store-bought versions.
- Prep Time: 2 min
- Cook Time: 0 min
- Total Time: 2 min
- Yield: 1 serving
- Category: Beverage
- Method: Mixing
- Cuisine: American
- Diet: Vegetarian
Ingredients
- 1 cup milk (dairy or non-dairy)
- 2 tablespoons unsweetened cocoa powder
- 1 to 2 tablespoons sugar (adjust to taste)
- 1/4 teaspoon vanilla extract
- Pinch of salt
Instructions
- Combine the cocoa powder, sugar, and salt in a small bowl or directly in your serving glass.
- Add about 2 tablespoons of the milk to the dry ingredients. Stir well until you form a smooth, thick paste (this prevents lumps).
- Add the vanilla extract to the paste.
- Pour in the remaining milk.
- Stir or whisk vigorously until the chocolate mixture is fully incorporated and the milk is uniformly colored.
- Serve immediately over ice if desired.
Notes
- For a richer flavor, heat a small amount of milk first and dissolve the cocoa and sugar in it before adding the cold milk.
- Use whole milk or oat milk for the creamiest texture.
- To make a low-sugar version, substitute the sugar with your preferred sweetener, like stevia or monk fruit, to taste.
- If you want whipped chocolate milk, froth the finished mixture using a handheld frother.
Nutrition
- Serving Size: 1 cup
- Calories: 180
- Sugar: 22g
- Sodium: 80mg
- Fat: 6g
- Saturated Fat: 3.5g
- Unsaturated Fat: 2.5g
- Trans Fat: 0g
- Carbohydrates: 28g
- Fiber: 2g
- Protein: 8g
- Cholesterol: 20mg