

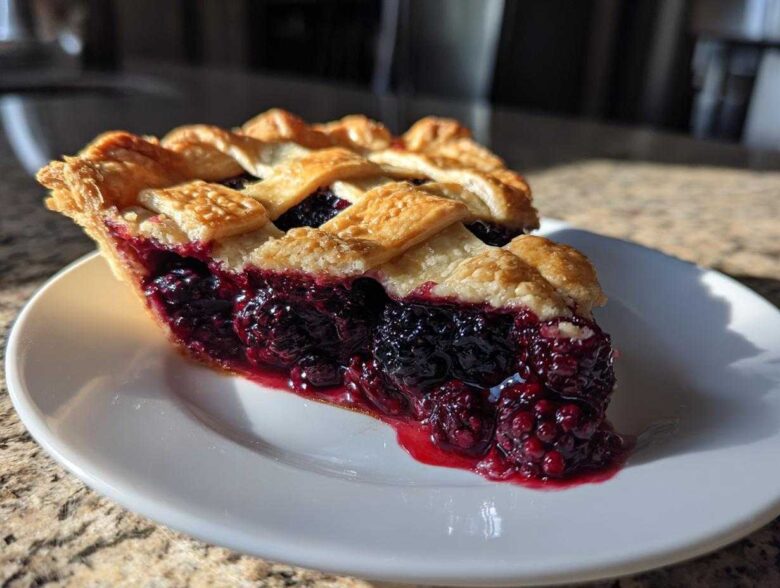
There’s something about that first bite of a truly perfect, homemade dessert that just stops time, isn’t there? Whether it’s the height of summer when the berries are bursting off the vine, or you’re looking for the perfect centerpiece for your Thanksgiving table, nothing beats a truly classic **blackberry pie**. I’ve spent years chasing that elusive combination—the crust that shatters perfectly under your fork, and a filling that’s sweet, tart, and gorgeously thick. Forget those watery, disappointing berry pies you’ve had!
Trust me when I tell you that I finally cracked the code on this **classic homemade blackberry pie recipe**. This isn’t some rushed, weeknight shortcut. This is the tried-and-true method that yields an unbelievably flaky pie crust and the juiciest berry filling you can imagine. I learned the hard way that a great pie takes patience, but once you nail the technique, you’ll be making this recipe forever.
If you want to know more about the journey to getting this blog running and the passion behind Eatable Empress, you can always check out our About Us page!
Why This is the Best Homemade Blackberry Pie Recipe
Okay, you’ve probably seen a million recipes floating around, but I promise you, this **blackberry pie** is different. It’s the one that just *works* every single time. I’ve logged hours in the kitchen tweaking this to make sure it’s sturdy enough for potlucks but tender enough for Sunday dessert. People ask me what my big secret is, and honestly, it comes down to two non-negotiable elements that elevate it far above your average fruit pie.
- The crust holds up beautifully—it never gets soggy, even the next day.
- The filling is pure, intense berry flavor without that frustrating, runny mess at the bottom of your plate.
- It honors that true, old-fashioned feel we all crave in comfort food desserts.
Achieving the Perfect Flaky Pie Crust Tutorial
If I could scream one thing from the rooftops, it’s this: COLD. Ingredients. That’s the entire secret to my flaky pie crust tutorial. You can’t rush cutting in the butter when you’re making the dough. We aren’t aiming for smooth here; we want pea-sized chunks of butter locked into that flour. When those cold butter pockets hit the hot oven, they steam, creating those glorious pockets of air that make the crust shatter—not crumble.
Secrets to a Juicy Berry Desserts Filling
My favorite part is when the filling bubbles up through the lattice because you know it’s set perfectly! To ensure you get fantastic **juicy berry desserts** without soup on the plate, you absolutely must respect the cornstarch. It’s what thickens the juices as they cook down. I also always add a splash of fresh lemon juice. It brightens up the sweetness of the berries and keeps our **blackberry pie** from tasting flat. It strikes that perfect sweet-tart balance!
Gathering Ingredients for Your Classic Blackberry Pie
This recipe is built on quality ingredients, so let’s make sure we have everything ready before we even touch the flour. Precision matters here, especially when we are dealing with the pastry. If you have everything measured out first, the whole **blackberry pie** comes together so much smoother. Here is exactly what you’ll need for both the crust and that gorgeous filling:
- 2 1/2 cups all-purpose flour
- 1 teaspoon salt
- 1 cup (2 sticks) cold unsalted butter, cut into cubes
- 1/2 cup ice water, plus more if needed
- 6 cups fresh or frozen blackberries
- 3/4 cup granulated sugar (you might tweak this, see below!)
- 1/4 cup cornstarch
- 1 tablespoon lemon juice
- 1/4 teaspoon ground cinnamon
- 1 large egg, beaten (for egg wash)
- 1 tablespoon coarse sugar (for sprinkling)
Ingredient Notes and Substitutions for Blackberry Pie
Don’t panic if you can’t get your hands on perfect fresh berries. If you use frozen blackberries, do not thaw them first—just toss them straight into the sugar mixture. This helps keep the filling from getting too watery during the initial mix. I usually taste my berries before I add sugar; if they are super tart, I bump that sugar up to a full cup. The egg wash is crucial, by the way! It’s just there to seal up the pastry beautifully and give that rustic top a lovely, shiny golden color when it comes out of the oven.
Step-by-Step Instructions for Your Easy Blackberry Pie Recipe
Alright, we have the ingredients, now let’s get to the fun part—putting this amazing **blackberry pie** together! Remember, these steps are sequential, and rushing any part, especially the chilling, will sabotage that flaky crust we worked so hard for. Follow this flow, and you’ll have a masterpiece ready for the oven in no time. It seems like a lot of steps, but it moves quickly once you’re in the rhythm!
Making the Flaky Pie Dough
First things first: we need that dough ice cold! Whisk your flour and salt together, then grab your cubed, **cold unsalted butter**. You need to work that butter into the flour until it looks all crumbly, with those walnut-sized or pea-sized butter bits still visible. Those are your flavor bombs! Then, add the ice water one tablespoon at a time. Stop adding water the second the shaggy dough starts holding itself together when you squeeze a bit. Don’t mix past that point! Divide that dough into two disks, wrap them up tight, and tell them to chill out in the fridge for at least an hour. Seriously, don’t skip the chill—it’s non-negotiable for flaky results.
Assembling the Blackberry Pie with Lattice Pie Top Ideas
Once the dough is chilled, grab one disk and roll it out right on a lightly floured surface until it’s big enough for your 9-inch pie plate. Gently ease that bottom crust in. While that’s sitting, gently fold your blackberry filling together—we want the berries intact, not mashed! Pour that glorious filling right into the shell. Now for the top! This is where you can get creative with your lattice pie top ideas, or just keep it simple. I usually go for the classic strips, weaving them over and under for that rustic look. Once the top is on (lattice or solid), make sure you crimp those edges tight to seal everything up. Then, go grab that beaten egg and brush it over the entire top. That’s what gives us that perfect sheen!
Baking Times and Temperature for Perfect Blackberry Pie
Okay, the pie looks beautiful assembled, but the baking is where the magic (and sometimes the fear) happens! You can’t just set it and forget it with a fruit pie like this **blackberry pie**. We need a two-stage approach to get everything cooked perfectly—the crust golden brown, and the filling bubbling thick and juicy.
We start hot! Preheat your oven to a zesty 425°F (220°C). That initial blast of high heat is essential because it immediately sets that bottom crust structure so it doesn’t turn soggy while the filling heats up. Pop the pie in for about 15 minutes at that high temperature. Keep an eye on it during this time; you want to see those edges start to firm up.
Once that 15 minutes is up, it’s time to turn the heat down. Reduce your oven temperature to 375°F (190°C). This is where the slow cooking happens. You’ll let it bake for another 40 to 50 minutes. How do you know it’s done? You’ll see the filling bubbling up through the lattice openings, and the bubbles should look thick, not watery. Don’t worry if the crust edges look deep brown before the filling is ready—that’s what the foil shield is for!
Whenever I see those edges getting a little too dark—maybe around the 30-minute mark of the second bake—I grab some aluminum foil, tear off strips, and gently drape them over the rim of the pie plate. This shields the delicate edges from scorching while the center finishes bubbling. This trick is a lifesaver for any **classic fruit pie**! Don’t be tempted to cut into it right away, though; patience is the final ingredient!
Tips for Success When Making This Old Fashioned Blackberry Dessert
We have made the dough, mixed the filling, and baked it! Fantastic job! But look, making a truly stunning **old fashioned blackberry dessert** requires just a few crucial things right at the end. These aren’t really steps, they are more like commandments I learned from years of cutting into prematurely sliced pies. Follow these three golden rules, and your blackberry pie will be legendary.
First, and I cannot stress this enough: you absolutely must let the pie cool completely. I mean, 4 hours minimum on a cooling rack. If you slice into it hot, every bit of that gorgeous, thickened juice you worked so hard to create will run right out onto the plate. It needs time for the cornstarch structure to fully set. It’s agonizing, I know, but think of it as baking anticipation!
Secondly, if you’re short on time and can’t use fresh berries, frozen is fine, but don’t thaw them first! Toss them directly from the freezer into your sugar mix. The only change you might need to make, as noted in the recipe, is adding about five or ten extra minutes to that final baking time just to ensure they break down properly.
Finally, for the crust edges if they brown too fast, use that foil shield trick we talked about! It’s an old technique but it works wonders for protecting your pastry while the filling finishes setting up. Don’t forget to check out our full disclaimer if you have any questions about ingredient assumptions!
Serving Suggestions for Your Rustic Berry Pie
Now the hardest part is over: the waiting! Your **blackberry pie** is cooled, it’s set, and it smells absolutely heavenly. This dessert is so versatile—it shines just as brightly at a backyard barbecue as it does at a formal dinner. We love calling this a quintessential **summer pie recipes** hero because nothing beats that warm berry aroma on a warm evening.
When it comes to serving this **rustic berry pie**, you have so many delicious options! If I’m serving it warm (and I often sneak a slice before it’s *totally* cooled, don’t judge me!), I always reach for a big, cold scoop of vanilla bean ice cream. The contrast between the warm, slightly tart filling and the melting, sweet cream is just perfection. It’s the ultimate classic combo for any **homemade blackberry pie**.
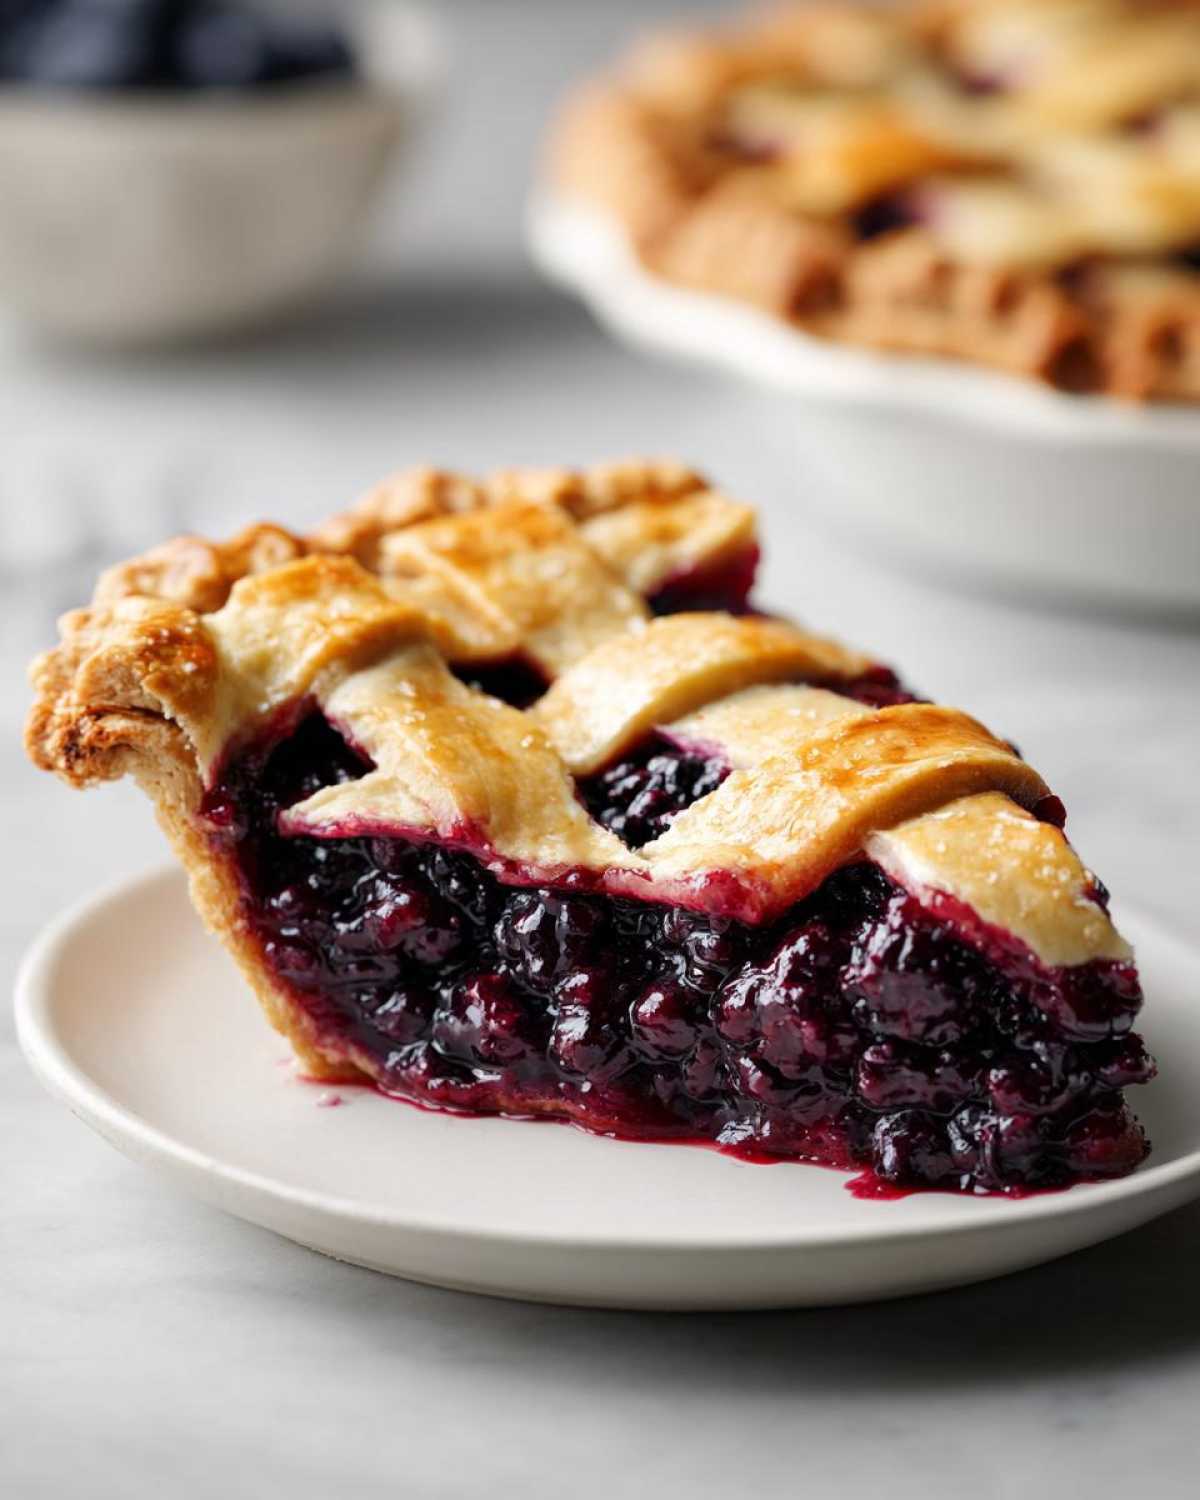
If you want something a little lighter, fresh whipped cream is fantastic. I whip mine with just a tiny sprinkle of powdered sugar and maybe half a teaspoon of vanilla. That light, airy cream cuts through the richness of the crust so perfectly. Sometimes, if I’m feeling fancy, I’ll gently fold in a teaspoon of lemon zest for an extra little zing that plays really well against the blackberries. Whether you go simple or dress it up, this pie is guaranteed to be the star of whatever table you put it on!
Storage and Reheating Instructions for Blackberry Pie
We’ve successfully baked this beautiful **blackberry pie**, but now we have to talk survival skills! Pies are tricky because the crust starts fighting the moisture the second they cool down. You did the hardest chore by cooling it for four hours, so let’s make sure we store it correctly to keep that crust as crisp as possible. My rule of thumb is always to let the pie cool completely on the counter, uncovered, just like you did after baking.
Once it’s totally cool—that means no warm spots if you touch the bottom—you’ve got two options for countertop storage. If you think you can eat the whole thing within about 24 hours, leaving it loosely covered on the counter is totally fine. The sugar content in the filling does a decent job of preserving it for that short period.
If you know you’ll have leftovers past a full day, or if your kitchen is just super warm, I always move my leftovers into the fridge. Pop it into an airtight container or cover it tightly with plastic wrap. Stored this way, your **homemade blackberry pie** will stay fresh for almost four days. Honestly, mine rarely makes it past day three!
Now, the important part: reheating. Nobody wants room-temperature pastry with cold filling, right? If you’re just reheating a single slice, never microwave it—that turns the crust instantly soggy. The best method, even for just one piece, is to use the oven or toaster oven. Set your oven to about 325°F (160°C). Lay the slice directly on a baking sheet or wrap it loosely in foil, and warm it for about 10 to 15 minutes. It warms the filling just enough while crisping up that pastry edges again. Then, you can dollop on some cold cream or ice cream for that perfect temperature contrast!
Frequently Asked Questions About Blackberry Pie
I get so many great questions about this recipe, especially from folks trying it out for the first time or looking to make one of those fun variations we talked about! I always try to answer every email that comes through my contact form, but I figured putting the most common ones right here saves everyone time. Here are a few things I hear often about making the perfect **blackberry pie**.
Can I use frozen blackberries for this easy blackberry pie recipe?
Absolutely, you can! I mentioned it briefly, but let’s be super clear: do not thaw your frozen berries! If you thaw them, you end up with mushy berries and a pool of watery juice before you even get the crust in the oven. Just toss those cold berries right into the sugar and cornstarch mix. The only thing you need to watch out for is that they might take five or maybe ten extra minutes to bubble up nicely in the oven because they start out so much colder than fresh ones. It makes for a fantastic **easy blackberry pie recipe** when you can’t get to the farmer’s market!
What is the difference between this and a blackberry cream pie?
That’s a great question if you’re weighing up your options for **Thanksgiving pie ideas**! This recipe here is for that deep-dish, double-crust, baked, **classic fruit pie**. It’s sturdy, warm, and relies on the fruit cooking down with the sugar and cornstarch until it’s jammy. A **blackberry cream pie**, on the other hand, is no-bake or lightly baked. It usually involves a crumb crust filled with a pudding or cream cheese base—like a delicious cousin to a banana cream pie—and is served cold. They are both amazing, but they offer totally different textures and experiences!
Estimated Nutritional Data for Blackberry Pie
So, we know this **blackberry pie** is pure indulgence, right? It’s a classic dessert, and let’s be real, we aren’t baking it for the diet perks! But I always like to give you an idea of what’s in a standard slice so you know what you’re working with. Please remember, these numbers are just an estimate.
I ran this recipe through a standard calculator based on typical ingredient quantities, assuming 8 even slices. Since every blackberry is a little different in sugar content, and you might use slightly more or less butter in your crust, these figures should be seen as a general guide, nothing more. You can always check out our site policies if you have further specific concerns!
Here is the breakdown for one serving of this delicious dessert:
- Calories: 410
- Fat: 22g (with 14g being Saturated Fat)
- Carbohydrates: 52g
- Protein: 5g
- Sugar: 35g
- Sodium: 250mg
- Fiber: 4g
It’s a treat, for sure! That fat content is what gives us that incredible, rich, **flaky pie crust**, so it’s well-earned. Enjoy every bite of your **homemade blackberry pie**!
PrintClassic Homemade Blackberry Pie with Flaky Lattice Crust
Make a traditional blackberry pie featuring a juicy, sweet-tart filling and a homemade flaky crust, finished with a lattice top.
- Prep Time: 45 min
- Cook Time: 60 min
- Total Time: 105 min
- Yield: 8 servings
- Category: Dessert
- Method: Baking
- Cuisine: American
- Diet: Vegetarian
Ingredients
- 2 1/2 cups all-purpose flour
- 1 teaspoon salt
- 1 cup (2 sticks) cold unsalted butter, cut into cubes
- 1/2 cup ice water, plus more if needed
- 6 cups fresh or frozen blackberries
- 3/4 cup granulated sugar (adjust to berry sweetness)
- 1/4 cup cornstarch
- 1 tablespoon lemon juice
- 1/4 teaspoon ground cinnamon
- 1 large egg, beaten (for egg wash)
- 1 tablespoon coarse sugar (for sprinkling)
Instructions
- Prepare the crust: In a large bowl, whisk together the flour and salt. Cut in the cold butter using a pastry blender or your fingers until the mixture resembles coarse crumbs with some pea-sized pieces of butter remaining.
- Gradually add the ice water, one tablespoon at a time, mixing until the dough just comes together. Do not overmix. Divide the dough in half, flatten each half into a disk, wrap in plastic, and chill for at least 1 hour.
- Prepare the filling: In a separate bowl, gently combine the blackberries, granulated sugar, cornstarch, lemon juice, and cinnamon. Set aside while you roll out the dough.
- Preheat your oven to 425°F (220°C).
- Roll out one disk of dough and carefully place it into a 9-inch pie plate. Trim the edges, leaving a 1-inch overhang.
- Pour the blackberry filling into the bottom crust.
- Roll out the second disk of dough. Cut into strips to create a lattice top, or place the whole sheet over the filling and cut vents. Crimp the edges of the top and bottom crusts together to seal.
- Brush the top crust with the beaten egg wash and sprinkle evenly with coarse sugar.
- Bake for 15 minutes at 425°F (220°C). Then, reduce the oven temperature to 375°F (190°C) and continue baking for 40 to 50 minutes, or until the crust is golden brown and the filling is bubbling thickly. Cover the edges with foil if they brown too quickly.
- Cool the pie completely on a wire rack for at least 4 hours before slicing to allow the filling to set.
Notes
- For a firmer filling, use frozen blackberries without thawing them first; you may need to add 5 to 10 minutes to the total bake time.
- If you prefer a simpler top, skip the lattice and use a solid top crust with several slits cut into it for steam release.
- Chill the butter and water thoroughly; cold ingredients create the flakiest crust texture.
Nutrition
- Serving Size: 1 slice
- Calories: 410
- Sugar: 35g
- Sodium: 250mg
- Fat: 22g
- Saturated Fat: 14g
- Unsaturated Fat: 8g
- Trans Fat: 0g
- Carbohydrates: 52g
- Fiber: 4g
- Protein: 5g
- Cholesterol: 55mg