

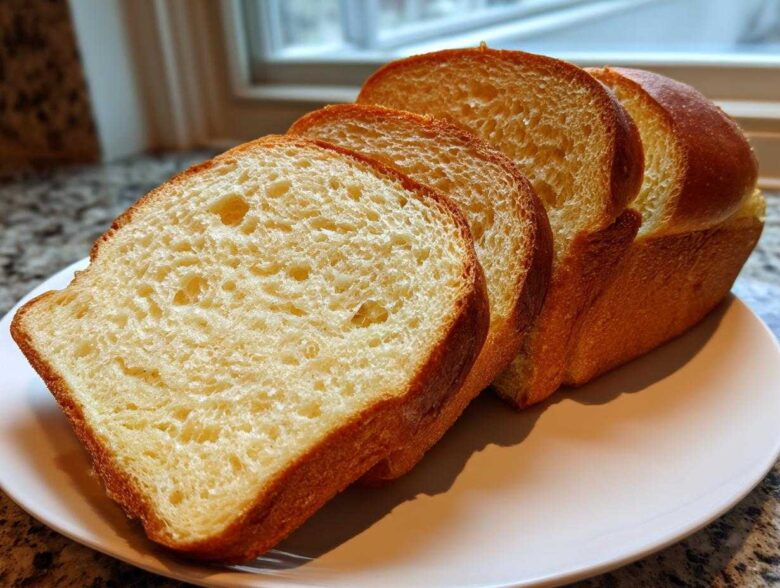
If you’ve ever made sourdough and ended up with something closer to a brick than bread, believe me, I completely get it. For ages, my attempts at sourdough sandwich bread yielded these rustic, chewy loaves that were great for dipping, but absolutely tragic for lunch meat! I struggled so much with that dense, tight crumb.
But friends, I finally cracked the code for that soft, fluffy, and perfectly sliceable texture we all crave. This recipe changes the game. It’s designed specifically to be forgiving and beginner-friendly, proving you don’t need years of experience to make an incredible sourdough sandwich bread. Seriously, get ready for the softest naturally leavened loaf you’ve ever tried. You can check out more about our mission in the kitchen over here!
Why This Is the Best Sourdough Sandwich Loaf for Beginners
You know why this happens to be my go-to Easy Sourdough Sandwich Recipe? Because it nails the texture! Most sourdough recipes forget that sandwich bread needs to be tender, not like a heavy rustic boule made for soup dunking. I’ve engineered this recipe to deliver a Soft Sourdough Loaf that cuts beautifully—no more wrestling with a bread knife!
It’s beginner-friendly because we keep the shaping simple and rely on a cold proof; this makes the dough firm and easy to handle when it’s time to shape it into that perfect loaf pan square. Plus, the flavor is perfectly balanced—not overwhelmingly sour!
Achieving That Tender Sourdough Recipe Crumb
This is where we cheat just a tiny bit, but only for the better! Traditional sourdough relies purely on flour and water, leading to that classic chewy bite. But for the ultimate sourdough sandwich bread, we sneak in avocado oil and honey. Trust me on the oil; it keeps the crumb incredibly soft and tender long after it cools. The honey adds just enough sweetness to round out the sourdough tang for that perfect classic taste.
Essential Ingredients for Fluffy Sourdough Bread
When making fluffy sourdough bread, the ingredients list is short, but every single item better be perfect! This recipe absolutely requires an active sourdough starter—and I mean bubbling, happy, recently fed starter that’s at 100% hydration, ready to go to work. We are using 100 grams of that wonderful starter to kick things off.
You need 500 grams of high-quality bread flour; this structure is key for that lovely rise. We mix in 350 grams of nice warm water to hydrate everything properly. Then come the secret weapons: 20 grams of honey for a kiss of sweetness, 20 grams of avocado oil for that soft crumb, and 10 grams of fine sea salt to control the fermentation and taste great.
Ingredient Notes and Substitutions for Sourdough Sandwich Bread
Don’t try to skimp on the flour here; you really need that high-protein bread flour to hold up the structure of this sourdough sandwich bread. If you don’t have honey on hand, maple syrup works as a perfect backup to keep that crumb soft!
For the oil, avocado oil is great because it’s neutral, but if you have a light olive oil, feel free to swap it in! Just avoid strongly flavored oils, as they might fight with the subtle sourdough flavor we are aiming for in this tender sourdough recipe.
Step-by-Step: How to Make Soft Sourdough Sandwich Bread
Okay, time to get your hands wonderfully sticky! This is where we build the structure for that perfect sliceable sourdough. First thing, grab your big bowl and mix your active starter, that warm water, your honey, and avocado oil until it looks like slightly cloudy soup. Then, dump in all the flour and salt.
Don’t even think about using a mixer here; we’re mixing by hand until it’s just shaggy and there’s no dry flour left floating around—about 30 seconds of work. Cover it up for a 30-minute rest—that’s your autolyse—to let the flour soak up the water. Now we start building strength so this sourdough sandwich bread holds its shape when we bake it!
Mixing and Developing Structure for Your Sliceable Sourdough
After that little break, it’s time for four sets of stretch and folds, spaced 30 minutes apart. Don’t be aggressive; we don’t want to knock all the air out! Wet your hands a little so the dough doesn’t stick. Gently reach under one side, pull the dough up high, and fold it over onto itself. Turn the bowl a quarter turn and repeat that three more times for one set.
This movement builds the gluten network needed for a great rise. After four sets, the dough will feel much smoother and hold its shape better. While the dough is resting between these folds, feel free to read up on our disclaimer while you wait!
Bulk Fermentation and Cold Proofing the Sandwich Loaf Baking Tutorial
Once your folds are done, let the dough chill out at room temperature—around 70 to 74 degrees is perfect. We aren’t looking at the clock too hard here; we are looking for the dough to increase by about 50% in volume! You’ll start seeing bubbles popping up on the surface. This usually takes 3 to 5 glorious hours.
When it looks happy and airy, gently form it into a tight log shape that fits snugly into your greased 9×5 loaf pan. Pop that pan straight into the fridge for a long, cold nap—12 to 16 hours is ideal. This long cold proof is essential; it deepens the flavor and firms the dough up so much, making it incredibly easy to handle when it comes out for baking.
Baking Techniques for the Best Crumb Sourdough
The oven is where this sourdough sandwich bread finally gets its perfect lift! For that beautiful oven spring and great crumb, we use a slightly dramatic two-step temperature process. Get your oven preheated way up high to 450°F (232°C) with the rack down low. High heat right at the start blasts the loaf with energy and sets that crust quickly!
Bake it hard for the first 20 minutes up there. Then, without opening the door if you can help it, drop the heat down to 375°F (190°C) and let it finish baking for another 25 to 30 minutes. The real secret to avoiding that awful gummy texture so common in **sourdough sandwich bread** is hitting the right internal temperature. You’ve got to check it—you’re aiming for 205°F to 210°F inside. That means it’s fully baked, but still wonderfully moist!
Tips for Success with Your Beginner Sourdough Sandwich Bread
Even though this is an Easy Sourdough Sandwich Recipe, there are a few little things that can trip you up if you aren’t careful. The absolute number one rule for getting that perfect, airy texture is patience after baking. You simply cannot slice this beautiful sourdough sandwich bread while it’s warm! I know it smells incredible fresh out of the oven, but slicing early traps steam, making the tender crumb gummy. Resist the urge for at least two full hours!
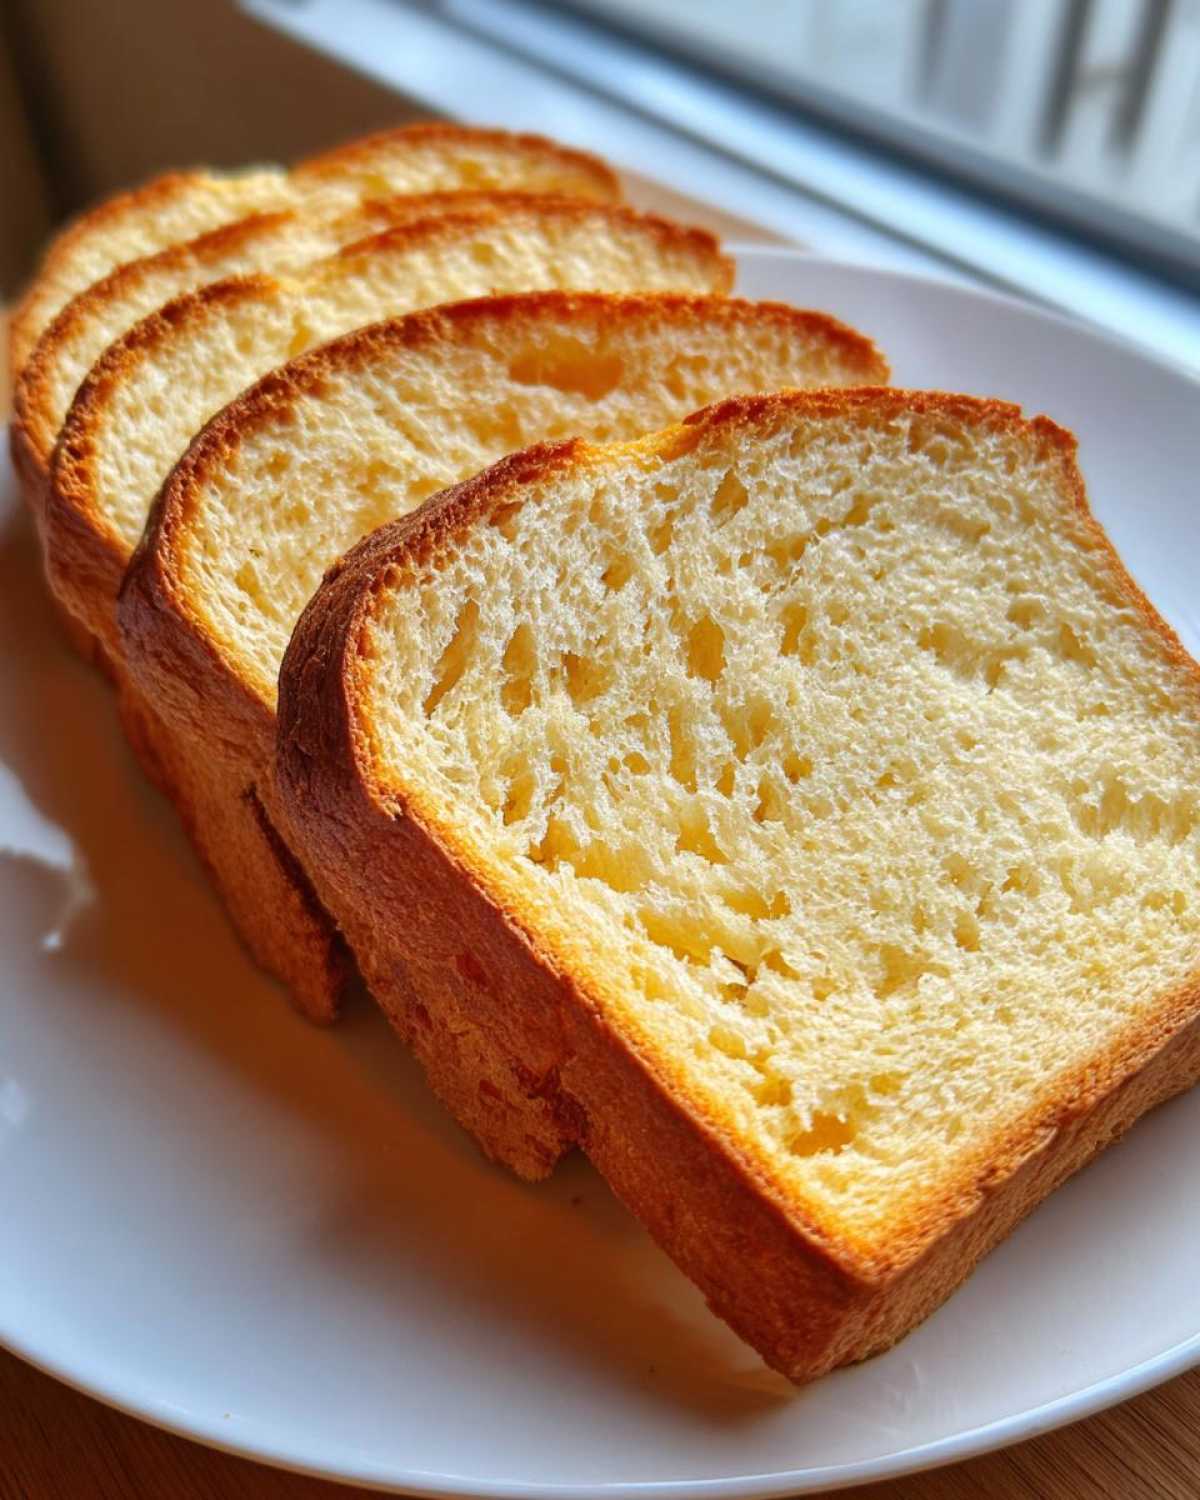
Also, pay attention to your starter! If your starter isn’t super active—if it hasn’t doubled or tripled reliably after feeding—your loaf won’t rise properly. A weak starter is the fastest path to a dense loaf. Stick to the volume check during bulk fermentation, and you’ll be golden. If you need to reach out with questions, you can always find my contact information right here!
Storing Your Tender Sourdough Recipe
This tender sourdough recipe doesn’t have preservatives, so how we store it matters a lot if we want to keep that lovely soft texture! At room temperature, wrapped tightly in foil or a bread bag, this sourdough sandwich bread will stay fresh and soft for about three days. Don’t stick it in the fridge too early—cold temperatures actually make bread go stale faster, and we don’t want that!
If you know you won’t finish the loaf in three days, which happens easily around here, freezing is your best friend. I slice the entire loaf first, then wrap the slices tightly in plastic wrap, maybe even add a layer of foil, and pop them into a freezer bag. It keeps perfectly for months and thaws on the counter in just an hour ready for the toaster!
Frequently Asked Questions About Naturally Leavened Sandwich Bread
Listen, sourdough is an art, and it’s normal to have questions when you are aiming for that perfect sliceable texture. Here are the things I get asked most often about making the Best Crumb Sourdough for a proper sandwich!
Why is my sourdough sandwich bread dense?
Oh, that dreaded dense texture! Usually, it comes down to one of two things for this type of sourdough sandwich bread: starter power or proofing time. If your starter wasn’t active enough—I mean truly bubbly and hungry—it just doesn’t have the gas to lift that enriched dough. Also, if you didn’t let it bulk ferment long enough (remember, look for that 50% rise!), you won’t have enough internal gas structure. This recipe combats that by asking for oil and honey, but a weak start will always lead to a heavy loaf.
Can I make this sourdough sandwich bread without a loaf pan?
You technically *can* bake this free-form on a baking stone or sheet, but I really wouldn’t recommend it if you are chasing that classic sandwich look! The loaf pan is crucial because it contains the dough, forcing it up rather than out, which is how we get those nice straight sides perfect for stacking fillings. If you bake it free-form, you’ll get a much rounder, rustic loaf with a thick, hard crust all over it—less ideal for a delicate sandwich!
How do I make this bread less sour for a Classic Sourdough Sandwich?
If you are looking for a milder, more classic profile, it’s all about controlling the long, cold proof in the fridge. The longer dough sits in the cold, the more sour flavors develop. If you want a very mild flavor, take your sourdough sandwich bread out of the fridge around the 10 or 11-hour mark instead of waiting the full 16 hours. Also, make sure your starter is fed recently (within 4-6 hours of mixing) so it’s milder when you begin. For more details on our site guidelines, please review the privacy policy!
Understanding the Gut Healthy Sandwich Bread Benefits
Even though we are making this wonderful sourdough sandwich bread soft and light, we still get to enjoy the benefits of true sourdough! That long, slow cold proofing time we do doesn’t just build flavor; it actually pre-digests some of the gluten and breaks down starches.
That means this naturally leavened loaf is often easier on your tummy than quick-rise bread. It’s fantastic knowing that your delicious, gut healthy sandwich bread slice is doing double duty!
Share Your Perfect Sourdough Sandwich Loaf
I have poured all my favorite tricks into making this the definitive loaf for you—the ultimate sourdough sandwich bread that’s soft, sliceable, and never dense. Now the success is completely in your hands, and I can’t wait to hear all about it!
Once you’ve let that beauty cool completely and you’ve managed to slice it without sneaking a piece (good luck!), please hop down to the comments below. Let me know how your first attempt at this tender sourdough recipe went!
Did you find the bulk fermentation time just right for your kitchen? Did the honey and oil really make a difference in achieving that soft crumb? I love seeing photos of your bakes, so if you shared your results on social media, tag me so I can cheer you on! Your feedback helps me keep these recipes reliable for everyone else staring down their first loaf. Thank you for trusting me with your baking journey, and don’t forget to check out our terms and conditions before you go!
PrintSoft Sourdough Sandwich Bread

A beginner-friendly recipe for a soft, sliceable sourdough loaf perfect for sandwiches, featuring a tender crumb.
- Prep Time: 30 min
- Cook Time: 55 min
- Total Time: 13 hours 55 min
- Yield: 1 loaf
- Category: Baking
- Method: Baking
- Cuisine: American
- Diet: Vegetarian
Ingredients
- 100g active sourdough starter (100% hydration)
- 350g warm water
- 500g bread flour
- 10g fine sea salt
- 20g honey
- 20g avocado oil
Instructions
- Mix the active starter, warm water, honey, and avocado oil in a large bowl until combined.
- Add the bread flour and salt to the wet ingredients. Mix by hand until a shaggy dough forms and no dry flour remains.
- Cover the bowl and let the dough rest for 30 minutes (autolyse).
- Perform four sets of stretch and folds, spaced 30 minutes apart. Gently stretch the dough up and fold it over itself, repeating four times per set.
- After the final set of folds, let the dough rest, covered, at room temperature (around 70-74°F) for 3 to 5 hours, or until it has increased in volume by about 50% and shows signs of aeration.
- Gently shape the dough into a tight log or batard shape suitable for a standard loaf pan (9×5 inch). Place it seam-side down into a lightly greased loaf pan.
- Cold proof the dough in the refrigerator for 12 to 16 hours.
- Preheat your oven to 450°F (232°C) with a rack positioned in the lower third.
- Remove the dough from the refrigerator 1 hour before baking. Let it sit on the counter while the oven heats.
- Bake for 20 minutes at 450°F. Reduce the oven temperature to 375°F (190°C) and continue baking for another 25 to 30 minutes, until the crust is golden brown and the internal temperature reaches 205-210°F.
- Remove the loaf from the pan immediately and cool completely on a wire rack before slicing.
Notes
- Using honey and oil helps keep the crumb soft, mimicking commercial sandwich bread texture.
- For a slightly more open crumb, use a longer bulk fermentation time at a slightly cooler temperature.
- Wait until the bread is completely cool before slicing to prevent a gummy texture.
Nutrition
- Serving Size: 1 slice
- Calories: 250
- Sugar: 3
- Sodium: 350
- Fat: 4
- Saturated Fat: 0.5
- Unsaturated Fat: 3.5
- Trans Fat: 0
- Carbohydrates: 48
- Fiber: 2
- Protein: 9
- Cholesterol: 0