

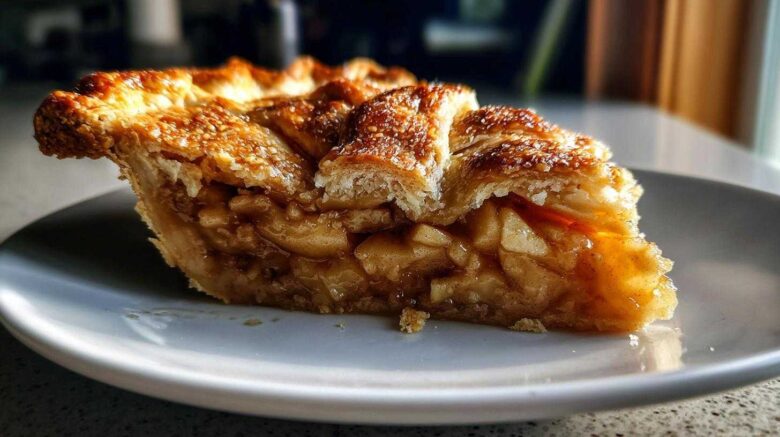
The Art of the Braided Apple Pie: A Show-Stopping Fall Dessert
There’s something truly magical about a braided apple pie. It’s more than just a dessert; it’s a centerpiece. As the leaves turn fiery shades of red and gold, my kitchen fills with the comforting aroma of cinnamon and baked apples. This recipe isn’t just about baking; it’s about creating a moment of pure indulgence. For me, this braided beauty is a perfect symbol of our Eatable Empress philosophy. It’s about taking a simple, beloved dessert and making it feel utterly regal, just for you. It’s a reminder that you deserve something special, even on a quiet Tuesday.
Why You’ll Love This Braided Apple Pie
* An elegant, eye-catching design.
* Bursting with warm, comforting fall flavors.
* Achievable for home bakers of all levels.
* Perfect for making any occasion feel extra special.
Gathering Your Royal Ingredients for Braided Apple Pie
Let’s talk about what makes this braided apple pie so delicious. It all starts with the apples. I love using a mix, like Honeycrisp for crunch and Gala for sweetness. You’ll need about 6 to 7 medium apples, thinly sliced. This ensures they cook evenly. For sweetness, we’ll use a blend of granulated and light brown sugar. This gives a lovely depth of flavor. Then comes the spice magic: cinnamon, nutmeg, and a hint of allspice. They just scream autumn! A little lemon juice brightens everything up. We’ll also need some butter, cut into tiny pieces, to dot over the apples. And of course, a fantastic double-crust pie dough. Using a variety of apples gives your pie a wonderful texture and a more complex taste.
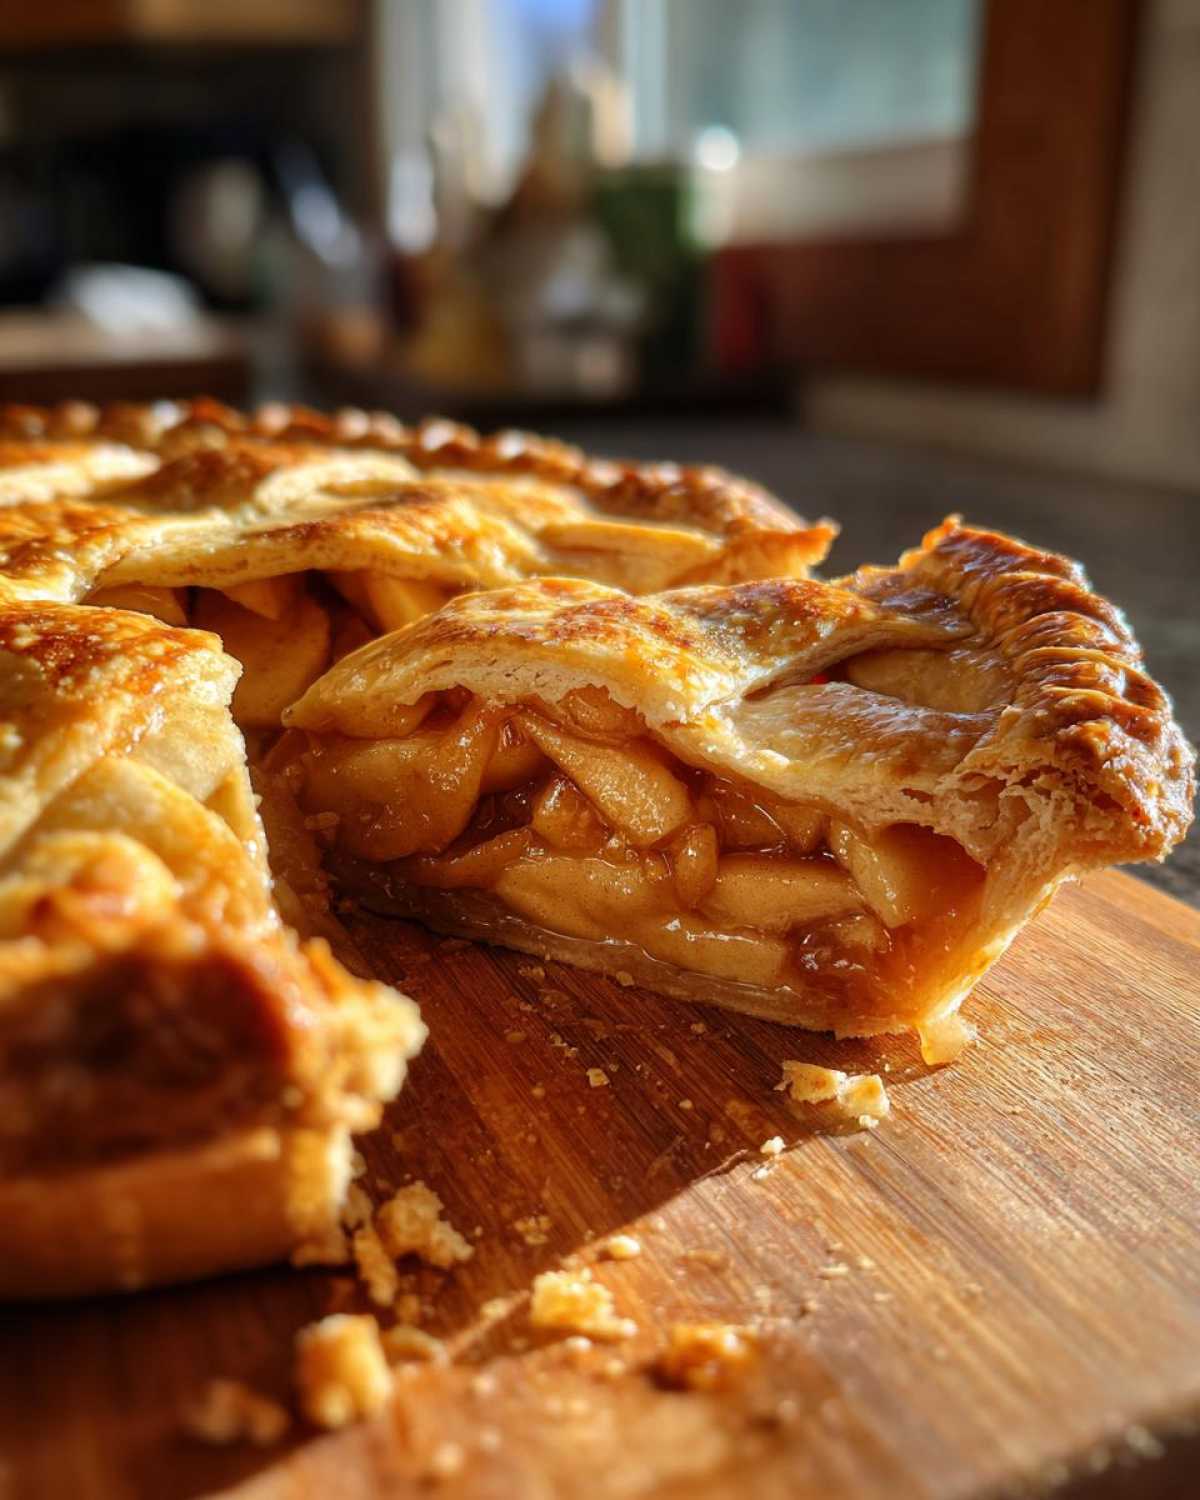
Pie Dough Essentials
Having a great pie dough is key. Whether you make it from scratch or use a good quality store-bought version, ensure it’s chilled and ready to go. This makes rolling and braiding so much easier for your beautiful braided apple pie.
The Perfect Apple Filling Blend
The heart of this pie is the apple filling. Tossing the apples with the sugars and spices ensures every bite is infused with flavor. The cinnamon and nutmeg are classic fall spices. Allspice adds a subtle warmth. The lemon juice cuts through the sweetness, balancing the flavors perfectly. Dotting the top with butter adds a lovely richness to the filling.
Crafting Your Beautiful Braided Apple Pie: Step-by-Step
Now for the fun part – bringing our gorgeous braided apple pie to life! First, preheat your oven to a nice hot 400°F (200°C). In a big bowl, toss your sliced apples with the granulated sugar, brown sugar, flour, cinnamon, nutmeg, and allspice. Make sure those apples are all coated evenly. Stir in the lemon juice. This mixture smells divine already!
Next, gently place one half of your pie dough into a 9-inch pie plate. Trim any extra dough hanging over the edge. Pour that glorious apple filling right into the crust. Now, dot the top of the apples with those little butter pieces.
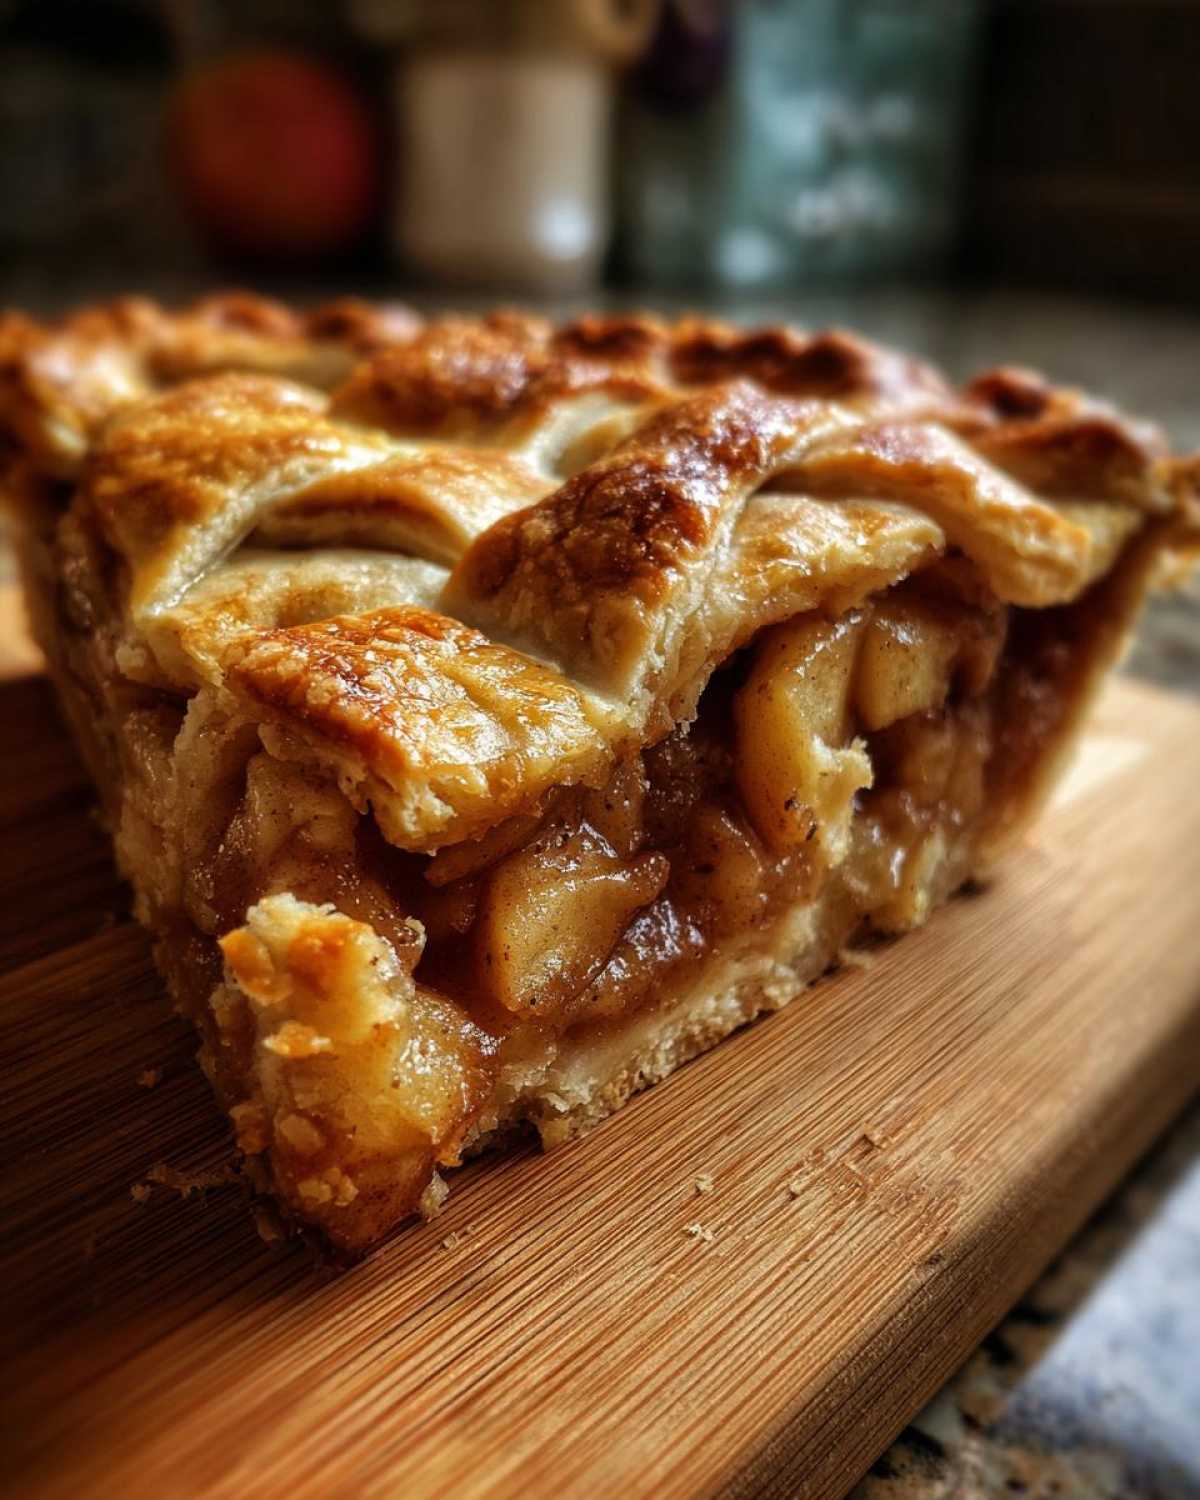
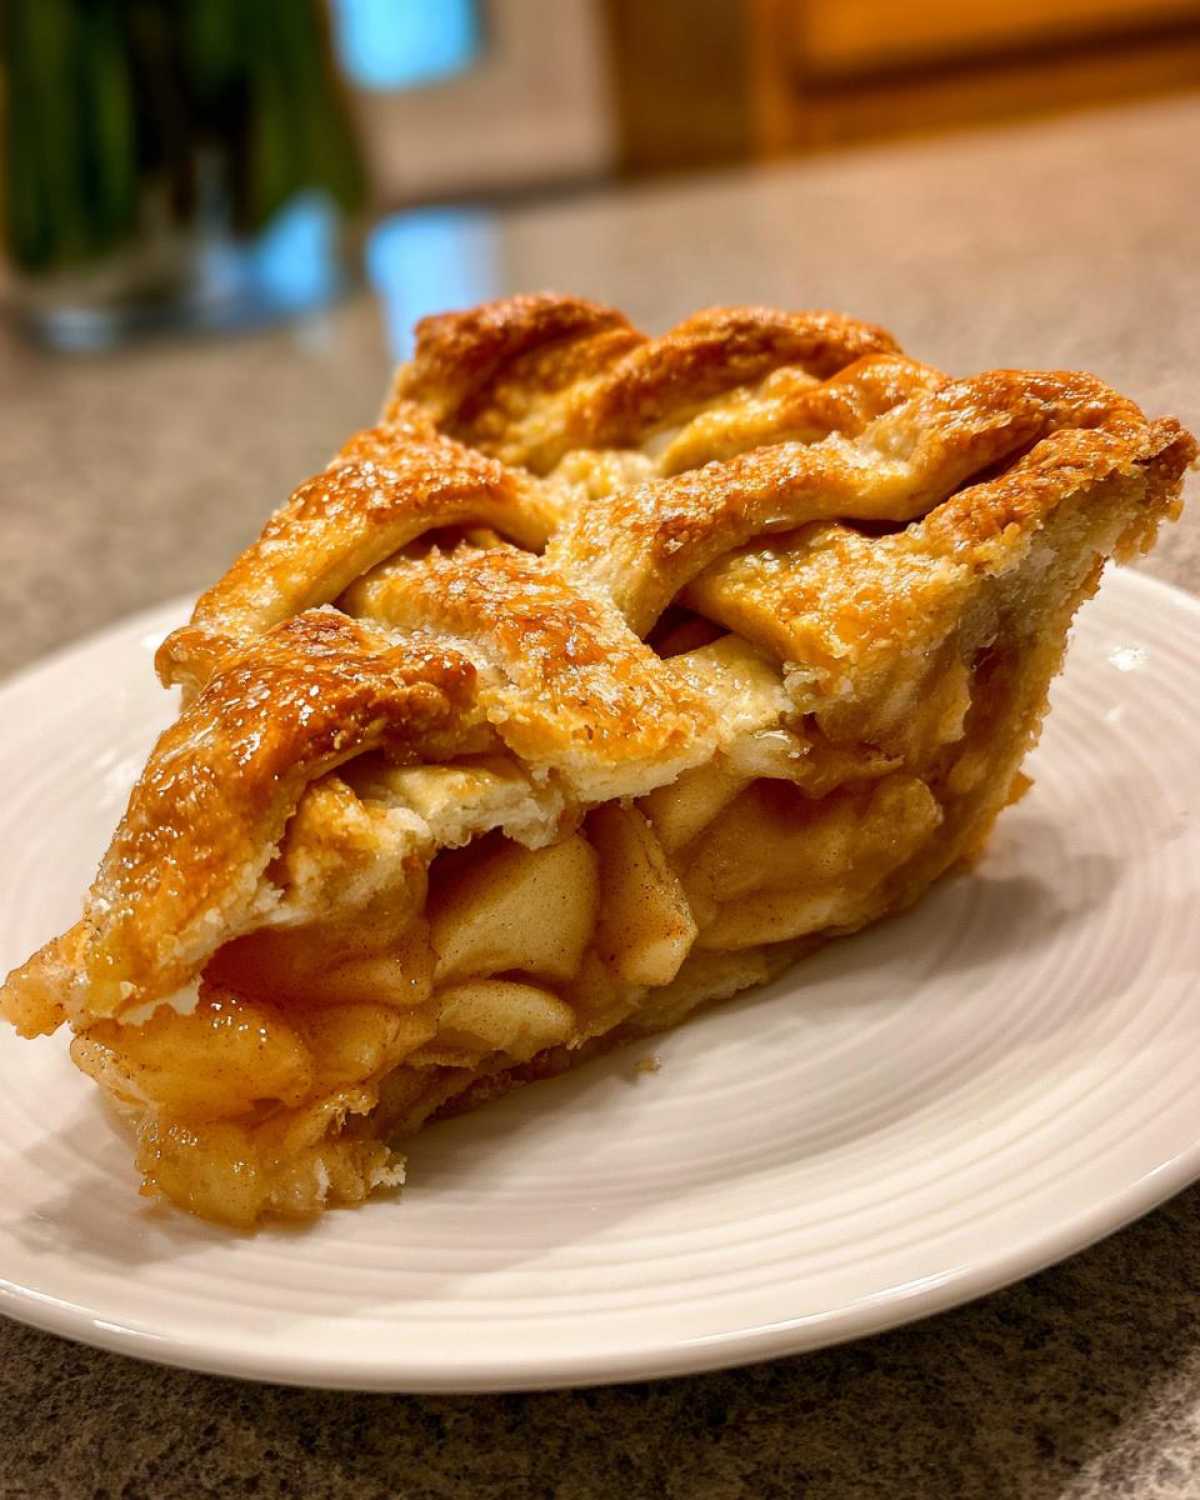
For the showstopper element, roll out the second half of your pie dough. Cut it into strips, about an inch wide. This is where the artistry happens! Arrange these strips over the apple filling in a beautiful lattice or braided pattern. I love the look of a braid; it feels so special. Trim the ends of the strips and press them into the edge of the bottom crust to seal. You can crimp the edges with your fingers or a fork for an extra pretty finish.
Brush the top of the pie with your egg wash mixture. This gives it that gorgeous golden sheen. Sprinkle with turbinado sugar, if you like that extra crunch and sparkle. Place the pie on a baking sheet – this is a smart move to catch any drips.
Bake for 20 minutes at 400°F (200°C). Then, lower the oven temperature to 375°F (190°C). Continue baking for another 30 to 40 minutes. You’re looking for a crust that’s golden brown and a filling that’s bubbling happily. If the crust starts to get too dark, just loosely tent the pie with foil.
Preparing the Apple Filling
Make sure all those apple slices get a good coating. Toss them gently but thoroughly with the sugars, flour, and spices. This even coating is the secret to a perfectly flavored apple filling.
Assembling the Braided Crust
This is the part that really makes your braided apple pie stand out. Cut your dough into even strips. Start laying them across the pie. You can weave them over and under each other for a classic braid. Press the ends firmly into the bottom crust to seal them well. A nice crimped edge adds a professional touch.
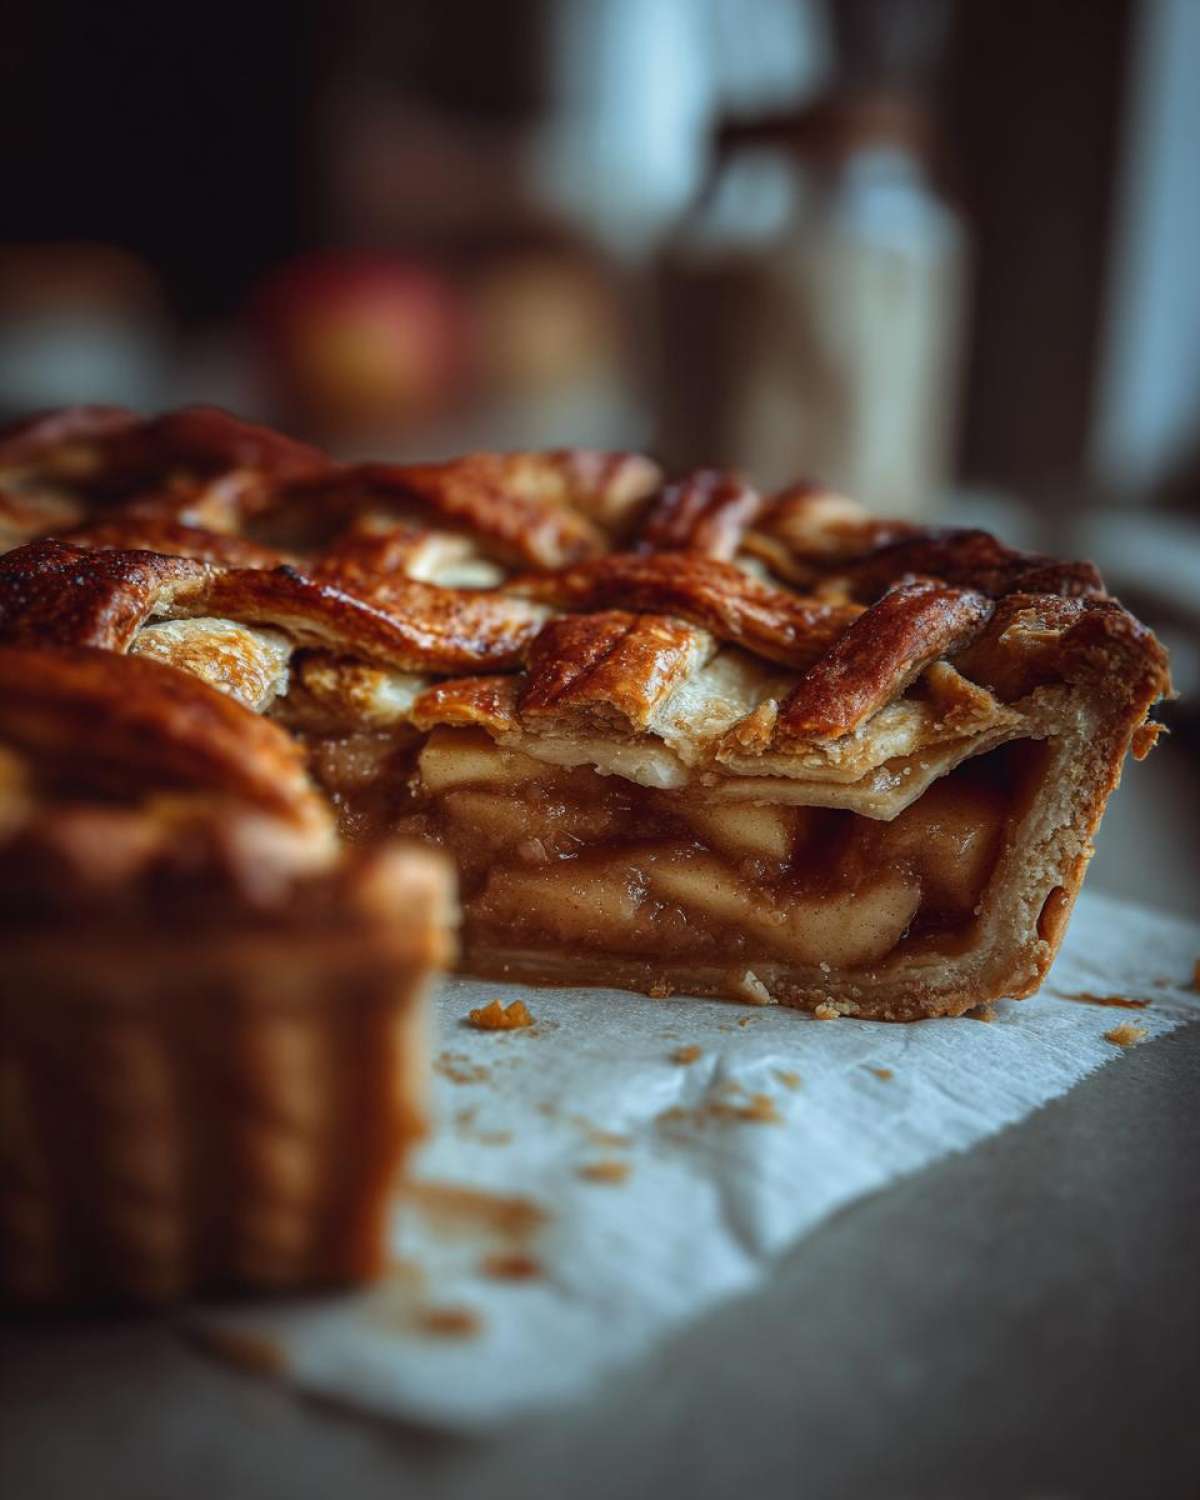
The Baking Process for a Golden Braided Apple Pie
The two-stage baking process is important. The initial high heat helps set the crust. Lowering the temperature allows the apples to cook through without burning the pastry. Always bake on a sheet pan. It saves you from a messy oven if any filling bubbles over.
Tips for a Flawless Braided Apple Pie
To get that perfect slice every time, uniform apple slicing is key. It ensures even cooking. Don’t rush the cooling process! Letting your braided apple pie cool for at least 2 to 3 hours is crucial. This allows the filling to thicken and set. Trust me, I’ve learned this the hard way! It makes all the difference for a clean cut.
Frequently Asked Questions About Braided Apple Pie
What are the best apples for a braided apple pie?
A mix of tart and sweet apples works best. Varieties like Honeycrisp, Fuji, Gala, or Granny Smith are excellent choices.
Can I make the pie dough ahead of time?
Absolutely! Homemade pie dough can be made a day or two in advance and kept chilled in the refrigerator.
How do I know when my braided apple pie is done baking?
The crust should be a deep golden brown, and the filling should be visibly bubbling through the lattice or braid.
Why is cooling the pie so important?
Cooling allows the juices to thicken. This prevents a runny pie when you slice into it.
Can I freeze a braided apple pie?
Yes, you can freeze an unbaked or baked pie. Wrap it tightly in plastic wrap and then foil. Thaw and reheat as needed.
Serving and Storing Your Braided Apple Pie
This braided apple pie is delicious served warm or at room temperature. A scoop of vanilla bean ice cream or a dollop of freshly whipped cream is pure bliss. If you have any leftovers, just cover the pie loosely with plastic wrap or foil and keep it at room temperature for a day or two. For longer storage, refrigerate it. Reheat gently in a low oven to crisp up the crust again.
A Taste of Sofia’s Kitchen: The Eatable Empress Philosophy
There’s a special joy I get from making this braided apple pie. It reminds me of my grandmother, who always made pie for special occasions. Now, Marco and I make it for ourselves, just because. It’s a simple ritual, but it feels so luxurious. It’s about honoring your own hunger, not just for food, but for beauty and calm. This pie is my declaration that you are worthy of a feast, every single day.
Understanding the Nutritional Value of Your Braided Apple Pie
A slice of this braided apple pie typically contains around 400-450 calories. It offers about 55-60g of carbohydrates and 4-5g of fiber. The exact nutritional values can vary based on your specific ingredients and portion sizes.
Why You’ll Love This Braided Apple Pie
This braided apple pie is a winner for so many reasons.
* Its beautiful braided top looks so elegant.
* The flavors are pure autumn comfort.
* You can totally make this, even if you’re new to pies.
* It’s perfect for making any day feel like a special occasion. It’s a lovely treat just for you.
Gathering Your Royal Ingredients for Braided Apple Pie
To create this stunning braided apple pie, we need some excellent ingredients. Think of it as gathering treasures for your royal feast. First, you’ll need about 6 cups of thinly sliced apples. I like to use a mix, like 6-7 medium apples such as Honeycrisp, Fuji, or Gala. This gives a wonderful balance of sweet and tart flavors. For sweetness, we’ll use 1/2 cup of granulated sugar and 1/4 cup of packed light brown sugar. The brown sugar adds a lovely caramel note. Then, we’ll add 2 tablespoons of all-purpose flour to thicken the filling. The spices are key: 1 teaspoon of ground cinnamon, 1/4 teaspoon of ground nutmeg, and 1/4 teaspoon of ground allspice. These create that classic warm, cozy fall aroma. A tablespoon of lemon juice adds a touch of brightness. And finally, 2 tablespoons of unsalted butter, cut into small pieces, will be dotted over the apples for richness. Quality ingredients truly make a difference for the best braided apple pie.
Pie Dough Essentials
A good pie dough is the foundation for any great pie. Whether you’re a seasoned baker who loves making dough from scratch or you prefer a reliable store-bought option, having a quality double-crust pie dough ready is essential for a successful braided apple pie.
The Perfect Apple Filling Blend
The magic of the filling comes from this simple blend. Tossing the apples with both white and brown sugars gives a lovely sweetness and depth. The flour helps create a beautifully thickened, not runny, filling. Spices like cinnamon, nutmeg, and allspice are the soul of fall baking. The lemon juice cuts through the sweetness, making the apple flavor pop. Dotting the filling with butter adds a touch of luxurious richness.
Crafting Your Beautiful Braided Apple Pie: Step-by-Step
Now for the fun part – bringing our gorgeous braided apple pie to life! First, preheat your oven to a nice hot 400°F (200°C). In a big bowl, toss your sliced apples with the granulated sugar, brown sugar, flour, cinnamon, nutmeg, and allspice. Make sure those apples are all coated evenly. Stir in the lemon juice. This mixture smells divine already!
Next, gently place one half of your pie dough into a 9-inch pie plate. Trim any extra dough hanging over the edge. Pour that glorious apple filling right into the crust. Now, dot the top of the apples with those little butter pieces.
For the showstopper element, roll out the second half of your pie dough. Cut it into strips, about an inch wide. This is where the artistry happens! Arrange these strips over the apple filling in a beautiful lattice or braided pattern. I love the look of a braid; it feels so special. Trim the ends of the strips and press them into the edge of the bottom crust to seal. You can crimp the edges with your fingers or a fork for an extra pretty finish.
Brush the top of the pie with your egg wash mixture. This gives it that gorgeous golden sheen. Sprinkle with turbinado sugar, if you like that extra crunch and sparkle. Place the pie on a baking sheet – this is a smart move to catch any drips.
Bake for 20 minutes at 400°F (200°C). Then, lower the oven temperature to 375°F (190°C). Continue baking for another 30 to 40 minutes. You’re looking for a crust that’s golden brown and a filling that’s bubbling happily. If the crust starts to get too dark, just loosely tent the pie with foil.
Preparing the Apple Filling
Make sure all those apple slices get a good coating. Toss them gently but thoroughly with the sugars, flour, and spices. This even coating is the secret to a perfectly flavored apple filling.
Assembling the Braided Crust
This is the part that really makes your braided apple pie stand out. Cut your dough into even strips. Start laying them across the pie. You can weave them over and under each other for a classic braid. Press the ends firmly into the bottom crust to seal them well. A nice crimped edge adds a professional touch.
The Baking Process for a Golden Braided Apple Pie
The two-stage baking process is important. The initial high heat helps set the crust. Lowering the temperature allows the apples to cook through without burning the pastry. Always bake on a sheet pan. It saves you from a messy oven if any filling bubbles over.
Tips for a Flawless Braided Apple Pie
Achieving that perfect slice of braided apple pie is all about a few key details. Uniformly slicing your apples is super important. It helps them cook evenly, so you don’t get any hard or mushy bits. Another crucial step I always follow is letting the pie cool completely. Seriously, wait those 2 to 3 hours! It’s the secret to a filling that sets up beautifully. This prevents a runny mess when you cut into it. If you’re worried about a soggy bottom, blind baking the crust for a few minutes before adding the filling can help. Just a little pre-bake gives you a wonderfully crisp base for your delicious pie.
Frequently Asked Questions About Braided Apple Pie
Got questions about making your beautiful braided apple pie? I’ve got answers!
What are the best apples for a Braided Apple Pie?
A mix of tart and sweet apples works best. Varieties like Honeycrisp, Fuji, or Gala are great. Granny Smith adds a nice tartness too.
Can I make the pie dough ahead of time?
Yes, you absolutely can! Homemade pie dough keeps well in the fridge for a day or two. This saves you time on baking day.
How do I know when my Braided Apple Pie is done baking?
Look for a crust that’s a lovely golden brown. The apple filling should be bubbling happily through the braids. That’s your cue!
Why is cooling the pie so important?
Cooling is critical! It lets the filling thicken. Without enough cooling time, your pie might be runny when you slice it. Patience pays off.
Can I freeze a Braided Apple Pie?
You sure can! You can freeze it either before or after baking. Wrap it well in plastic and foil. Thaw and reheat gently.
Serving and Storing Your Braided Apple Pie
This gorgeous braided apple pie is truly delightful served either warm or at room temperature. For an extra touch of indulgence, I love adding a scoop of creamy vanilla bean ice cream or a swirl of freshly whipped cream. It’s pure bliss! If by some chance you have any leftover pie (which is rare in my house!), just cover it loosely with plastic wrap or foil. It’s happy at room temperature for a day or two. For longer storage, pop it in the refrigerator. To enjoy it again, gently reheat it in a low oven to crisp up that beautiful crust.
A Taste of Sofia’s Kitchen: The Eatable Empress Philosophy
Making this braided apple pie always brings a smile to my face. It’s more than just a recipe now; it’s a ritual. Marco and I often make it just for the two of us. We light some candles, put on our favorite music, and enjoy a quiet moment together. This pie is my way of reminding myself, and all of you, that we deserve to feel special. It’s about honoring your own hunger for a beautiful, delicious life. You are the Empress of your own table. This dessert is a little act of royal self-care. It’s proof that you are worthy of a feast, every single day.
Understanding the Nutritional Value of Your Braided Apple Pie
A slice of this delightful braided apple pie offers a warm, comforting treat. Expect roughly 400-450 calories per serving. It contains about 55-60g of carbohydrates and 4-5g of fiber. Remember, these are estimates and can change based on your specific ingredients and portion sizes.
PrintBreathtaking Braided Apple Pie: 1 Fall Masterpiece
Create a stunning braided apple pie, perfect for impressing guests or treating yourself to a special fall dessert. This recipe focuses on bringing elegance to your table, even for a simple meal.
- Prep Time: 30 minutes
- Cook Time: 50-60 minutes
- Total Time: 3 hours 30 minutes (includes cooling time)
- Yield: 8 servings
- Category: Dessert
- Method: Baking
- Cuisine: American
- Diet: Vegetarian
Ingredients
- 6 cups thinly sliced apples (about 6-7 medium apples, such as Honeycrisp, Fuji, or Gala)
- 1/2 cup granulated sugar
- 1/4 cup packed light brown sugar
- 2 tablespoons all-purpose flour
- 1 teaspoon ground cinnamon
- 1/4 teaspoon ground nutmeg
- 1/4 teaspoon ground allspice
- 1 tablespoon lemon juice
- 2 tablespoons unsalted butter, cut into small pieces
- 1 recipe for double-crust pie dough (enough for a 9-inch pie)
- 1 large egg, beaten with 1 tablespoon water (for egg wash)
- 1 tablespoon turbinado sugar (optional, for topping)
Instructions
- Preheat your oven to 400°F (200°C).
- In a large bowl, toss the sliced apples with granulated sugar, brown sugar, flour, cinnamon, nutmeg, and allspice until evenly coated. Stir in the lemon juice.
- Line a 9-inch pie plate with one half of the pie dough. Trim any excess dough.
- Pour the apple filling into the pie crust. Dot the top of the filling with the small pieces of butter.
- Roll out the second half of the pie dough. Cut it into 1-inch wide strips.
- Arrange the dough strips over the apple filling in a lattice or braided pattern. Trim the ends of the strips and press them into the edge of the bottom crust to seal. You can crimp the edges decoratively.
- Brush the top of the pie with the egg wash and sprinkle with turbinado sugar, if using.
- Place the pie on a baking sheet (to catch any drips).
- Bake for 20 minutes at 400°F (200°C).
- Reduce the oven temperature to 375°F (190°C) and continue baking for another 30-40 minutes, or until the crust is golden brown and the filling is bubbly. If the crust starts to brown too quickly, loosely tent the pie with foil.
- Let the pie cool on a wire rack for at least 2-3 hours before slicing and serving. This allows the filling to set properly.
Notes
- For a beautiful presentation, use a mix of apple varieties for flavor and texture.
- Ensure your apples are sliced uniformly for even cooking.
- Allowing the pie to cool completely is crucial for a clean slice.
Nutrition
- Serving Size: 1 slice
- Calories: Approximately 400-450
- Sugar: Approximately 30-35g
- Sodium: Approximately 200-250mg
- Fat: Approximately 20-25g
- Saturated Fat: Approximately 10-12g
- Unsaturated Fat: Approximately 10-13g
- Trans Fat: 0g
- Carbohydrates: Approximately 55-60g
- Fiber: Approximately 4-5g
- Protein: Approximately 4-5g
- Cholesterol: Approximately 50-60mg