

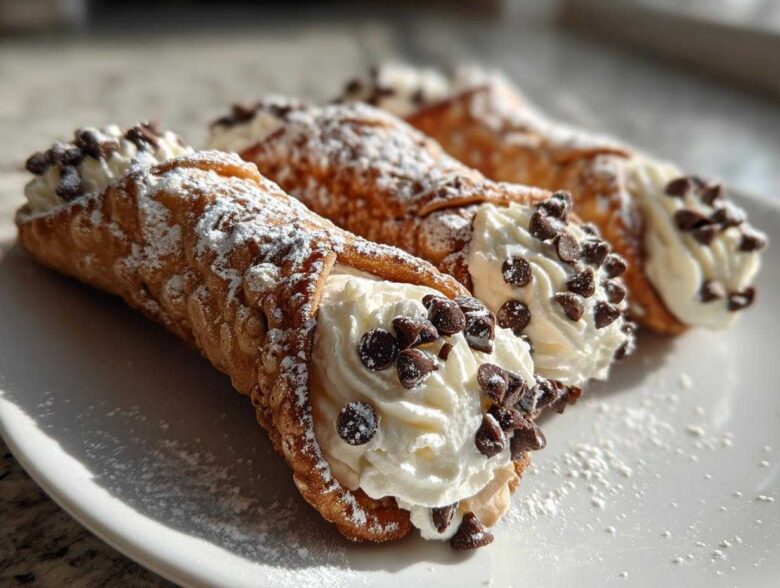
Oh, you simply have to try making these! I know when we think of amazing Italian pastry recipe treats, something super complicated pops into our heads, right? We see those perfect glass cases at the bakery and think, “Never in a million years could I make that at home.” Well, trust me on this one: achieving bakery-quality results is totally possible, and I’m handing you the keys right now! This Authentic Homemade Cannoli Recipe isn’t just another set of directions; it’s the result of testing every single step until I got that signature shatter in the shell and that velvety smooth, not-at-all-grainy filling. As someone who’s spent years perfecting regional cooking methods—you can read a bit more about my kitchen philosophy right here—I promise this is the guide you need.
It takes a little love, but once you master this cannoli recipe, you’ll be the hero of every single gathering. I spent years chasing that secret Sicilian snap! After tons of practice making these homemade Italian sweets, I figured out the little tweaks that keep things crisp. You can be confident that I’ve ironed out all the fussy parts so you don’t have to.
Why This is the Best Cannoli Recipe You Will Ever Make (E-E-A-T Focus)
What separates my cannoli recipe from the ones that end up soggy or grainy? It all comes down to chemistry and a little bit of Sicilian tradition. I learned early on that you can’t rush the dough; the combination of cold butter, and yes, tart white wine and vinegar, is what creates that signature bubbly shell when it hits the oil. It’s the tiny pockets of trapped air that make the difference!
On the filling side, frankly, if you skip draining the ricotta, you’re setting yourself up for soup, not dessert. I insist on whole milk ricotta, and then it has to spend hours in the fridge, hanging out in cheesecloth. That little bit of patience ensures a rich, dense texture that holds its shape perfectly.
Achieving Truly Crispy Cannoli Shells
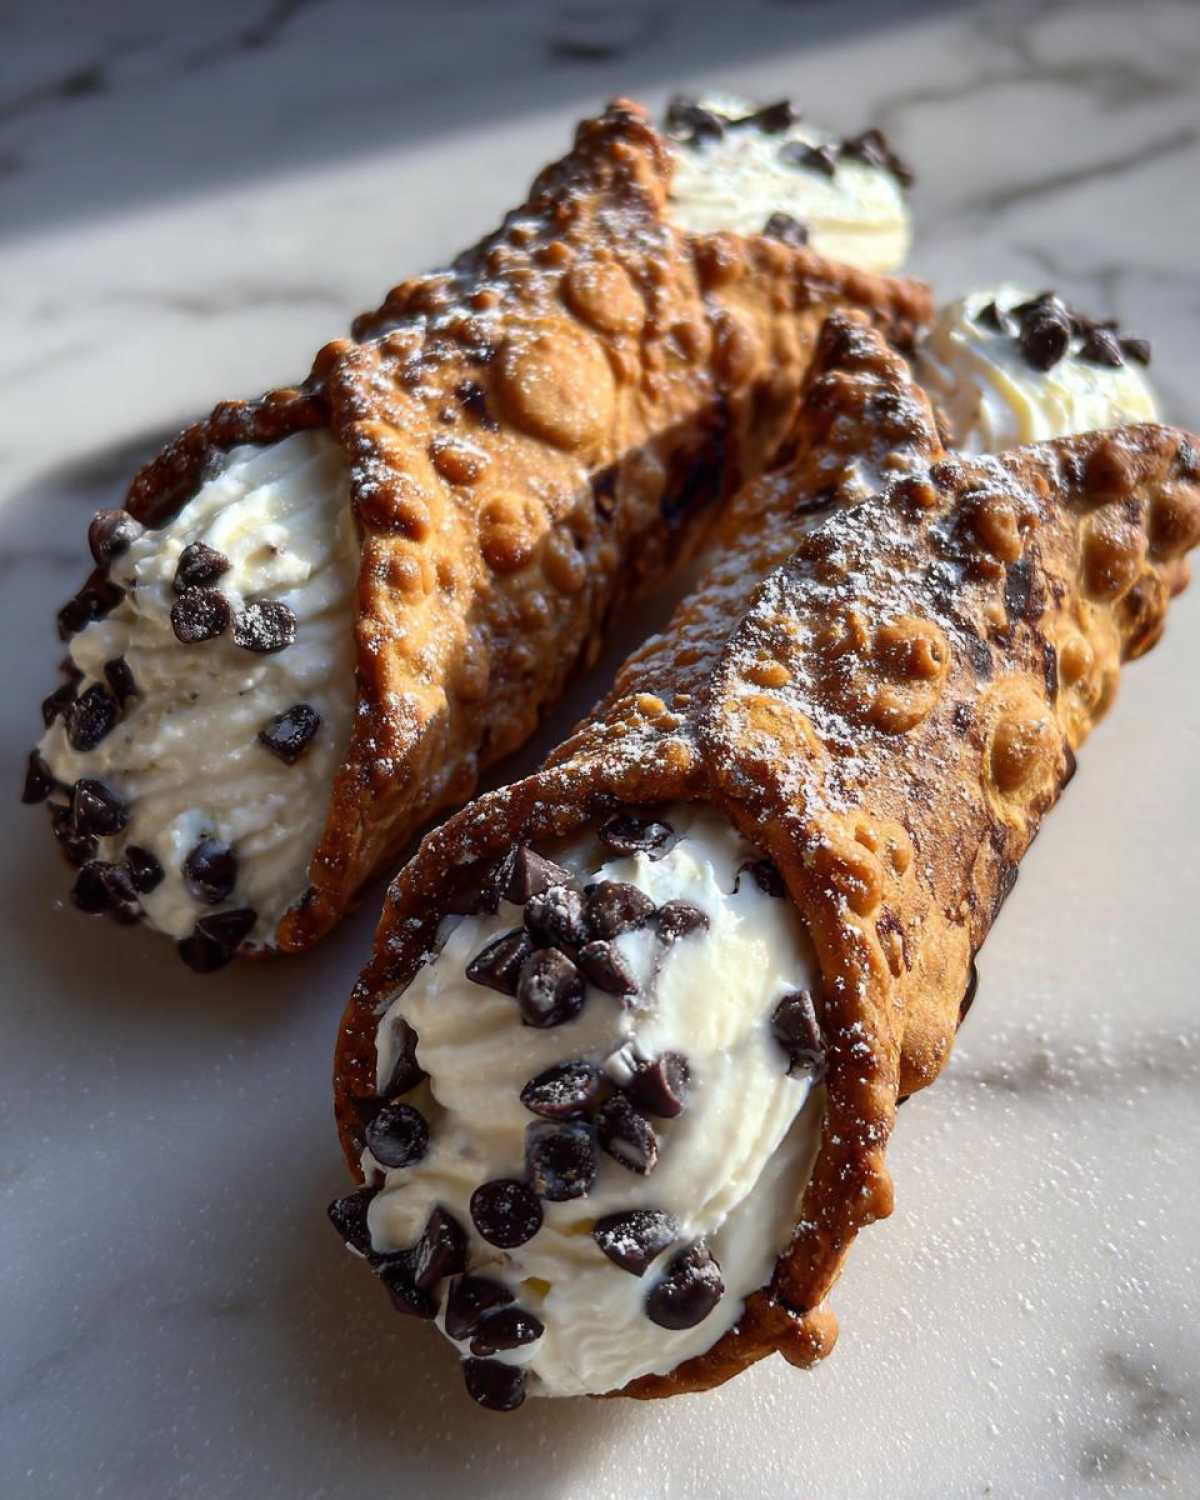
The secret to crispy cannoli shells, you guys, is temperature and acid! Using very cold, cubed butter keeps the dough fragile, letting it steam and blister instead of just baking flat. The white wine—don’t worry, you won’t taste it—and the vinegar react in the hot oil at 375°F, creating those amazing little air bubbles you see on bakery shells. No bubbles, no crunch, plain and simple. Keep that oil steady!
The Key to a Smooth and Creamy Ricotta Filling Tutorial
If you see tiny lumps in your filling, the battle was lost before it started! My top priority for a perfect creamy ricotta filling tutorial is draining that cheese, like I said—overnight is best. Once it’s dry, you MUST press it through a fine-mesh sieve. It takes five minutes, but that pressing action breaks down any lingering graininess. Mix the sugar in gently after that, and suddenly, you have the smoothest, creamiest filling possible. You won’t believe the texture!
Gathering Ingredients for Your Authentic Cannoli Recipe
Okay, now that we know *why* this cannoli recipe works so brilliantly, let’s talk about what you need to pull this off. Don’t let the list scare you; most of this is pantry stable stuff! But remember, quality counts here, especially with the ricotta. You really, truly want that whole milk stuff—none of that low-fat nonsense pretending to be authentic. Get organized, measure everything out, and then we can move on to the fun part!
Ingredients for the Crispy Fried Dessert Shells
For the shells, you need to make sure your butter is ice cold and cubed up small. That’s important for the pastry texture!:
- 2 cups all-purpose flour
- 1 tablespoon granulated sugar
- 1/2 teaspoon salt
- 1/4 cup unsalted butter, cold and cubed
- 1 large egg yolk
- 1/2 cup dry white wine (or water, but wine is better!)
- 1 teaspoon white vinegar
- Vegetable oil, for frying (you’ll need about 2 inches deep)
Ingredients for the Classic Dessert Recipes Filling
Here is where we pay attention to the details. The star is the cheese, which must be well drained. And please, sift your powdered sugar!
- 15 ounces whole milk ricotta cheese, drained overnight
- 1/2 cup powdered sugar, sifted
- 1 teaspoon vanilla extract
- 1/4 teaspoon ground cinnamon
- 1/4 cup mini chocolate chips
- Optional garnish: Powdered sugar, chopped pistachios
Step-by-Step Instructions: How to Make Cannoli at Home
Alright, deep breaths! This is the part where we turn those lovely ingredients into edible gold. Making these Sicilian beauties takes patience, but I promise, following these steps for your cannoli recipe means you’re really learning how to make cannoli at home the right way. We tackle the dough, the frying, and finally, the filling assembly. Don’t rush anything, especially the resting time—that’s non-negotiable for good texture!
Preparing and Chilling the Dough
First things first, you mix your dry ingredients—flour, sugar, salt—and then you cut in that cold butter until it looks like little pea-sized crumbs. Next, slowly add your liquid mixture: the yolk, the wine, and the vinegar. Mix it until it just comes together into a shaggy ball. Then, turn it out onto your counter and knead it for about five minutes until it’s smooth—it shouldn’t be sticky anymore. Wrap that dough up tight—like you’re protecting a treasure!—and shove it in the fridge for at least two hours, but honestly, I always let mine rest overnight. It relaxes the gluten so it rolls out like a dream later.
Forming and Frying the Fried Dessert Shells
Once your dough is chilled, grab one piece at a time—keep the rest covered. You need to roll this out thin—seriously thin, about 1/16 of an inch thick. Use a round cutter (about 3 inches) and lightly grease your cannoli tubes. Wrap the circle around the tube, overlapping the edges slightly, and pinch that seam *really* hard! If the seam pops open in the oil, you’ll have a total mess. Heat your oil to a steady 375°F. Using tongs, carefully drop in a couple of shells at a time. You have to hold the tube down submerged in the oil; the dough needs to puff around the whole tube. Fry for about two minutes per side until those beautiful golden blisters show up. Once they’re golden, pull them out and let them drain completely on paper towels while still on the tubes. Once they cool, they should slide right off. These fried dessert shells have to cool totally before filling!
Assembling the Creamy Ricotta Filling Tutorial
Now for the creamy part after you’ve already drained your ricotta for what feels like a decade! Take that dry ricotta and press it firmly through a fine-mesh sieve right into a clean bowl. This step is what guarantees no lumps in your creamy ricotta filling tutorial. Once it’s smooth, gently mix in your sifted powdered sugar, vanilla, and cinnamon. Mix just until it’s incorporated—don’t beat it too hard! Then, fold in those mini chocolate chips gently with a spatula. Cover this up and put it back in the fridge for at least 30 minutes to firm up before you attempt to fill those crispy shells.
Tips for Success When Making Your Cannoli Recipe
Even with the best cannoli recipe laid out, sometimes little things trip us up, right? I’ve learned a few tricks over the years that take these incredible Italian treats from “good” to “I swear this came from a Sicilian nonna’s kitchen.” We are working hard for that perfect shatter, so let’s lock in the success now with these pro-level tips that really make a difference in your final Italian pastry recipe.
Ingredient Notes and Substitutions for This Italian Pastry Recipe
Listen, the ricotta is everything. When shopping for the cheese, it must be *whole milk* ricotta, and if the container looks watery, don’t even buy it! Water is the enemy of crispness and smoothness. If, and I mean *if*, you absolutely cannot find dry white wine for the dough, you can use water, but I recommend adding an extra tiny splash of that vinegar to help compensate for the lack of acidity. Also, don’t stress if you don’t own those fancy metal tubes! You can fashion perfectly good cylinders out of heavy-duty aluminum foil—just roll it tight and secure the seam with a tiny dab of your dough scraps.
Make-Ahead & Freezer Tips for Crispy Cannoli Shells
This is the most important tip for surviving a big party! You absolutely cannot fill these guys a day ahead; they’ll go sad and soggy before anyone even gets a chance to try them. The shells should be filled *right* before serving. However, if you must prep ahead, here’s the trick I discovered: Once the shells are completely cooled—and I mean stone cold—take some melted white chocolate and brush a very thin layer inside the shell. This creates a moisture barrier, basically waterproofing them! Then you can fill them a few hours later, and they stay much crispier. The chocolate melts right into the shell, and nobody ever knows it’s there!
Serving Suggestions for This Sicilian Dessert
Once you’ve wrestled those gorgeous, blistered shells into submission and piped them full of that heavenly creamy filling, it’s time for the grand finale! Serving this Sicilian dessert properly is almost as important as making it right. These aren’t meant to be an all-day affair; they need to be devoured with enthusiasm!
I always keep the presentation simple because the pastry speaks for itself. My go-to finish is a quick dust of powdered sugar over the top. It looks elegant but takes two seconds. For a little color and crunch, use finely chopped pistachios around the ends where the filling peeks out. My kids love when I add those, it reminds them of visiting family in Sicily!
When it comes to what to serve alongside them, think about after-dinner sipping. These are rich, so they pair beautifully with something strong to cut through the sweetness. A nice, hot espresso is traditional and perfect. Or, if you are serving these for a celebration, a small glass of chilled Limoncello makes an absolutely unbeatable combination. Enjoy every single bite of your hard work!
Storage and Reheating Instructions
This is the hardest part of making any truly crispy dessert: waiting to eat it! Listen, because this is crucial for maintaining that hard-earned crunch. Once you fill these beauties, they are officially on the clock. You absolutely must store your filled cannoli airtight in the refrigerator, but honestly, you only have about one to two days max before that delicate shell starts losing its fight against the moisture from the ricotta.
If you’re making a big batch for a party coming up tomorrow, please, please, please do yourself a favor and don’t assemble them all at once! You want them perfect when people bite in. The absolute best scenario is to store the cooled, empty shells in a container with a paper towel at room temperature, and keep the creamy ricotta filling tightly sealed in the fridge in its own container.
Then, right before serving, you just grab a shell, pipe it full, and serve immediately. If you absolutely have to fill them a few hours ahead (maybe you need both hands for something else!), just remember that white chocolate waterproofing trick I mentioned earlier. Reheating, by the way, is a no-go. I tried putting them in a low oven, and they just got soft and oily. Once they’re filled, enjoy them fresh! That’s when they are at their peak glory.
Frequently Asked Questions About This Traditional Pastry Making
I know you have questions—we all did when we first tackled something this amazing! Tackling traditional pastry making can feel intimidating, but honestly, the hardest parts are the ones I helped you simplify above. Here are a few things I hear most often from people trying this recipe for the first time. Don’t let these little hurdles stop you! If you ever have any doubt about my site policies as you cook, you can check out the disclaimer page, but for now, let’s stick to the cannoli!
Can I use store-bought cannoli shells with this recipe?
You certainly *can*, and if you’re in a huge rush, go for it! But if you’re aiming for the *best* and most authentic results, you really need to try making them from scratch. Store-bought shells often lack the bubbly texture and just don’t have that shatter you get from fresh frying. They can also sometimes taste a bit stale. Trust me, after you nail the dough once, you’ll never go back. Making your own shells is what elevates this from a simple dessert to a real labor of love.
What is the best way to sweeten the ricotta dessert without making it runny?
This brings us right back to our biggest rule: DRAIN THE RICOTTA. You have to get rid of that excess whey first, or nothing you do afterward will work. After it’s drained overnight, you press it through that fine-mesh sieve to fix any graininess. When it comes to adding flavor, you must avoid adding any liquid extracts or juices unless you’ve already removed the water content. Use only sifted powdered sugar for sweetness, as it dissolves instantly without adding extra moisture, which keeps our fabulous ricotta dessert perfectly thick and pipeable!
Estimated Nutritional Information for Your Cannoli Recipe
Now, I know we aren’t baking these for health reasons—they are glorious, deep-fried Italian treasures! But since you asked, here are the rough estimates for this incredible cannoli recipe based on the ingredients listed and assuming a yield of 12 servings. Remember, every tiny chocolate chip and every drop of oil counts, so these are just guidelines!
If you are worried about the fat content from frying, remember that you can always try the white chocolate waterproofing trick and still enjoy the filling separately! But honestly, that crunch is worth every calorie.
- Serving Size: 1 cannoli
- Calories: 350
- Sugar: 25g
- Sodium: 150mg
- Fat: 18g
- Saturated Fat: 9g
- Trans Fat: 0.5g
- Carbohydrates: 40g
- Fiber: 1g
- Protein: 10g
- Cholesterol: 55mg
These values assume that the shells are fried correctly and that you are using the standard amounts of powdered sugar and chocolate chips listed. Enjoy your authentic slice of Sicily!
Share Your Homemade Italian Sweets Experience
Whew! We did it! You’ve successfully navigated the dough chilling, the tricky frying, and ensured that gorgeous ricotta filling is perfectly smooth. You are now officially in possession of what I truly believe is the best cannoli recipe out there. Making these homemade Italian sweets is a real accomplishment, and I absolutely want to see what you created!
Don’t be shy! Drop a comment below and let me know how your shells turned out—did you get those amazing brittle bubbles? How did you choose to garnish them? Did you use pistachios or just a light dusting?
Your feedback helps build this community, and knowing you successfully created these authentic treats motivates me every single day in the kitchen. If you snapped a picture of your finished masterpiece, I’d love to see it! If you need to reach out for a question or just want to share a great success story, you can always send a message through my contact page. Now go on—grab a coffee and enjoy your slice of Sicily!
PrintAuthentic Homemade Cannoli Recipe: Crispy Shells and Creamy Ricotta Filling

Make traditional Sicilian cannoli with crisp, bubbly shells and a sweet, creamy ricotta filling flavored with vanilla and chocolate chips.
- Prep Time: 45 min
- Cook Time: 20 min
- Total Time: 150 min
- Yield: 12 servings
- Category: Dessert
- Method: Frying
- Cuisine: Italian
- Diet: Vegetarian
Ingredients
- For the Shells: 2 cups all-purpose flour
- 1 tablespoon granulated sugar
- 1/2 teaspoon salt
- 1/4 cup unsalted butter, cold and cubed
- 1 large egg yolk
- 1/2 cup dry white wine (or water)
- 1 teaspoon white vinegar
- Vegetable oil, for frying
- For the Filling: 15 ounces whole milk ricotta cheese, drained overnight
- 1/2 cup powdered sugar, sifted
- 1 teaspoon vanilla extract
- 1/4 teaspoon ground cinnamon
- 1/4 cup mini chocolate chips
- Optional garnish: Powdered sugar, chopped pistachios
Instructions
- Prepare the Dough: In a large bowl, whisk together the flour, sugar, and salt. Cut in the cold butter using a pastry blender or your fingers until the mixture resembles coarse crumbs.
- Add Wet Ingredients: Mix the egg yolk, white wine, and vinegar. Gradually add the liquid to the flour mixture, mixing until a shaggy dough forms.
- Knead and Rest: Turn the dough onto a lightly floured surface and knead for about 5 minutes until smooth. Wrap the dough tightly in plastic wrap and refrigerate for at least 2 hours, or preferably overnight.
- Roll the Shells: Divide the chilled dough into four equal pieces. Working with one piece at a time (keep the others covered), roll the dough very thin, about 1/16 inch thick. Use a 3-inch round cutter to cut circles.
- Shape the Cannoli: Lightly grease the outside of cannoli tubes. Wrap each dough circle around a tube, overlapping the edges slightly. Pinch the seam firmly to seal.
- Fry the Shells: Heat 2 inches of vegetable oil in a deep, heavy-bottomed pot to 375°F (190°C). Carefully drop 2 or 3 shells into the hot oil, using tongs to hold the tubes down until the dough puffs and turns golden brown (about 2 minutes per side).
- Cool the Shells: Remove the shells from the oil, keeping them on the tubes. Place them on a paper towel-lined tray to drain excess oil. Once cool enough to handle, gently slide the shells off the tubes. Let them cool completely.
- Make the Filling: After draining the ricotta thoroughly, press it through a fine-mesh sieve into a bowl to remove lumps. Add the powdered sugar, vanilla extract, and cinnamon. Mix until just combined and smooth. Do not overmix.
- Fold in Chips: Gently fold in the mini chocolate chips. Chill the filling for at least 30 minutes.
- Fill and Serve: Just before serving, pipe or spoon the ricotta filling into the cooled shells. Dip the ends in chopped pistachios or dust with powdered sugar.
Notes
- Drain the ricotta cheese for at least 8 hours, or overnight, in a cheesecloth-lined sieve placed over a bowl in the refrigerator. This prevents a watery filling.
- To keep shells crisp, fill them immediately before serving. If you must fill them ahead of time, brush the inside of the cooled shells lightly with melted white chocolate before filling.
- If you do not have cannoli tubes, you can use heavy-duty aluminum foil shaped into small cylinders.
Nutrition
- Serving Size: 1 cannoli
- Calories: 350
- Sugar: 25
- Sodium: 150
- Fat: 18
- Saturated Fat: 9
- Unsaturated Fat: 5
- Trans Fat: 0.5
- Carbohydrates: 40
- Fiber: 1
- Protein: 10
- Cholesterol: 55