

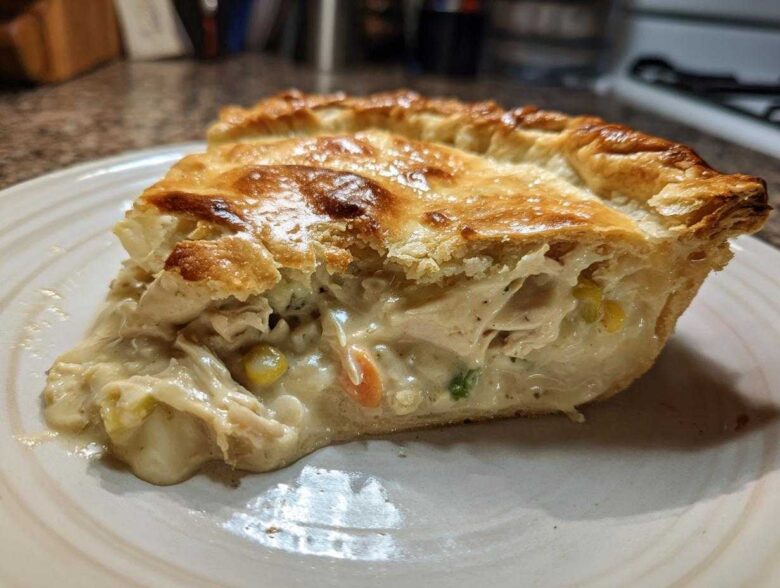
Oh, the weather is turning chilly, and really, is there anything that screams ‘hug in a bowl’ louder than chicken pot pie? Forget those sad, thin, canned versions you might have tried over the years. We’re talking about the real deal today—the sort of deep, savory aroma that stops traffic in your house. This chicken pot pie recipe is my absolute go-to, the one I turn to when only true comfort food will do. Seriously, years ago when my sister was laid up after surgery, this rich, hearty pie was delivered weekly because it just tasted like home.
What makes this recipe the champion in my kitchen is the texture contrast. We’re making everything from scratch here, which means that filling is going to be deeply creamy—no soup required, trust me!—and that crust? It’s a spectacular, golden, flaky double crust that shatters just right when you cut into it. It takes a little bit more elbow grease than stirring something into a casserole dish, but the payoff is unbelievable. If you’re tired of mushy bottoms, stick with me, because I have a few secrets for keeping that crust crisp when baking this savory chicken pie.
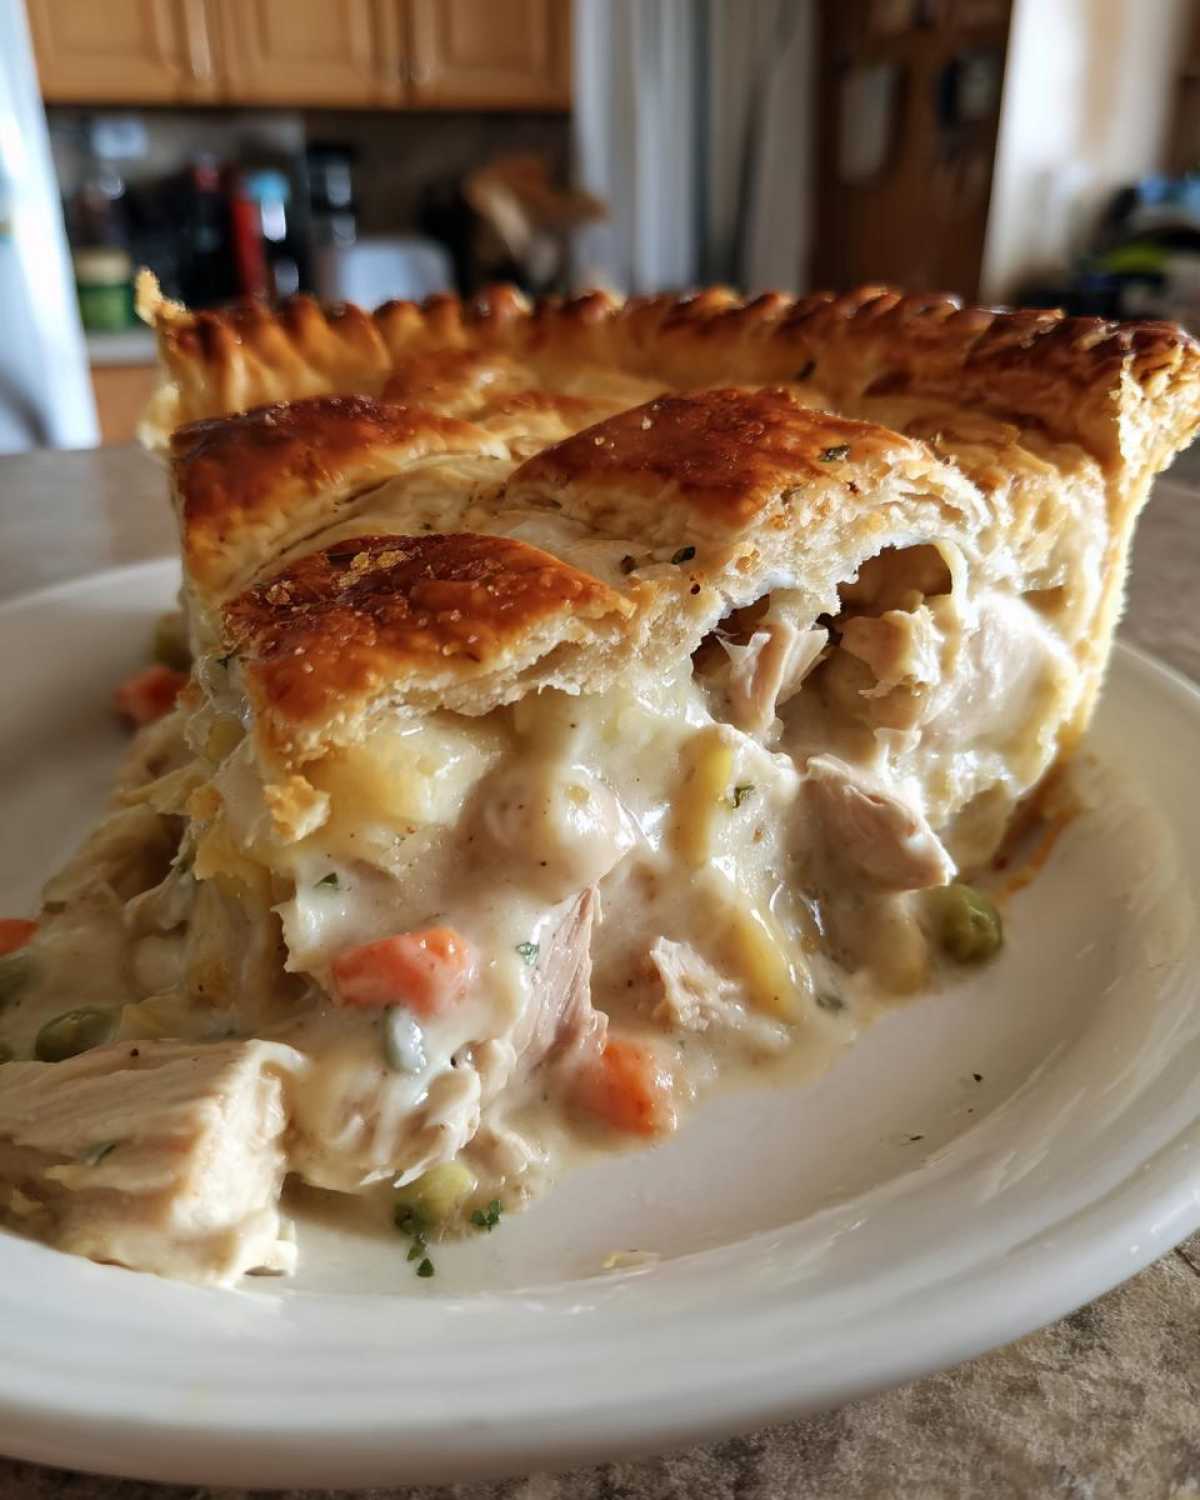
If you are looking for something a little quicker next time, I have a great variation using biscuit topping instead, but for today? We’re going fully traditional. Get your apron on, because we are about to build the ultimate savory chicken pie!
Why This Classic chicken pot pie recipe Is The Ultimate Comfort Meal
I know you’ve got a million dinner options floating around, but this one always wins when the family needs a proper meal. Choosing this recipe means you’re picking guaranteed satisfaction over weeknight stress. It’s the definition of heartwarming food!
Here’s why this pie stands head and shoulders above the rest of my comfort food dinner ideas:
- The filling is ridiculously creamy—we build that perfect, velvety gravy base ourselves, so it coats every single vegetable and chunk of chicken beautifully.
- The flaky double crust! It bakes up golden brown and buttery. It’s crunchy on top and firm on the bottom, which is really hard to achieve, but we nailed it.
- It uses simple, recognizable ingredients, making it an easy win for any family gathering or just a cozy Sunday Supper.
Honestly, if you only bake one savory chicken pie all year, make it this one. It tastes expensive, but it’s actually super budget-friendly!
Ingredients for Your Homemade chicken pot pie recipe
Okay, let’s look at what we need to pull off this spectacular, from-scratch beauty. The beauty of a homemade chicken pot pie recipe is that it relies on pantry staples and fresh veggies, but the star, of course, is the chicken. I’m going to list everything out, but real talk: if you’re short on time, grab a good quality rotisserie chicken! It saves you a step and still gives you that amazing flavor base we’re aiming for. We want about two cups, shredded, ready to jump into that creamy gravy.
Don’t skimp on the fresh bits like the carrots and celery; they bring that wonderful little snap of texture against the tender chicken. Remember, everything chopped needs to be relatively uniform so it cooks evenly in the chicken pot pie using rotisserie chicken is an easy cheat, but the rest is pure home cooking magic. Here is what you need for the ultimate savory chicken pie:
- 2 tablespoons unsalted butter (Don’t substitute this fat, it’s crucial for the roux!)
- 1 medium yellow onion, chopped
- 2 carrots, peeled and diced
- 2 celery stalks, diced
- 1/2 cup all-purpose flour
- 1 teaspoon salt
- 1/2 teaspoon black pepper
- 1/4 teaspoon dried thyme
- 2 cups chicken broth
- 1 cup whole milk
- 2 cups cooked, shredded chicken (Rotisserie chicken works brilliantly here!)
- 1 cup frozen peas
- 1 cup frozen corn
- 2 pie crusts (Yes, two! One for the bottom, one for that gorgeous top.)
- 1 large egg, beaten (This is just for brushing on top so it gets shiny—the egg wash.)
How To Make chicken pot pie recipe: Step-by-Step Instructions
This is where the magic happens! Making a proper chicken pot pie shouldn’t feel like rocket science, but there are a few techniques that turn simple veggies into that signature, velvety filling. We’re moving step-by-step here. Follow these closely, and I promise you’ll get that perfectly thick, never-runny sauce every single time. Pay close attention when we mix the flour in—that’s your make-or-break moment for a perfect gravy!
Preparing the Crust and Oven
First things first, get that oven warming up to 400 degrees Fahrenheit. You want it nice and hot before that pie goes in. Take one of your pie crusts—the bottom layer—and gently press it into your 9-inch pie dish. Don’t stress too much about making it perfect right now, just get it settled and trim those edges a little bit. We’ll seal it up tighter later on!
Building the Creamy Chicken Pot Pie Filling Base
Grab your biggest saucepan. Melt that butter over medium heat. Toss in your onion, carrots, and celery—your mirepoix, if you want to sound fancy! Let them sauté until they start getting soft, maybe five to seven minutes. Now, this next part is crucial: whisk in the flour, salt, pepper, and thyme. You need to cook this mixture for a full minute while stirring constantly. This is called cooking out the raw flour taste, and it’s essential for the best pot pie gravy.
Once that minute is up, start adding the chicken broth slowly, whisking like crazy as you go. You have to whisk constantly to avoid lumps! Once all the broth is in, stream in the milk the same way. Keep stirring until the mixture comes to a gentle simmer and thickens up beautifully. It should coat the back of a spoon nicely. That’s when you take it off the heat!
Assembling and Baking Your chicken pot pie recipe
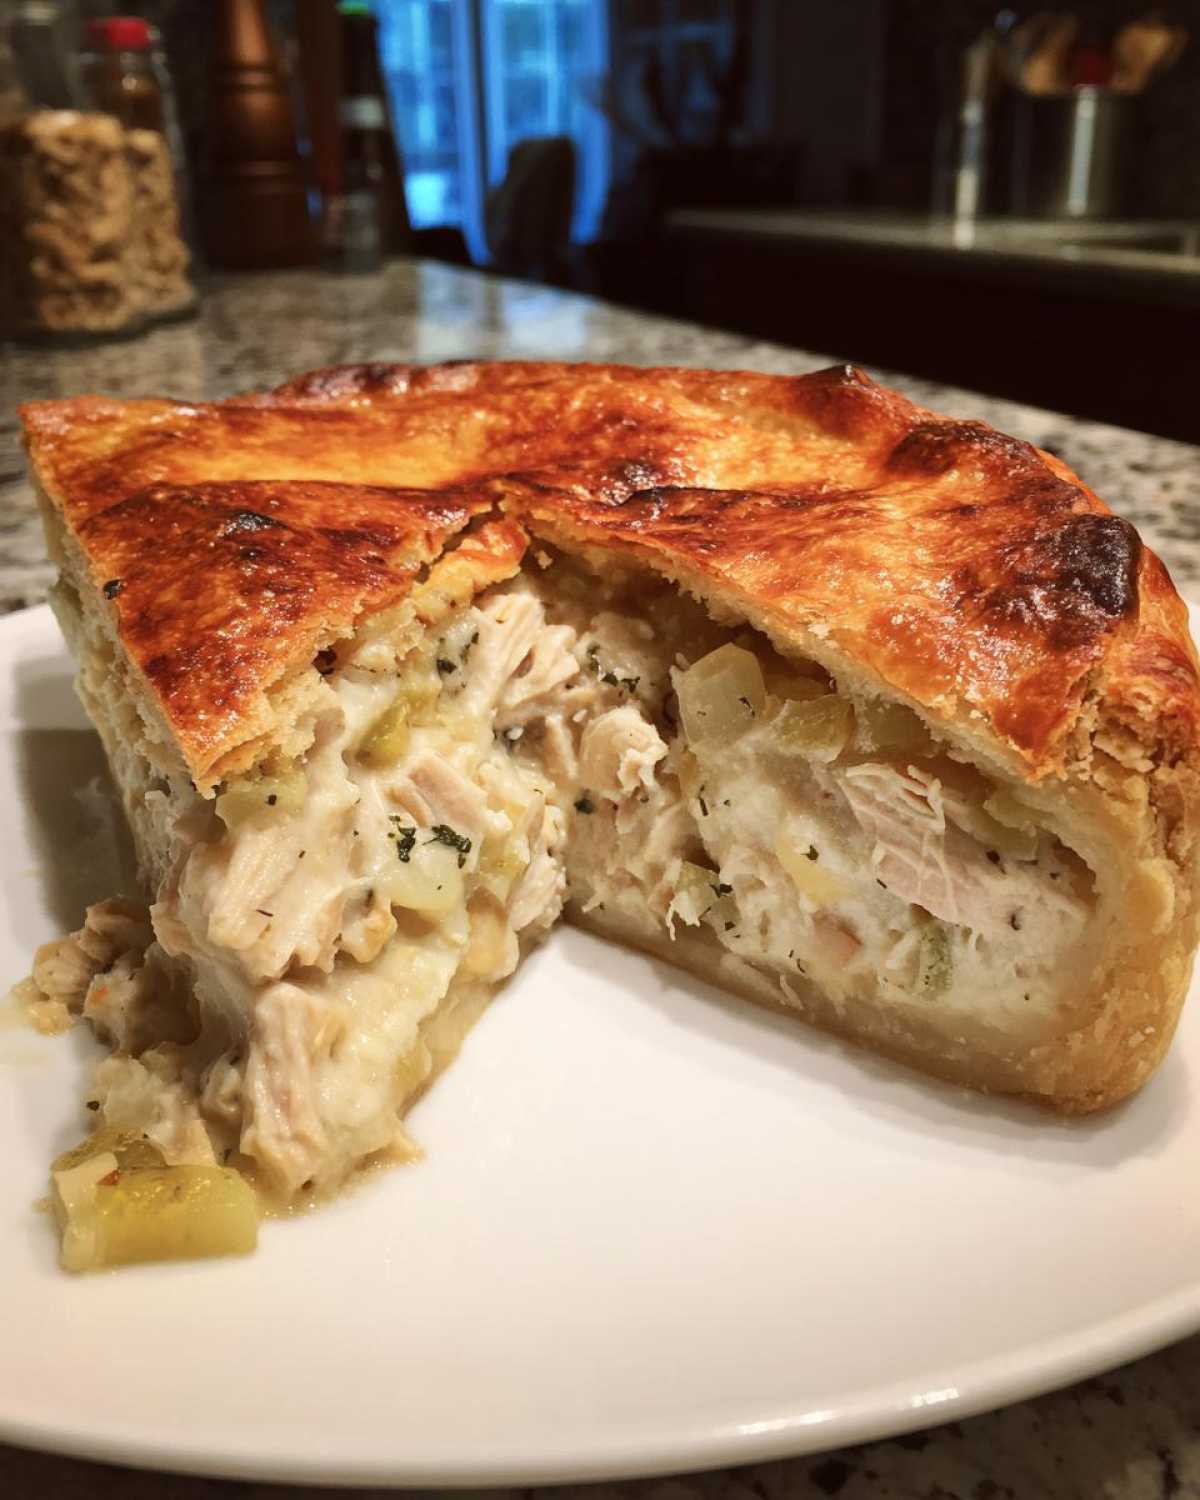
Take that thick sauce off the burner. Now is the moment to fold in your shredded chicken, those frozen peas, and the corn. That’s the filling done! Pour the entire mixture right over that bottom crust you set aside earlier.
Lay your second crust over the top. Now, use your fingers to crimp the edges of the top and bottom crusts together—give them a nice, tight seal all the way around. Remember, steam needs an escape route, so cut a few slits right in the center of that top crust. Finally, brush the whole top surface lightly with your beaten egg wash. This gives you that gorgeous, shiny finish from the baking guide! Bake it for 35 to 45 minutes until it’s puffed up and golden brown. If the edges look like they’re getting too dark halfway through, just sneak some foil around the rims!
Tips for the Best Chicken Pot Pie Recipe Results
Even with the perfect instructions, sometimes we need a little nudge to get that professional, crisp finish. Nobody wants a soupy pie filling or a crust that sticks to the plate! My biggest lesson learned over the years, which I picked up from my auntie, is all about temperature control and pan placement when baking this Best Chicken Pot Pie Recipe.
If you struggle with a soggy bottom crust—and honestly, who hasn’t?—try this trick: for the first 20 minutes of baking, set your pie dish on the absolute lowest rack in the oven. Direct heat hits that bottom crust, giving it a necessary head start to firm up before the filling gets too hot. It works like a charm every time!
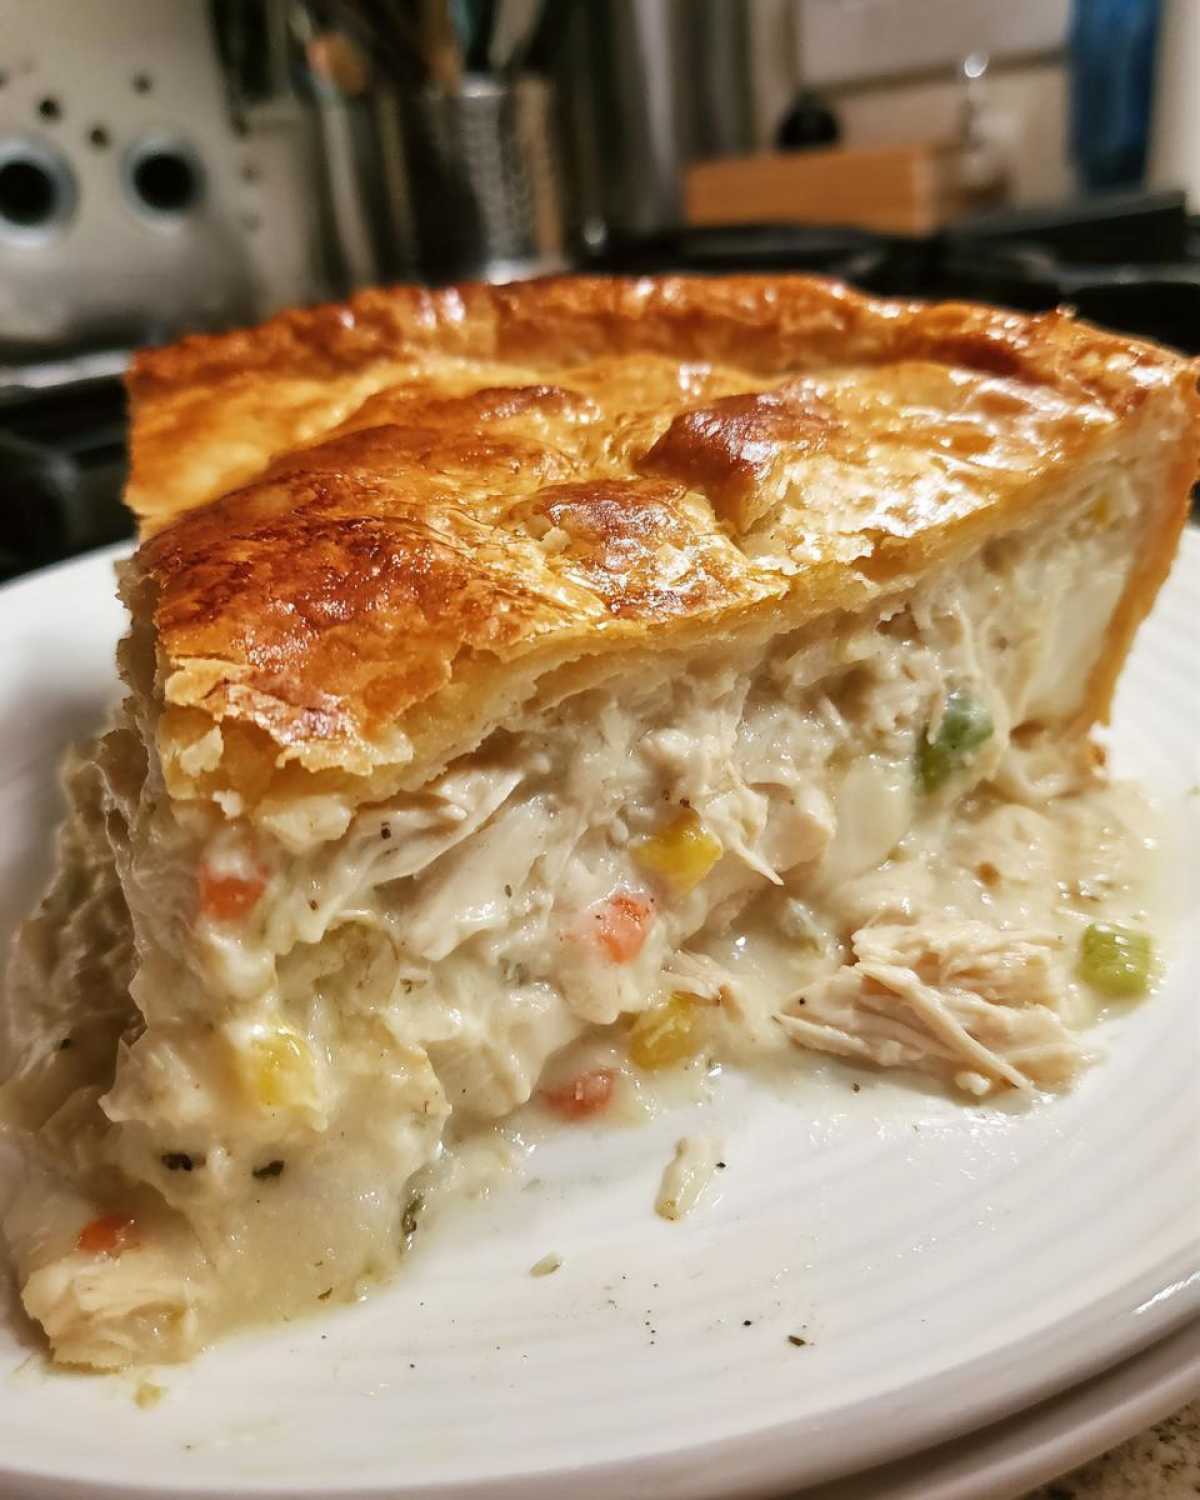
For the filling consistency, if you are worried about it being too thin, just let that sauce simmer for an extra minute or two until it really coats your spoon well before you take it off the heat. Trust me, once that crust seals the top, it’s not going anywhere! A good, thick base ensures you get that perfect slice every time.
Variations on the Classic chicken pot pie recipe
Okay, so I’ve given you the whole nine yards—the glorious double crust, the from-scratch gravy—but I totally get it! Sometimes you’re craving that ultimate comfort meal after a super long day and don’t have the time to roll out two different crusts, and that’s perfectly fine! We all need a good quick chicken dinner up our sleeve. This recipe is so sturdy, it handles switches like a champ, but you have to promise me you’ll still make that creamy filling from scratch!
If you need speed, here are my favorite couple of adjustments. These are fantastic ways to turn this into a one dish chicken bake without losing the heart of the meal.
For the fastest, flakiest top crust imaginable, ditch the bottom crust and save yourself rolling time by grabbing store-bought puff pastry. Seriously, put that on top, brush it with egg wash, and bake it! It gets puffier and more delicate than any homemade crust, creating a wonderful contrast to the rich filling. You’ll love that super light texture if you’re looking for a puff pastry chicken pot pie.
Now, if you’re looking to skip pastry altogether and lean into that casserole vibe, you can easily switch this up to a chicken pot pie casserole. You’d just skip both the bottom and top crusts. Pour that leftover filling into a deep 9×13 dish, and instead of a lid, top it with spoonfuls of your favorite biscuit dough. You can find my absolute best recipe for the topping right here! That’s how you turn this into a rustic, cozy pot pie with biscuit topping—it cooks faster and it’s perfect for serving a crowd. If you prefer that style, you can see all the details on how to manage that chicken pot pie casserole version!
Another time-saver I always mention is using that rotisserie chicken we talked about. It slashes about 15 minutes off your prep time and still gives you that great chicken flavor needed for this savory chicken pie. No judgment here; we all need an Easy Chicken Pot Pie day now and then!
Serving Suggestions for Your Savory Chicken Pie
Now that you’ve created this magnificent, hearty pot pie—the ultimate in classic American comfort food—you need the perfect supporting cast! Honestly, on its own, this pie is a whole meal, but every star needs a great backup singer, right?
Because the filling is so rich and creamy, I always like to balance it out with something bright and fresh. Nothing too heavy, otherwise, you’ll need a nap right after dinner! For a fantastic contrast, I usually throw together a very simple side salad. We’re talking mixed greens, maybe some sliced red onion, and a light vinaigrette. The acidity cuts right through the richness of that butter and gravy beautifully.
If you need something warmer, roasted vegetables are your friend. Think about pairing this with simple roasted asparagus or maybe some balsamic-glazed Brussels sprouts. Those slightly bitter, charred edges are just perfect next to the sweet carrots and savory chicken inside the crust. Honestly, these simple pairings let your beautiful pie take center stage. You can find some great ideas for vegetable sides over in my collection of winter dinner recipes!
Storage and Reheating Instructions for Leftover chicken pot pie recipe
The absolute best part about making a whole Homemade Chicken Pot Pie is having leftovers! Seriously, a slice of this pie cold from the fridge might be my guilty pleasure, but reheating it properly is key so you don’t ruin that gorgeous crust we worked so hard on.
When it comes to storage, you need to let the pie cool down almost completely first. Trying to seal up a hot pie traps steam, and steam equals soggy crust, which is what we are trying so hard to avoid! Once it’s just warm to the touch, cover the whole dish tightly with plastic wrap or foil, or if you cut out your portions, wrap individual slices separately.
This pie is perfectly safe in the refrigerator for about three to four days. After that, well, the texture can start to degrade a little, and the quality just isn’t the same as when it was fresh from the oven.
The only way to reheat your leftover chicken pot pie
Okay, listen closely: Do NOT microwave this! If you put a beautiful slice of flaky crust through the microwave, you end up with a rubbery, sad pastry shell. We are keeping this as a crispy, comforting experience!
Your best friend here is the oven or even an air fryer if you have a good slice size for it. Preheat your oven again, but lower this time, maybe to 350 degrees Fahrenheit. Place your slice (or the whole pie if you’re reheating the remainder) on a baking sheet. If you’re worried about the bottom crust drying out, you can place a tiny piece of foil loosely over the top crust, just to keep the edges from burning while the center warms up.
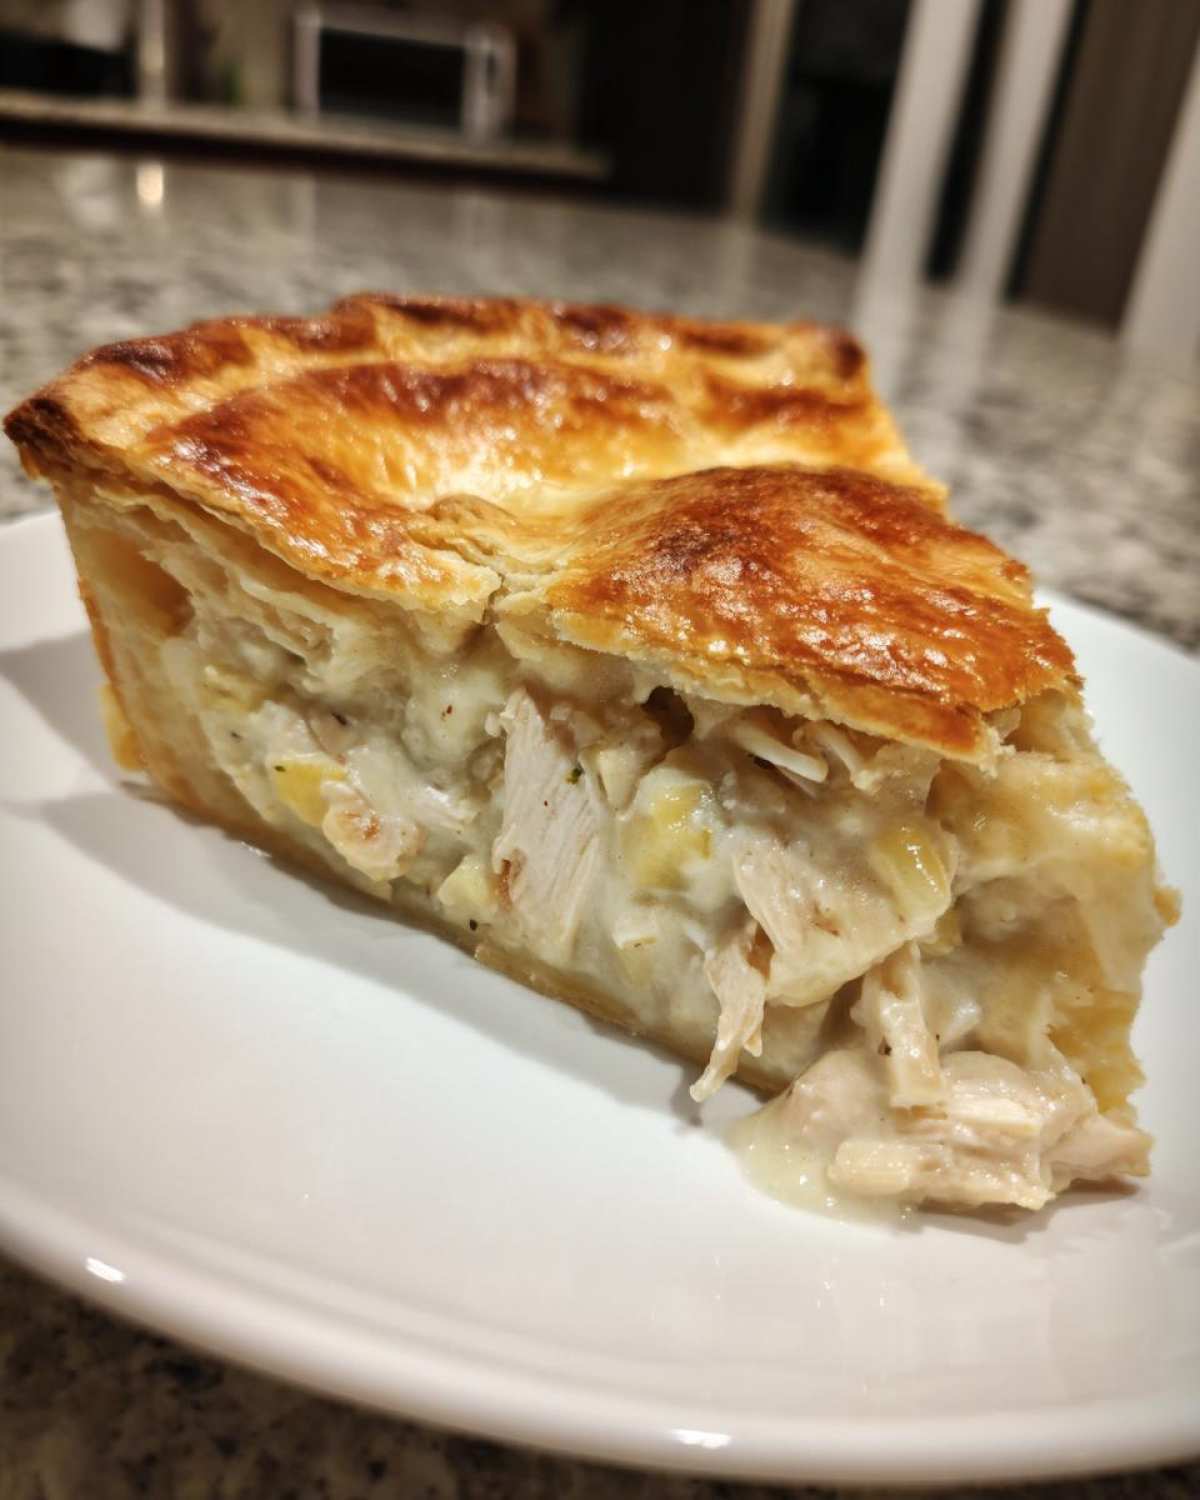
It usually takes about 15 to 20 minutes. You know it’s ready when the filling is bubbling gently in the center again, and that crust is piping hot and crispy! It tastes almost as good as the first time you pulled it out. Enjoy that second round of savory goodness!
Frequently Asked Questions About This chicken pot pie recipe
Folks always have the best follow-up questions when it comes to a classic like this, and that’s how you know you’re baking something truly special! It’s smart to know how to adjust things or troubleshoot when you’re trying to nail that perfect texture in your chicken pot pie recipe. I’ve gathered the ones I get asked most often down here. I hope these little tidbits help you feel like a total pro!
Can I make the creamy chicken pot pie filling ahead of time?
Oh yes, you absolutely can! That’s one of my favorite things about this recipe when planning a busy day. You can whip up that whole creamy chicken pot pie filling mixture—the sautéed veggies, the glorious gravy, everything except the crust—up to two days ahead of time. Just store it snugly covered in the fridge.
When you are ready to bake, let the filling sit on the counter for about 30 minutes to warm up just slightly. Then, pour it into your prepared bottom crust, top it with the second crust, egg wash it, and put it in the oven! You might need to add about 5 to 10 minutes to your original baking time since the filling starts cooler, but it’s worth it for that stress-free assembly time.
What is the best way to use a rotisserie chicken for this recipe?
This is such a fantastic shortcut for making a quick chicken dinner! When you buy that pre-cooked chicken, you just need to get all the meat off the bone. I usually pull every salvageable bit off—don’t throw away the breasts, dark meat, or even the crispy skin pieces if you like a bit more texture!
Once you have done the shredding, you need exactly two cups. I weigh it sometimes just to be sure, but two packed cups work almost every time. Make sure you shred it relatively small; you don’t want huge chunks tearing up your nice, flaky crust when you slice it later. It mixes right into the gravy beautifully!
How do I ensure my flaky pie crust bakes up evenly?
This is all about making sure the steam can escape without blowing your top crust off! The egg wash is crucial for that gorgeous golden color, so make sure you brush the entire surface evenly. Don’t let it pool too thickly on the edges where the two crusts meet, as that can cause them to stick together instead of flaking apart.
The other huge part of ensuring even baking and preventing a soggy bottom is venting. I use a sharp paring knife and cut at least four good-sized slits in the top crust. Think of them like little chimneys! The steam needs a way out, or it condenses under the crust, making it wet. If you don’t vent properly, you risk a puff explosion or a gummy top layer. For more ideas on keeping things crisp, sometimes I look at tips for making shredded chicken for other dishes, because good cooking technique always overlaps!
Estimated Nutritional Data for This chicken pot pie recipe
Alright, since this is a substantial, homemade meal, I always feel like it’s good to have a general idea of what you’re digging into. Remember, this is my best guess! Since we’re using a full double crust and rich, homemade gravy, these numbers reflect that classic, decadent approach to this chicken pot pie recipe.
These estimates are based on dividing the whole recipe into 8 generous servings, using standard ingredient measurements, and assuming average pastry dough. If you use a lighter puff pastry top or skip the bottom crust, things will change dramatically!
Here’s the general breakdown for one hearty slice of this classic American comfort food:
- Serving Size: 1 slice
- Calories: Approximately 450
- Fat: Roughly 25 grams (This is where the butter and crust shine!)
- Saturated Fat: About 10 grams
- Carbohydrates: Around 35 grams
- Protein: A solid 24 grams
- Sugar: Low, about 4 grams
- Sodium: About 650 mg (We use salt in the vegetables and the broth, so keep an eye on store-bought broth if that’s a concern for you.)
It’s hearty fuel for a chilly evening! It’s certainly not a low-fat meal, but it’s packed with real ingredients, and honestly, when you’re eating something this delicious, it’s totally worth enjoying!
Share Your Experience Making This Family Favorite Chicken Recipe
Now that you’ve made this incredible, golden-brown chicken pot pie, I am just dying to hear how it turned out! Honestly, seeing your creations is the best part of sharing these recipes. This is truly a centerpiece for any gathering, the kind of family favorite chicken recipe that people talk about for weeks afterward.
Did those flaky crusts shatter just right? Did you go for the double crust, or did you sneak in some of those biscuit topping variations we talked about? Don’t be shy—whether you stuck strictly to the recipe or tried something new like adding mushrooms or using thyme from your own garden, I want to know all about it!
Head down to the comments section below. Leave a rating—tell me what stars you’d give this absolute champion of classic American comfort food. If you took a picture, feel free to tag me on social media! I love seeing how this pie looks on your dinner tables. Happy baking, everyone!
PrintClassic Chicken Pot Pie with Flaky Double Crust

Make a comforting, from-scratch chicken pot pie featuring a creamy filling and a golden, flaky double crust. This recipe provides instructions for a traditional bake.
- Prep Time: 20 min
- Cook Time: 45 min
- Total Time: 65 min
- Yield: 8 servings
- Category: Dinner
- Method: Baking
- Cuisine: American
- Diet: Vegetarian
Ingredients
- 2 tablespoons unsalted butter
- 1 medium yellow onion, chopped
- 2 carrots, peeled and diced
- 2 celery stalks, diced
- 1/2 cup all-purpose flour
- 1 teaspoon salt
- 1/2 teaspoon black pepper
- 1/4 teaspoon dried thyme
- 2 cups chicken broth
- 1 cup whole milk
- 2 cups cooked, shredded chicken (rotisserie chicken works well)
- 1 cup frozen peas
- 1 cup frozen corn
- 2 pie crusts (one for bottom, one for top)
- 1 large egg, beaten (for egg wash)
Instructions
- Preheat your oven to 400 degrees Fahrenheit (200 degrees Celsius). Place one pie crust in the bottom of a 9-inch pie dish. Trim the edges.
- Melt the butter in a large saucepan over medium heat. Add the onion, carrots, and celery. Cook until the vegetables soften, about 5 to 7 minutes.
- Whisk in the flour, salt, pepper, and thyme. Cook for 1 minute, stirring constantly.
- Gradually whisk in the chicken broth and milk until the mixture is smooth. Bring the mixture to a simmer, stirring until the sauce thickens, about 5 minutes.
- Remove the sauce from the heat. Stir in the cooked chicken, frozen peas, and frozen corn.
- Pour the filling into the prepared pie crust.
- Place the second pie crust over the filling. Crimp the edges of the top and bottom crusts together to seal. Cut several slits in the top crust to allow steam to escape.
- Brush the top crust lightly with the beaten egg wash.
- Bake for 35 to 45 minutes, or until the crust is golden brown and the filling is bubbly. If the edges brown too quickly, cover them loosely with foil.
- Let the pie cool for at least 15 minutes before slicing and serving.
Notes
- For a quicker version, substitute the homemade crust with one package of store-bought puff pastry for the top crust only, and use 3 cups of pre-cooked, shredded rotisserie chicken.
- To prevent a soggy bottom crust, place the pie dish on the lowest rack in the oven for the first 20 minutes of baking.
- If you prefer a biscuit topping instead of a double crust, omit the top crust and drop spoonfuls of biscuit dough over the filling before baking.
Nutrition
- Serving Size: 1 slice
- Calories: 450
- Sugar: 4
- Sodium: 650
- Fat: 25
- Saturated Fat: 10
- Unsaturated Fat: 15
- Trans Fat: 0
- Carbohydrates: 35
- Fiber: 3
- Protein: 24
- Cholesterol: 75