

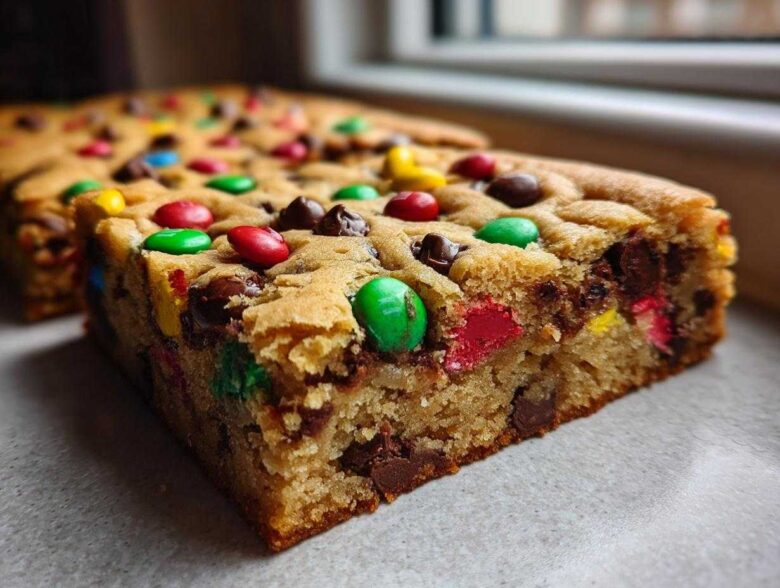
Oh my gosh, I know the holidays bring on the baking pressure, right? Especially when you have to bring something impressive to that cookie exchange or the big family party. Forget worrying about perfectly round cookies that spread too much! I spent years perfecting this recipe because I wanted something genuinely soft and chewy—the kind that makes people go, “Wait, what *is* this amazing thing?” These Christmas cookie bars are the answer. They give you that huge, joyful festive flavor packed into a super easy, no-fuss square. Trust me, I’ve tested these through three different neighborhood cookie exchanges, and they disappear first every single time!
Why These Are the Best Chewy Christmas Cookie Bars for Your Holiday Spread
Look, we all need some winning Simple Christmas baking ideas that don’t take all day. These bars are my secret weapon because they hit every mark! They offer unbelievable visual appeal with those bright holiday M&Ms, and honestly, the texture is what sets them apart. Forget crumbly edges; we are aiming for pure bliss.
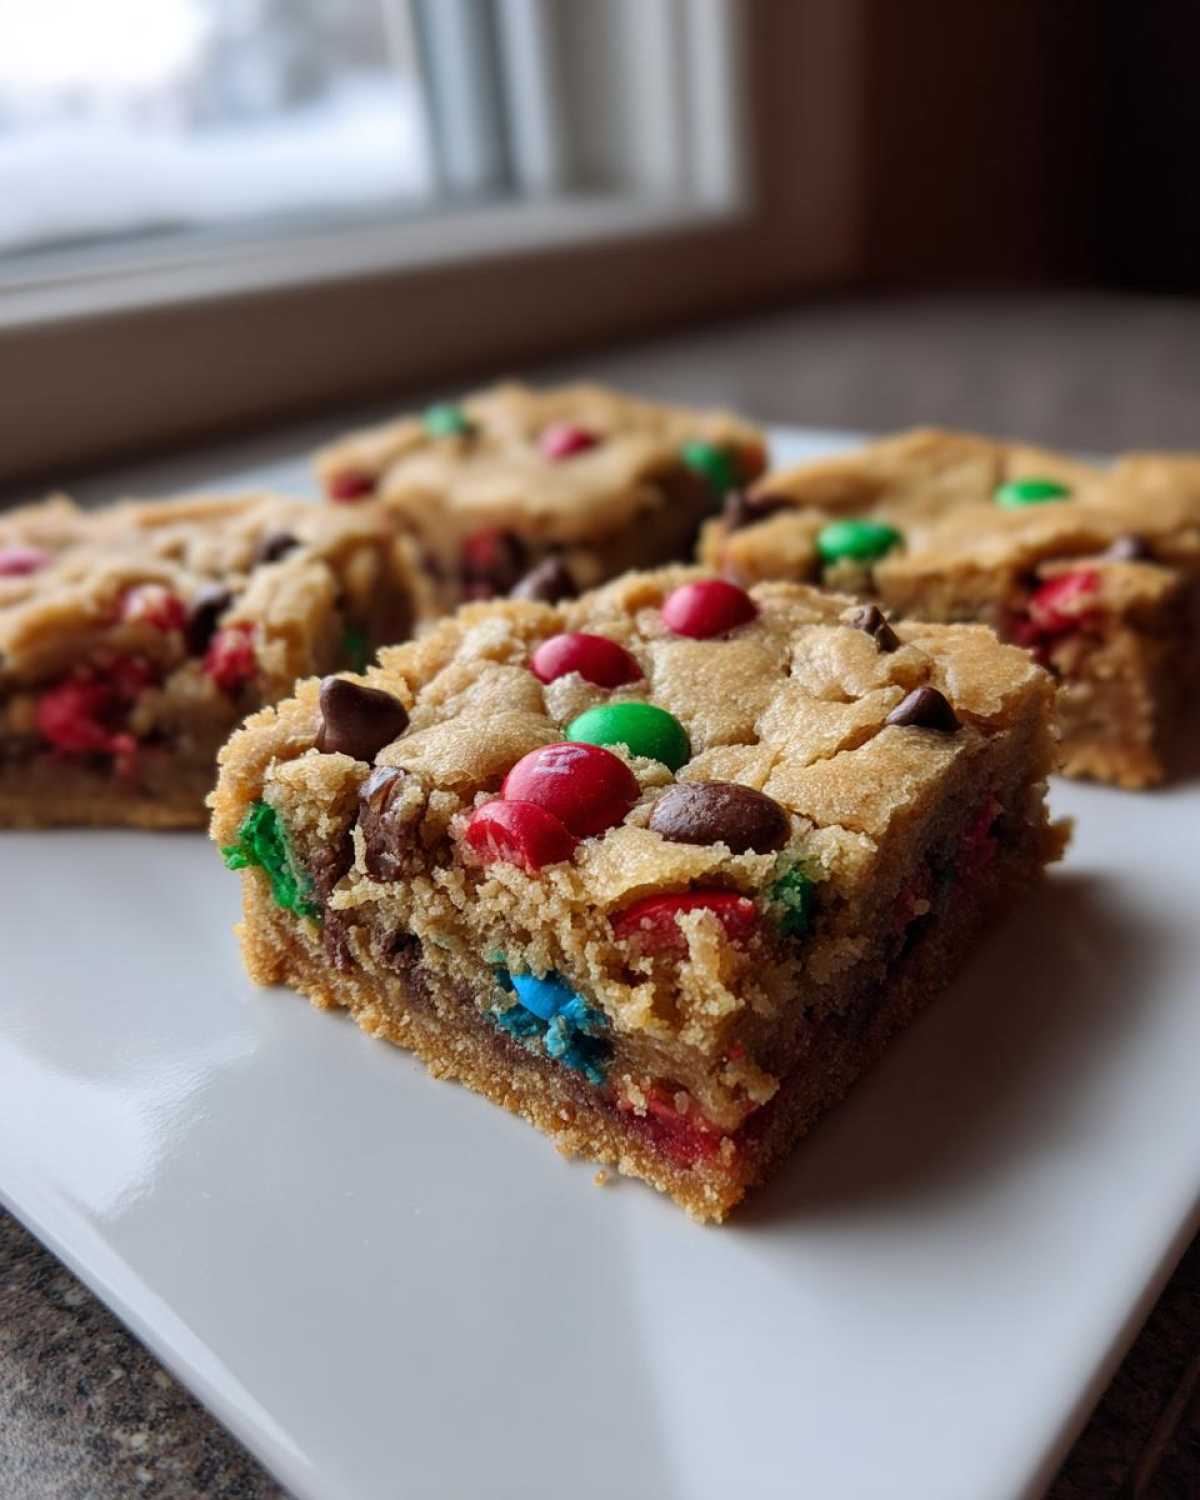
- They are incredibly fast—you just mix and press into the pan.
- The mix-ins are gorgeous right out of the oven thanks to the holiday colors.
- They transport like a dream, which is essential for any Christmas cookie exchange recipe.
- Most importantly, these are the ultimate Chewy Christmas treats you’ll ever make!
Achieving the Perfect Gooey Texture in Your Christmas Cookie Bars
The secret to these gooey holiday squares really comes down to two things you absolutely have to follow. First, look at the sugar! We are using a higher ratio of brown sugar than white. That molasses in the brown sugar keeps things soft, rich, and moist, even after they cool down.
Second, and this is huge: Do NOT overmix the flour once you add it in! As soon as those dry ingredients come together with the wet—seriously, stop mixing. A few streaks of flour are way better than activating all that gluten. Overmixing gives you a tough cake instead of the tender, soft base these beautiful Christmas cookie bars need.
Gathering Ingredients for Your Festive Christmas Cookie Bars
Okay, let’s talk about what you need to pull these babies together! Since these are easy holiday cookie bars, the ingredient list looks a lot like my favorite regular chocolate chip cookie dough, just scaled up for the pan.
You’ll need one cup of butter, softened—and I mean *softened*, not melted! Grab your granulated sugar, 1/2 cup of that lovely, dark brown sugar packed in nice and tight, and two big eggs. Then, the usual suspects: flour, baking soda, salt, vanilla. The stars of the show are the chocolate chips and those amazing holiday M&Ms!
Ingredient Notes and Simple Holiday Substitutions
If you can splurge anywhere, splurge on high-quality vanilla extract. It makes a difference, seriously! You can totally change up the chips, too. If you don’t love white chocolate, just skip them! For the M&Ms, use whatever holiday colors your store has available—red and green are great, but if you find seasonal browns and whites, totally go for it.
If you want to add a little crunch to these festive dessert bars, gently fold in about half a cup of chopped pecans right along with the chips. Just make sure they aren’t overly salty, as we already have salt in the mix!
Step-by-Step Guide to Making Easy Holiday Cookie Bars
This is where these quick Christmas desserts really shine because they are so straightforward! First things first, turn that oven to 350°F (175°C). Now, grab your 9×13 pan. Don’t just grease it; you NEED to line it with parchment paper so it hangs over two sides. That overhang is your handle for lifting everything out later—lifesaver!
Grab your biggest bowl. Get that softened butter in there with both sugars. Beat them until they look fluffy and light—this is getting air into the batter, which helps make them tender, not dense. Then, one egg at a time, mix those in nice and slow with the vanilla.
In a separate bowl, whisk your dry stuff—flour, baking soda, and salt. Now, add those dry ingredients slowly to your butter mixture, mixing on low speed. Stop as soon as you see it looks combined. Seriously, walk away from the mixer! Last step: fold in those M&Ms and chocolate chips gently. Press that glorious dough evenly into your prepared pan and get it into the oven!
Baking Times and Visual Cues for Perfect Christmas Cookie Bars
The baking time is usually about 25 to 30 minutes, but you have to watch them! We aren’t looking for bone-dry cookies here. You want the edges to just barely start turning golden brown. The center should look mostly set, which means soft, not jiggly.
When you do the toothpick test, remember what I said before: you’re hoping for moist crumbs sticking to the toothpick, not wet batter. If it comes out totally clean, you’ve gone too far, but don’t sweat it—they’ll still be good! The most important step, though, is letting them cool completely in that pan on a wire rack. If you try to cut them warm, they will just crumble everywhere. Be patient, use those parchment handles to lift them out, and *then* cut them into perfect squares.
Tips for Success When Preparing Christmas Cookie Bars
Okay, you’ve mixed it, you’ve baked it, but here are a few little tweaks I’ve learned over the years to make these Christmas cookie bars absolutely flawless for your holiday table. Getting great results relies on a few simple secrets that take these from good to spectacular!
Tip number one is all about the pan depth. Since this is meant to be a thicker bar, if you try to layer too much dough in—say, over ¾ full—the middle won’t cook quite right on time. It’ll look done on the edge but be raw in the center. Stick to that 9×13 pan and spread the dough evenly! It keeps the baking time reliable and guarantees those amazing Chewy Christmas treats.
For achieving those magazine-worthy clean cuts, you have to wait until they are completely cool. I know, I know, smelling warm chocolate while you wait is torture! But if you try to slice them warm, the chips pull and smear the edges. Once they are totally cool, try using a large, sharp chef’s knife that you wipe clean between each cut. This really helps keep the lines crisp, which is important if you are taking these somewhere nice.
Also, I sometimes like to lightly flatten the chips and M&Ms onto the dough right before they go into the oven. A lot of the candies sink right down into the dough while these Quick Christmas desserts bake, and while that’s fine, pressing them up top ensures those beautiful red and green colors greet you immediately when you pull the pan out. It’s a tiny step, but it adds so much festive cheer!
Variations on Classic Christmas Cookie Bars
While I think this basic version with the M&Ms is pretty darn perfect for just grabbing a spoon and digging in, who doesn’t love to customize, right? These Christmas cookie bars are such a great canvas! Once you nail the soft, chewy base, you can really go wild with what you fold in there. It’s all about making it fit your holiday vibe.
If you’re looking for something really wintry, try adding a teaspoon of almond extract right along with your vanilla. It gives the base a subtle, sophisticated nutty flavor that pairs unbelievably well with the chocolate. Or, how about crushing up some starlight mints? If you fold in about half a cup of crushed peppermint right at the end, you instantly turn these into spectacular Winter dessert squares!
Another fun direction is thinking about those complex Layered holiday cookie bars you see sometimes. You could easily take your base dough and press only half of it into the bottom of the pan. Then, slather a thin layer of softened cream cheese mixed with a little powdered sugar over the top, and only then do you sprinkle on the remaining dough over that layer before baking. It gives you that lovely gooey layer in the middle!
How to Make Frosted Christmas Cookie Bars
If you want to dress these up even more—especially if you plan on packaging these up for gifting—you absolutely have to frost them. But here is the non-negotiable rule for Frosted Christmas cookie bars: the bars need to be room temperature. I mean stone cold! If you try to frost them even slightly warm, you’re just going to end up with a melted, sticky mess that slides right off.
For a quick, easy frosting that tastes amazing with this base, just take about 4 ounces of softened cream cheese, beat it until smooth, then whip in about 2 cups of powdered sugar, a teaspoon of vanilla, and just a splash of milk or heavy cream until it’s spreadable. You want it thick enough that it doesn’t run everywhere. Once it’s smoothed over the completely cooled baking sheet, throw a few extra M&Ms or some festive nonpareil sprinkles on top for that final holiday punch! They look so beautiful sitting out on a platter at any party.
Make Ahead Christmas Treats and Storage for Your Cookie Bars
One of the reasons I adore these Christmas cookie bars so much is that they are truly wonderful Make ahead Christmas treats. You don’t have to stress about baking them the same day you host! In fact, I think they taste even better the day after, after all those sugars and spices have really settled into that chewy base.
If you plan on keeping them out on the counter for a few days leading up to the big gathering, just use a good airtight container. Don’t use a flimsy lid! Layer them with a piece of parchment or wax paper between the layers so they don’t stick together. Kept this way at cool room temperature, they stay perfectly soft and gooey for about four days. Seriously, I’ve tested that limit!
Now, if you need to make a HUGE batch for a cookie exchange or you want to get a jump start on your holiday baking weeks ahead, freezing is your absolute best friend. You can freeze these bars baked or even unbaked. For baked bars, cut them into squares first (remember, cool completely!). Stack them in a freezer-safe container, separating each layer with parchment paper. They’ll be great in the freezer for up to three months!
When you’re ready to thaw them, just pull the container out of the freezer and let it sit on the counter for a few hours. They thaw beautifully and keep that soft, chewy texture we worked so hard to achieve. Unlike some drop cookies that can get stale sitting around, these Chewy Christmas treats actually thrive on a little wait time!
Frequently Asked Questions About These Christmas Cookie Bars
Can I use butter substitutes or oil instead of the creamed butter?
Oh, I really hope you don’t! The butter is absolutely essential here for forming those little air pockets when creaming with the sugars. That’s what creates that delicate, chewy structure for our Christmas cookie bars. If you use oil—even shortening—you skip that crucial creaming step and end up with a greasier, denser square that doesn’t have the right crumb. Butter it is, trust me on this one!
What’s the best way to safely transport these for a cookie exchange?
This is such a crucial question when dealing with gooey holiday squares! Remember how I told you to let them cool completely? Once they are stone-cold, lift the entire slab out of the pan using that parchment paper overhang. You can leave them whole in the pan, cover it tightly with foil, and then just cut them onsite. If you have to slice them beforehand, make sure you have plenty of wax paper between the layers. They are sturdy if cool, but you don’t want them smushing together on the car ride!
Are these suitable for gifting, or are they better for parties?
They are amazing for both! If they are going to a party, the whole uncut slab in the pan is fantastic because people can just grab a square. If you are gifting them, wait until they are completely cool, cut them neatly, and then stack them in nice decorative tins or boxes separated by parchment paper. They make incredible Simple Christmas baking ideas gifts because they look so colorful with the M&Ms!
Do these M&M Christmas cookie bars need to be refrigerated?
Nope! That’s one of the best things about these types of bars. Since they have a higher sugar and fat content than a regular cookie, they actually do best stored at room temperature in an airtight container for up to four days. Refrigerating them can sometimes make the butter firm up too much and actually dry out the texture a little bit! If you have leftovers after the holidays, you can then freeze them following the advice in our storage section. Let me know if you have any other questions about this recipe on the contact page!
Estimated Nutritional Data for Simple Christmas Baking Ideas
Now, I know some of you lovely bakers like to keep track of this information, even for the most decadent of treats! So, here is the breakdown for our Chewy Christmas treats. Remember, these numbers are just estimates, because I’m still figuring out exactly how much sugar clings to everyone’s serving spoon, ha! But this should give you a really good idea.
This estimation is based on dividing the whole 9×13 pan into 24 squares, which is what I usually do for cookie exchanges. If you cut them bigger—and who am I to judge?—these numbers will naturally go up!
- Serving Size: 1 square
- Calories: 210
- Total Fat: 11g (7g saturated)
- Carbohydrates: 28g
- Protein: 3g
See? Honestly, for something this decadent and cheerful, 210 calories isn’t too bad for a holiday indulgence, especially when you look at the fiber and protein content—it means you actually get some substance in there!
If you ever have concerns about substitutions or ingredients, please check out our official disclaimer page for general guidance. But for baking advice specific to making these the best Christmas cookie bars, you know where to find me!
Share Your Festive Dessert Bars Experience
Wow, we made it! Now that you have the blueprint for the most perfectly chewy, colorful, and easy Christmas cookie bars on the block, I can’t wait to see what you do with them. Since these recipes are all about spreading holiday cheer, I seriously want to see your creativity in action!
Did you turn them into a towering masterpiece for a big buffet? Did you try adding that peppermint crunch I mentioned, or maybe you went rogue and did a completely different chip combination? Please hop down into the comments below and give this recipe a star rating—it really helps other bakers know that these are the real deal when they are scrolling for quick Christmas desserts!
If you snapped any photos—maybe showing off how neatly they cut, or showing them piled high for your Christmas cookie exchange recipe—please shout out about it in the comments! Tell me what you made them for. Knowing these treats made it onto your table and brought some joy is the best reward for me. If you want to know more about how we handle site feedback and privacy, you can always check out our site policies. Happy holiday baking, my friends!
PrintChewy Festive Christmas Cookie Bars
Make soft, chewy cookie bars loaded with holiday M&Ms and chocolate chips. This recipe is simple to prepare for cookie exchanges or holiday parties.
- Prep Time: 15 min
- Cook Time: 30 min
- Total Time: 45 min
- Yield: 24 squares
- Category: Dessert
- Method: Baking
- Cuisine: American
- Diet: Vegetarian
Ingredients
- 1 cup (2 sticks) unsalted butter, softened
- 1 cup granulated sugar
- 1/2 cup packed light brown sugar
- 2 large eggs
- 1 tablespoon vanilla extract
- 2 3/4 cups all-purpose flour
- 1 teaspoon baking soda
- 1/2 teaspoon salt
- 1 cup semi-sweet chocolate chips
- 1 cup holiday M&Ms (red, green, brown)
- 1/2 cup white chocolate chips (optional)
Instructions
- Preheat your oven to 350°F (175°C). Line a 9×13 inch baking pan with parchment paper, leaving an overhang on the sides for easy removal.
- In a large bowl, cream together the softened butter, granulated sugar, and brown sugar until light and fluffy.
- Beat in the eggs one at a time, then mix in the vanilla extract.
- In a separate bowl, whisk together the flour, baking soda, and salt.
- Gradually add the dry ingredients to the wet ingredients, mixing on low speed until just combined. Do not overmix.
- Fold in the semi-sweet chocolate chips, holiday M&Ms, and white chocolate chips, if using.
- Press the dough evenly into the prepared baking pan.
- Bake for 25 to 30 minutes, or until the edges are lightly golden and the center is mostly set. A toothpick inserted near the center should come out with moist crumbs attached, not wet batter.
- Let the bars cool completely in the pan on a wire rack before lifting them out using the parchment paper overhang.
- Cut into squares.
Notes
- For extra gooey bars, slightly underbake them by about 2 minutes. They will firm up as they cool.
- You can substitute any holiday mix-ins you prefer, such as chopped pecans or different colored sprinkles.
- If you want a frosted version, wait until the bars are completely cool before spreading a thin layer of vanilla buttercream on top and decorating with extra M&Ms.
Nutrition
- Serving Size: 1 square
- Calories: 210
- Sugar: 18g
- Sodium: 95mg
- Fat: 11g
- Saturated Fat: 7g
- Unsaturated Fat: 4g
- Trans Fat: 0g
- Carbohydrates: 28g
- Fiber: 1g
- Protein: 3g
- Cholesterol: 30mg