

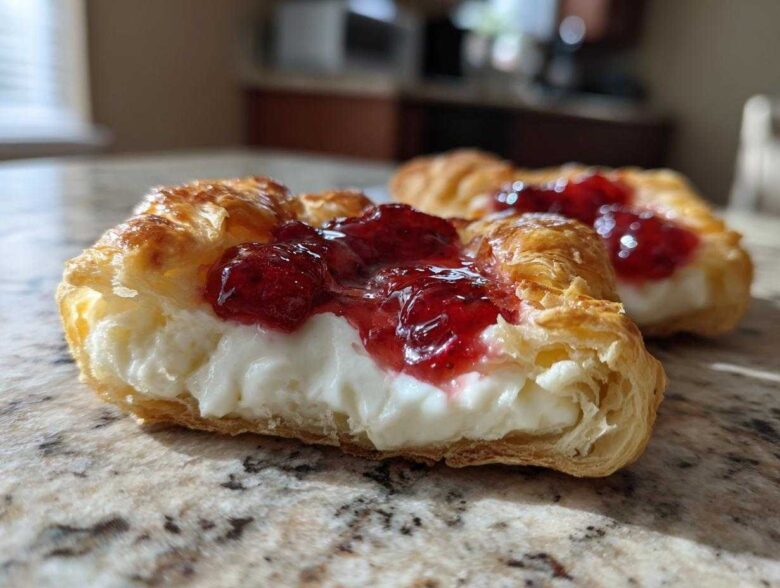
Oh my gosh, friends, if you’ve ever stood in a bakery case looking longingly at those perfect, laminated pastries and thinking, “Why can’t I ever get that beautiful flakiness with gluten-free baking?”—then lean in close because I have spent *years* on this. Seriously, I used to just sigh and buy the slightly sad GF scone instead. But no more! I’ve cracked the code, and I’m so excited to share my recipe for truly flaky, utterly decadent Gluten-Free Strawberry Cream Cheese Danishes. This isn’t just another dense, crumbly take on a pastry; this is the real deal. We’re tackling the delicate dance of lamination using specialized GF flour and careful chilling, and trust me, the payoff is worth every perfectly folded layer. If you want to know the heart behind this whole kitchen adventure, you can read a bit more about my journey over at my story page!
Why You Will Love This Gluten-Free Strawberry Cream Cheese Danishes Recipe
I know what you’re thinking—gluten-free laminated dough is a nightmare. It’s usually dry or just turns into a sad, buttery mess. But I promise, this recipe is different! You are going to absolutely adore:
- The texture: It’s legitimately flaky, layered perfection, just like the bakery version.
- Simplified handling: I’ve included steps that make working with GF pastry dough so much easier.
- The flavor explosion: That sweet-tart strawberry filling paired with tangy cream cheese is just unbeatable.
Essential Equipment for Perfect Gluten-Free Strawberry Cream Cheese Danishes
Okay, listen up—you can’t make magic without the right tools, especially when we’re trying to trick butter into laminating itself inside flour that doesn’t want to hold hands. Don’t panic; you probably have most of this already, but I want you prepared!
We absolutely need enough surface area to roll things out. I use my biggest, sturdiest wooden cutting board, but a large countertop space works too. Getting that dough rectangle right is 80% of the battle for achieving those layers.
Here’s the non-negotiable list for success:
- A good, heavy-duty rolling pin. You need some muscle for that initial roll-out.
- Two full rolls of parchment paper. This is crucial; we’re layering butter sheets here, and you do *not* want a buttery disaster stuck to your counter.
- Plastic wrap or good quality foil for wrapping the dough tightly during chilling. Chilling is your best friend here!
- A digital kitchen scale is handy for weighing the flour, but if you insist on cups, make sure you know how to spoon-and-level your gluten-free flour blend correctly.
- A bench scraper. This helps lift the soft dough cleanly off the work surface without stretching it too much when folding.
Gathering Ingredients for Your Gluten-Free Strawberry Cream Cheese Danishes
Alright, now that we have our tools ready, let’s talk food! Since these are Gluten-Free Strawberry Cream Cheese Danishes, we have to be super precise about what we bring into the mix. Gluten-free baking, especially when we want flakes, demands the right helpers. Think of these ingredients as the building blocks for the most amazing gluten-free breakfast pastry you’ve ever eaten.
I’ve broken down the list so you can organize your mise en place. Honestly, having everything measured out before we even start the yeast is the secret to staying calm when we get to the butter folding stage!
For the Flaky Gluten Free Danish Dough Instructions
This dough mixture needs patience! Make sure you have high-quality everything here, especially the flour.
- 1 cup (240ml) warm milk (make sure it’s between 105-115°F—too hot and you’ll kill that yeast!).
- 2 1/4 teaspoons active dry yeast.
- 1/4 cup granulated sugar, plus 1 teaspoon reserved just for waking up the yeast.
- 1 large egg.
- 1/4 cup unsalted butter, melted (and slightly cooled, please!).
- 1 teaspoon vanilla extract.
- 2 1/2 cups high-quality gluten-free all-purpose flour blend. This is KEY: it *must* contain xanthan gum, or you’ll have tears later!
- 1 teaspoon baking powder.
- 1/2 teaspoon salt.
- 1/2 cup (that’s one full stick!) cold unsalted butter, cut into small, tiny cubes. These go in later for lamination, so keep them deeply chilled!
For the Rich Strawberry Cream Cheese Filling
This is the gooey center that makes everyone request this recipe over and over. We want it smooth and dreamy!
- 8 ounces cream cheese, softened to room temperature—no shortcuts here, or it won’t whip right.
- 1/4 cup powdered sugar.
- 1/2 teaspoon lemon zest (freshly grated, please; it wakes up the cheese!).
- 1 cup strawberry preserves or thick strawberry jam. Use good quality stuff; it makes a difference!
- 1 egg, beaten lightly for the egg wash on the edges.
- 1/4 cup powdered sugar mixed with just 1 tablespoon milk for that optional final drizzle.
How to Make Flaky Gluten Free Danish Dough Instructions for Gluten-Free Strawberry Cream Cheese Danishes
Time to get our hands dirty! The first steps for these Gluten-Free Strawberry Cream Cheese Danishes are surprisingly easy, just like making any enriched bread dough. We need to wake up that yeast first, so grab your warm milk. Remember, warm, not hot! If it scalds the yeast, the whole batch is toast, and we can’t have that.
Activate the yeast by mixing it with that little teaspoon of sugar and the warm milk. Let it sit until it gets foamy—that’s the bubbly sign that your yeast is alive and ready to work the magic! Once foamy, whisk in your egg, melted butter, and vanilla. Now, gently add in your GF flour blend, baking powder, and salt. Mix it just until it comes together into a soft, somewhat sticky ball. Trust me on this: gluten-free dough doesn’t develop much structure on its own, so don’t overmix looking for that elastic feel you get with wheat flour. A gentle mix is all you need!
Cover that dough ball and let it rest for 30 minutes. This rest time allows the flour to fully hydrate—a crucial step in GF baking where dry pockets can ruin the texture later. If you want to read more about how hydration affects texture in pastries, check out my thoughts on scones; the principles are similar!
Laminating the Dough for a Perfect Texture Gluten Free Danish
Okay, deep breaths. This next part is what makes these pastries amazing: the lamination! This is how we create those stunning, flaky layers in our Gluten Free Danish Dough Instructions. After the dough rests, turn it out carefully onto your floured surface and roll it into a large rectangle, aiming for about half an inch thick.
Now for the cold butter cubes. Scatter those wee chunks evenly over just two-thirds of the dough surface. Then, we fold it like a fancy business letter: fold the unbuttered third over the center, and then fold the remaining buttered third right over the top of that. You should have three layers stacked now. This is your first turn!
Wrap it tight and chill it for exactly 30 minutes. Then, unwrap it, roll it into a long rectangle again, and repeat the three-fold letter fold. Chill again for 30 minutes. We are doing this process *three times total* (including the first fold), with a 30-minute rest in the fridge between *every* single fold. Those chill periods keep the butter hard enough to create those distinct layers when baking, which is vital for a Perfect Texture Gluten Free Danish!
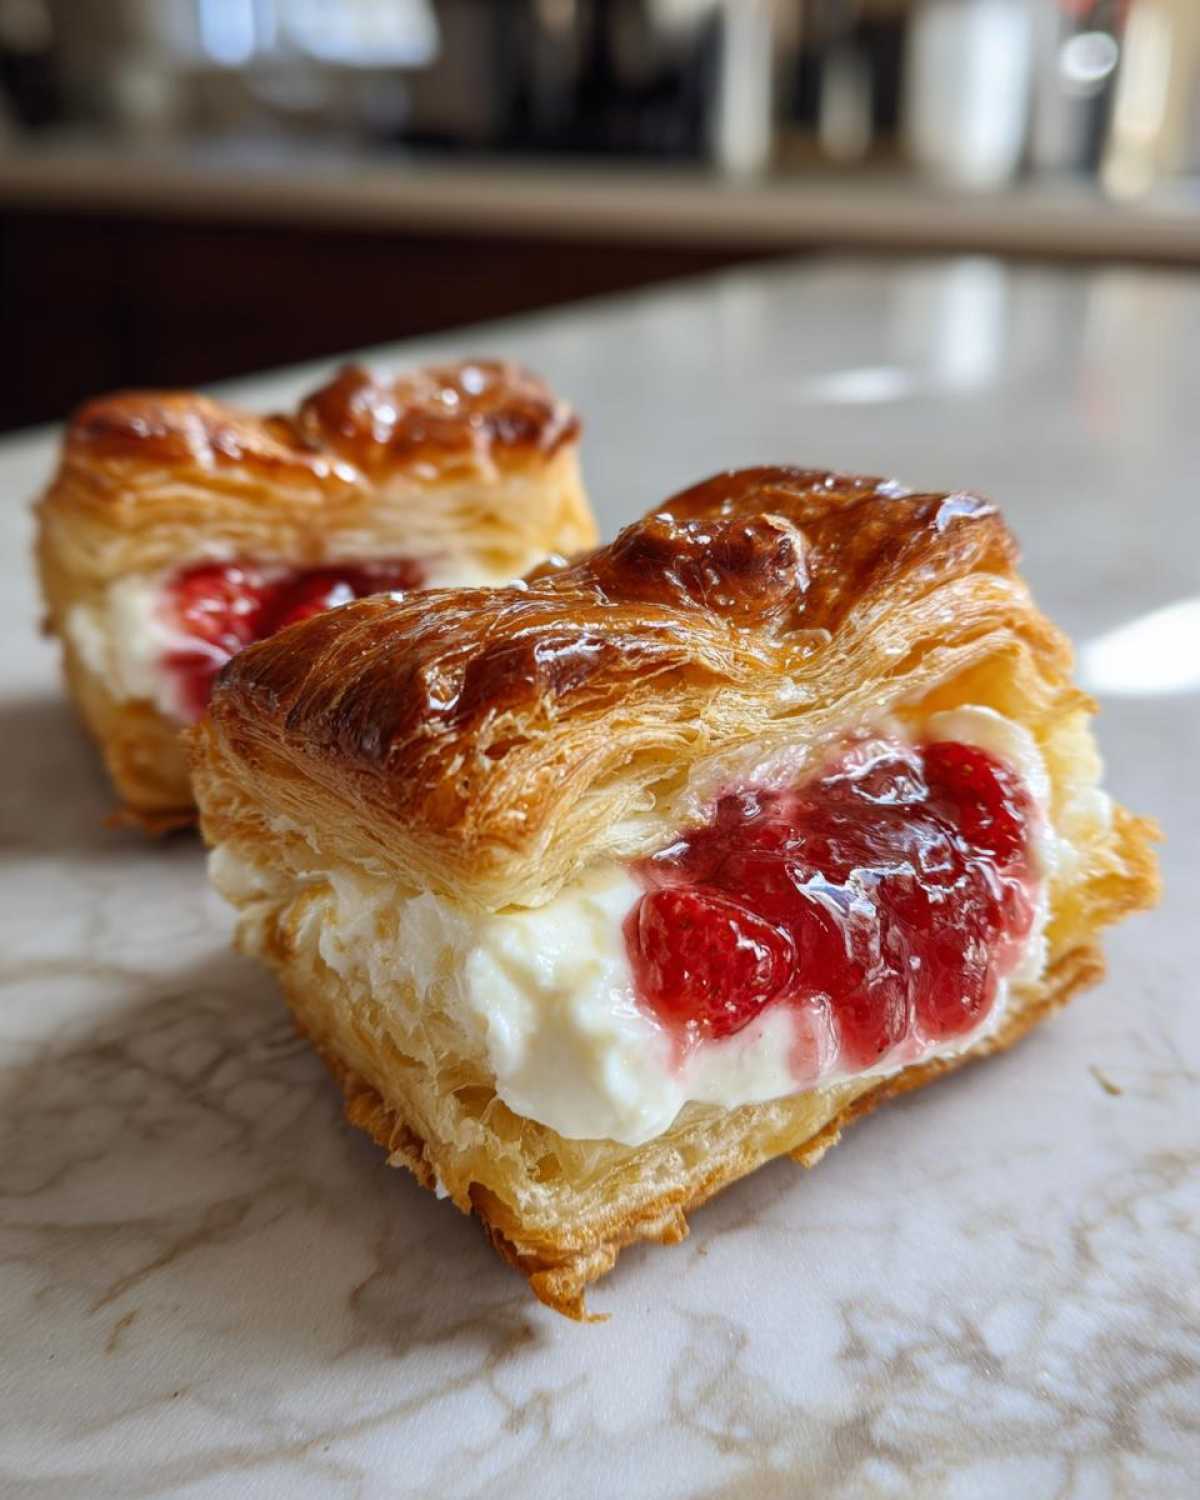
Assembling Your Rich Strawberry Danish with Cream Cheese Gluten Free
While the dough is getting its final chill, let’s whip up that decadent center! For the filling, take your softened cream cheese—and I mean soft, almost pudding-like—and beat it with the powdered sugar and that bright little kick of lemon zest until it’s totally smooth. No lumps allowed; we’re aiming for bakery quality here!
Once the final chill is up, roll that gorgeous, laminated dough out one last time until it’s thin, maybe 1/8 of an inch thick. Take a sharp knife and cut the dough into neat 3-inch squares. Now, here is the secret to getting that beautiful border that holds the filling in: score a frame! Use your knife to gently score a line about a half-inch in from the edge, making a square border, but *do not cut all the way through*. This un-cut edge will puff up around the filling nicely.
In the center of that scored square, drop a little dollop of your cream cheese mixture. I like to swirl it slightly. Then, top that with a spoonful of your best strawberry preserves. That combination is what makes this Rich Strawberry Danish with Cream Cheese Gluten Free so special. If you need tips on making sure your preserves aren’t too runny, I talk about fruit fillings over in my cookie post—the same rules apply!

Baking Your Gluten-Free Strawberry Cream Cheese Danishes to Golden Perfection
It’s showtime! After all that folding and chilling—we get to the best part: the oven. First things first, crank that oven up to 375°F (190°C). Preheat it properly; you want that butter shock the second the dough goes in so it steams instantly and creates those beautiful lift layers.
Before they go in, we do the classic finishing touch. Gently brush the little exposed dough edges—the border you scored but didn’t cut through—with that beaten egg wash. This is what gives your Gluten-Free Strawberry Cream Cheese Danishes that gorgeous, shiny, golden-brown finish that looks like you bought them fresh this morning. Don’t let the egg wash drip down into the filling, though; we want that cream cheese center to stay nice and beautifully topped, not swimming in egg!
Place those beauties on a parchment-lined baking sheet. Pop them into the preheated oven and set a timer for 18 minutes. The official time range is 18 to 22 minutes. Gluten-free pastry can sometimes bake a little differently than traditional dough, so keep an eye on them around minute 16.
Here’s my pro tip for knowing they’re absolutely done: don’t just check the tops! Gluten-free pastry often needs a little more assurance than wheat pastry. Carefully lift one with a spatula and check the bottom. You want a nice, light golden color on the bottom, too. If the filling is bubbling happily and the edges are deep gold, they are ready! If you see that the edges are darkening but the center still looks a bit soft, pull them out anyway. They’ll continue baking slightly on the rack.
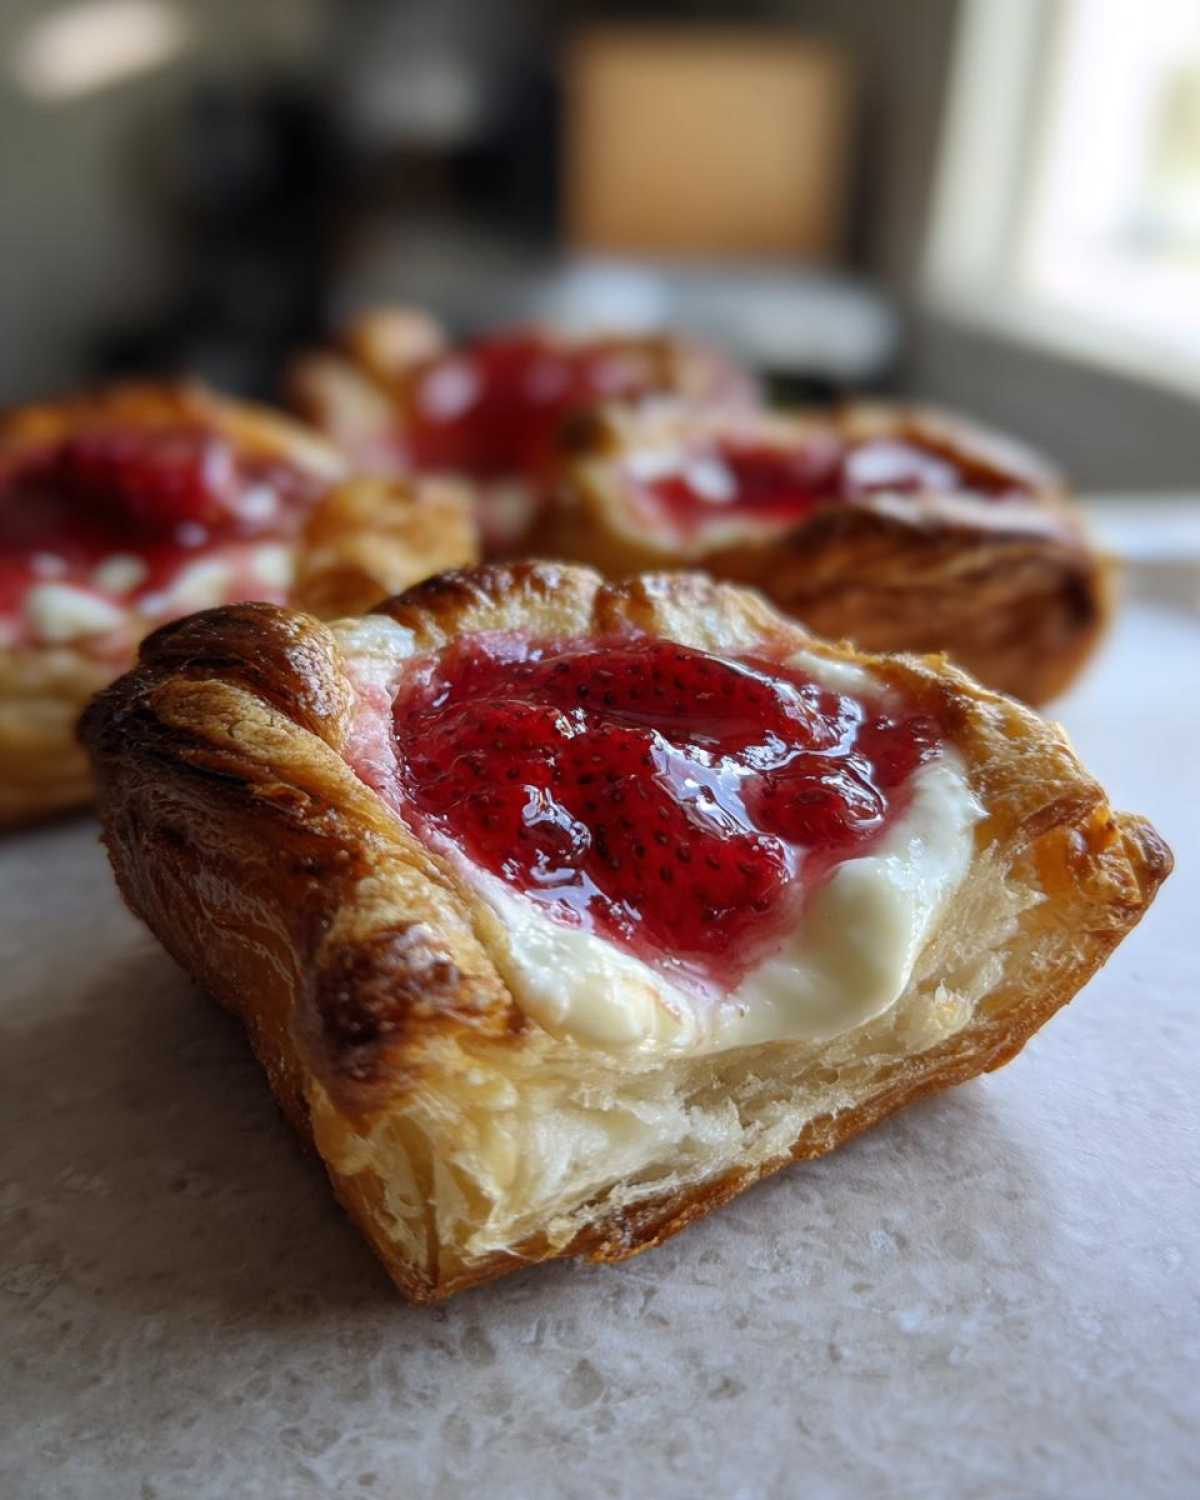
Once they are out, let them cool on the rack for just a few minutes. If you’re going for the optional drizzle, now is the time to mix up that simple glaze—powdered sugar and milk—and wave it artistically over the tops. That warm glaze sets up perfectly on the cooling pastry. Enjoy those perfect Gluten-Free Strawberry Cream Cheese Danishes; you earned them!
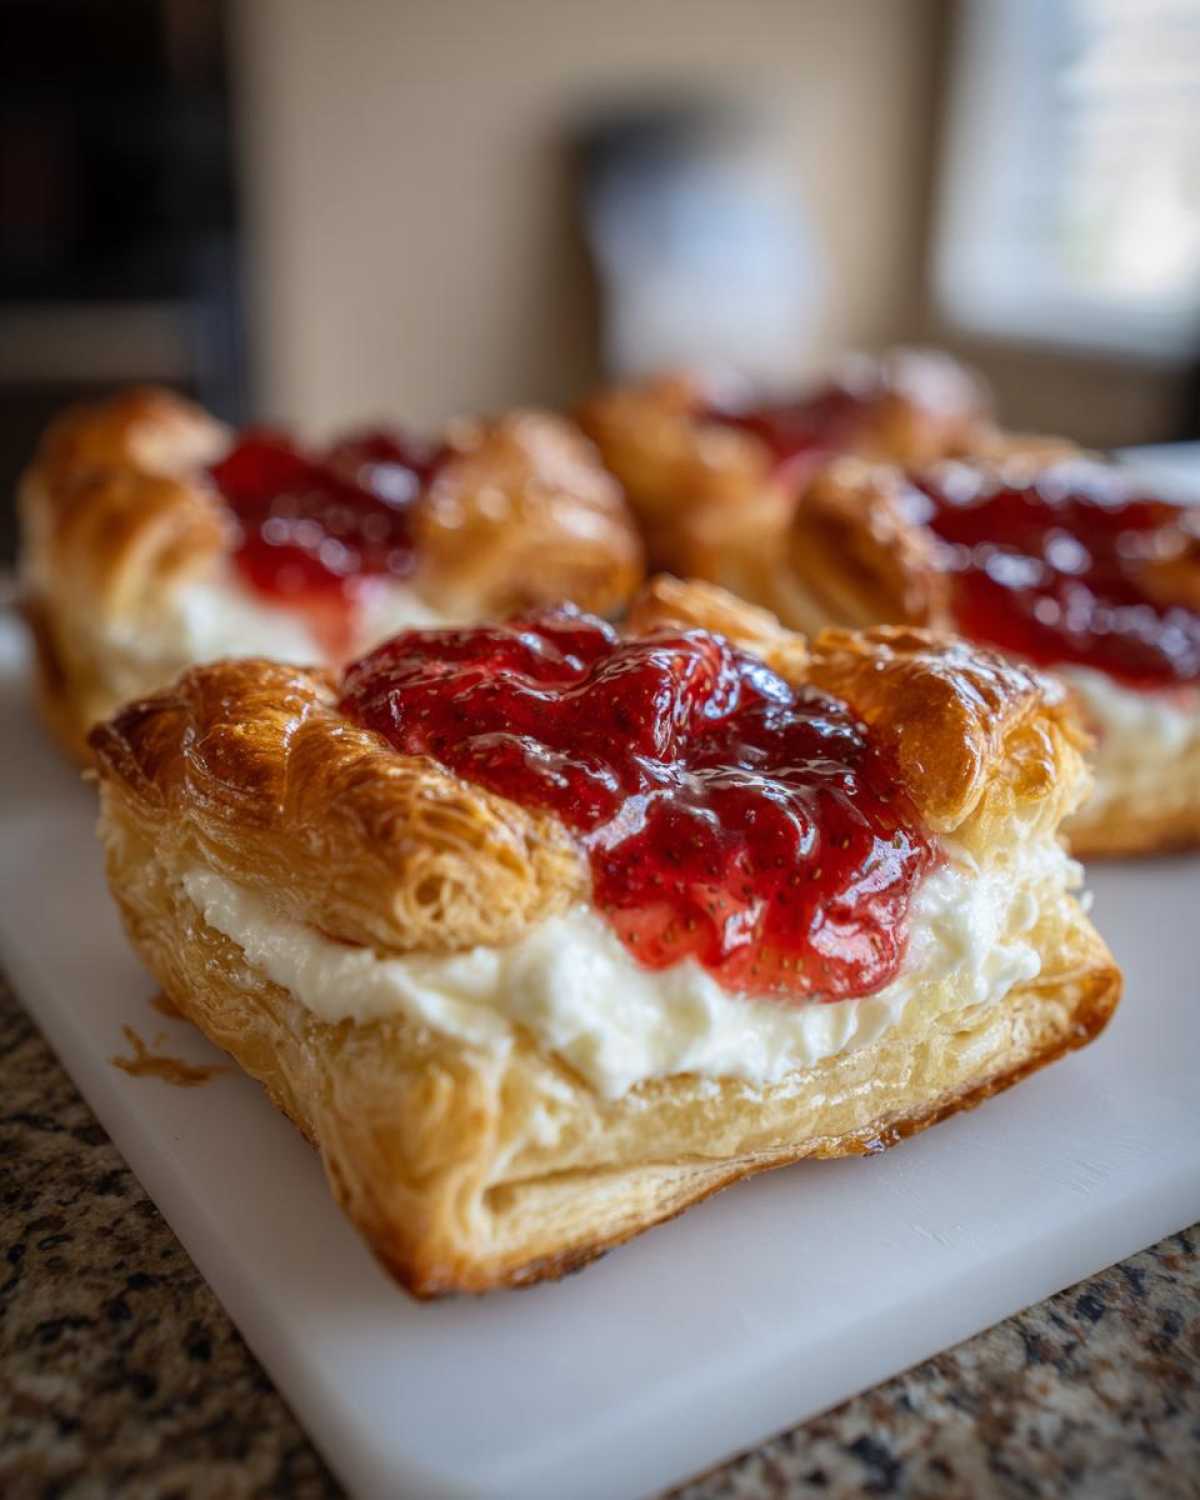
Tips for Success: Achieving the Best GF Strawberry Cream Cheese Pastry
I want you to have stellar results every single time you make these, so let’s talk about the pitfalls I hit before I perfected these steps. Working with any gluten-free pastry dough requires a little more respect than regular dough, right? It feels different—less cooperative! But these little tricks make all the difference between a delicious result and a pile of buttery crumbs.
First, let’s revisit that flour blend. This is my number one piece of advice! You absolutely must use a quality gluten-free all-purpose blend that already contains xanthan gum. If yours doesn’t, you need to add about a teaspoon of pure xanthan gum when you measure your flour. This gum is the magic glue that stands in for gluten; without it, your dough just won’t hold together when we roll it for those critical folds.
Second, remember that GF dough tears easily. When you’re rolling it out for any of those three turns required for lamination, use light, even pressure. If you see a tiny crack forming near the edge, just gently pinch it closed. Don’t stress and don’t overwork it trying to make it smooth like wheat dough. The goal is pliability, not perfection!
My biggest savior during assembly is keeping everything cold! Seriously, if your cubed butter gets soft during the lamination process, your layers will merge into one big layer, and you’ll have a tasty, but flat, cheese Danish. If your kitchen is warm, or if you notice the dough getting sluggish, wrap it up and stick it back in the fridge for 15 minutes, even if it isn’t scheduled for chilling. It can wait!
Speaking of assembly, when you score that border to hold the filling, don’t press too hard. You only need to cut through about half the thickness of the dough. If you cut all the way through, the filling boundary will bake right into the sheet pan, and you’ll lose that beautiful raised edge. It’s annoying, I know, but trust me on the gentle touch!
If you love the bright flavor profile of the filling, I have a recipe for amazing lemon cookies that use a similar zesty approach, you can find those over here if you want another fantastic morning treat!
Make Ahead Gluten Free Breakfast Recipes and Storage for Gluten-Free Strawberry Cream Cheese Danishes
I am a huge fan of making things ahead of time, especially when weekend brunch looms! Who wants to laminate dough at 6 AM on a Saturday? Not me! The beautiful thing about these Gluten-Free Strawberry Cream Cheese Danishes is that they actually benefit from a little rest when assembled, which makes them perfect for our list of make ahead gluten free breakfast recipes.
You have two great options here for prepping in advance. The first option is chilling the dough after the final fold, which I already talked about. But if you want to go further and have breakfast ready to bake, you can assemble the entire thing!
Assembling Early for Morning Baking
Once you have shaped the squares, spooned in your cream cheese and strawberry filling, and brushed on that egg wash, don’t bake them yet! Carefully place the assembled pastries onto a baking sheet lined, of course, with parchment paper. Then, cover the whole thing loosely with plastic wrap—don’t let the wrap touch the filling! Stick that sheet pan right into the refrigerator overnight. The cold helps the GF dough set up around the filling beautifully.
When morning comes, you just pull them out and bake! Because they are starting cold from the fridge, you’ll need to add a tiny bit of extra time—maybe 3 to 5 minutes longer than the recipe calls for. They will still bake up perfectly flaky and delicious. How great is that?
Storing Leftovers (If You Even Have Any!)
So, let’s say you made a double batch, or maybe you just couldn’t eat all twelve of those glorious Homemade Gluten Free Breakfast Pastries in one sitting. How do we keep them fresh? Store leftover baked danishes in an airtight container at room temperature for up to two days. Honestly, they are best on the day they are baked, but if you seal them well, the filling keeps them pretty moist.
If you need to keep them longer than two days, move the airtight container to the fridge. You’ll want to reheat them gently to bring back that flaky texture. I never microwave these because they get chewy, which is the enemy of good pastry! Instead, pop them on a piece of foil and heat them in a 300°F oven for about 5 to 7 minutes. That warmth reactivates the flakiness. They’ll taste almost as good as fresh!
Frequently Asked Questions About This Gluten Free Strawberry Cream Cheese Danish Recipe
I always save a few slots at the end for reader questions because you guys always ask the *best* things that I forget to mention in the main recipe flow! Baking with gluten-free flour is a journey, and sometimes you just need a little extra reassurance to make sure your Gluten Free Strawberry Cream Cheese Danish Recipe turns out picture-perfect.
Can I use a different gluten-free flour blend for these Gluten-Free Strawberry Cream Cheese Danishes?
This is a big one! Because we rely so heavily on that initial mixing and then the lamination process, the binder is essential. If you swap out the specific blend I recommended, you absolutely HAVE to make sure your new blend includes xanthan gum, or better yet, add an extra half teaspoon of it yourself. The magic in making these Decadent Gluten Free Fruit Filled Pastries stretchy enough to fold relies on that gum mimicking the work gluten usually does. If you use a blend without it, your dough will just shear apart when you try to roll it, and you’ll end up with a delicious, but flat, strawberry-cheese biscuit instead of a flaky pastry!
What is the best way to serve these Homemade Gluten Free Breakfast Pastries?
Honestly, I think the absolute best way to enjoy these Homemade Gluten Free Breakfast Pastries is still slightly warm about 15 minutes after they have come out of the oven. The cream cheese filling is soft and gooey, and the pastry is at its flakiest right then. I love having one with a big mug of strong black coffee to cut through the richness. If you added the powdered sugar glaze, it firms up nicely once cooled a bit, so room temperature is great for packing up or serving later in the day.
If you didn’t glaze them, sometimes I’ll add a tiny sprinkle of flaky sea salt right when they come off the baking sheet—it just elevates the sweetness beautifully! They are truly fantastic as part of any weekend brunch spread.
If you have any issues or need further clarification on ingredients, please see my full cooking disclaimer. Happy baking!
PrintGluten-Free Strawberry Cream Cheese Danishes

Follow this detailed recipe to create flaky, bakery-style gluten-free strawberry cream cheese danishes at home. This guide covers making the dough, the rich filling, and assembly.
- Prep Time: 45 min
- Cook Time: 22 min
- Total Time: 1 hour 47 min
- Yield: 12 danishes
- Category: Breakfast
- Method: Baking
- Cuisine: American
- Diet: Gluten Free
Ingredients
- 1 cup (240ml) warm milk (about 105-115°F)
- 2 1/4 teaspoons active dry yeast
- 1/4 cup granulated sugar plus 1 teaspoon for yeast
- 1 large egg
- 1/4 cup unsalted butter, melted
- 1 teaspoon vanilla extract
- 2 1/2 cups high-quality gluten-free all-purpose flour blend (with xanthan gum)
- 1 teaspoon baking powder
- 1/2 teaspoon salt
- 1/2 cup (1 stick) cold unsalted butter, cut into small cubes (for lamination)
- 8 ounces cream cheese, softened
- 1/4 cup powdered sugar
- 1/2 teaspoon lemon zest
- 1 cup strawberry preserves or thick strawberry jam
- 1 egg, beaten (for egg wash)
- 1/4 cup powdered sugar mixed with 1 tablespoon milk (for optional glaze)
Instructions
- Activate the yeast: In a small bowl, combine the warm milk, 1 teaspoon of sugar, and the yeast. Let stand for 5 to 10 minutes until foamy.
- Mix the dough: In a large bowl, whisk together the remaining 1/4 cup sugar, egg, melted butter, and vanilla extract. Add the yeast mixture. Gradually mix in the gluten-free flour blend, baking powder, and salt until a soft dough forms.
- First rest: Cover the dough and let it rest at room temperature for 30 minutes.
- Laminate the dough: Turn the dough out onto a surface lightly dusted with gluten-free flour. Roll the dough into a rectangle, about 1/2 inch thick. Scatter the cold, cubed butter evenly over two-thirds of the dough surface. Fold the dough like a business letter (fold the unbuttered third over the center, then fold the remaining buttered third over that).
- Chill and turn: Wrap the dough tightly and refrigerate for 30 minutes. After chilling, roll the dough out again into a long rectangle. Fold it into thirds again. Repeat this chilling and folding process two more times, chilling for 30 minutes between each set of folds (total of 3 turns). This builds the flaky layers.
- Prepare the filling: While the dough chills for the final time, beat the softened cream cheese with 1/4 cup powdered sugar and lemon zest until smooth. Set aside.
- Shape the danishes: Roll the chilled dough into a large rectangle, about 1/8 inch thick. Cut the dough into 3-inch squares. Place the squares on a parchment-lined baking sheet.
- Fill the danishes: Score a border about 1/2 inch from the edge of each square without cutting all the way through. In the center of each square, place a spoonful of cream cheese mixture, followed by a spoonful of strawberry preserves on top of the cream cheese.
- Bake: Brush the edges of the dough with the beaten egg wash. Preheat your oven to 375°F (190°C). Bake for 18 to 22 minutes, or until the pastry is golden brown and cooked through.
- Glaze (optional): Let the danishes cool slightly on a wire rack. Drizzle with the simple powdered sugar glaze if desired.
Notes
- Use a high-quality gluten-free flour blend that contains xanthan gum for the best structure. If your blend lacks it, add 1 teaspoon of xanthan gum to the dry ingredients.
- Gluten-free dough is delicate; handle it gently during rolling and folding to prevent tearing. Chilling between turns is crucial for texture.
- For a make-ahead option, assemble the danishes completely, cover them, and refrigerate them overnight. Brush with egg wash and bake in the morning, adding 3-5 minutes to the bake time if starting cold from the refrigerator.
Nutrition
- Serving Size: 1 danish
- Calories: 310
- Sugar: 22
- Sodium: 180
- Fat: 18
- Saturated Fat: 11
- Unsaturated Fat: 7
- Trans Fat: 0
- Carbohydrates: 33
- Fiber: 1
- Protein: 5
- Cholesterol: 55