

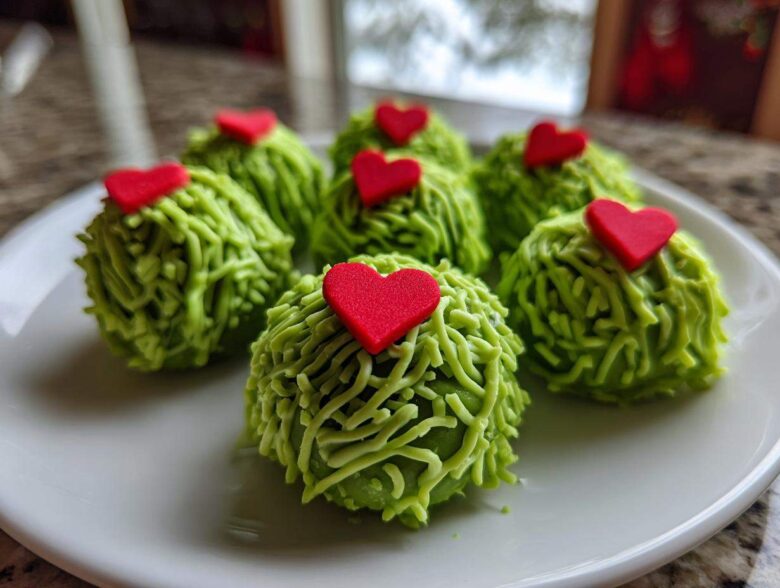
The holidays are supposed to be joyous, right? Most years, though, mine end up feeling more like an endurance competition. We spend ages planning those huge, complicated desserts we think everyone *expects* us to make. After all that fuss, the only thing I feel like celebrating is my own marathon survival! That’s why Marco and I made a pact: we must have at least one showstopper dessert that requires zero trips to the oven. Enter the easiest no-bake grinch oreo balls you will ever meet. These little bites are pure holiday magic without any of the stress. For us, these simple, festive treats are a declaration that we deserve joy now, not later. Making these whimsical Christmas bites is our favorite way to reclaim the season. You can read more about why we believe in treating ourselves like royalty over at our About Us page!
Why These Grinch Oreo Balls Are Your New Holiday Favorite
If you’re anything like us, you look at a packed holiday schedule and wonder how you’re going to fit in all the necessary feasts. These Grinch oreo balls solve that problem the minute you see them. Seriously, they are a total game-changer for easy holiday desserts.
What makes them so fantastic for your busy court schedule? Let me count the ways:
- No-Bake Magic: Absolutely zero oven time! This means more time enjoying the atmosphere and less time hovering by the stove.
- Quick Assembly: Trust me, once you crush the cookies, the dough comes together in minutes. It’s faster than wrapping a present!
- Incredible Visual Appeal: That bright green coating and tiny red heart make them the most adorable festive Christmas bites imaginable. Everyone stops to look at them.
- Perfect for Gifting: Since they are sturdy little truffles, they pack beautifully for cookie exchanges or neighbor gifts.

Gathering Your Ingredients for Perfect Grinch Oreo Balls
Before we dive into the assembly, we need our supplies lined up. When Marco and I are preparing for any big event, we always lay everything out first. It just keeps the operation flowing smoothly, which is key when speed is the goal! For these Grinch Oreo Balls, we need just a few core items, but getting the details right makes all the difference in achieving that perfect, fudgy texture under the fancy green shell.
Here is exactly what you need to gather for about two dozen of these little festive wonders:
- One whole package (that’s 14.3 ounces, typically) of those chocolate sandwich cookies—you know the ones!
- Eight ounces of cream cheese, and this is important: it absolutely must be fully softened.
- Twelve ounces of green candy coating wafers. These melt down into that bright, happy Grinch color.
- One teaspoon of coconut oil. I only ever suggest this because it helps thin the coating just slightly, making dipping less messy. It’s totally optional, though!
- The finishing touch: those tiny red heart sprinkles. Don’t skimp; that little heart is what sells the whole Grinch look.
Ingredient Notes and Substitutions for Grinch Oreo Balls
Okay, let’s talk specifics about a couple of these items because shortcuts here can actually mean more work later. First, the cream cheese. If it’s cold, it won’t blend with the cookie crumbs properly, and you’ll end up with lumpy, hard balls instead of the smooth, fudgy Oreo balls we are aiming for. Let it sit on the counter for at least an hour beforehand.
Now, for the cookies! While the classic chocolate sandwich cookie is standard, I’ve seen people use the Red Velvet variety for a slight flavor twist. If you use Red Velvet, your center will be red instead of dark brown, which is a fun little surprise that only you and the eater know about! If you’re worried about the coating staying runny enough, that teaspoon of coconut oil is your safety net; it makes the melted coating slicker and easier to work with, especially if your kitchen runs a little cool. Trust me on this.
Step-by-Step Instructions for Making Grinch Oreo Balls
This is where the fun truly begins! Even though we call these **No Bake Oreo Balls**, there’s still a bit of ‘making’ involved, but it’s honestly more like playing with playdough than actual baking. We want to move through these steps efficiently so when we get to the dipping part, everything is perfect. Remember, making these is exactly as Marco says: it’s about honoring the moment, not rushing through it just to say it’s done. Our goal is that perfect, fudgy spoonful of Oreo bliss before we dress them up! If you’re looking for another effortless treat, check out our recipe for no-bake pumpkin pie!
Here are the exact steps we follow for every batch of our **cookie truffle recipe**:
- First, we crush those cookies. If you have a food processor, pulse them until they are fine, fine crumbs. If you’re doing this the rustic way with a rolling pin and a sturdy bag, just beat those things until they look like dark brown sand.
- Next, dump those crumbs into a nice, clean bowl. Now, toss in that fully softened cream cheese we talked about. Grab a sturdy spatula—or, honestly, just use clean hands!—and mash everything together until it’s totally uniform. You’re looking for a thick, cohesive dough that holds its shape.
- Time to roll! Pinch off little pieces and roll them between your palms into balls that are about one inch wide. Try to make them as uniform as possible so they dip evenly later. Line them up on a sheet covered in parchment paper for their mandatory nap.
- This next step is non-negotiable: chill them! Pop those balls into the refrigerator for at least 30 minutes. They need to firm up properly, or they’ll fall apart when they meet the warm coating.
- While they chill, get your green candy coating ready. Melt them according to the package directions. If you decided to use that teaspoon of coconut oil, stir it in now until it’s silky smooth.
- Now for the transformation! Take one chilled ball at a time and drop it right into that melted green goodness. Use a fork or a dipping tool to roll it around until it’s completely covered. Tap the fork gently on the bowl’s edge to let any extra coating drip back down.
- Place the coated ball back onto that parchment sheet. This is the critical second: before that green coating hardens around the ball, gently place one tiny red heart sprinkle right on top. That little heart is the soul of our Grinch Themed Food!
- Let them set! You can leave them on the counter if your kitchen isn’t too warm, or pop them back in the fridge for 15 minutes if you’re in a real rush. Once that coating is hard, you’re done!
Mixing the Fudgy Base for Your Grinch Oreo Balls
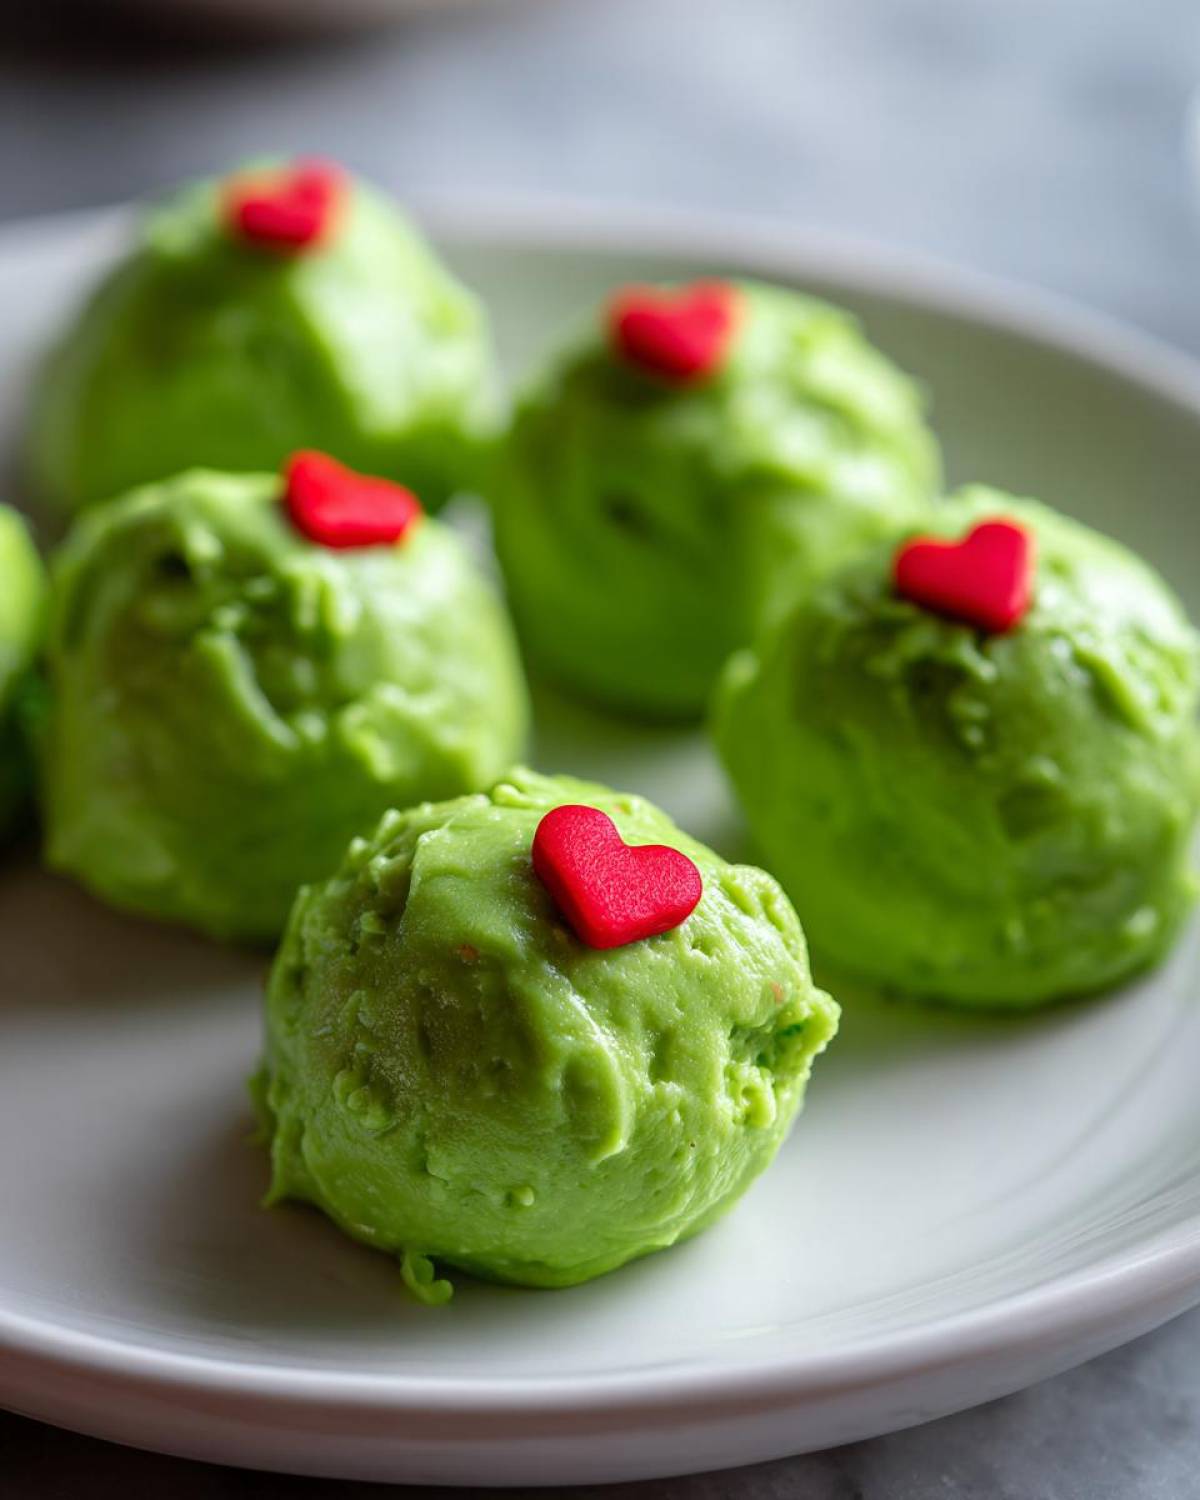
When you’re combining the crushed cookies and the cream cheese, don’t stop mixing too soon! I learned this the hard way once when I thought, ‘Oh, that looks mostly combined.’ Nope! You need to really go in there and work it until there are zero white streaks left from the cream cheese and everything is a consistent, dark, rich color. When it’s ready, Marco always says it looks like brownie batter that decided it wanted to be firmer. If you can roll a scoop easily between your palms without it sticking everywhere, you’ve hit that perfect, fudgy consistency.
Chilling and Coating Your Festive Christmas Bites
The chilling time is your prep time for the exterior! Make sure your green candy melts are the perfect texture before you start dipping. If they look like thick paste, microwave them in 15-second bursts and stir every time—don’t overheat them! When you’re dipping these **Green Candy Coated Treats**, work quickly because those Oreo balls come straight from the cold fridge and will cool the coating down fast. Have your heart sprinkles right next to your dipping station. As soon as that ball is dipped and back on the parchment, drop the heart on top immediately. If you wait even thirty seconds, the coating will skin over, and the heart will just slide off!
Tips for Perfect Grinch Oreo Balls Every Time
Even though these are technically no-bake, that coating process can still throw a wrench in your otherwise regal plans! We’ve made enough batches of these Grinch Oreo Balls to learn a few tricks to make sure your final result looks truly professional, not just rushed. These are the few things I always tell my friends when they try this fantastic **Fudgy Oreo Balls Recipe** for the first time.
Here are my best tips for getting those beautiful spheres perfectly green and smooth:
- The Perfect Roll Matters: You mentioned uniformity back in the mixing stage, but it’s worth repeating! If your balls are lumpy or different sizes before chilling, the final coats won’t look consistent. Be a bit fussy here—use a small cookie scoop if you have one, or just keep re-rolling until the surface is smooth after the initial chill.
- Keep the Coating Warm (But Not Hot): Candy melts are tricky customers. If they get too hot, they seize up and get gooey and thick instantly. If they get too cool, they’re too thick to dip properly. If you notice it thickening up mid-batch, don’t be afraid to zap it for 10 seconds in the microwave and stir well. That little bit of warmth is what keeps everything gliding smoothly over the chilled centers.
- Don’t Skip the Prep Surface: We talked about parchment paper for the final setting, but make sure you have enough room! You need enough clear space on that parchment to drop the ball, place the heart, and then move on to the next one without bumping any wet ones. Trust me, a bumped coated ball ruins my entire aesthetic!
- The Cream Cheese Softness Rule: I know I keep harping on this, but I can’t stress it enough for the fudgy base! If the cream cheese isn’t room temperature, you’ll end up with clumps of cold cream cheese in your dough. Those cold spots won’t incorporate fully, and when you try to dip that lumpy ball, the coating cracks right off! It needs to be soft enough to mash easily with a fork.

Storage and Making Ahead for Simple Christmas Party Snacks
This is the part of the recipe I absolutely adore because it means I get to take a massive breath during the busiest week of the year! These Christmas truffles are truly champions among Make Ahead Christmas Desserts. You can totally make these days in advance, which frees up our holiday schedule for things that actually matter—like sipping wine and listening to carols!
Once the green coating is completely set and hard, transfer your finished Grinch Oreo Balls into a good, airtight container. We don’t bother with fancy layering; just stack them gently. They hold up beautifully in the refrigerator for almost a solid week. If you need to keep them even longer, flash-freeze them first! Pop them in the freezer for about an hour until hard, then transfer them to a freezer-safe bag. They’ll be perfect for up to a month. When you need them, just let them thaw on the counter for 20 minutes before serving. If you’re looking for another easy make-ahead holiday staple, you should check out Marco’s cranberry brie bites recipe!
Serving Suggestions for Your Grinch Themed Food
Once you’ve managed to get your **Grinch Oreo Balls** set and looking impossibly cute, the next important mission is presentation! These aren’t just desserts; they’re tiny pieces of festive art. Since they are the definition of ideal Bite Sized Christmas Sweets, they look wonderful scattered across a platter, but I have a few thoughts on how to truly elevate their presence at your royal gathering.
First, presentation matters because you deserve beauty! Try arranging them not just randomly but in little groupings right next to the coffee station. The deep, fudgy chocolate flavor balances perfectly against a strong cup of coffee—a true treat before the holiday chaos really sets in!

And for those nights when the little ones (or, let’s be honest, the adults!) need a cozy wind-down, these truffles are the absolute best companion to a big mug of hot cocoa. I always make a huge batch of our easy homemade hot cocoa mix at the start of December, and having these little Grinch faces ready to dunk or munch alongside it just feels right. It completes the cozy vibe perfectly.
If you are serving these as part of a big Christmas platter, I suggest pairing them with something slightly less sweet and perhaps a little sharper to cut through all that sugary bliss. Think about placing them near some buttery shortbread cookies or maybe a tiny little platter of sharp cheddar cheese and dried cranberries. The contrast makes every bite of the Grinch Themed Food taste even better, I promise!
Frequently Asked Questions About Grinch Oreo Balls
We get so many questions when people start hosting holidays for the first time! It’s totally normal to have a few specific worries when you’re working with candy melts or trying to get a recipe just right the first time. Since these **Grinch Oreo Balls** are so simple, most questions revolve around customization or making sure the coating looks professional for your spread of **Simple Christmas Party Snacks**. Hopefully, these answers help you feel totally confident as you finish up your holiday lineup!
If you want to look at other cookie variations we love to bring out when company comes over, check out our coffee cake cookies recipe!
Can I use different types of Oreos for these Decorated Oreo Balls?
Oh, absolutely! This is a fun place to play around, especially if you’re working with a slightly different color palette. If you use the standard chocolate wafer cookies, you get that beautiful dark, fudgy interior that contrasts nicely with the bright green shell. However, lots of people swap in Red Velvet Oreos, and they turn out stunning! The inside will be reddish, which is a fun, slightly secret pop of color when someone bites into one of your **Christmas Truffles**. I’ve even heard of folks using Golden Oreos for a lighter flavor, although your green coating might look a little less vibrant against the pale center.
What is the best way to get a smooth coating on these Oreo Cream Cheese Balls?
This is the classic troubleshooting moment for any dipped dessert! Candy melts can go from perfect to rock-solid in seconds. First and foremost, make sure you melt them slowly—no sudden bursts of high heat! We always use 15-second intervals in the microwave, stirring in between. If they start looking stiff, that’s where the optional coconut oil comes in handy. If you didn’t add it initially, stir in about half a teaspoon of coconut oil or even a tiny dab of vegetable shortening right then. Fat is what keeps the candy coating flowing smoothly, allowing you to get that perfect, even shell around your **Oreo Cream Cheese Balls** without leaving thick globs behind. Tap that fork well when lifting the ball to let the excess drip off!
Nutritional Estimates for Your Winter Dessert Recipes
Now, I know we at Eatable Empress are all about savoring the moment and treating ourselves like royalty, which means we aren’t usually counting every tiny calorie! These Grinch Oreo Balls are definitely a holiday indulgence, packed with rich cookies and sweet coating, so they aren’t exactly light fare. But, since I know some of you Eaters like the full picture before you indulge, here is a general breakdown of what you might be looking at per truffle.
Please remember, these are just estimates for your Winter Dessert Recipes! The exact amounts change based on what brand of Oreo you use, how much cream cheese you measure out, and the exact melting chocolate you pick up. I always say, enjoy it first, worry about the specifics later!
Here is the approximate nutritional overview per one small ball:
- Serving Size: 1 ball
- Calories: Around 150
- Fat: Roughly 9 grams
- Carbohydrates: Approximately 16 grams
- Protein: About 1 gram
You’ll notice the fat and carb counts are higher, which is exactly what gives these No Bake Oreo Balls that dense, fudgy, satisfying texture we love so much. They are definitely designed to be rich, bite-sized perfection, so one or two is usually plenty to satisfy that sweet craving!
Share Your Royal Feast of Grinch Oreo Balls
The final step, beyond the chilling and the dipping, is the best part Marco and I know: sharing the joy! Creating these Grinch Oreo Balls is about taking that moment for yourself, but the real magic happens when you share those little jewels of holiday happiness—even if it’s just sharing the quiet satisfaction of a job well done with Marco over a cup of coffee.
We truly want to know how your royal feast turned out! Did your hearts stay perfectly placed on the green coating? Did those **Whimsical Holiday Treats** disappear instantly at your gathering? Don’t be shy; we want all the details!
Please take a moment to rate this recipe right below. A five-star rating lets us know we’ve successfully made your holiday just a little bit easier and a whole lot brighter. And if you snapped a photo of your perfectly decorated batch, tag us on social media! Seeing your creations pop up always brightens our day here at Eatable Empress.
Come share your stories and see what else we’re cooking up just for us in the kitchen over on the main blog page. Cheers to simple feasts!
PrintEasiest No-Bake Grinch Oreo Balls (Perfectly Festive Holiday Treats)

Make these adorable Grinch Oreo Balls for a simple, no-bake holiday dessert. They feature a fudgy Oreo center coated in bright green candy melts and topped with a tiny red heart sprinkle. These Christmas truffles are quick to assemble and perfect for cookie exchanges or holiday snacking.
- Prep Time: 20 min
- Cook Time: 0 min
- Total Time: 50 min
- Yield: 24 servings
- Category: Dessert
- Method: No-Bake
- Cuisine: American
- Diet: Vegetarian
Ingredients
- 1 package (14.3 ounces) chocolate sandwich cookies (like Oreos)
- 8 ounces cream cheese, softened
- 12 ounces green candy coating wafers (or green candy melts)
- 1 teaspoon coconut oil (optional, for smoother dipping)
- Small red heart sprinkles (for the Grinch heart detail)
Instructions
- Place the chocolate sandwich cookies in a food processor and pulse until fine crumbs form. If you do not have a food processor, place cookies in a large zip-top bag and crush them with a rolling pin until fine.
- Transfer the cookie crumbs to a medium bowl. Add the softened cream cheese. Mix with a rubber spatula or clean hands until the mixture is completely combined and forms a thick dough.
- Roll the dough into small, uniform balls, about 1 inch in diameter. You should get about 24 to 30 balls. Place the rolled balls on a baking sheet lined with parchment paper.
- Chill the Oreo balls in the refrigerator for at least 30 minutes. This step helps them firm up before dipping.
- Melt the green candy coating wafers according to package directions. If using, stir in the coconut oil for a thinner consistency.
- Working with one ball at a time, drop it into the melted green coating. Use a fork or a dipping tool to roll the ball completely in the coating. Lift the ball out, tapping the fork gently on the side of the bowl to let excess coating drip off.
- Place the coated ball back onto the parchment-lined baking sheet. Immediately place one small red heart sprinkle on top of the wet coating to resemble the Grinch’s heart.
- Allow the Grinch Oreo balls to set completely at room temperature, or speed up the process by chilling them for about 15 minutes until the coating is hard.
Notes
- For the best texture, make sure your cream cheese is fully softened before mixing.
- If the green coating becomes too thick while you are working, microwave it in 15-second intervals until it is smooth again.
- You can make these ahead of time. Store finished, set Grinch Oreo Balls in an airtight container in the refrigerator for up to one week.
Nutrition
- Serving Size: 1 ball
- Calories: 150
- Sugar: 15
- Sodium: 90
- Fat: 9
- Saturated Fat: 5
- Unsaturated Fat: 4
- Trans Fat: 0
- Carbohydrates: 16
- Fiber: 0
- Protein: 1
- Cholesterol: 10