

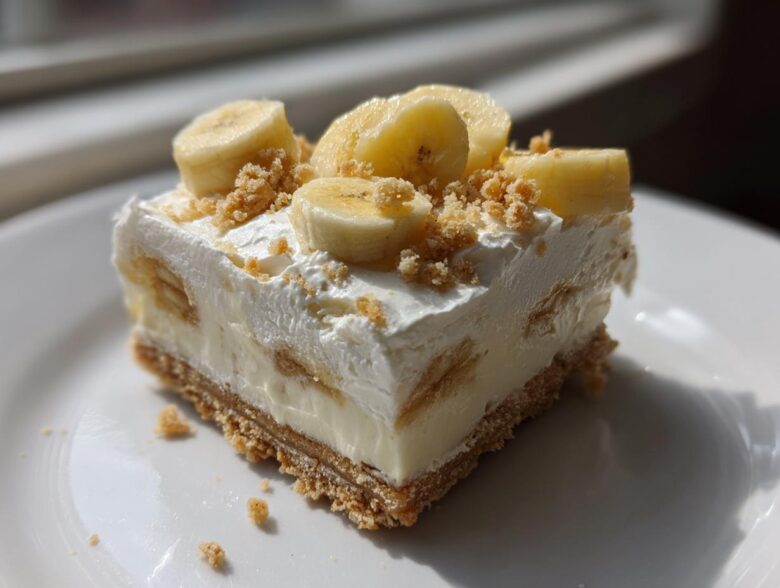
Oh my goodness, you know how sometimes you just have two desserts you absolutely adore, and you wish they could just merge into one perfect creation? That’s exactly how these incredible Banana Pudding Cheesecake Bars were born in my kitchen! I’m such a sucker for that creamy, nostalgic flavor of banana pudding, but you know me—I always crave a little bit of structure, a little bit of richness.
I spent a whole weekend testing this recipe out because I wanted something sturdy enough for a potluck but decadent enough for a special occasion. I was so tired of soggy pudding desserts, and frankly, plain cheesecake can sometimes be a little too heavy on its own. These bars are the absolute best combination, folks. We’re talking a buttery vanilla wafer crust, a tangy, perfectly baked cheesecake layer, and then that glorious, creamy pudding topping with real banana slices. Trust me; this recipe gives you everything you’ve wanted in a Banana Pudding Cheesecake Bar.
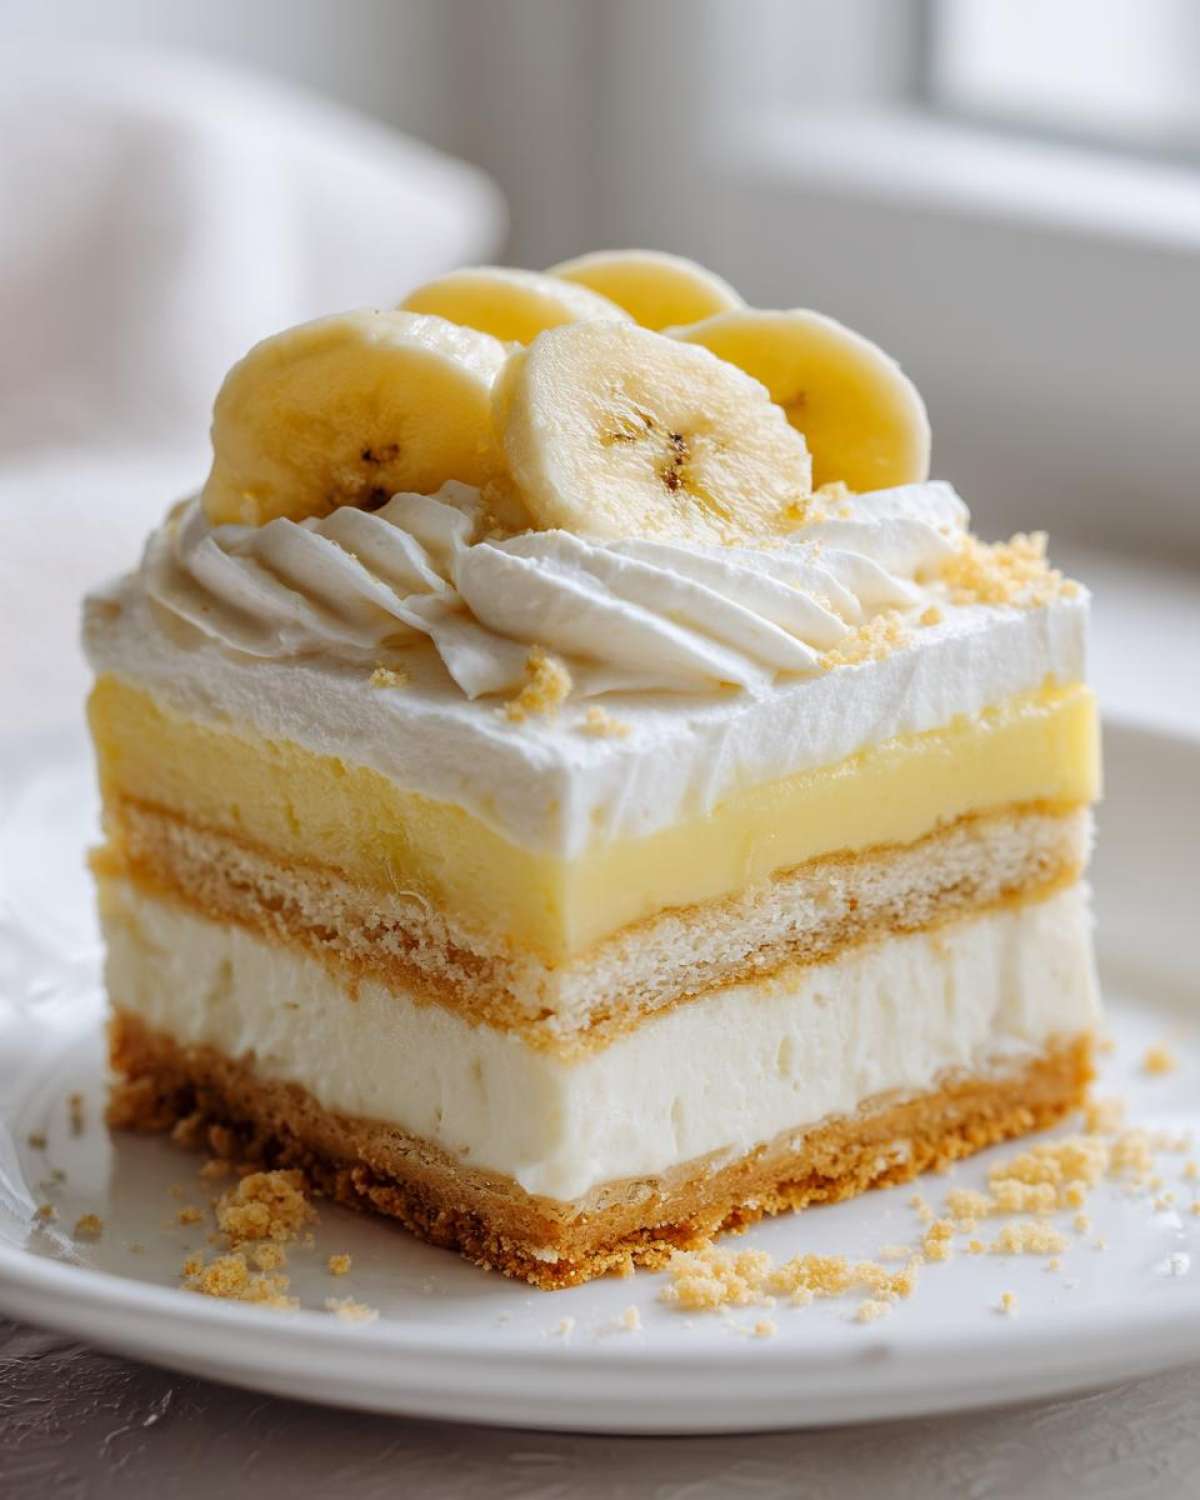
I developed this hybrid because my family kept asking for a showstopper bake that wasn’t a complicated multi-layer cake. The structure here is everything! The cheesecake sets up beautifully and the layers stay defined, even when chilled overnight. If you’re aiming for that perfect, crack-free cheesecake top, I actually have a whole guide written up on my secrets for that right here, but honestly, this layering technique really helps manage the texture for these squares.
Why You Will Love These Banana Pudding Cheesecake Bars
I’ve always believed the best recipes fix a problem, and this one solves the age-old dilemma: do I make rich cheesecake or comforting banana pudding? You get both! These make-ahead banana dessert bars are absolute crowd-pleasers. Here’s why you absolutely need to save this recipe:
- They are perfectly rich, but the bar format keeps them from feeling overwhelmingly heavy.
- Every single bite delivers that classic Southern comfort we all love.
- Cleaning up is a breeze because you bake them in one pan!
- You can totally make these a day ahead, which is a lifesaver when you have company.
Perfect Texture Combination
Wow, the textures are what make these so special! We have that satisfyingly crisp vanilla wafer crust doing the heavy lifting. Then comes the silky, smooth cheesecake body, which is immediately contrasted by the light, cool, creamy pudding topping. It’s a textural party in your mouth!
Ideal for Gatherings
Forget trying to scoop cake or worry about messy slices. Because these are firm, layered banana dessert bars, you cut them into neat squares *after* they are fully chilled. They hold their shape beautifully on a platter, making them the simplest, most elegant dessert to serve at any summer picnic or holiday bash.
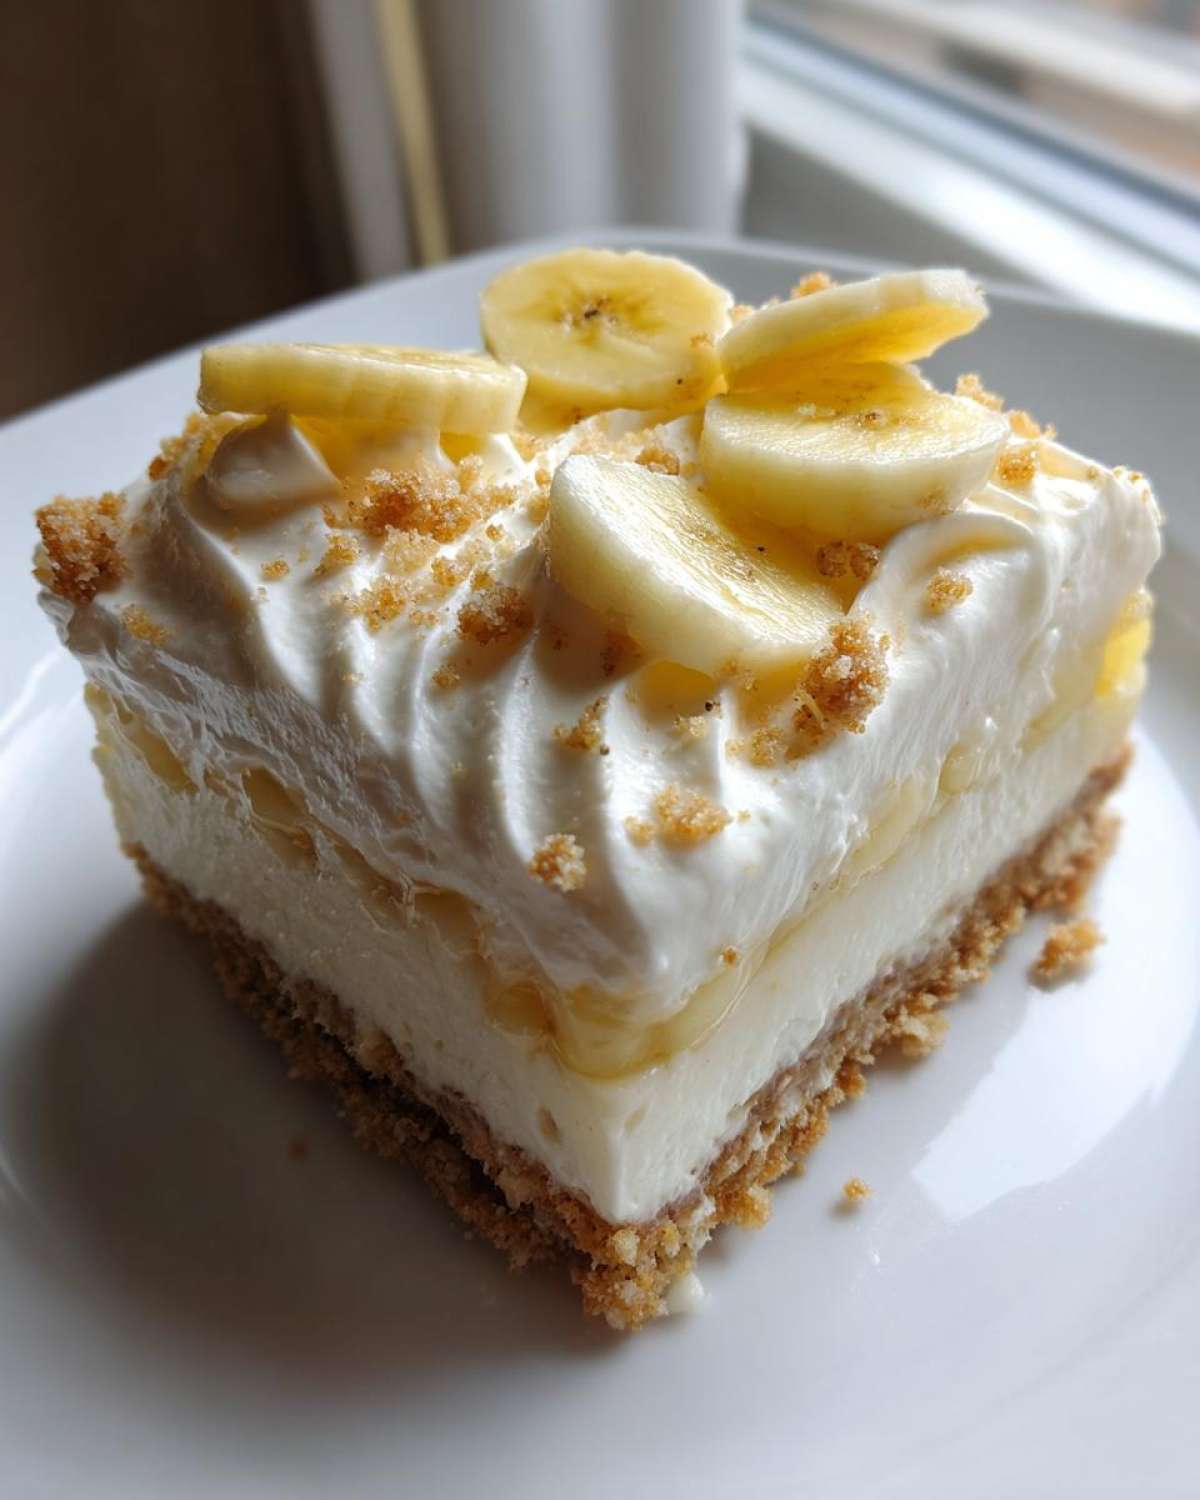
Essential Ingredients for Perfect Banana Pudding Cheesecake Bars
Okay, let’s talk about the lineup! For these Banana Pudding Cheesecake Bars to turn out exactly right—you know, sturdy, creamy, and packed with flavor—you absolutely must use the right components. I keep my list tight because every ingredient pulls its weight. If you’re planning to bake something that needs to hold up, ingredient quality really matters. If you’re already a fan of my other banana bakes, you know I swear by ripe fruit, like in my easy banana bread recipe, and that holds true here too!
We’ve got three main players here: the base, the filling, and the topping. Keep your ingredients at the right temperature, and you’ll be golden!
For the Vanilla Wafer Crust
This is where we start building that crunch! Don’t skip the measuring here; we need just the right ratio of butter to crumb to get that perfect press-in crust that doesn’t crumble apart when you cut the bars.
- 1 1/2 cups vanilla wafer crumbs (Make sure you crush those cookies till they are fine crumbs!)
- 1/4 cup granulated sugar
- 6 tablespoons unsalted butter, melted (Make sure this is fully melted, not just soft!)
For the Creamy Cheesecake Layer
This is the heart of the bar, and it needs precision, especially with the dairy items. If your cream cheese is cold, you’re going to get lumps, and nobody wants lumpy cheesecake in their amazing Banana Pudding Cheesecake Bars!
- 16 ounces cream cheese, softened (I mean truly soft, like room temperature soft!)
- 1 cup granulated sugar
- 1 teaspoon vanilla extract
- 3 large eggs (Again, room temperature is best for smooth mixing!)
For the Pudding Topping and Garnish
This layer brings in that signature banana pudding element. The instant pudding mix is key because it sets up much firmer than traditional custard, which is what we need to support the bananas and our final crumb sprinkle. These bars need structure!
- 1 (3.4 ounce) package instant vanilla pudding mix
- 1 cup cold milk (Must be cold to activate the instant pudding correctly!)
- 1 cup whipped topping, thawed (If it’s still icy, it won’t fold in nicely.)
- 2 ripe bananas, sliced (Ripe, but not mushy, please!)
- 1/4 cup vanilla wafer crumbs for topping (Save these for the very end!)
Step-by-Step Guide: How to Make Banana Pudding Cheesecake Bars
Alright, now for the fun part! Pull out your mixing bowls, because we are building layers of pure joy here. I need you to focus on being gentle when we mix the cheesecake batter, okay? Overmixing is the enemy when we try to get those perfect, crack-free tops. If you follow these steps exactly, you are going to end up with the most beautiful, sturdy Banana Pudding Cheesecake Bars imaginable. These aren’t super complicated, but the order of operations really makes the difference between a dessert and *the* dessert.
I had to test this baking sequence over and over because I wanted the perfect crust-to-filling ratio for these layered beauties. If you want to see how I handle the pudding part when I make a straight-up banana pudding recipe, check that out, but for bars, we firm things up a bit!
Preparing and Baking the Vanilla Wafer Crust
First things first, crank that oven up to 350 degrees Fahrenheit. Before we do anything else, line your 9×13 baking pan with parchment paper, making sure you leave a big overhang on the sides. Trust me on this one; those overhangs are like little handles we use at the end to lift the whole beautiful square out in one piece! Mix those 1 1/2 cups of vanilla wafer crumbs, the 1/4 cup of sugar, and the melted butter until it looks like wet sand. Press that mixture down firmly and evenly into the bottom of the pan. We’re baking this crust for just 10 minutes to set it up before the wetter layers go on. Let it cool down a bit once it comes out.
Creating the Rich Cheesecake Layer
In a large bowl—and have your electric mixer ready—beat the softened cream cheese and the 1 cup of sugar until it’s completely smooth. No lumps allowed! Now, add your vanilla extract, and then you add the eggs, one at a time. This is the crucial part: after you add each egg, mix it just until it disappears. Stop the mixer! If you beat it too much now, you introduce too much air, and that equals cracks later on. Pour this beautiful batter right over your slightly cooled crust. Bake this layer for 25 to 30 minutes. You’ll know it’s done when the edges look set, but the very center still has a tiny, gentle wiggle to it. Then, let it cool completely on a wire rack.
Assembling the Pudding and Banana Topping
While the cheesecake is cooling down, get your pudding ready. You need to whisk that instant vanilla pudding mix right into the 1 cup of cold milk. Whisk hard for about 2 minutes until you see it starting to thicken up quite a bit. Then, gently fold in that nice, thawed whipped topping. Don’t beat it in aggressively; we want the airiness! Once it’s lovely and light, spread that mixture evenly over the cooled cheesecake layer. Now comes the best part: arrange your sliced bananas neatly right on top of that pudding layer. They look so artful before they go into the fridge!
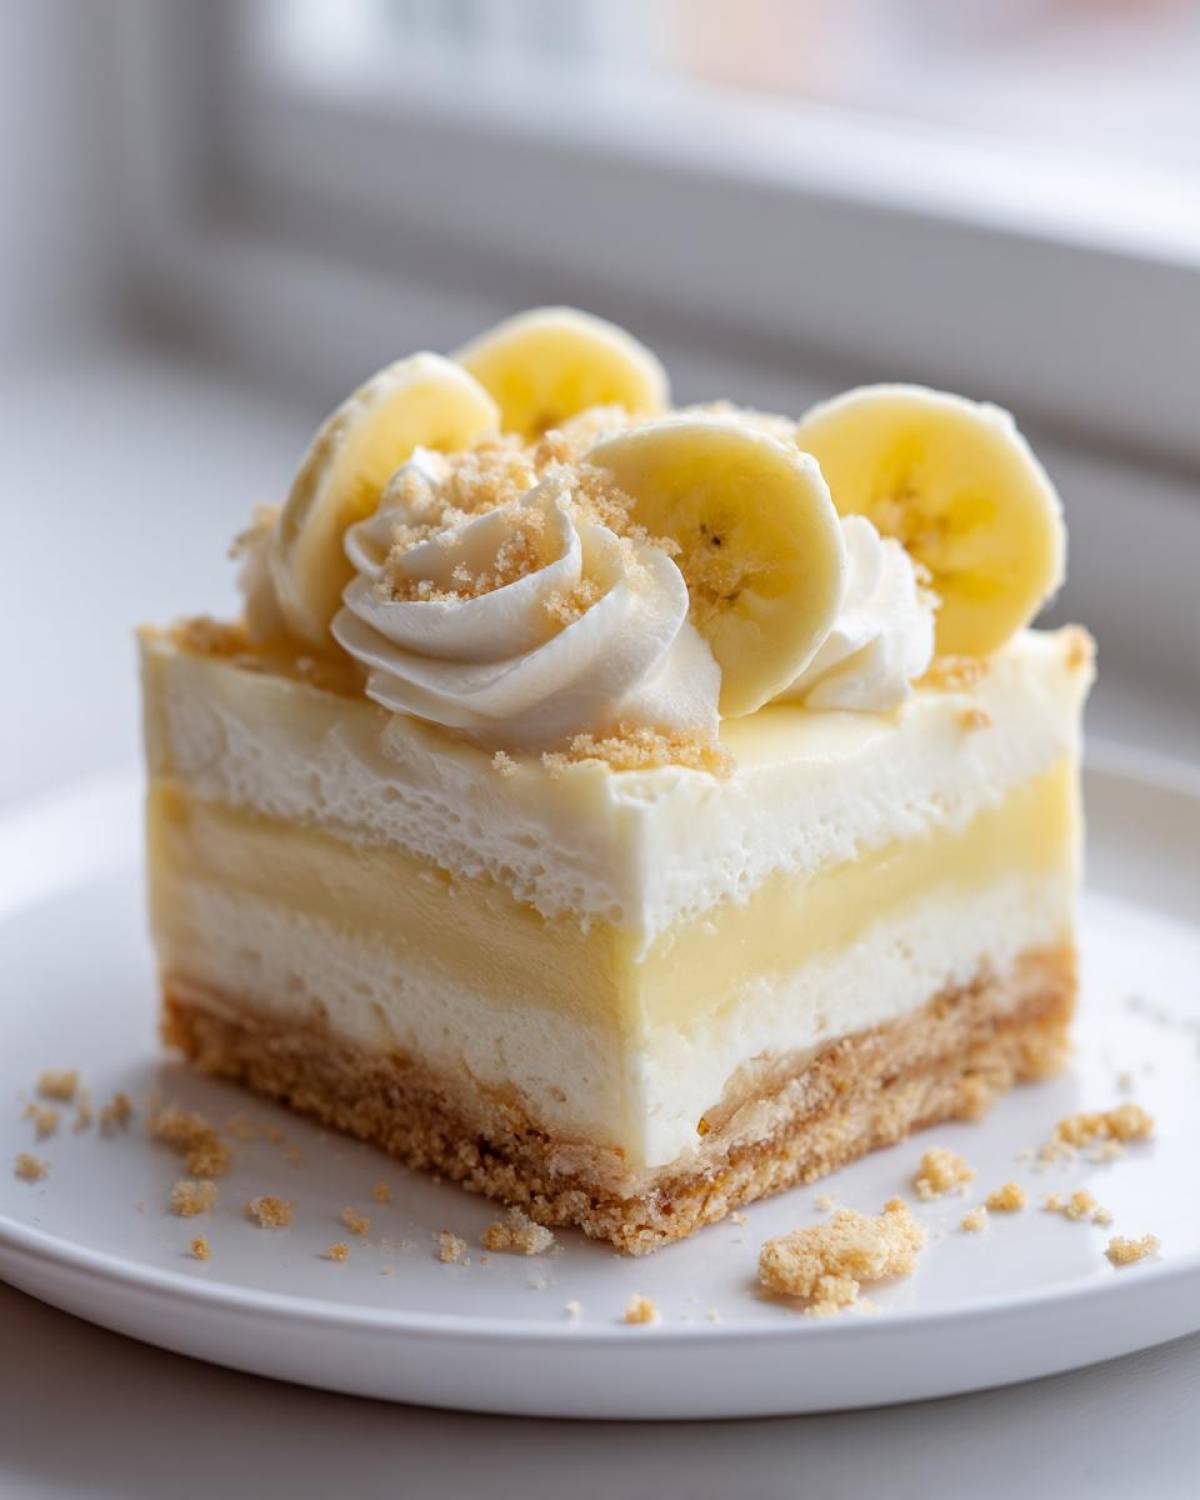
Chilling and Serving Your Banana Pudding Cheesecake Bars
This step requires willpower because you want to dig in immediately, but you have to wait! We need at least 4 hours of solid chilling time in the refrigerator so these Banana Pudding Cheesecake Bars set up firmly enough to cut neatly. Honestly, if you can wait overnight, that’s even better for the cleanest cutting experience we talked about! Just before you serve them—and I mean right before—sprinkle the remaining 1/4 cup of vanilla wafer crumbs over the whole top for that final crunch. Use those parchment handles to lift them out, place them on a board, and slice them into perfect squares!
Tips for Achieving Perfect Banana Pudding Cheesecake Bars
Listen, making a cheesecake layer inside of a bar isn’t always straightforward, especially when you sandwich it between a crust and a pudding topping. But don’t you worry! I’ve learned a few things over the years that really keep these Banana Pudding Cheesecake Bars from throwing a tantrum in the oven. Cheesecake is temperamental, but we can trick it into behaving beautifully. My experience showing off my old-fashioned banana cream pie recipe taught me these tricks carry right over!
Preventing Cracks in Your Cheesecake Layer
The number one fear people have with cheesecake is the dreaded crack, right? We want smooth sailing here. The secret? Temperature and gentle hands! Make sure your cream cheese is soft—really soft—and your eggs are sitting out on the counter for a while beforehand. When you mix them, just gently incorporate them. The minute those eggs are mixed in, stop the mixer! If you beat it like you’re trying to make meringue, you’re building air bubbles that suddenly expand and then collapse in the oven, causing cracks. We want density, not fluffiness, in that layer!
Best Bananas for Layered Banana Dessert Bars
This is where people sometimes mess up the flavor balance. We are using ripe bananas, yes, because they have the best sweet banana flavor. However, you don’t want bananas that are practically black and mushy! If they are too soft, they’ll turn into banana soup when they sit under that pudding layer for hours in the fridge, and that will compromise the texture of your beautiful cheesecake underneath.
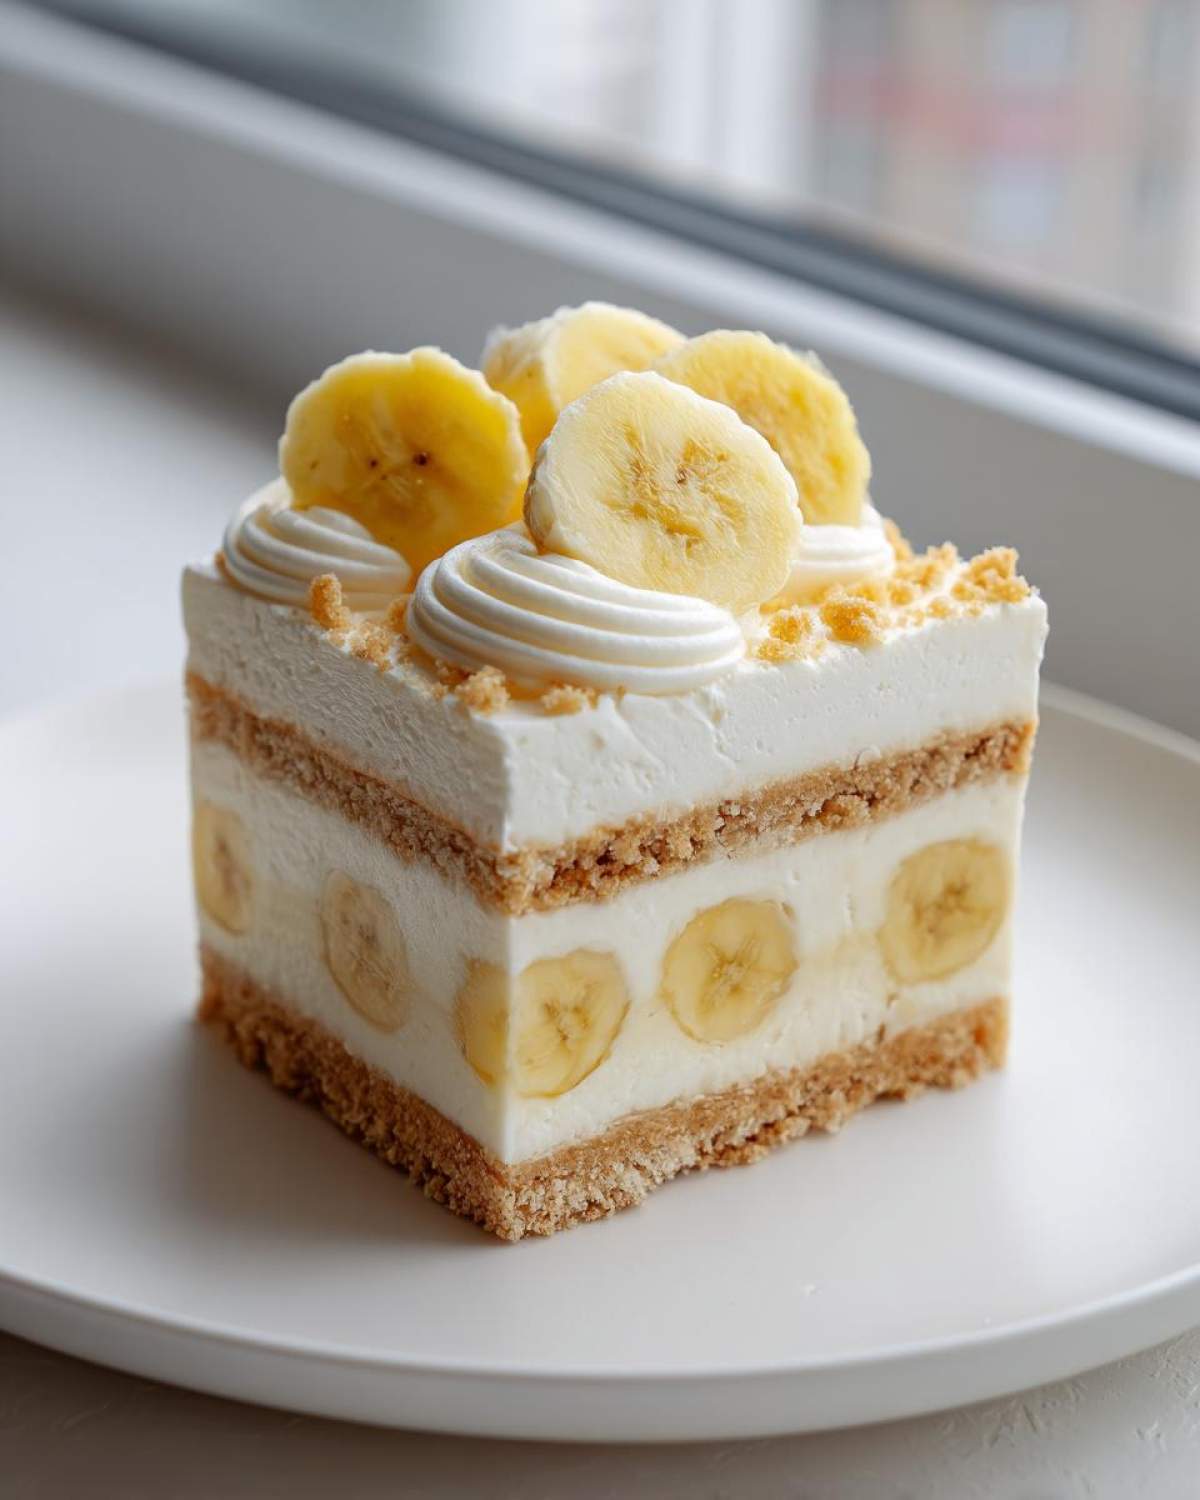
I look for bananas that are perfectly yellow with just a few flecks of brown—the flavor is intense, but they still have enough structure to hold their shape when I slice them. Firm but flavorful! Keeping that structural integrity is key to perfectly layered Banana Pudding Cheesecake Bars.
Variations on These Creamy Banana Cream Cheese Squares
You know I love a recipe that tells you exactly what to do, but I also love shaking things up a little bit every now and then! These rich banana cream cheese squares are fantastic as written, but if you feel like getting creative or maybe you just ran out of vanilla wafers (it happens to the best of us!), we have some great swaps you can make without losing that ‘wow’ factor.
A great dessert should be adaptable, right? These small changes still keep the spirit of classic banana pudding flavors, but they let you put your own little spin on these layered treats. I’ve tried a few things—especially when adapting recipes for holidays—and these variations have always been hits. For example, I recently loved the warmth those spices added when I made my chai-spiced banana muffins, and that inspired some of these flavor boosters!
Swapping the Crust
The vanilla wafer crust is traditional for achieving that true banana pudding flavor, but let’s face it, sometimes we need to improvise! If you’re out of wafers or just want a different textural start, graham crackers work beautifully. They give you a slightly heartier, almost buttery base that stands up just as well to the cheesecake filling.
Another winner? Shortbread cookies! Crush those up and mix them just like the recipe says with the melted butter and sugar. Shortbread adds a pure buttery richness that pairs surprisingly well with the sweet banana and cream cheese. Just remember, whichever crust you choose, you still need to press it firmly into that parchment-lined pan and bake it for those signature 10 minutes!
Adding Flavor Accents to Banana Pudding Cheesecake Bars
If you want to elevate these Banana Pudding Cheesecake Bars from delicious to downright unforgettable, consider adding a little pop of flavor to the banana layer. Seriously, a tiny adjustment makes a big difference in brightness!
My absolute favorite upgrade right now is adding just a teaspoon of dark rum extract right when I fold the whipped topping into the pudding mix. It adds a beautiful, complex depth that cuts through the richness of the cheesecake layer slightly. It doesn’t make it taste like a cocktail, just richer! Also, after you slice your bananas and place them on the pudding, try sprinkling a quarter teaspoon of ground cinnamon very lightly right over the fruit. That warm spice marries perfectly with the vanilla and banana. It’s just fancy enough for company, but it’s so easy you could do it any Tuesday night!
Make Ahead & Storage Instructions for Banana Pudding Cheesecake Bars
One of the best things about these Banana Pudding Cheesecake Bars is just how perfect they are for planning ahead! Seriously, if you’re hosting a party or bringing dessert to a big family gathering, you should absolutely make these the day before. They actually taste better after a long chill, which is so convenient, right?
When it comes to leftovers—if you even have any, which is doubtful!—storage is super simple, but we have to be mindful of those fresh bananas on top. Because we are using a whipped topping and fresh fruit in the upper layers, these are definitely best eaten within a couple of days to keep that pudding layer light and fresh.
When it comes to preparing them ahead of time, remember what the instructions said: chill for a minimum of 4 hours, but I always suggest an overnight chill if you can manage it. That extra time in the fridge lets the cheesecake set up firmly, and it lets the moisture from the pudding layer settle just right, giving you those beautiful, clean lines when you slice them—just like you see in the pictures!
To store them after slicing, just layer them in an airtight container. I usually place a piece of wax paper or parchment between layers if I stack them too high, just to make sure that crumb topping on one bar doesn’t stick to the pudding on the one above it. They stay perfectly delicious in the refrigerator for up to three days. They won’t freeze well once the bananas and pudding are on top, so save any leftovers for eating within that 72-hour window!
Planning dessert ahead of time is such a game-changer, and since these are so wonderful when made ahead, you have one less thing to worry about on the day of your party! You can find more tips for other make-ahead banana desserts on the blog if you need more ideas!
Alternative Preparation: No Bake Banana Pudding Cheesecake Bars Recipe
Now, I know some of you are reading this and thinking, “Baking? Ugh, it’s too hot,” or maybe you just prefer things quick! I totally get it. If you’re craving those creamy vibes of our Banana Pudding Cheesecake Bars but absolutely cannot turn the oven on, we have a brilliant workaround. This recipe is super adaptable, which is why I love it so much!
If you look back at the notes section, I gave a little hint about how to make these into a fully no-bake situation. It’s really minimal effort because we are skipping that 40 minutes of oven time, but you gain so much time back!
To jump straight to the no bake banana pudding cheesecake bars recipe version, you need to get that crust ready first—same idea, same ingredients—but instead of baking it for 10 minutes, you just press it firmly into the pan and pop it into the freezer for about 30 minutes until it’s solid. It acts like a base for a great no-bake pie!
For the cheesecake layer, that’s where the magic happens without heat. The recipe note says you chill the crust for 30 minutes, and then you proceed with spreading the cheesecake batter right on top. Since there’s no heat to set the eggs, you just need to ensure the cream cheese mixture is perfectly smooth before you put it on the crust, as lumps won’t soften later!
Once the cheesecake layer is spread, you pop the whole thing back into the refrigerator—not the oven—to chill until it’s firm enough to hold the pudding layer. This usually takes about 2 hours, depending on your fridge temperature. Then, you just continue with the recipe as written: top with the pudding mix, fold in the whipped topping, add your bananas, and sprinkle those wafers on top. It sets beautifully, just slightly softer than the baked version, making for incredibly rich banana cream cheese squares that are perfect for a super hot day!
Frequently Asked Questions About These Layered Banana Dessert Bars
I always get so many questions when people try this recipe for the first time because it’s a little different from a standard cheesecake! Honestly, that’s why I love fielding questions—it means you’re excited to bake! These easy banana pudding dessert bars are worth a few extra moments of planning, so let’s tackle the things that usually trip people up when assembling these beauties.
Can I use fresh pudding instead of instant mix in the Banana Pudding Cheesecake Bars?
That’s a good question! You absolutely *can* make homemade, cooked pudding, but for these specific Banana Pudding Cheesecake Bars, I really, really suggest sticking with the instant vanilla pudding mix. The reason is simple: structure! Instant pudding sets up much firmer and faster than traditional stovetop pudding because of the modified starches in the mix. Since these bars need to hold up to slicing and stacking, that extra firmness is crucial. If you use cooked pudding, the top layer might get too soft and ooze out when you try to cut the squares.
How do I prevent the bananas from turning brown on top?
Oh, that dreaded gray banana look! It can ruin the presentation of even the prettiest dessert. If you’re making these ahead of time, you need a shield for those beautiful banana slices sitting on the pudding layer. My tried-and-true method is super simple: grab a tiny bit of lemon juice—maybe a teaspoon—and just gently brush it over all the exposed banana surfaces before you sprinkle your final crumbs on top.
If you don’t want to use lemon, the other key technique that works really well is making absolutely certain that the final 1/4 cup of vanilla wafer crumbs is generously and evenly distributed over the entire surface. It acts like a protective blanket, blocking the air and slowing down that oxidation process. Either way, your vanilla wafer crust cheesecake bars will stay looking bright!
What is the best way to cut clean squares from these rich banana cream cheese squares?
This is probably the most important serving tip for any layered bar dessert, especially those with a creamy component. You want those clean, impressive cuts of your rich banana cream cheese squares! You simply cannot cut them straight out of the fridge after the minimum 4-hour chill.
My advice, which I mentioned briefly before, is to chill them overnight if you can—seriously, overnight is best! Once they are rock hard from that deep chill, you need a hot knife. Grab a long, sharp knife and run the blade under very hot water for about 30 seconds. Wipe it dry quickly, and make your first cut. You might have to reheat the knife between every one or two cuts, depending on how warm your kitchen is. That smooth, hot blade glides right through the chilled cheesecake and pudding without dragging or smashing the layers. It makes slicing simple!
If you want some more ideas on making any easy banana dessert ahead of time, check out some of my other thoughts!
Nutritional Estimate for Banana Pudding Cheesecake Bars
If you’re counting things up, here is a general estimate for one single bar based on the recipe and standard ingredient brands. These are just estimates, of course, because we all know homemade desserts vary slightly based on how much butter we sneak off the spoon!
- Serving Size: 1 bar
- Calories: 320
- Sugar (Total): 25g
- Sodium: 210mg
- Fat (Total): 19g
- Saturated Fat: 11g
- Trans Fat: 0g
- Carbohydrates (Total): 34g
- Fiber: 1g
- Protein: 5g
- Cholesterol: 55mg
Remember, these counts definitely shift up or down depending on what kind of whipped topping you use or if you decide to use a different cookie for that wonderful crust!
PrintLayered Banana Pudding Cheesecake Bars with Vanilla Wafer Crust
Make rich, layered dessert bars combining a vanilla wafer crust, a creamy cheesecake layer, and a topping inspired by classic banana pudding.
- Prep Time: 25 min
- Cook Time: 40 min
- Total Time: 5 hours 5 minutes
- Yield: 16 bars
- Category: Dessert
- Method: Baking
- Cuisine: American
- Diet: Vegetarian
Ingredients
- 1 1/2 cups vanilla wafer crumbs
- 1/4 cup granulated sugar
- 6 tablespoons unsalted butter, melted
- 16 ounces cream cheese, softened
- 1 cup granulated sugar
- 1 teaspoon vanilla extract
- 3 large eggs
- 1 (3.4 ounce) package instant vanilla pudding mix
- 1 cup cold milk
- 1 cup whipped topping, thawed
- 2 ripe bananas, sliced
- 1/4 cup vanilla wafer crumbs for topping
Instructions
- Preheat your oven to 350 degrees Fahrenheit. Line a 9×13 inch baking pan with parchment paper, leaving an overhang on the sides for easy removal.
- Prepare the crust: Mix the 1 1/2 cups vanilla wafer crumbs, 1/4 cup sugar, and melted butter in a bowl until combined. Press the mixture firmly and evenly into the bottom of the prepared pan. Bake for 10 minutes. Let cool slightly.
- Prepare the cheesecake layer: In a large bowl, beat the softened cream cheese and 1 cup sugar with an electric mixer until smooth. Beat in the vanilla extract and eggs one at a time, mixing just until combined after each addition. Do not overmix.
- Pour the cheesecake batter over the cooled crust. Bake for 25 to 30 minutes, or until the edges are set but the center still has a slight jiggle. Let the cheesecake cool completely on a wire rack.
- Prepare the pudding layer: Whisk the instant vanilla pudding mix and cold milk together for 2 minutes until it begins to thicken. Gently fold in the thawed whipped topping.
- Spread the pudding mixture evenly over the cooled cheesecake layer. Arrange the sliced bananas over the pudding layer.
- Chill the bars in the refrigerator for at least 4 hours, or until firm.
- Before serving, sprinkle the remaining 1/4 cup vanilla wafer crumbs over the top. Use the parchment paper overhang to lift the bars from the pan, then cut into squares.
Notes
- You can use a no-bake cheesecake base by chilling the crust for 30 minutes and then proceeding with the pudding layer after the cheesecake layer has chilled for 2 hours.
- For a Southern style topping, substitute the whipped topping with homemade whipped cream stabilized with a little powdered sugar.
- Chill the bars overnight for the cleanest cuts when slicing.
Nutrition
- Serving Size: 1 bar
- Calories: 320
- Sugar: 25
- Sodium: 210
- Fat: 19
- Saturated Fat: 11
- Unsaturated Fat: 8
- Trans Fat: 0
- Carbohydrates: 34
- Fiber: 1
- Protein: 5
- Cholesterol: 55