

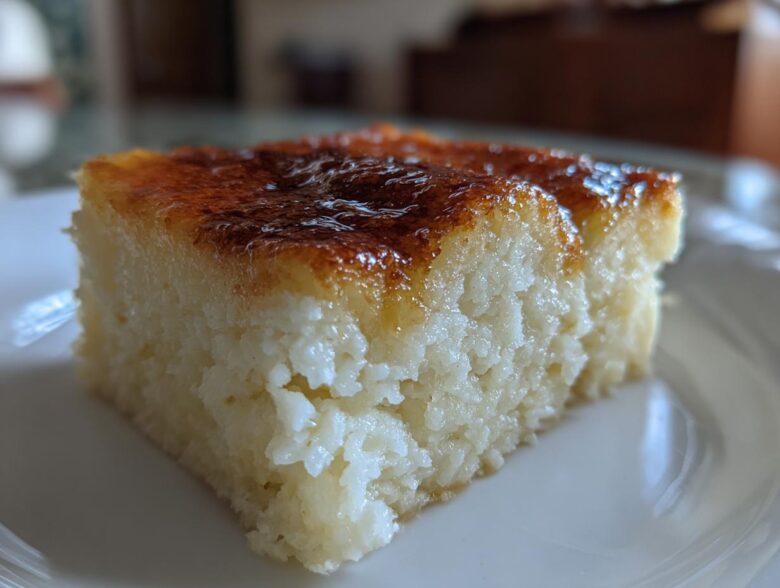
If you’ve ever felt like you’re saving all the truly special, celebratory cooking for guests, Marco and I want to have a serious talk with you. You deserve that regal experience every single day, right here in your own kitchen! That’s why I’m practically vibrating with excitement to share our Filipino Cassava Cake with you. This Bibingka isn’t just a dessert; it’s pure tropical comfort wrapped up in a layer of golden sunshine. Forget fussy baking; this cassava cake recipe is designed to be incredibly easy—even if you’re brand new to the kitchen—and I promise you’ll nail that incredibly moist, chewy, and creamy texture every single time. You deserve to feel like royalty at your own table, which is why Marco and I started Eatable Empress, as you can read more about in our story here. Long Live the Simple Feast, indeed!
Why This Easy Cassava Cake Recipe Reigns Supreme
I know you’re looking for a recipe that doesn’t require a degree in pastry arts, and this one delivers pure Filipino magic without the fuss. We created this version specifically to guarantee success. It’s incredibly straightforward but manages to hit all those nostalgic notes we crave.
- It’s fast! Seriously, the hands-on time is minimal, making it a perfect afternoon bake.
- It delivers unbeatable texture—moist, yes, but with that fantastic chew that good cassava cake is famous for. You can even upgrade your hot cocoa game with our quick homemade chocolate milk while this bakes!
- The topping is non-negotiable. That golden custard layer sets up perfectly every time.
Achieving the Perfect Chewy Cassava Cake Texture
If you want that delightful, slightly sticky resistance when you bite into it, listen closely: do not, I repeat, do not overmix the base batter. Once the wet ingredients meet the grated cassava, you only want to mix until everything is just incorporated. Overbeating develops gluten in the cassava, and we want a delightfully Chewy Cassava Cake, not something tough. Think of it as stirring gently to combine; that’s the secret to chewiness!
Simple Steps for a Golden Creamy Cassava Cake Topping
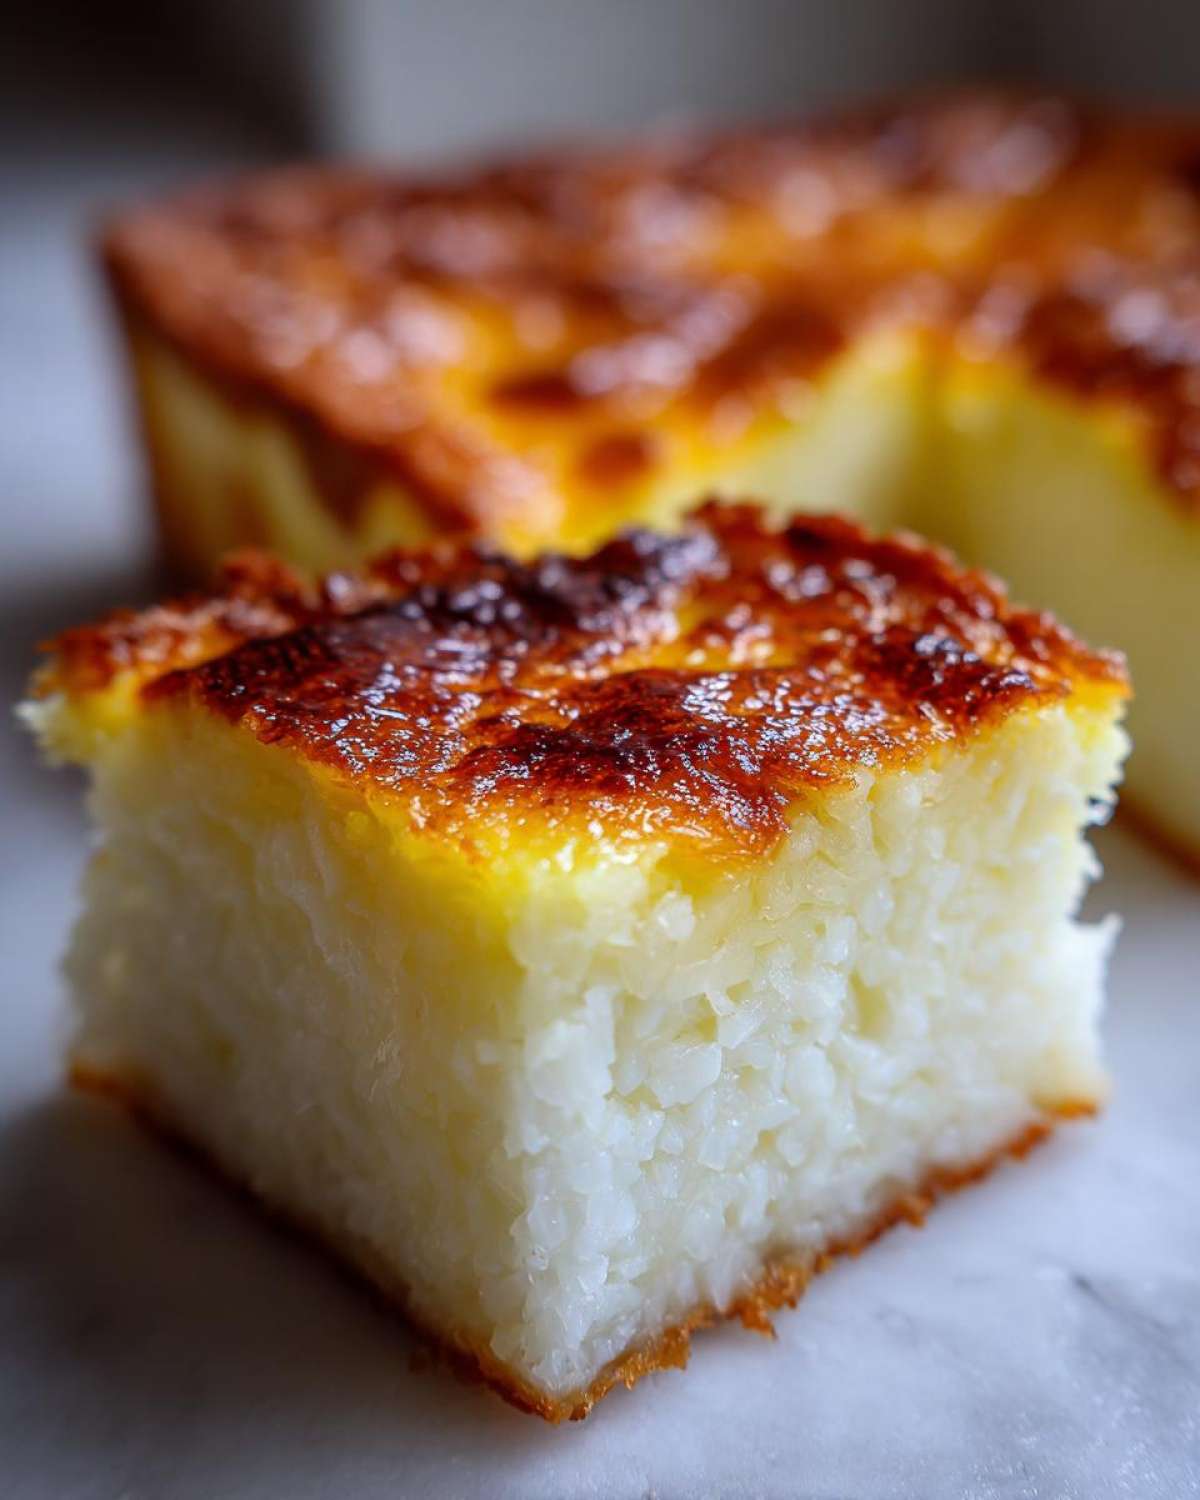
Honestly, the topping is what elevates this from a simple dessert to a celebration centerpiece. We cook the coconut milk mixture on the stovetop briefly to activate the thickening agents before it even sees the oven. This small step creates a stunningly smooth, Creamy Cassava Cake Topping that bakes up beautifully golden while the base finishes setting. It looks professional, but it’s ridiculously easy. If you love creamy finishes, you must try our best creamy vanilla buttercream recipe sometime, too!
Gather Your Ingredients for Authentic Cassava Cake
Alright, now for the fun part: gathering our treasures! Making an authentic Cassava Cake Recipe hinges on having the right cast of characters. Trust me, sourcing full-fat ingredients makes a gigantic difference here. We’re keeping this simple, but quality matters, especially with the coconut milk. When you lay everything out like this, you realize we aren’t using much fuss—it’s all about honoring the core flavors of this wonderful Filipino Dessert.
For the Cassava Cake Base
Here is what you need for the satisfying bottom layer. Remember, this is where the structure comes from, so pay attention to the cassava!
- Four cups of grated cassava. If you’re using frozen, you must thaw it completely, and then squeeze out every drop of extra water you can manage—I mean really squeeze it!
- One 13.5-ounce can of rich, full-fat coconut milk. Don’t grab the “light” version; we need that creamy body.
- One 14-ounce can of sweetened condensed milk—the main sweetener for the base.
- Half a cup of standard white sugar.
- Half a cup of good butter, melted down gently.
- Two large eggs, whisked lightly.
- A tiny dash of vanilla extract.
- A quarter teaspoon of salt to balance all that sweetness.
- And the special treat: half a cup of Macapuno strings, if you’re feeling decadent. They are optional but so worth it!
For the Rich Cassava Custard Cake Topping
This is the creamy crown for our dessert. It browns up to that perfect golden hue we’re aiming for, creating a fantastic Cassava Custard Cake!
- Another 13.5-ounce can of full-fat coconut milk. Yes, you need two cans!
- Half a cup of condensed milk for the topping’s sweetness.
- Two large egg yolks—just the yolks here for richness and color.
- Two tablespoons of white sugar.
- And for the sweet-meets-savory magic that some folks adore: a quarter cup of grated cheese. If you’re going for that classic combination, make sure it’s sharp enough to cut through the sweetness.
Step-by-Step Instructions for Your Easy Cassava Cake
This is where the transformation happens! I know the recipe card looks long, but trust me, the actual active time is so short. We’re going to handle this in two simple stages: the base and then the golden crown. Marco’s big rule here is preparing that pan perfectly. You want that clean release later, or the Empress will not be happy! We whip up this Filipino Cassava Cake Recipe so fast you’ll have time to dream up another amazing treat, like our easy 3-ingredient chocolate mousse recipe before dinner.
A quick note from Marco: If you used frozen grated cassava (and hey, sometimes we need shortcuts!), please make sure you really wring out that excess liquid first. Use a clean kitchen towel and squeeze hard over the sink. You won’t believe how much water comes out, and if you skip that, your base will just steam instead of developing that lovely chew we’re aiming for.
Preparing the Base and Initial Bake of the Cassava Cake
First things first, get your oven roaring to 350°F (175°C). While it heats up, grease your 9×13 inch pan and line it thoroughly with parchment paper. That paper is your security blanket! In a big bowl—and this is important, keep it gentle—combine your grated cassava, the first can of coconut milk, condensed milk, the half-cup of sugar, melted butter, eggs, vanilla, and salt. Fold everything together only until it’s mixed. Seriously, stop stirring when you stop seeing streaks of dry ingredients. Pour this into your prepared pan evenly.
Slide that base into the oven for about 40 to 50 minutes. You’re looking for the edges to just start looking set and maybe kissed with a little gold.
Making and Applying the Creamy Cassava Cake Topping
While the base is baking, whisk together the second can of coconut milk, the condensed milk for the topping, the two egg yolks, and the remaining 2 tablespoons of sugar in a saucepan. You need to cook this mixture over medium-low heat, stirring constantly like you mean it, until it thickens just a little—maybe 5 to 8 minutes. Do not let it boil, or it gets crumbly! Once it coats the back of a spoon, take it off the heat immediately.
Pull your partially baked base out of the oven. Pour that creamy custard right over the top, spreading it gently. Pop it back in for another 15 to 20 minutes until that topping is totally set and golden brown. If you’re going wild with the cheese, sprinkle it over during the last 5 minutes so it melts beautifully.
Tips for the Best Homemade Cassava Dessert
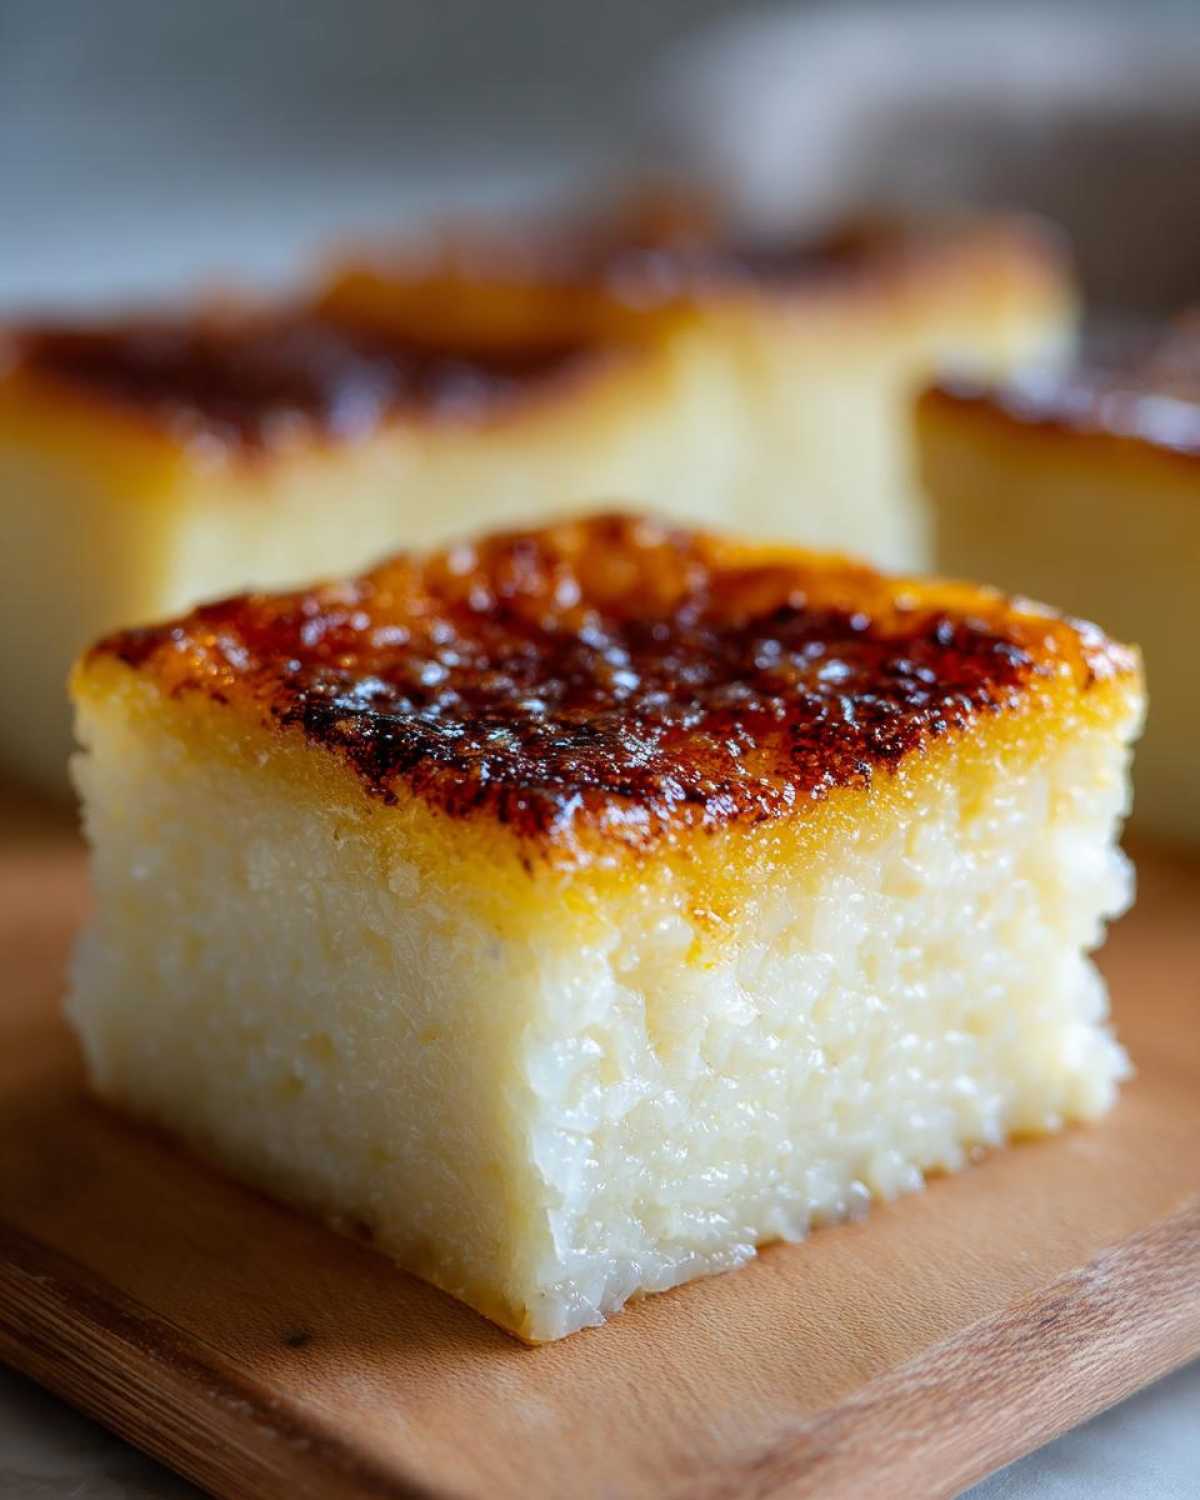
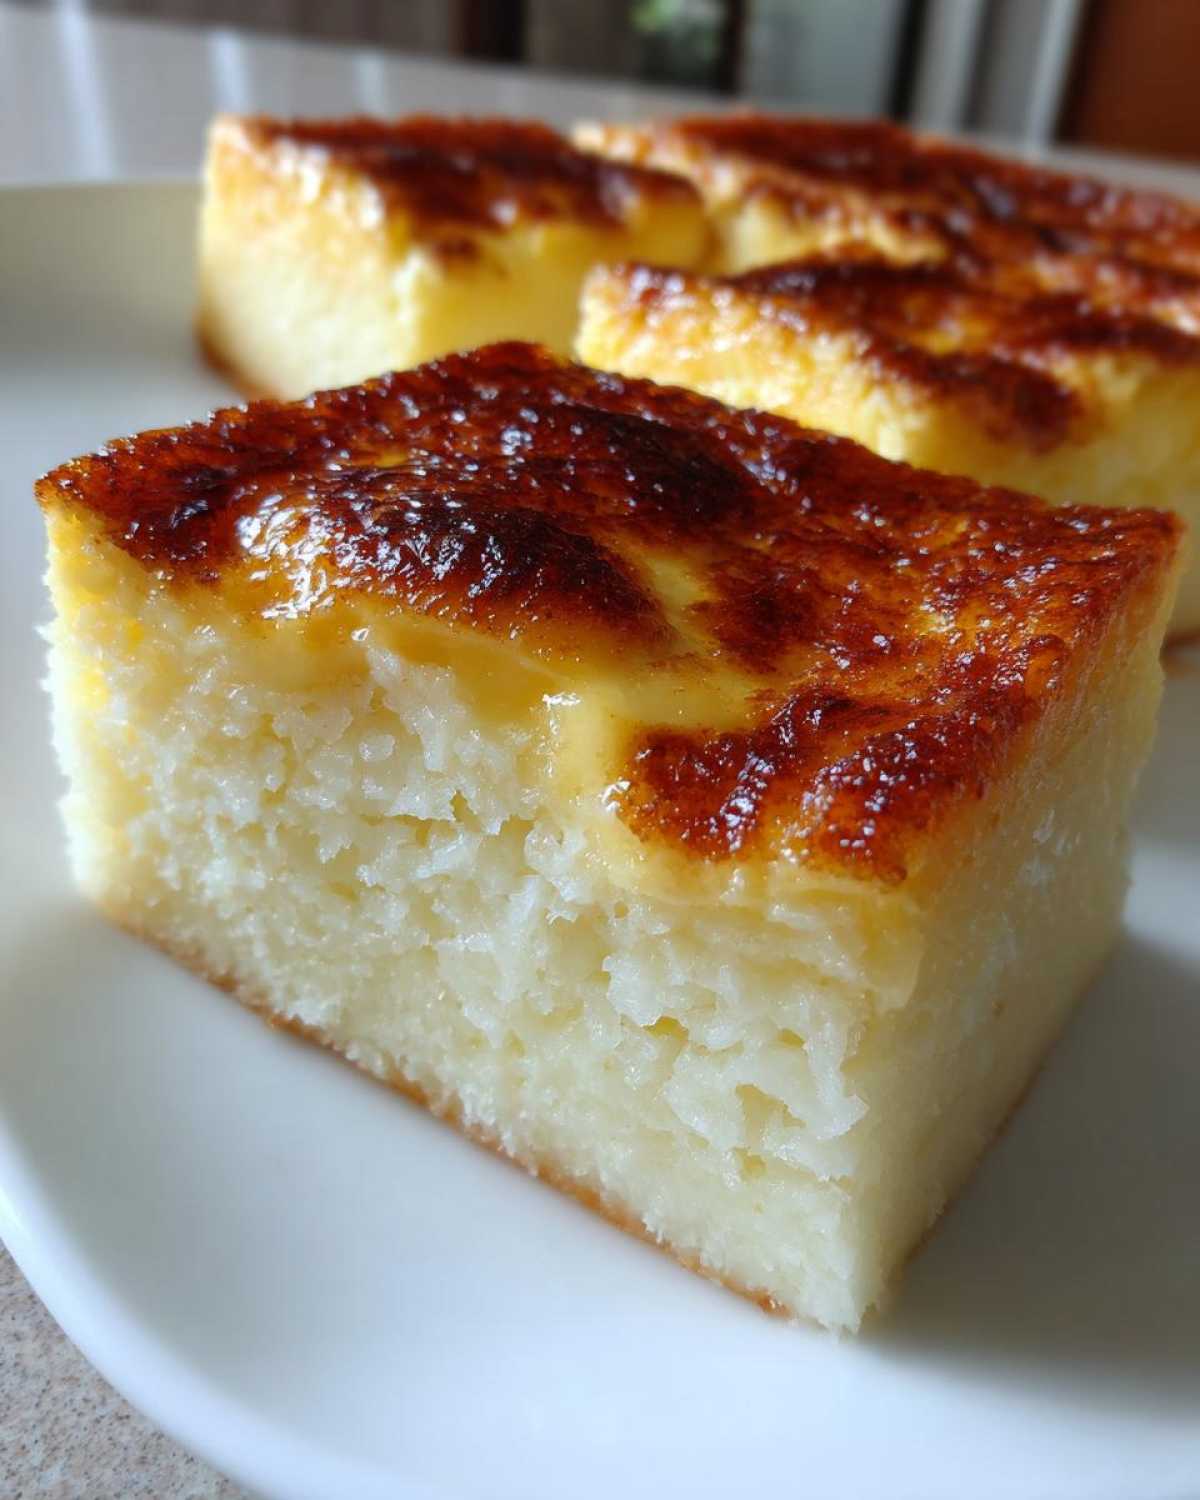
Now that you’ve got your beautiful, golden Homemade Cassava Dessert out of that oven, I have to tell you the most important, non-negotiable step. Seriously, push the cooling rack to the very center of the counter and walk away! I know, I know, the smell of warm coconut and sugar is intoxicating, but you absolutely must let this cool completely before slicing. If you try and cut into it while it’s warm, the layers will weep and separate, and we won’t get that satisfying, chewy texture we worked so hard for. It needs time to firm up and set that wonderful starch structure.
Imagine this is the perfect wine—you wouldn’t drink it straight out of the cellar, right? You let it breathe! Patience here is what separates a good cake from the Empress-worthy feast. Marco’s job is to guard the kitchen during this cooling period. Don’t let anyone sneak a peek slice!
Ingredient Notes and Substitutions for Cassava Bibingka
When making your Cassava Bibingka, the quality of your liquids really sings through, especially since there aren’t a million strong spices competing for attention. While the recipe calls for canned coconut milk because it’s easy (which we love!), if you can get your hands on fresh, first-press coconut milk, please do it. The flavor profile is just richer, deeper, and more tropical. It’s truly the level-up move.
What about substitutes? You can’t really substitute the cassava itself, naturally, but if you can’t find Macapuno, don’t stress too much. You can use shredded young coconut meat instead, though you’ll lose that unique stringy texture. Also, if you’re avoiding dairy, you can try substituting the melted butter with a neutral-flavored coconut oil, but I warn you, the flavor won’t be quite as rich. Sometimes in baking, the old ways using real butter just can’t be beaten for that deep flavor.
If you’re looking for other easy, comforting recipes to pair with this, check out my tips on making soft streusel coffee cake cookies—another perfect treat after the main meal!
Variations: Cassava Cake with Macapuno and Cheesy Cassava Cake
Okay, Empress, now that we have the fundamental recipe nailed down—the foundational, deeply satisfying Filipino Cassava Cake Recipe—it’s time to talk about personalization! We love sticking to tradition, but sometimes you just need a little something extra, right? It’s the beauty of taking command of your own table—you get to choose your own adventure.
Our recipe deliberately kept the Macapuno and the cheese as optional inclusions because not everyone likes the same level of complexity, but honestly, I think these additions are worth the extra minute of effort. Thinking about making my lemon cookies with a zesty glaze always reminds me that a little twist makes things exciting!
Adding Sweet Coconut Strings: Cassava Cake with Macapuno
If you’ve ever seen a truly luxurious Cassava Cake with Macapuno, you know what I mean. Macapuno strings are sweet coconut sport fibers, and they add this incredible, soft, chewy texture that’s just heavenly against the creamy base. How do you add them? Simple! You fold them right into the cassava base mixture before it goes into the pan for the first bake, just like we talked about in the instructions. They bake up tenderly alongside the root vegetable, giving you little pockets of intense tropical flavor in every single slice.
It doesn’t change the cooking time at all, but the resulting texture is so much more layered and interesting. It’s a truly traditional upgrade.
Indulging in Sweet and Savory: Cheesy Cassava Cake
Now, for those of you who enjoy that divine tension between salty and sweet—Marco is a huge fan of this one—we have the Cheesy Cassava Cake option. This is where we utilize that optional grated cheese that goes right on top of the custard layer. You won’t mix this into the base; you save it entirely for the end!
The trick here is timing. You wait until the custard topping has been baking for about 10 to 15 minutes, so it’s already mostly set. Then, sprinkle that cheese evenly over the top. Return the pan to the oven for the final 5 minutes. You want it melted and blistered just slightly, but you don’t want it to burn or dissolve entirely into the custard. We want visible strands of golden, savory topping against that sweet coconut custard. It truly makes for an unforgettable piece of Traditional Filipino Dessert. If you want to see another fantastic take on a cake recipe, check out the folks over at Recipe Ni Juan for inspiration on getting that perfect golden-brown finish!
Serving Suggestions for This Tropical Baked Goods Favorite
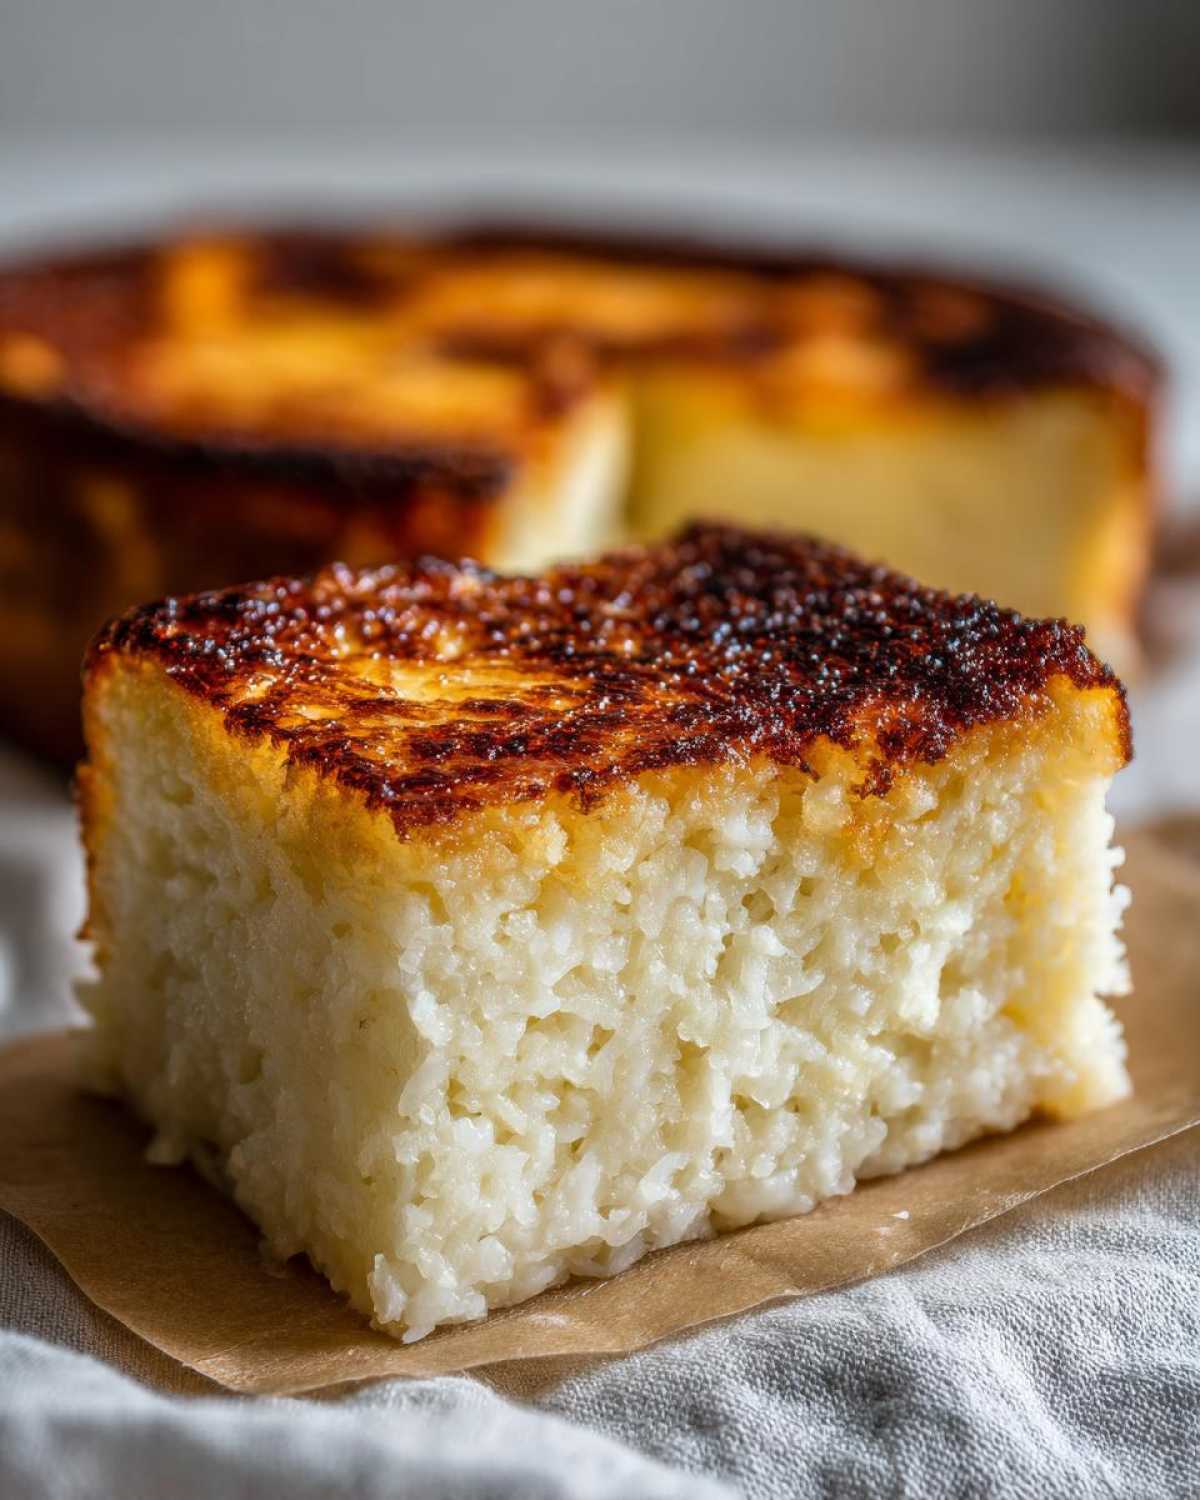
Once that beautiful Cassava Cake has fully cooled—and trust me, you waited, right?—it’s time for the grand presentation! This is the perfect Merienda Filipino Sweets treat, marvelous with coffee or tea. We love serving ours slightly cool, straight from room temperature, as that’s when the chewiness really shines through, but honestly, having it chilled from the fridge works beautifully too, especially on a hot day!
If you’re looking for the ultimate pairing for this slice of paradise, try serving it alongside something warm and spiced, like our decadent authentic Puerto Rican Coquito when the weather turns cooler. These Tropical Baked Goods feel special no matter the occasion, so pull out your best dishes and enjoy the feast!
Storage and Reheating Instructions for Your Cassava Cake
Okay, deep breaths, Empress! You made this masterpiece, and now we need to make sure we treat the leftovers with the respect they deserve so they taste just as incredible tomorrow. Marco and I never want you to compromise on texture, even on day two, so pay attention to how we manage storage. It’s not as finicky as an elaborate cake, but there are definite rules for maintaining that perfect, creamy, chewy bite.
Because this Cassava Cake is so moist—thanks to all that coconut milk—it actually keeps really well. We always try to keep any leftovers around for about three days. Think of it like a lovely, dense bread pudding!
Keeping it Fresh on the Counter or in the Fridge
If you plan on eating the whole thing within 24 hours, keeping it covered at room temperature is totally fine. Just make sure it’s tightly covered with plastic wrap or foil to keep the air off that beautiful custard top. However, if you want it to last longer, or if your kitchen runs warm, the fridge is the way to go. Store it in an airtight container for up to three days. You’ll notice it firms up a lot when chilled—that’s normal because the fats solidify.
When we save slices, Marco always insists on using glass containers for storage. It just feels more regal than plastic, doesn’t it? Plus, you get a better view of what delicious treats await you!
The Best Way to Reheat Your Cassava Cake
This is the part where people usually mess up! If you are going to reheat it, you have two paths, depending on how you like your dessert. If you prefer it cold or at room temperature, just let the refrigerated slice sit out on the counter for about 30 to 45 minutes. It softens up perfectly then.
If you absolutely, positively need it warm—maybe you’re pairing it with a hot latte—please, skip the microwave! The microwave zaps the moisture right out of the cassava and makes the topping rubbery. Instead, preheat a toaster oven or a regular oven very low, maybe 300°F (150°C). Place a slice on a small baking sheet, tent it loosely with foil, and warm it through for about 8 to 10 minutes. This gentle heat brings the moisture back without cooking it again aggressively. It’s almost as good as fresh from the oven, I promise! For more recipes that make leftovers magical, you can check out my tricks for a no-bake pumpkin pie, which keeps wonderfully, too.
Frequently Asked Questions About This Filipino Cassava Cake Recipe
We get so many questions about this beloved staple, and I love hearing how you all are making your own versions of this Filipino Cassava Cake Recipe! Marco and I always say that once you master the core balancing act of moisture and structure, you’re set for life. Here are the things we hear asked most often in the comments and DMs. If your question isn’t here, pop on over to our main blog page and ask us directly!
Can I make this a Quick Cassava Recipe?
That’s the million-dollar question, isn’t it? We definitely designed this to be relatively swift—it comes together in about 20 minutes of prep, and the total bake time is usually under 75 minutes. So, yes, for a traditional baked dessert, it’s pretty speedy! However, if you’re aiming for that perfect chewy texture that the Empress demands, there’s no real cutting corners on the cooling time. That hour you wait for it to set after it comes out of the oven is non-negotiable if you want the proper sliceable texture. So, it’s a Quick Cassava Recipe for assembly, but you must practice patience at the end!
Is this a naturally Gluten Free Cassava Dessert?
Yes, absolutely! This is one of the wonderful things about using cassava (or tapioca) as the main structure instead of wheat flour. Since it relies entirely on the starches from the root vegetable, this is inherently a Gluten Free Cassava Dessert. It’s perfect for serving at gatherings where you need a delicious, safe option for friends who avoid wheat. It’s a true slice of tropical goodness that just happens to be naturally free of the major gluten culprits. Honestly, sometimes the most traditional recipes are the best when you’re looking for specific dietary needs!
For more deep dives into these classic recipes, I always admire the work that goes into testing over at Rasa Malaysia—they have some wonderful insights into authentic techniques!
Estimating the Nutrition for a Slice of Cassava Cake
Now, I know that when we talk about royal feasts here at Eatable Empress, we are primarily focused on joy, flavor, and treating ourselves like the wonderful beings we are. We don’t obsess over numbers, because an Empress commands satisfaction, not calorie counting! However, since many of you ask, I did run the numbers on our *Easy and Creamy Filipino Cassava Cake* to give you a general idea of what’s in a single, beautiful slice.
Remember, Marco reminds me constantly that these are just estimates based on the standard ingredients listed. If you use extra Macapuno or go heavy on the cheese variation, those values are going to shift, so take this as a joyful guideline rather than a hard science measure! You can always check our main policy page if you are curious about how we approach all this data here on the site.
This is what the typical slice breaks down to, based on 12 servings:
- Serving Size: 1 slice
- Calories: 350
- Sugar: 35g (That condensed milk is workin’ hard!)
- Fat: 18g
- Carbohydrates: 45g
- Protein: 5g
- Sodium: 150mg
See? A decadent little treat that is perfectly worth it. Life is too short for boring food, even if it has a slightly higher sugar count. After all, we should always feel worthy of the good plates and the rich flavors, right?
PrintEasy and Creamy Filipino Cassava Cake with Golden Custard Topping
Make this classic Filipino Cassava Cake, or Bibingka, easily at home. This recipe delivers a moist, chewy base topped with a rich, golden coconut custard layer. It is a perfect tropical baked good for any occasion.
- Prep Time: 20 min
- Cook Time: 70 min
- Total Time: 90 min
- Yield: 12 servings
- Category: Dessert
- Method: Baking
- Cuisine: Filipino
- Diet: Gluten Free
Ingredients
- 4 cups grated cassava (fresh or frozen, thawed)
- 1 (13.5 oz) can full-fat coconut milk
- 1 (14 oz) can sweetened condensed milk
- 1/2 cup granulated sugar
- 1/2 cup melted unsalted butter
- 2 large eggs
- 1 teaspoon vanilla extract
- 1/4 teaspoon salt
- 1/2 cup Macapuno strings (optional, for base)
- For the Custard Topping:
- 1 (13.5 oz) can full-fat coconut milk
- 1/2 cup condensed milk
- 2 large egg yolks
- 2 tablespoons granulated sugar
- 1/4 cup grated cheese (optional, for sweet and savory)
Instructions
- Preheat your oven to 350°F (175°C). Grease and line a 9×13 inch baking pan with parchment paper.
- In a large bowl, combine the grated cassava, 1 can of coconut milk, condensed milk, 1/2 cup sugar, melted butter, eggs, vanilla extract, and salt. Mix until just combined. Do not overmix.
- If using, fold in the Macapuno strings gently.
- Pour the cassava mixture evenly into the prepared baking pan.
- Bake the base for 40 to 50 minutes, or until the edges are set and lightly golden.
- While the base bakes, prepare the custard topping. In a medium saucepan, whisk together the second can of coconut milk, condensed milk, egg yolks, and 2 tablespoons of sugar.
- Heat the mixture over medium-low heat, stirring constantly, until it thickens slightly, about 5 to 8 minutes. Do not let it boil. Remove from heat.
- Carefully pour the custard topping evenly over the partially baked cassava base.
- Return the pan to the oven and bake for another 15 to 20 minutes, or until the topping is set and golden brown. If you are using cheese, sprinkle it over the top during the last 5 minutes of baking.
- Remove the Cassava Cake from the oven and let it cool completely on a wire rack before slicing. Cooling allows the cake to firm up for a chewy texture.
Notes
- If you use frozen grated cassava, make sure you squeeze out any excess liquid before mixing it into the batter. This helps achieve a chewier texture.
- For a richer, more authentic flavor, use fresh coconut milk if available.
- This dessert is best served at room temperature or slightly chilled.
Nutrition
- Serving Size: 1 slice
- Calories: 350
- Sugar: 35
- Sodium: 150
- Fat: 18
- Saturated Fat: 15
- Unsaturated Fat: 3
- Trans Fat: 0
- Carbohydrates: 45
- Fiber: 3
- Protein: 5
- Cholesterol: 45