

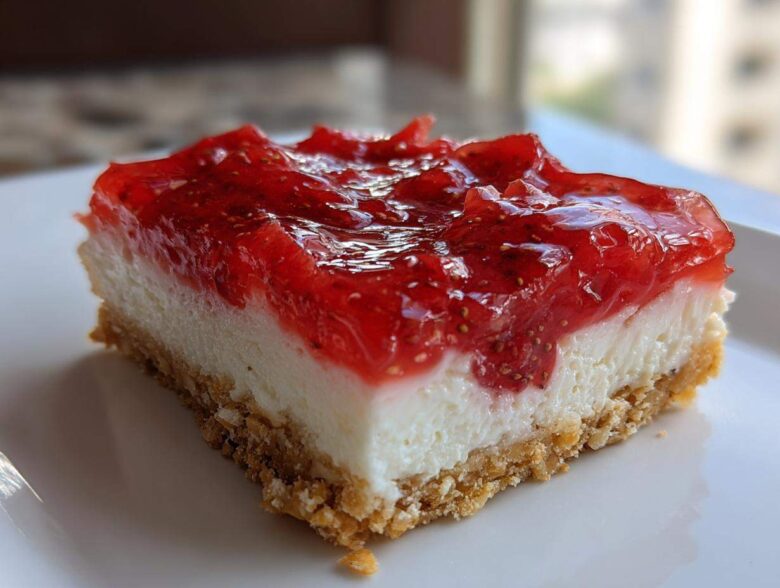
When the weather gets hot and I just *cannot* face turning on the oven, I reach straight for my favorite chilled recipes. And honestly, nothing beats the pure satisfaction of these **No-Bake Strawberry Pretzel Dessert Bars**! They are the absolute definition of layered perfection: salty, crunchy pretzel base, a dreamy smooth cream cheese middle, and that brilliant, sweet strawberry spread right on top. It’s the ultimate sweet and salty combination, and the best part? Not a single minute spent waiting for the oven to preheat!
I first learned this trick when I needed a quick contribution for a church picnic years ago. Everyone went nuts for them! They look impressive but they’re secretly so simple to throw together. Seriously, if you need a super easy, guaranteed crowd-pleaser, you’ve found your new go-to summer treat. Trust me when I say these bars are addictive. You can find more of my must-try comfort bakes over on my blog!
Why You Will Love These No-Bake Strawberry Pretzel Dessert Bars
Honestly, if you can manage to mix things in a bowl and set a timer, you can make these bars! They are my personal favorite for anything from a casual Tuesday night treat to a big summer gathering. Here’s the quick rundown on why these have earned a permanent place in my rotation:
- The Perfect Sweet & Salty Hit: That pretzel crust is everything! It offers this incredible, salty crunch that just balances out the sweet layers so perfectly. They really are the best Sweet and Salty Bars around.
- Zero Oven Required: This is obvious, but worth shouting about! Since they are a No Oven Required Dessert, you skip all the heat and waiting. They just need chill time to set up perfectly.
- Travels Beautifully: Because they are firm bars that need to stay chilled, they are absolutely fantastic for taking to neighborhood potlucks or picnics. They hold their shape unbelievably well, making them top-tier Summer Dessert Bars.
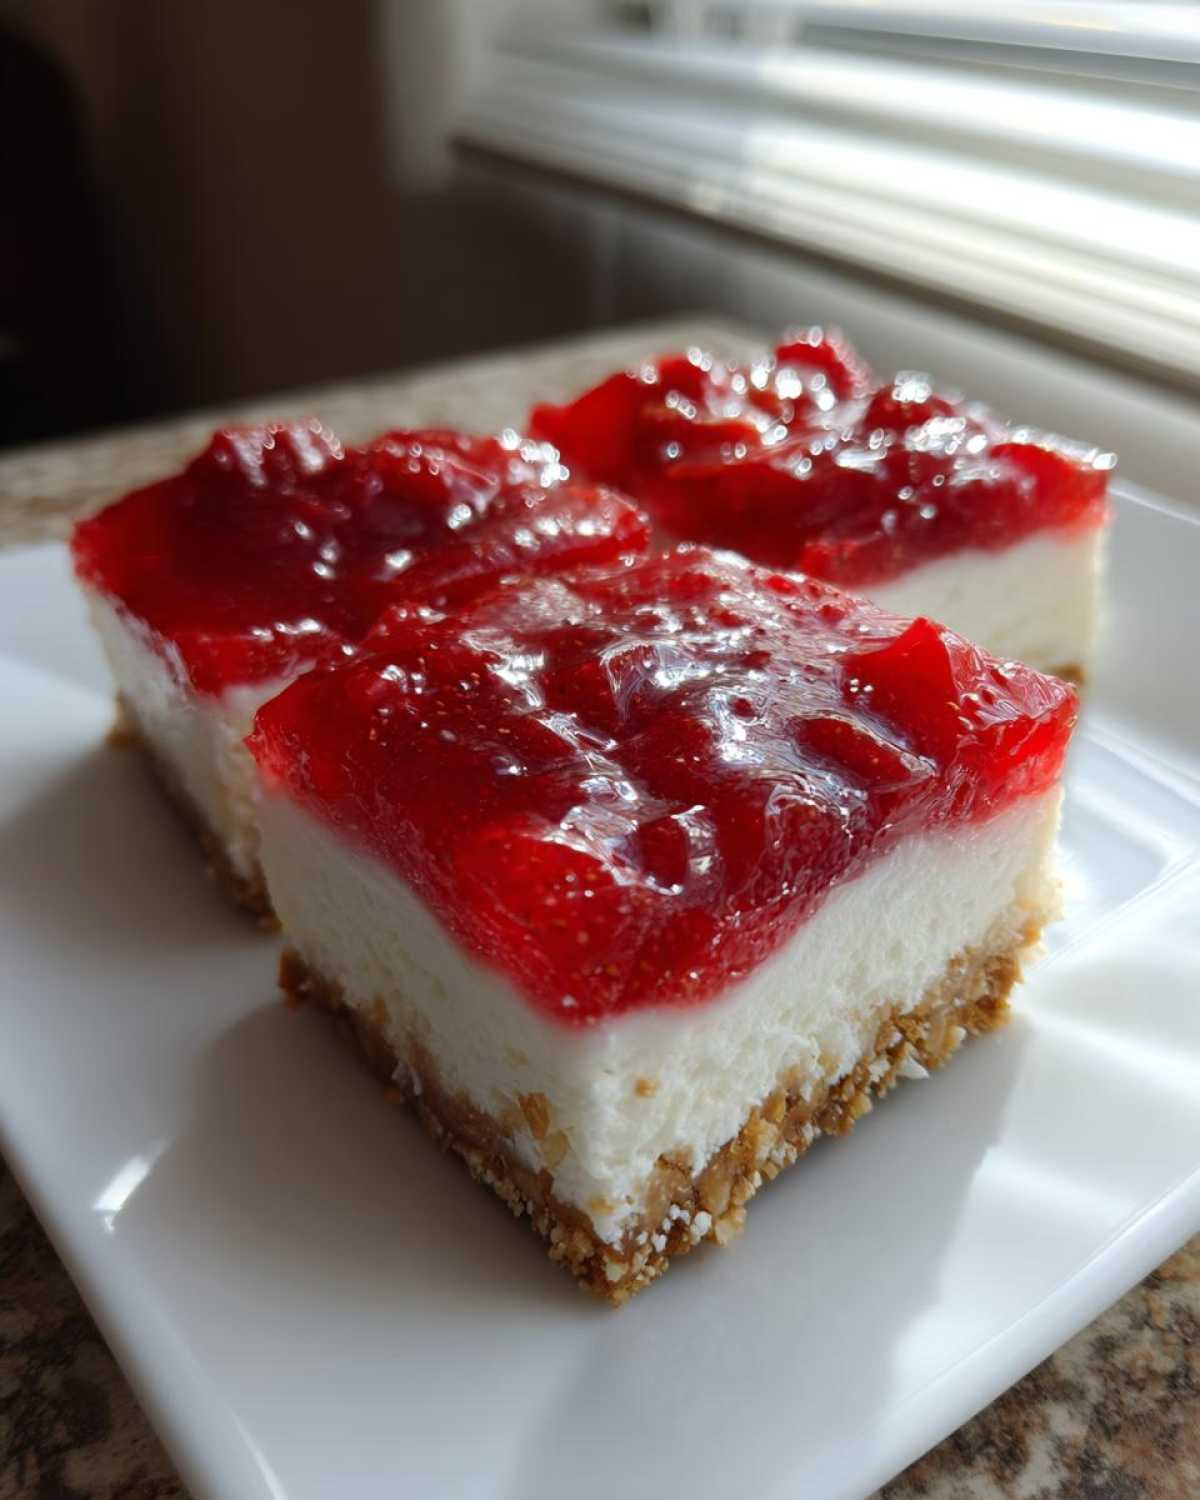
- Layer Perfection: You get three wonderful textures: the buttery crunch, the cool, fluffy cream cheese layer, and the slightly jiggly, fruity top. It hits every note!
- Super Quick Assembly: I can have the three layers prepped and into the dish in under 30 minutes. That’s why I call them my go-to Easy Pretzel Dessert Bars when company is coming over unexpectedly! You can see more travel-friendly recipes over here at summer-dessert-bars.
Gathering Ingredients for Your Layered Strawberry Dessert
Okay, putting together this Layered Strawberry Dessert is almost embarrassingly easy because you don’t need to bake anything! The magic is really in having everything ready to go before you start assembling. Remember, since this is a chilled dessert, layering matters! Here’s what you need to grab for the best No Bake Strawberry Dessert bars.
- 1 1/2 cups crushed pretzels (Make sure they are crushed finely! We want a crust, not big chunks!)
- 1/2 cup unsalted butter, melted (Don’t use salted butter here, we control the salt with the pretzels!)
- 1/4 cup granulated sugar (Just a tiny bit for the crust, to complement the pretzels.)
- 8 ounces cream cheese, softened (This is really important—it has to be soft enough to whip smoothly!)
- 1 cup powdered sugar (For that sweet, velvety filling.)
- 1 cup frozen whipped topping, thawed (Cool Whip works perfectly here, just make sure it’s fully thawed but still cold.)
- 1 (3 ounce) package strawberry flavored gelatin (The classic Jell-O brand works great, of course.)
- 1 cup boiling water
- 1 cup cold water
- 1 (10 ounce) package frozen sliced strawberries, thawed and drained (Draining is HUGE, trust me on this one!)
For those crucial little details that make this recipe shine, check out my notes below. If you want to see how I tackle another no-bake favorite, hop over and check out my no-bake pumpkin pie recipe!
Ingredient Notes and Substitutions for Cream Cheese Pretzel Dessert
A few pointers on what makes the ingredients work their best in this Cream Cheese Pretzel Dessert:
- Cream Cheese Caution: Please use the standard brick-style cream cheese, not the whipped kind in a tub. The tub style has too much air and can make your middle layer weep or get too soft when combined with the whipped topping. If you use light cream cheese, your filling will definitely be softer, so go for the full-fat version for that perfect set!
- Strawberry Drainage: When you thaw your sliced strawberries, they release a ton of water. Pour them into a fine-mesh sieve over a big bowl and let them drain for at least 15 minutes. If you skip this, that extra moisture will seep into the gelatin and you’ll end up with watery pockets instead of set layers.
- Gelatin Temp Check: When you mix the gelatin, make sure it cools down sufficiently before it goes near that cream cheese layer. If it’s too hot, it melts the lovely fluffy filling right underneath it, and then all your hard work sinks together—we want distinct layers!
Step-by-Step: How to Make No-Bake Strawberry Pretzel Dessert Bars
Alright, let’s get this show on the road! As I mentioned, this Quick Strawberry Dessert Recipe is perfect because it comes together fast. We break it down into three main jobs: the crust, the filling, and the fruity top. Follow these steps closely, paying special attention to the chilling times, and you’ll have picture-perfect bars every single time. Ready? Let’s dive in!
Preparing the Salty Pretzel Crust Base
First things first, we need that glorious salty foundation. Grab your 9×13 pan—I usually just line mine with a little parchment paper sling, even though it’s not strictly necessary, just for peace of mind when cutting!
- In a medium bowl, mix up those crushed pretzels, the melted butter, and that tiny bit of granulated sugar. You want it all damp and clinging together, like slightly wet sand.
- Press this mixture firmly into the bottom of your prepared dish. And I mean firmly! Use the bottom of a glass or a flat measuring cup to really pack it down edge-to-edge. A loose crust crumbles when you try to slice it later, and nobody wants that drama.
- Pop that dish into the refrigerator while you work on the next layer. It needs a good 30 minutes to firm up nice and solid. Don’t rush this chill time!
Creating the Creamy Filling for Your No Bake Strawberry Dessert
This layer is pure, fluffy heaven, the perfect reward for making that crust solid.
- Using your electric mixer (or a stand mixer if you’re feeling fancy!), beat that softened cream cheese and the powdered sugar together until it’s absolutely smooth. Scrape down the sides of the bowl a couple of times so you don’t end up with those nasty cream cheese lumps.
- Now, gently fold in that thawed whipped topping. Don’t overmix during the folding stage; we need to keep all that air we just whipped in there!
- Take your crust out of the fridge and spread this creamy mixture evenly over the top. Spread it carefully right to the edges.
- Back into the cold storage it goes while we tackle the strawberry top!
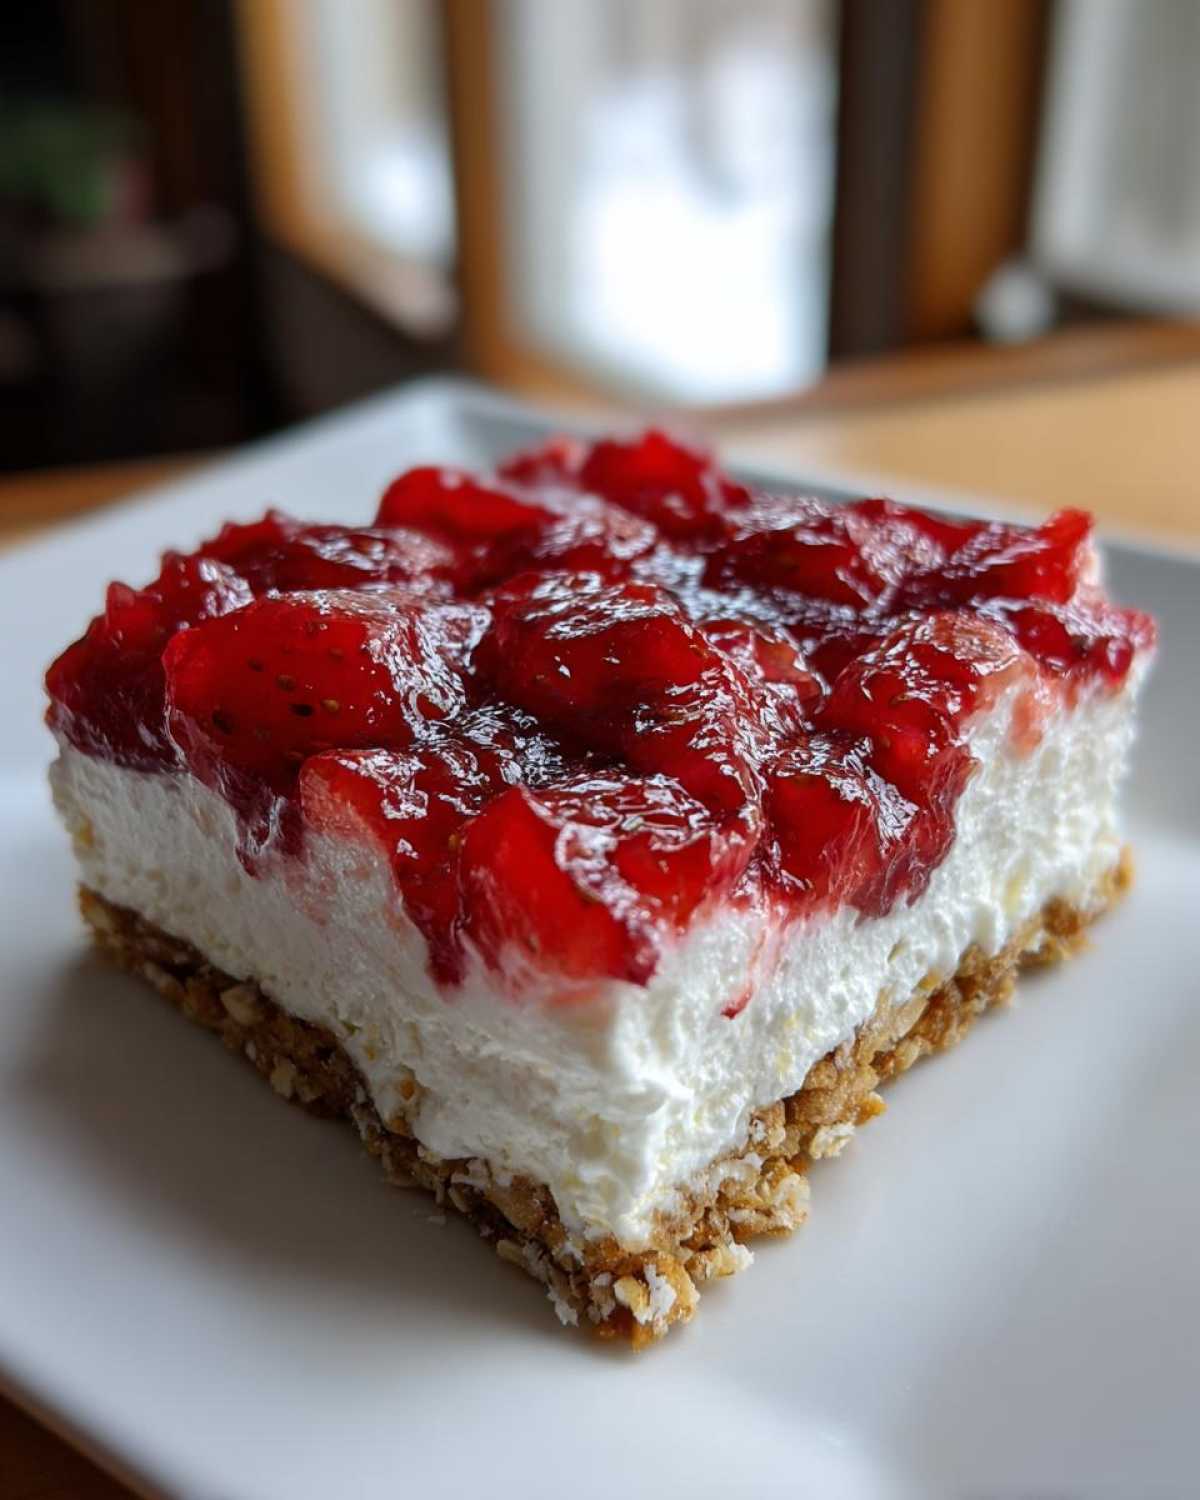
Setting the Strawberry Gelatin Layer for Perfect No-Bake Strawberry Pretzel Dessert Bars
This is the trickiest part, but once you understand the cooling, you are golden! This step shows the real kitchen knowledge for making these No-Bake Strawberry Pretzel Dessert Bars work.
- In a medium bowl, combine your strawberry gelatin packet with 1 cup of boiling water. You have to stir this until it’s completely dissolved. No grainy bits allowed! Stir for at least two minutes, just to be sure.
- Stir in the 1 cup of cold water.
- Now, here’s the expertise part: You need to let this mixture cool on the counter. We are looking for it to thicken up slightly, almost like watery applesauce, which usually takes about 20 to 30 minutes. If it’s too hot when you pour it over the cream cheese layer, it will melt the filling beneath it! If it gets too thick, just stir it vigorously for 30 seconds to loosen it up.
- Once it’s slightly thickened—but definitely still pourable—gently fold in your thawed and fully drained sliced strawberries.
- Finally, spoon this strawberry layer evenly over the chilled cream cheese layer. Be gentle so you don’t disturb the white layer underneath!
- Pop the whole pan back into the fridge. It needs a minimum of 4 hours, but honestly, overnight is even better, to make sure that gelatin is fully set!
If you want to see a recipe that uses a similar technique but for a cold drink, check out my quick homemade chocolate milk recipe for a sweet treat on the side!
Tips for Success Making Easy Pretzel Dessert Bars
Look, even though these are called Easy Pretzel Dessert Bars, nobody wants a sloppy mess when they go to serve them! Since we are dealing with layers that rely on chilling rather than baking for structure, we need a couple of little tricks up our sleeves to ensure maximum success. I learned these the hard way, so you don’t have to!
Here are my top tips for getting that perfect structure so you can slice the bars cleanly and serve beautiful squares every time. If you’re looking for another simple, no-fuss recipe, you should really check out my easy 3-ingredient chocolate mousse recipe; it pairs great with these bars!
- The Crust Must Be Densely Packed: I can’t stress this enough—bake or no-bake, the crust is the foundation. Use something really flat, like the bottom of a dry measuring cup, and press that pretzel mixture down until it feels like a legitimate tile. You should be able to press pretty hard without seeing movement in the mix.
- Keep That Filling Cold: When you mix the cream cheese and powdered sugar, if your kitchen is warm, your cream cheese starts getting soft fast. Work quickly here, and make sure your crust is properly chilled (30 minutes minimum!) before the filling goes on. The contrast between the cold crust and the slightly warmer filling helps everything adhere before that final chill.
- Use the Full Chilling Time for Gelatin: People always want to rush the final set, but if you cut into the bars after only two hours, the top layer will wiggle right off the cream cheese layer. Four hours is the absolute minimum, and I always recommend setting it in the fridge overnight if I can—it makes cutting so much easier!
- The Hot Knife Trick for Serving: When it comes time to serve (and only when it’s time to serve!), don’t try to use a room-temperature knife. Get out a sharp chef’s knife, run it under very hot water for about 10 seconds, dry it immediately, and then make your cut. Wipe the blade clean, run it under hot water again, and cut the next slice. This melts just enough of the gelatin and cream cheese to give you those perfect, shiny, clean edges that look amazing on a platter.
Storage and Making Ahead for Your Potluck Strawberry Bars
One of the HUGE selling points for these No-Bake Strawberry Pretzel Dessert Bars is that they are built to be made ahead of time. Seriously, these are the best party food because you can make them completely the day before the event and they taste even better the next day! That totally frees up your oven and brain space right before guests arrive.
Since we have those dairy and gelatin layers, these bars absolutely must stay cold. They are wonderful chilled, but if you leave them sitting out on the summer picnic table for too long, that cream cheese layer gets soft fast and the whole thing turns into a sweet puddle. Keep them covered tightly in the 9×13 dish in the refrigerator.
If you are prepping them as a fantastic Make Ahead Strawberry Treat, here’s my simple schedule. You can mix the crust and press it into the pan a day before you plan on serving. Just cover it tightly with plastic wrap and keep it chilled. Then, the next day, you make the cream cheese layer and pour it over the cold crust, chill that again while you make the gelatin, and finish the assembly!
They taste best when they’ve had a full 24 hours for all those layers to truly marry in the cold. I find that even 36 hours later, they are still holding together beautifully. Just remember, if you’re taking them somewhere, use an insulated cooler with an ice pack underneath the serving dish for safety, especially if it’s a warm day. For more chilled make-ahead ideas, you’ve got to check out my no-bake pumpkin pie bites!
Serving Suggestions for This Chilled Strawberry Dessert
Now that you’ve successfully navigated the layers and your Chilled Strawberry Dessert is perfectly set—maybe even overnight—it’s time for the fun part: serving! Since these bars are so pretty with their three distinct stripes, you don’t actually need to do much to make them look special. They carry themselves well!
The single most important serving tip I can give you happens right before you put them on the platter: make sure you use that hot knife trick we talked about! Slicing them when they are ice cold, but using a clean, sharp, hot knife in between each cut, ensures those gorgeous layers stay neat instead of smearing everywhere. I always try to cut them into neat 4×4 pieces, giving you 16 perfect squares.
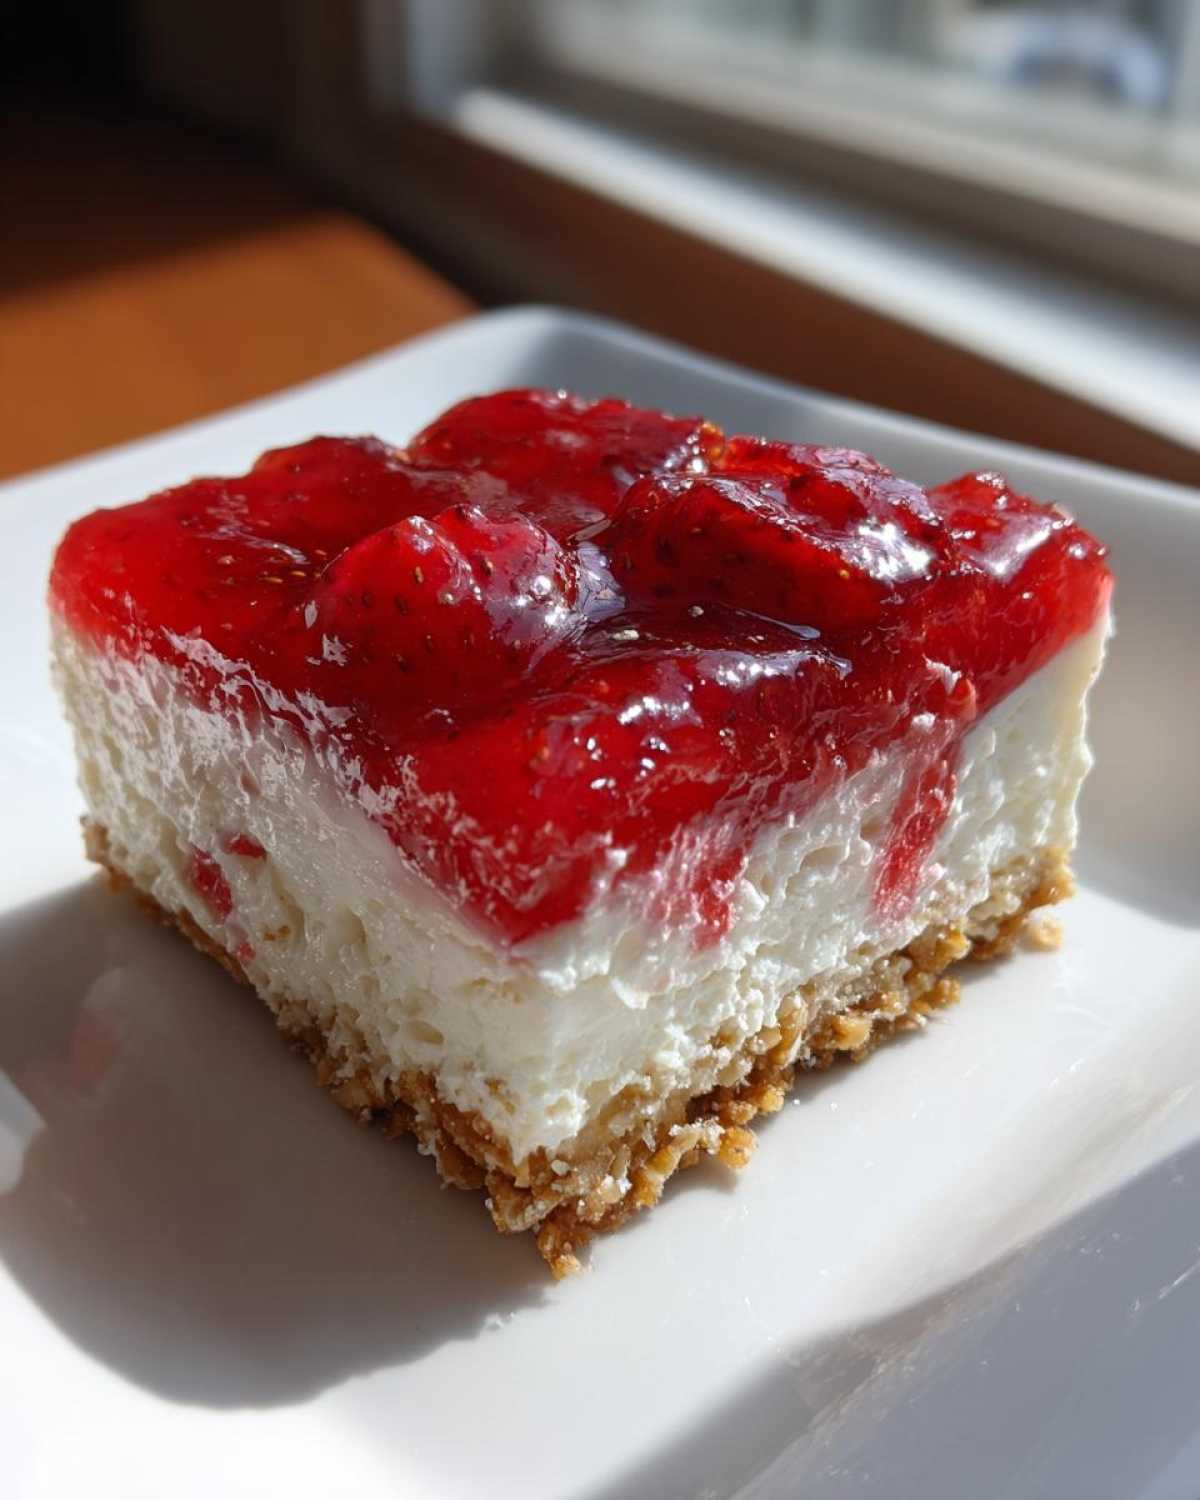
If you want to dress them up just a tiny bit for company, a little garnish goes a long way. A dollop of fresh, unsweetened whipped cream on the side of the plate offers a lovely coolness that contrasts nicely with the sweetness of the Jello. And you know me, I love fresh anything! Sprinkle just a whisper of finely chopped fresh mint over the top of the bars right before you bring them out—it adds this amazing pop of green color and a lovely fresh scent. It makes this simple Easy Party Dessert look professional!
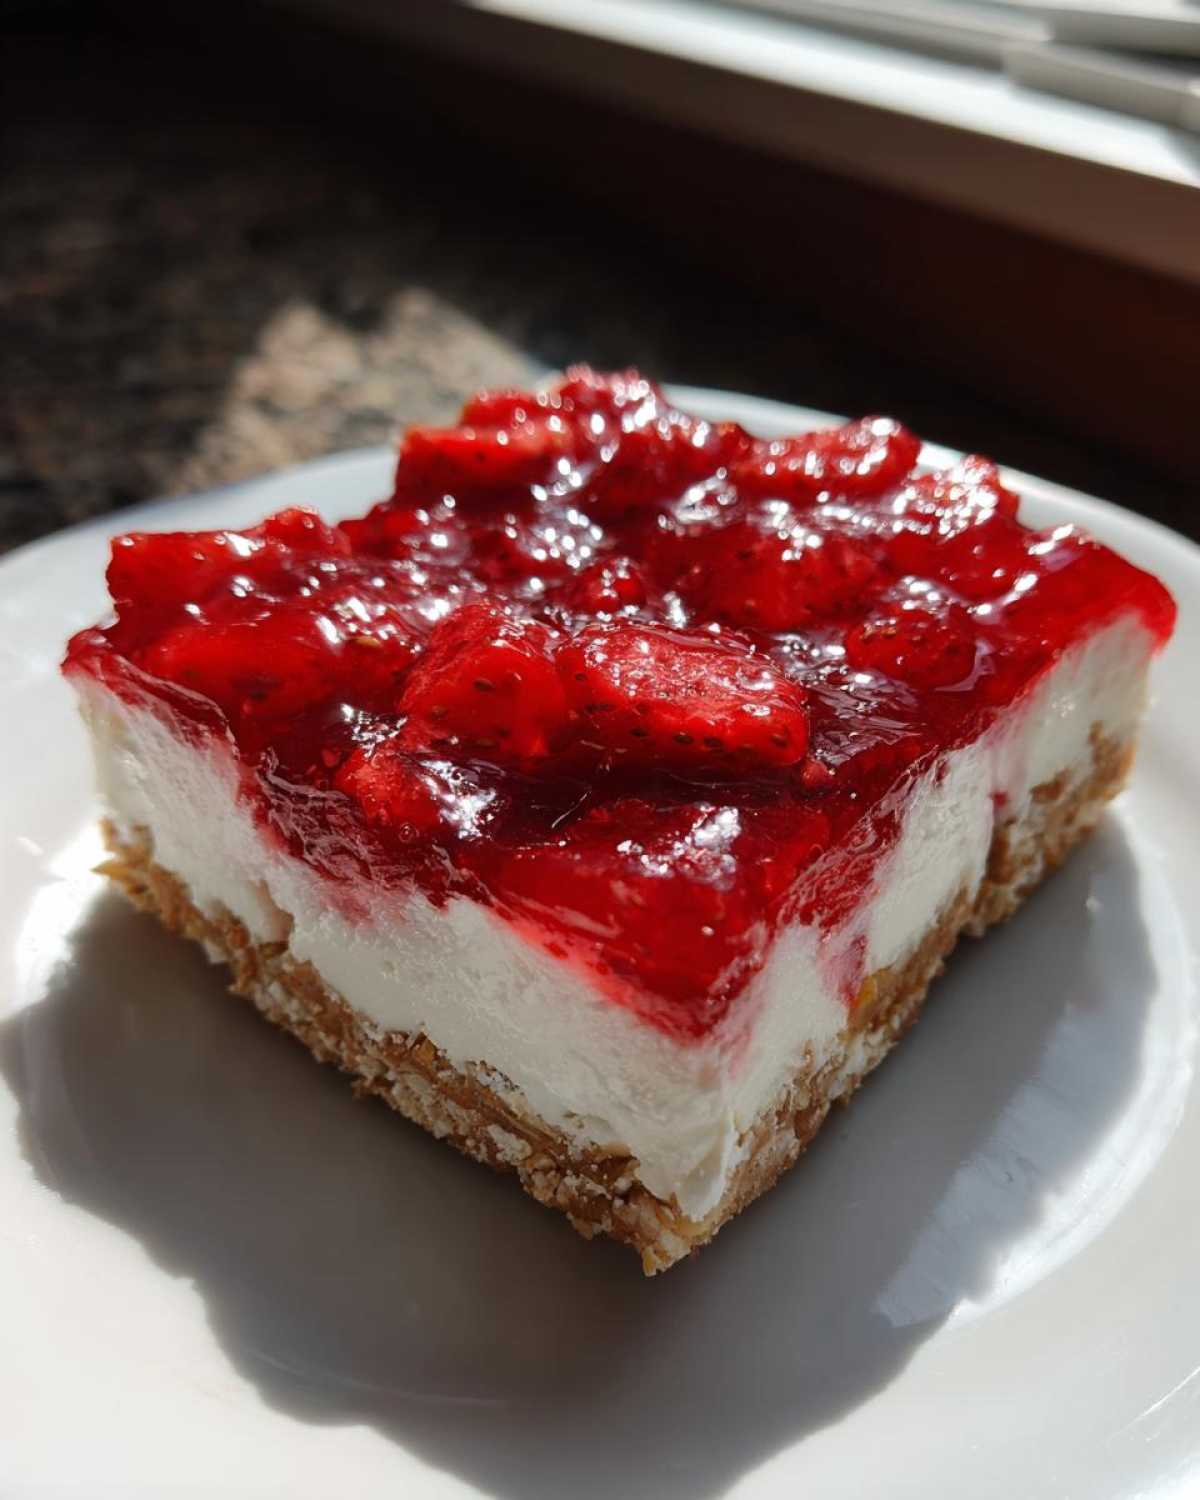
If you’re serving these alongside another very sweet item, you might want something lighter. Maybe a simple drizzle of my favorite creamy vanilla buttercream, thinned way down with a tiny splash of milk so it just drizzles, would look elegant across the plate. But honestly, these bars are so robust flavor-wise, they usually only need a clean plate and a fork!
Frequently Asked Questions About No-Bake Strawberry Pretzel Dessert Bars
When baking friends ask me questions, it’s usually about making sure the layers set right, or how to get those perfect, clean slices from a chilled dessert. That’s fair! Since these are No-Bake Strawberry Pretzel Dessert Bars, the structure relies completely on the chilling process, not baking. Here are the top things I always get asked about these wonderful Sweet and Salty Bars!
For more great tips on making quick, delicious food, you can check out my recipe for tuna pasta salad—it’s another potluck favorite!
Can I use fresh strawberries instead of frozen in this Easy Party Dessert?
Oh, absolutely you can! Using fresh berries is a fantastic idea, especially when everything is perfectly in season. The main difference is that frozen berries are pre-cut and pre-thawed, giving you that extra liquid we had to drain. If you use fresh strawberries for this Easy Party Dessert, just make sure you wash them, hull them, and slice them yourself.
Here’s the adjustment: Skip the thawing/draining step entirely. Slice your fresh berries and fold them straight into the gelatin mixture *after* the gelatin has cooled down slightly but before it starts to set. Because fresh berries are typically firmer than thawed ones, they generally don’t release much liquid into the gelatin during the final 4-hour chill. It might make the top layer look a little less uniform than the frozen sliced ones, but the taste will be truly bright and fresh!
What is the best way to cut the No Oven Required Dessert cleanly?
This is the million-dollar question for any layered, chilled dessert like this! You cannot just pull a cold knife through it straight from the drawer; you’ll end up dragging the soft cream cheese layer up into the Jello, or the crust will just crumble out the sides. These bars are firm, so they need a little help to cut cleanly.
My trick for achieving those Instagram-worthy squares on a No Oven Required Dessert is using heat. First, pour your liquids in and chill completely. Once it’s rock solid, grab a long, sharp chef’s knife—something sturdy. Dip the blade of the knife into a tall glass of very hot water for about 10 seconds. Quickly wipe the blade completely dry with a clean towel.
Now, press firmly down through all three layers in one smooth motion. Wipe the knife clean again, re-heat it in the hot water, dry it, and cut the next line. Repeat this process for every single cut you make! It sounds fussy, but it makes the clean slices through the creamy filling effortless. It’s the secret to serving beautiful portions of this amazing Jello Pretzel Dessert.
Estimated Nutritional Snapshot for Simple Strawberry Squares
Alright, let’s talk specifics! When you are making something this delicious, sometimes you just want to know the breakdown. Remember, since these Simple Strawberry Squares rely on cream cheese and butter, we aren’t exactly serving up lettuce here, but they are perfectly portioned for sharing! Also, since I am making this by hand and using different brands of pretzels or whipped topping, these numbers are just close estimates. For the most accurate count, you’d need to plug in *your* specific ingredients!
I always keep my nutritional disclaimer front and center. You can read all my thoughts on how I calculate these figures over on my site, which is super important for transparency, right? See my full disclaimer here.
For one serving (one bar, cut 4×4 from a 9×13 dish), here’s what you are generally looking at for this wonderful No Bake Strawberry Dessert:
- Serving Size: 1 bar
- Calories: 210
- Sugar: 18g (That’s the Jello and powdered sugar doing their thing!)
- Sodium: 250mg (Hello, pretzel crust!)
- Fat: 12g
- Saturated Fat: 7g
- Unsaturated Fat: 5g
- Trans Fat: 0g (Hooray!)
- Carbohydrates: 24g
- Fiber: 0g
- Protein: 3g
- Cholesterol: 30mg
I usually look at the sugar and sodium when making party food, and honestly, for a treat this satisfying, I think those numbers are perfectly reasonable! Enjoy them chilled!
Share Your Experience with These Sweet and Salty Bars
Well, that’s it! You are now armed with the secrets to the most fuss-free, flavor-packed, No-Bake Strawberry Pretzel Dessert Bars that ever came out of a refrigerator! I truly hope you love making these as much as my family loves devouring them. They hit that perfect spot between refreshing and richly satisfying.
Now that you’ve made them, I absolutely need to hear about it! Did your crust pack down perfectly? Did you try them alongside your favorite summer BBQ side like my creamy tuna pasta salad? Head down to the comments below and give these bars a star rating! Five stars if they disappeared instantly, of course!
Seriously, tell me what you thought. I love hearing about your own little kitchen successes, and if you tweaked the recipe—maybe added a little almond extract to the cream cheese layer, or used a different flavor of Jello—share that modification so we can all learn from each other! If you have any questions bubbling up while you’re enjoying these delightful Sweet and Salty Bars, please ask over on my contact page so I can clear things up for you!
Don’t forget to snap a picture and share it on social media! Tagging me means I get to virtually sneak a peek at your beautiful, chilled, no-bake masterpieces before they vanish!
PrintNo-Bake Strawberry Pretzel Dessert Bars
Make these easy, layered dessert bars featuring a salty pretzel crust, a creamy filling, and a sweet strawberry topping. This recipe requires no oven.
- Prep Time: 25 min
- Cook Time: 0 min
- Total Time: 4 hr 25 min
- Yield: 16 servings
- Category: Dessert
- Method: Chilling
- Cuisine: American
- Diet: Vegetarian
Ingredients
- 1 1/2 cups crushed pretzels
- 1/2 cup unsalted butter, melted
- 1/4 cup granulated sugar
- 8 ounces cream cheese, softened
- 1 cup powdered sugar
- 1 cup frozen whipped topping, thawed
- 1 (3 ounce) package strawberry flavored gelatin
- 1 cup boiling water
- 1 cup cold water
- 1 (10 ounce) package frozen sliced strawberries, thawed and drained
Instructions
- Mix crushed pretzels, melted butter, and 1/4 cup granulated sugar in a bowl until combined. Press the mixture firmly into the bottom of a 9×13 inch baking dish. Chill the crust for 30 minutes.
- In a separate bowl, beat the softened cream cheese and powdered sugar until smooth. Gently fold in the thawed whipped topping. Spread this cream cheese mixture evenly over the chilled pretzel crust. Return the dish to the refrigerator while you prepare the topping.
- In a medium bowl, dissolve the strawberry gelatin completely in 1 cup of boiling water. Stir for at least 2 minutes.
- Add 1 cup of cold water to the gelatin mixture and stir well. Let the mixture cool at room temperature until it thickens slightly, about 20 to 30 minutes. Do not let it set completely.
- Gently fold the thawed and drained sliced strawberries into the slightly thickened gelatin mixture.
- Pour the strawberry gelatin mixture evenly over the cream cheese layer.
- Refrigerate the bars for at least 4 hours, or until the gelatin is fully set. Cut into squares before serving.
Notes
- Use finely crushed pretzels for the best crust texture.
- Make sure the gelatin mixture cools enough before adding it to the cream cheese layer, or it may melt the filling.
- Drain the thawed strawberries well to prevent excess liquid from thinning the gelatin layer.
Nutrition
- Serving Size: 1 bar
- Calories: 210
- Sugar: 18
- Sodium: 250
- Fat: 12
- Saturated Fat: 7
- Unsaturated Fat: 5
- Trans Fat: 0
- Carbohydrates: 24
- Fiber: 0
- Protein: 3
- Cholesterol: 30