

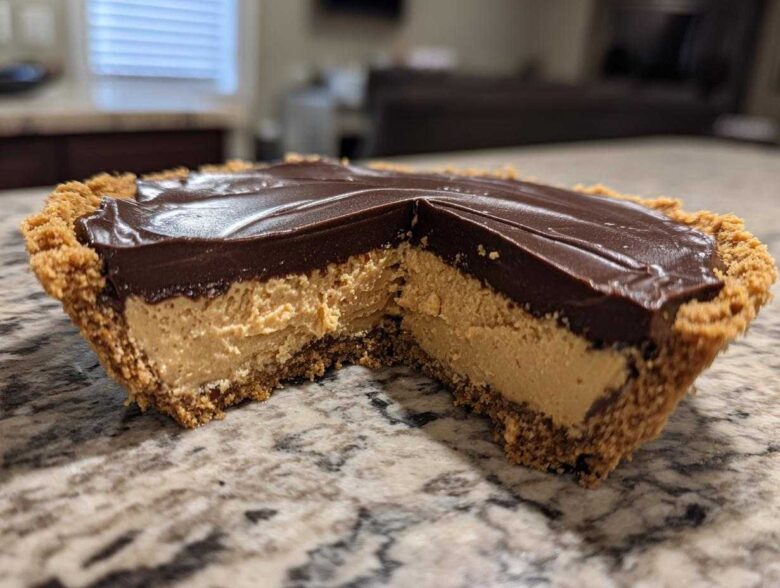
Oh my goodness, if you are looking for that dessert that absolutely stops the show at any party—the one that gives you that deep, satisfying mash-up of creamy peanut butter and rich, dark chocolate—you have found your holy grail. Forget turning on the oven! I’ve spent way too many weekends tweaking ratios to get this just right, but I nailed it. This is the ultimate, easy, no-bake chocolate peanut butter pie recipe that never fails. Seriously, if you are searching for the recipe that always impresses whether it’s a huge summer BBQ or just a Tuesday night craving, this is it. It’s so creamy, so decadent, and honestly, ridiculously simple to put together.
Why This No-Bake chocolate peanut butter pie Is Your New Favorite Dessert
Okay, trust me when I say this specific pie is a total game-changer. It ticks every single box you could ever want in an indulgent sweet treat. Why should you make this the very next time you need a dessert?
- It’s truly no-bake! That means zero risk of burning or dealing with oven temperatures. Bless those easy-bake recipes!
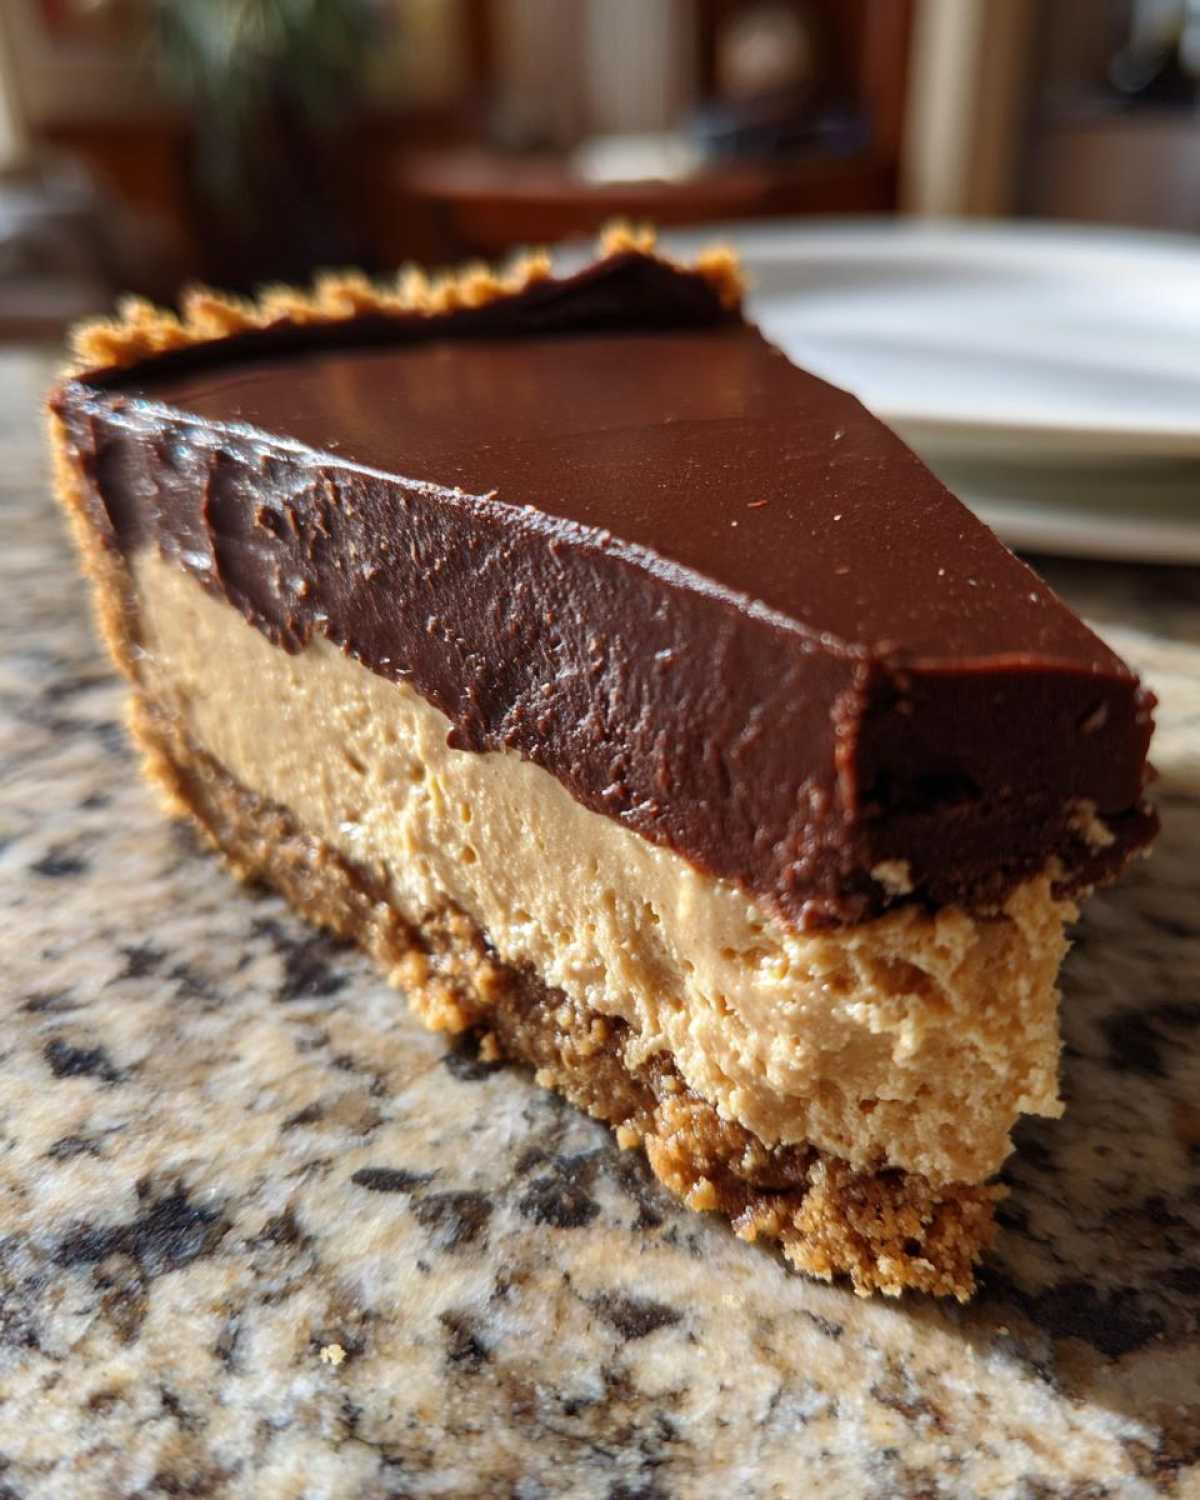
- The texture balance is perfect: fluffy peanut butter filling meeting a rich, dense chocolate top.
- You can prepare the whole thing a day ahead; it actually tastes better chilled overnight!
- It’s the ultimate potluck dessert idea—it travels well and everyone loses their minds over it.
Ingredients for the Ultimate chocolate peanut butter pie
Getting this decadent layered pie recipe right starts long before you mix anything. Ingredient quality matters here, especially since we aren’t baking away any flavors! The most critical thing? Make sure your cream cheese is actually room temperature. Seriously, if it’s too cold, your **homemade peanut butter pie filling** will be lumpy, and trust me, lumps mean a lot of extra mixing time that you don’t need.
I always keep my heavy whipping cream stored in the coldest part of the fridge until the moment I need it. Cold cream whips up into those gorgeous stiff peaks needed for that light, fluffy texture. Remember, this needs to be as easy as possible, so having everything measured out is your secret weapon!
For the Graham Cracker Crust
- 1 1/2 cups graham cracker crumbs (Make sure they are fine crumbs!)
- 1/4 cup granulated sugar (Just a touch to sweeten the base)
- 6 tablespoons unsalted butter, melted (This is what binds it all together)
When you mix these, you really have to press them down hard into that 9-inch pie plate. I use the bottom of a measuring cup to really compact it. Think of it as building a sturdy foundation for this masterpiece!
For the Fluffy Peanut Butter Filling
- 1 cup creamy peanut butter (Stick to the classic, shelf-stable kind—natural kinds can sometimes split the filling!)
- 8 ounces cream cheese, softened (Remember what I said about room temp!)
- 1 cup powdered sugar (Sift this if you have the time, it helps with smoothness)
- 1 teaspoon vanilla extract
- 1 cup heavy whipping cream, cold (Crucial for that velvety peanut butter mousse quality)
For the Rich Chocolate Ganache Topping
- 1 cup semi-sweet chocolate chips
- 1/2 cup heavy whipping cream (This makes the topping wonderfully pourable)
- 1 tablespoon unsalted butter (Adds a lovely sheen, almost like a bakery style peanut butter pie)
- Whipped cream, chopped peanuts, or mini peanut butter cups for topping (Optional, but highly recommended for presentation!)
Step-by-Step Instructions for Your No-Bake chocolate peanut butter pie
Okay, friend, let’s get this pie assembled! Since this is a **no oven dessert recipe**, the timing is all about chilling and setting. Follow these steps carefully, and you’ll have that gorgeous, layered look without breaking a sweat. Don’t rush the chilling times, that’s where the magic happens!
Preparing and Chilling the Crust
First up is the foundation! Grab those graham cracker crumbs, that little bit of sugar, and pour in that melted butter. Stir it up until it looks like wet sand—you should be able to squeeze a handful and have it hold its shape. Press that mixture firmly all over the bottom and up the sides of your 9-inch pie plate. I mean firmly, really pack it in there! Pop that crust into the freezer for about 15 minutes while we move onto the fun part.
Creating the Creamy Chocolate Peanut Butter Filling
In a big bowl, beat the room-temperature cream cheese until it’s actually smooth. Then add the peanut butter, powdered sugar, and vanilla. Beat it until it looks like one perfect, cohesive mixture. Now, take that cold heavy cream and beat it separately until you get stiff peaks. This is where we get the fluff! Gently—and I mean gently—fold the whipped cream into the peanut butter base. You are just trying to incorporate it, not deflate all that lovely air you just whipped in! Spread this mixture evenly over the chilled crust. Because we need it firm when we top it, pop the whole thing back into the freezer for about 15 minutes while you whip up the chocolate layer. Thanks to recipes like this quick homemade chocolate milk recipe, I always have cream on hand!
Assembling the Decadent Layered Pie Recipe
Time for the final touch! Melt your chocolate chips and cream using short bursts in the microwave, stirring well after each burst until you have a smooth, glossy ganache. Stir in that tablespoon of butter right at the end for shine. Working quickly, pour that warm chocolate mixture right over the peanut butter layer. Tilt the pan gently to spread it out so you cover everything completely. Now, the hard part: this pie needs serious chill time. Cover it up and refrigerate for at least 4 hours, but honestly, overnight is even better for getting those perfect, clean slices.
Expert Tips for the Best chocolate peanut butter pie Success
Listen up, because I have wrecked this recipe before by rushing! If you want that perfect, sturdy base for this **easy no bake peanut butter pie**, make sure you use the whole 1 1/2 cups of crumbs, and press them down like you mean it. I learned this the hard way when I tried to make a thinner crust for a party, and the whole thing cracked when I tried to slice it—total disaster!
If you’re swapping crusts, remember the ratios change slightly. For a great oatmeal cookie crust or an Oreo crust, you usually need slightly less melted butter because the cookie crumbs are naturally richer. Also, if you see your peanut butter filling starting to look a little loose, just pop it in the freezer for 10 minutes before you fold in the whipped cream. That little bit of chill helps stabilize everything. This really is the most satisfying make ahead dessert you’ll ever master.
Make-Ahead and Storage for Your chocolate peanut butter pie
This is my absolute favorite part about this recipe, which is why I always champion it for busy weekends: it’s the ultimate **make ahead dessert**! Seriously, you need to plan ahead with this pie, but only in the best way possible. Because this is a **quick weeknight pie** option, knowing you can prep it early is a lifesaver.
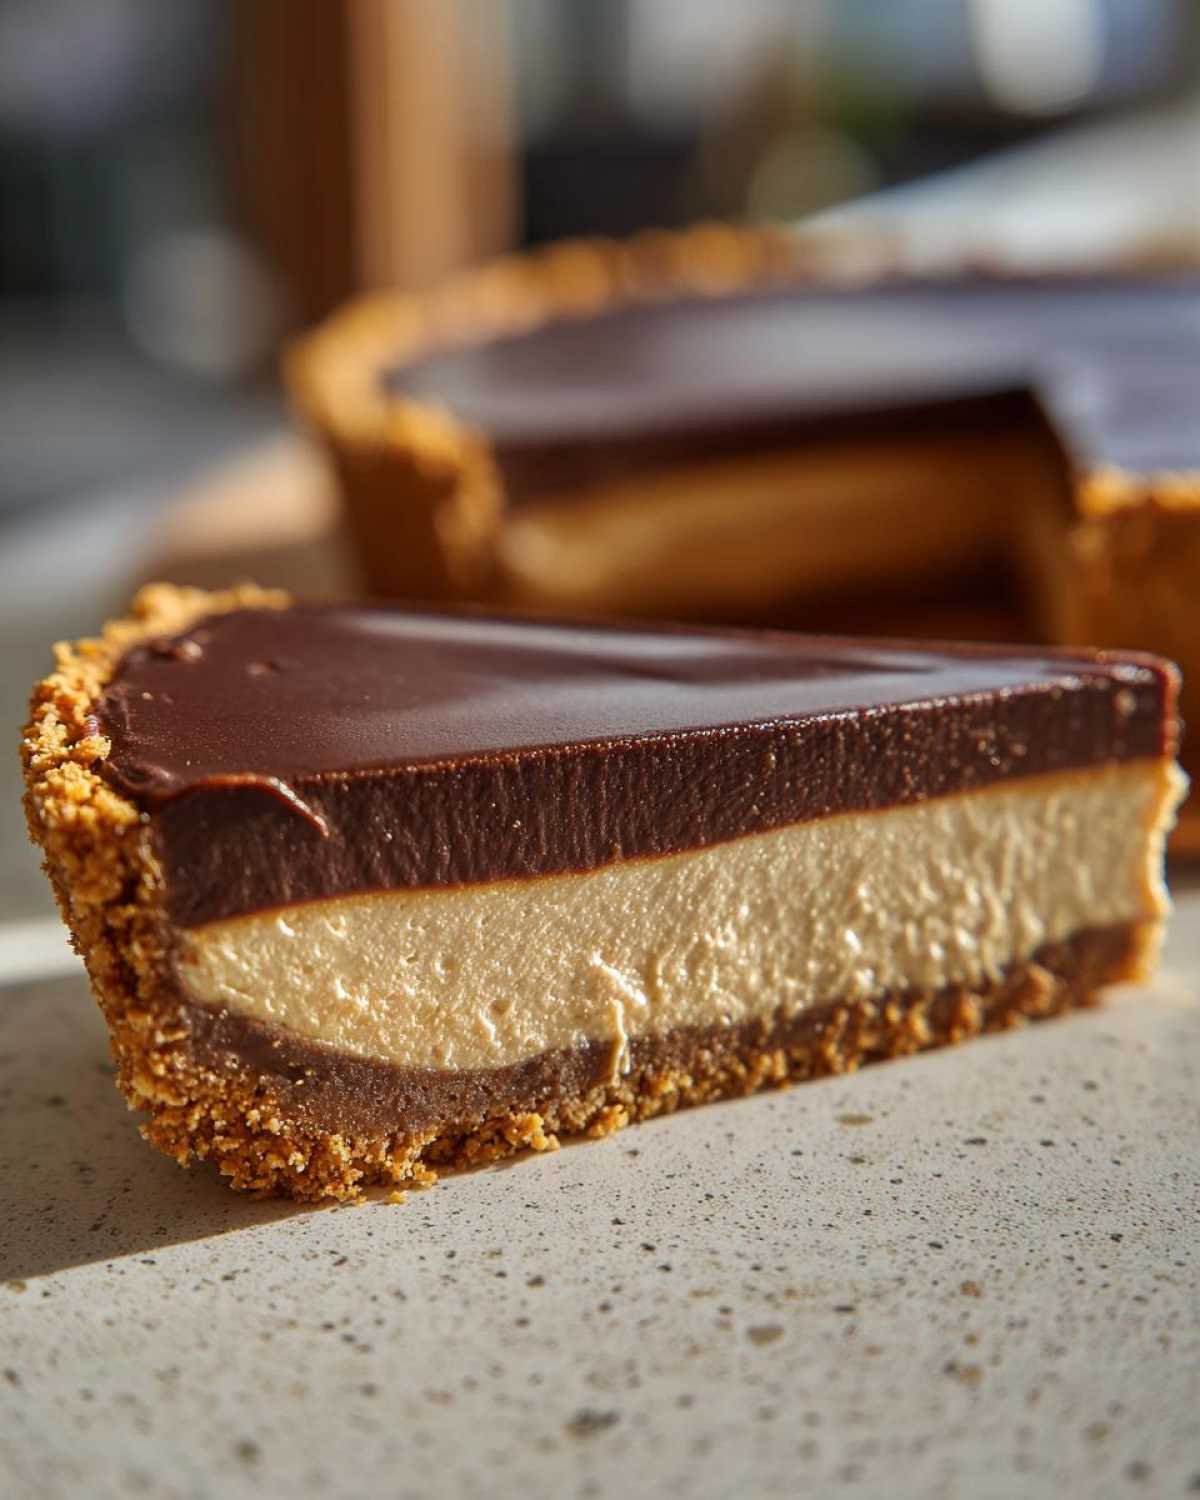
You actually need time for the layers to set up properly. I find that chilling it for that minimum of four hours is fine if you’re in a pinch, but honestly? This **chocolate peanut butter indulgence** is 100 times better when you let it chill overnight in the refrigerator. The flavors have time to really marry together, and the peanut butter filling firms up perfectly, giving you those gorgeous, clean slices we all dream about. It’s why this is one of my go-to make ahead dessert options!
If you’re bringing this to a party, you can wrap the whole pie securely with plastic wrap (make sure the wrap doesn’t touch the chocolate topping, or it will leave marks!) and keep it chilled in the fridge for up to two days. If you want to make it even further out, you can freeze the pie with the crust and peanut butter layers set—but hold the chocolate topping until about two hours before you plan to serve it.
If you happen to have leftovers (haha, fat chance!), just cover the pie tightly and keep it chilled. The texture will stay fantastic for several days. If you chilled it overnight and it’s rock-solid, just let it sit on the counter for about 15 to 20 minutes before slicing. That little bit of time takes the chill off the filling so it’s not quite so dense, making it easier to cut and taste those amazing flavors. This is why it’s such a lifesaver for gatherings; you make it Saturday morning, and it’s perfect for Sunday dinner!
Variations on the Classic chocolate peanut butter pie
Even though this is the ultimate, foolproof version of this **indulgent sweet treat**, I absolutely adore experimenting when I make it for my own family! You can take this recipe and twist it into something totally unique depending on what you find in your pantry or what flavor mood you’re in. It’s all about adding a little personal flair to what is already a perfect **no fail pie recipe**.
For example, let’s talk crusts. Most people go for the graham cracker base, which I love, but what about something richer? Try crushing up about 18-20 shortbread cookies instead of graham crackers, mix that with the melted butter, and press it in. It offers a buttery, slightly more refined crumble that pairs beautifully with the sweet filling. Or, if you’re a real chocoholic, you can absolutely use crushed Oreos. Just use about 1 3/4 cups of crushed wafers (I usually skip the extra sugar in the crust if I use Oreos, they’re sweet enough!). I even made one last week where I added finely chopped pretzels to the crust just for that salty crunch—wow, that was good!
If you want to boost the flavor in the filling itself, I’ve got two favorite tricks. First, for a richer experience, add about one teaspoon of espresso powder right in with the peanut butter and cream cheese. It doesn’t make the pie taste like coffee, but it deepens that chocolate flavor magically. It elevates it straight to a **bakery style peanut butter pie** experience.
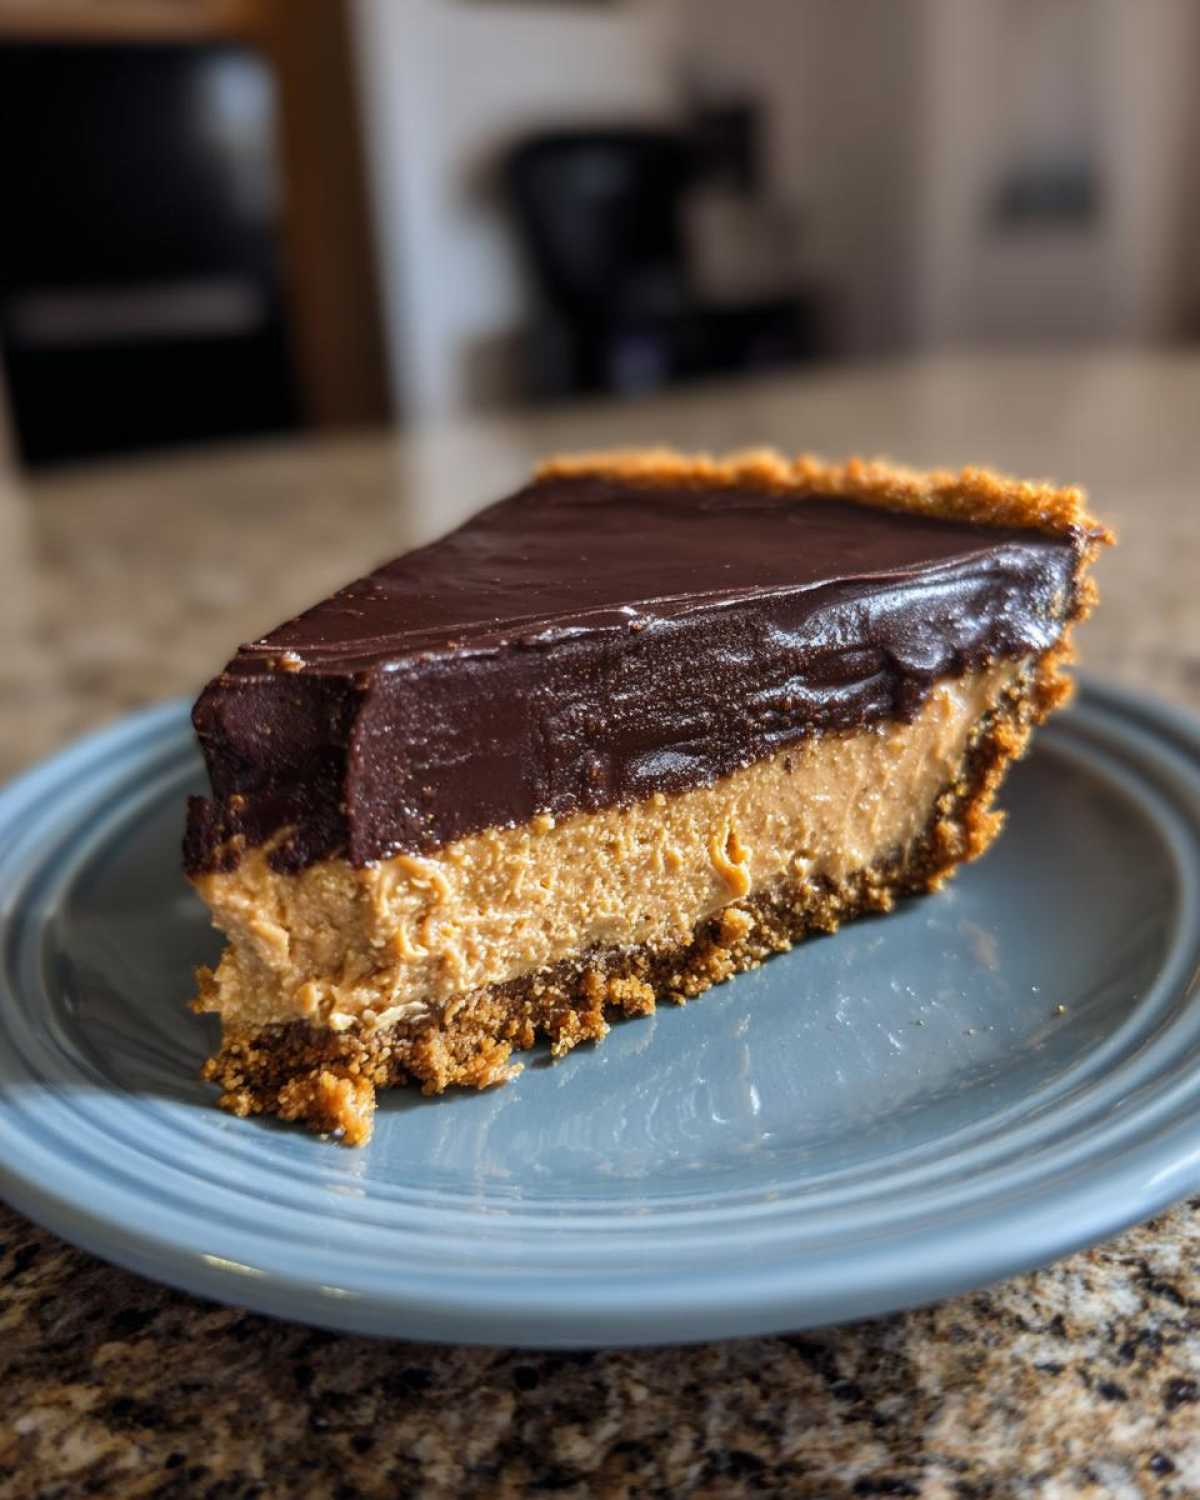
And for the topping? Forget keeping it simple! If you’re a huge fan of those little peanut butter cups, here’s how to go full Reese’s inspired. After you pour on the warm ganache, immediately press whole or chopped-up mini peanut butter cups on top. Then, let it set! I also love drizzling on a homemade caramel sauce right before serving. For a nice textural contrast, you can gently melt some extra peanut butter with a tiny splash of vegetable oil and drizzle *that* back and forth over the chocolate layer before the final chill. Honestly, once you master the base layers, the fun really begins. If you love a good chocolate swirl, check out my recipe for chocolate caramel toffee crunch cake for more topping inspiration!
Frequently Asked Questions About Making a chocolate peanut butter pie
Even the best recipes sometimes leave little things vague, right? I get so many messages asking about texture fixes or swapping out ingredients in this **creamy chocolate peanut butter dessert**. Don’t worry one bit if you have questions; that’s why I’m here! Here are the biggest things people ask me when they are trying to achieve that perfect, luscious slice of this **ultimate chocolate PB dessert**.
Can I use natural peanut butter in this easy no bake peanut butter pie?
This is tough, honestly. My official recommendation for this specific recipe is to stick to the standard, processed, shelf-stable peanut butter—you know, the Jif or Skippy kind. Natural peanut butter tends to have much more oil that separates out when you mix it with the cream cheese and sugar. If you totally must use natural, you’ll need to stir it really, really well first to get all that separated oil back in, and you might find the texture of your **fluffy peanut butter cream pie** filling ends up slightly more oily or looser than intended. If you use it, you might need an extra 30 minutes in the freezer just to help it firm up!
How long does the chocolate peanut butter pie need to set?
This is the make-or-break moment for presentation! The recipe calls for at least four hours in the refrigerator, and yeah, that’s the minimum required time for the filling to be safe to eat. But listen to me: if you want those gorgeous, clean slices for your potluck, you absolutely need to chill it overnight. When it’s chilled for only four hours, the peanut butter layer is a bit too soft, and when you cut it, the layers tend to squish together. Letting it chill overnight makes the filling almost fudge-like and lets the chocolate layer firm up beautifully. It is worth the wait, trust me!
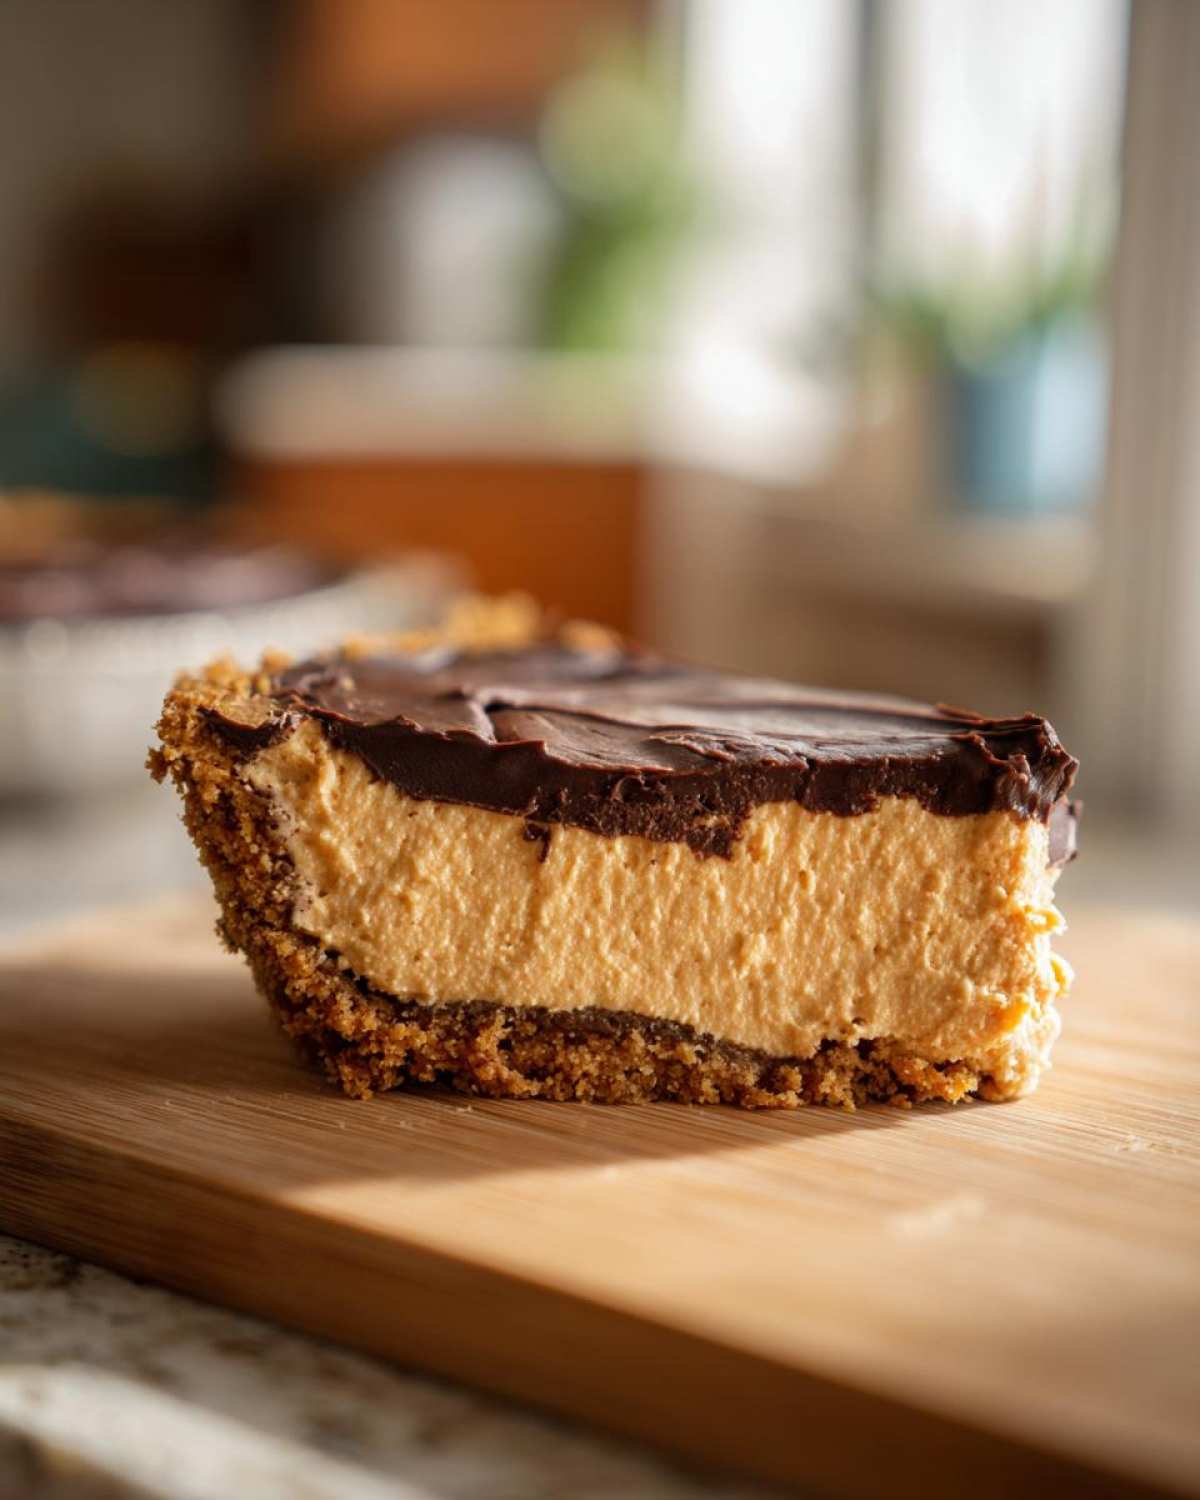
I always plan this quick dessert on a Friday so it can chill until Saturday afternoon. It’s truly the best way to guarantee that perfect presentation!
Estimated Nutritional Information for this creamy chocolate peanut butter dessert
Now, I know what some of you health nuts (and, let’s be real, I’m a health nut half the time!) are thinking when they see a rich, decadent pie like this. Yes, this **chocolate peanut butter indulgence** is certainly a treat, not an everyday meal, but it’s good to know what you’re getting into! I took the standard ingredient measurements and ran the numbers so you have a general idea of the breakdown per slice.
Please remember, these numbers are just estimates, okay? They totally depend on the brands of peanut butter, the exact amount of sugar you use in the crust, and how generous you are with those optional toppings like chopped peanuts or those amazing mini Reese’s cups. I calculate this information to be transparent, but this is meant to be an occasional, indulgent sweet treat!
Here is a ballpark estimate for one slice of the pie, using the core recipe without extra garnishes:
- Serving Size: 1 slice
- Calories: Around 450
- Fat: About 30g (Remember a good chunk of that comes from that wonderful peanut butter and cream cheese!)
- Saturated Fat: Roughly 12g
- Carbohydrates: Around 40g
- Sugar: Approximately 35g
- Protein: Nearly 10g (Thanks to all that peanut goodness!)
- Sodium: Near 250mg
If you want to check out our full data handling policies, you can always peek at the privacy policy on the site. Enjoy this **creamy chocolate peanut butter dessert** responsibly—it’s too good to pass up!
Share Your Indulgent Sweet Treat Experience
Alright, now that you’ve got the secrets to the ultimate **chocolate peanut butter pie**, the best part is letting me know how it turned out! Did you use the graham cracker crust or did you cave and make that rich Oreo crust? Did you dust yours with peanuts, or did you go wild and chop up a whole bag of mini candy cups for the topping?
I really want to hear about your creations! When you leave a comment below, please let me know what you thought. Don’t be shy—give it a star rating so everyone knows how much you loved this **quick weeknight pie**!
If you snapped a picture of your perfect slice against that chocolate ganache, please tag me on social media! Seeing your **make ahead dessert** come out perfectly set always makes my day. It means so much that you’re bringing this recipe into your home. If you ran into any trouble, or if you have a brilliant modification, fire away! I’m always checking my messages. You can even send a note through the contact page if you have a private question about getting that filling just right.
Happy baking (or, well, *not* baking)! Enjoy every single decadent bite of this.
PrintNo-Bake Chocolate Peanut Butter Pie

You can make this rich, creamy, no-bake pie with a simple graham cracker crust. It features a fluffy peanut butter filling topped with a smooth chocolate layer.
- Prep Time: 25 min
- Cook Time: 0 min
- Total Time: 4 hr 25 min
- Yield: 8 servings
- Category: Dessert
- Method: No-Bake
- Cuisine: American
- Diet: Vegetarian
Ingredients
- 1 1/2 cups graham cracker crumbs
- 1/4 cup granulated sugar (for crust)
- 6 tablespoons unsalted butter, melted (for crust)
- 1 cup creamy peanut butter
- 8 ounces cream cheese, softened
- 1 cup powdered sugar
- 1 teaspoon vanilla extract
- 1 cup heavy whipping cream, cold (for filling)
- 1 cup semi-sweet chocolate chips
- 1/2 cup heavy whipping cream (for ganache)
- 1 tablespoon unsalted butter (for ganache)
- Whipped cream, chopped peanuts, or mini peanut butter cups for topping (optional)
Instructions
- Prepare the crust: Mix graham cracker crumbs, 1/4 cup sugar, and melted butter until combined. Press the mixture firmly into the bottom and up the sides of a 9-inch pie plate. Chill for 15 minutes.
- Make the peanut butter filling: In a large bowl, beat the peanut butter, softened cream cheese, powdered sugar, and vanilla extract until smooth.
- In a separate bowl, whip 1 cup of cold heavy cream until stiff peaks form. Gently fold the whipped cream into the peanut butter mixture until just combined.
- Spread the peanut butter filling evenly over the chilled crust. Place the pie in the freezer while you prepare the topping, about 15 minutes.
- Make the chocolate topping: Place chocolate chips and 1/2 cup heavy cream in a microwave-safe bowl. Microwave in 30-second intervals, stirring between each, until smooth. Stir in 1 tablespoon of butter until fully incorporated.
- Pour the warm chocolate mixture over the peanut butter layer. Gently spread to cover the entire surface.
- Refrigerate the pie for at least 4 hours, or until the filling is firm.
- Before serving, top with whipped cream, chopped peanuts, or other desired garnishes. Slice and serve cold.
Notes
- If you prefer an Oreo crust, substitute 1 3/4 cups of finely crushed Oreo cookies (filling removed) for the graham cracker crumbs.
- For a thicker, richer chocolate topping, use 1 cup of semi-sweet chocolate chips and only 1/4 cup of heavy cream for the ganache.
- You can make this pie one day ahead. Keep it covered in the refrigerator.
Nutrition
- Serving Size: 1 slice
- Calories: 450
- Sugar: 35
- Sodium: 250
- Fat: 30
- Saturated Fat: 12
- Unsaturated Fat: 18
- Trans Fat: 0
- Carbohydrates: 40
- Fiber: 2
- Protein: 10
- Cholesterol: 55