

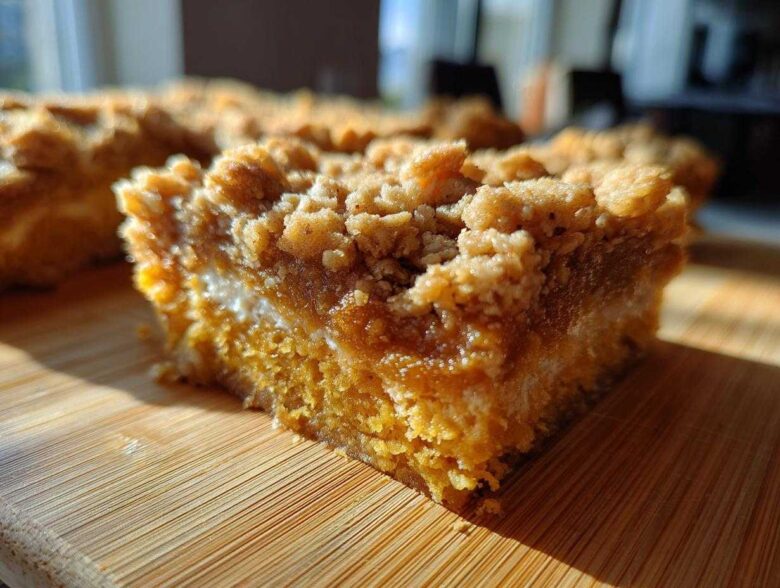
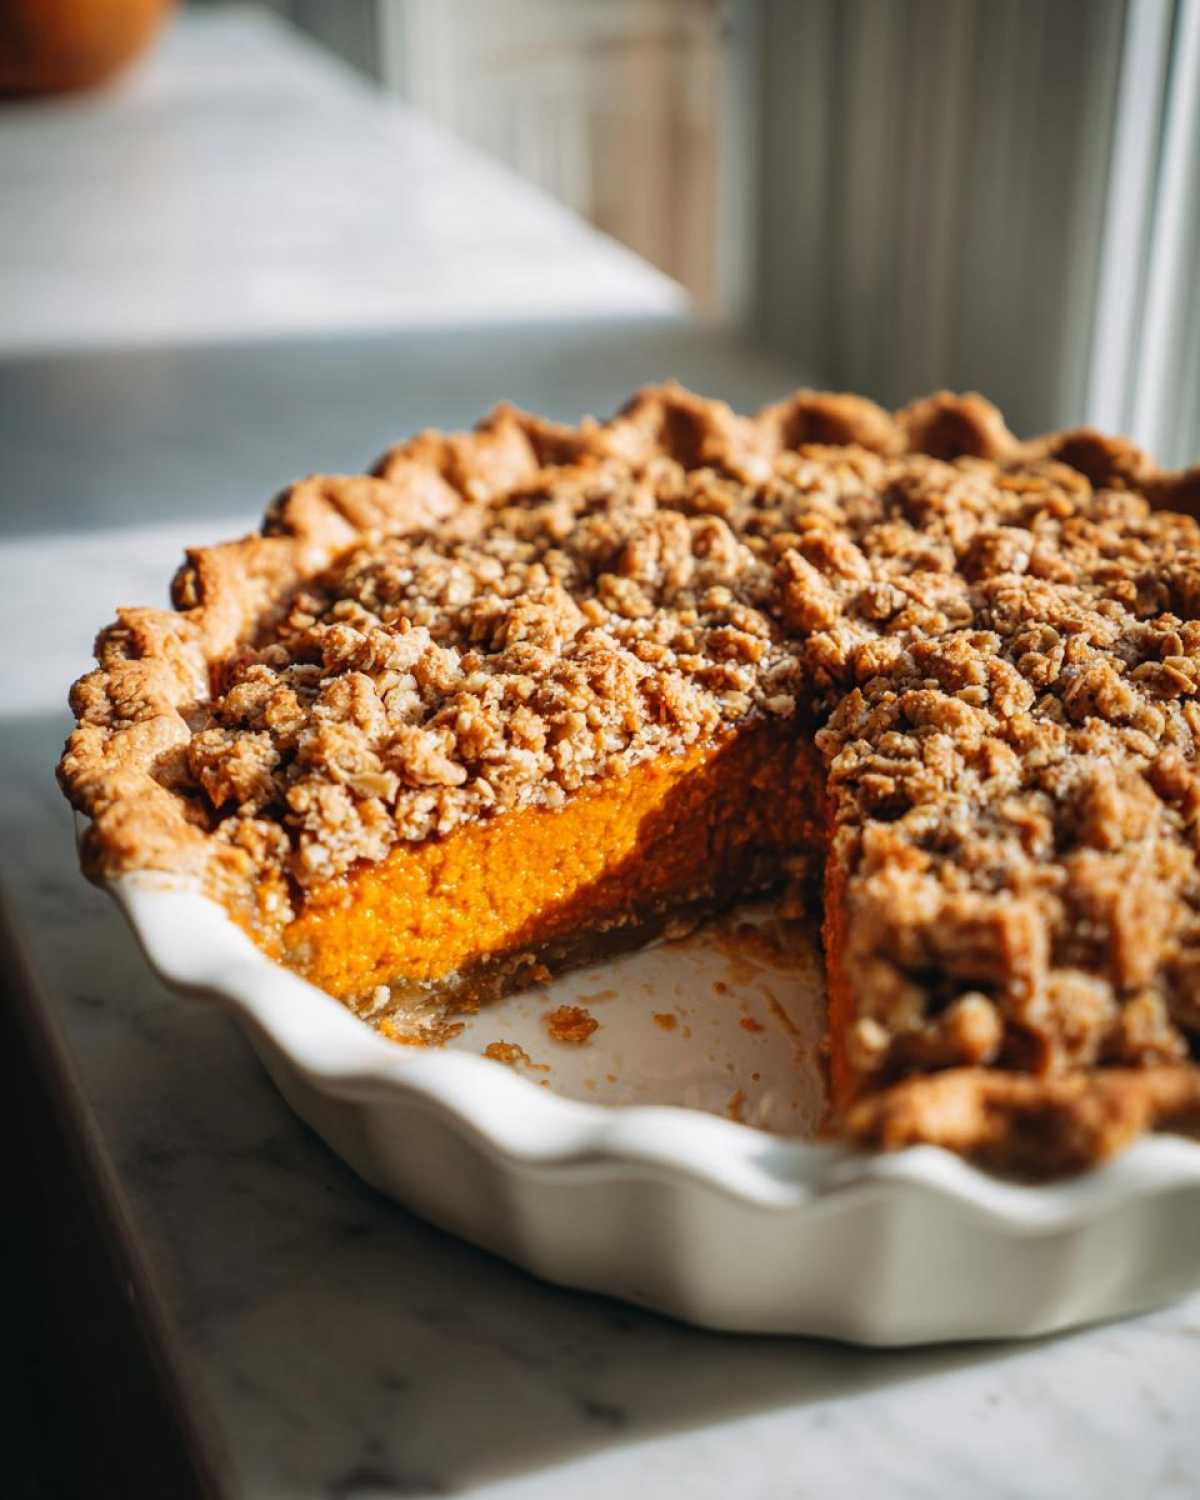
Oh boy, when that first crisp autumn breeze hits, I immediately dive headfirst into everything pumpkin spice! I swear, I’ve made every single seasonal dessert under the sun over the years, from complicated layered cakes to fussy pies that just decide to fall apart when you look at them wrong. But you know what always wins? My incredibly easy pumpkin crisp. Seriously, if you’re craving that classic comforting pumpkin flavor without wrestling with a pie crust, this is your answer. It’s my go-to for Thanksgiving when the oven is already packed, and believe me, that contrast between the incredibly smooth, spiced pumpkin filling and that crunchy, buttery oat topping? It’s just pure magic. You won’t believe how simple this is, and I’ve shared the secret to getting that topping just right over at my no-bake pumpkin pie guide if you need even more inspiration!
Why This Easy Pumpkin Crisp Recipe is a Fall Favorite
Picking a pumpkin crisp over pie used to feel like a compromise, but not anymore! This simple recipe proves you can have all those cozy fall flavors faster. If you’re looking for the absolute best fall dessert recipes, this one checks every box.
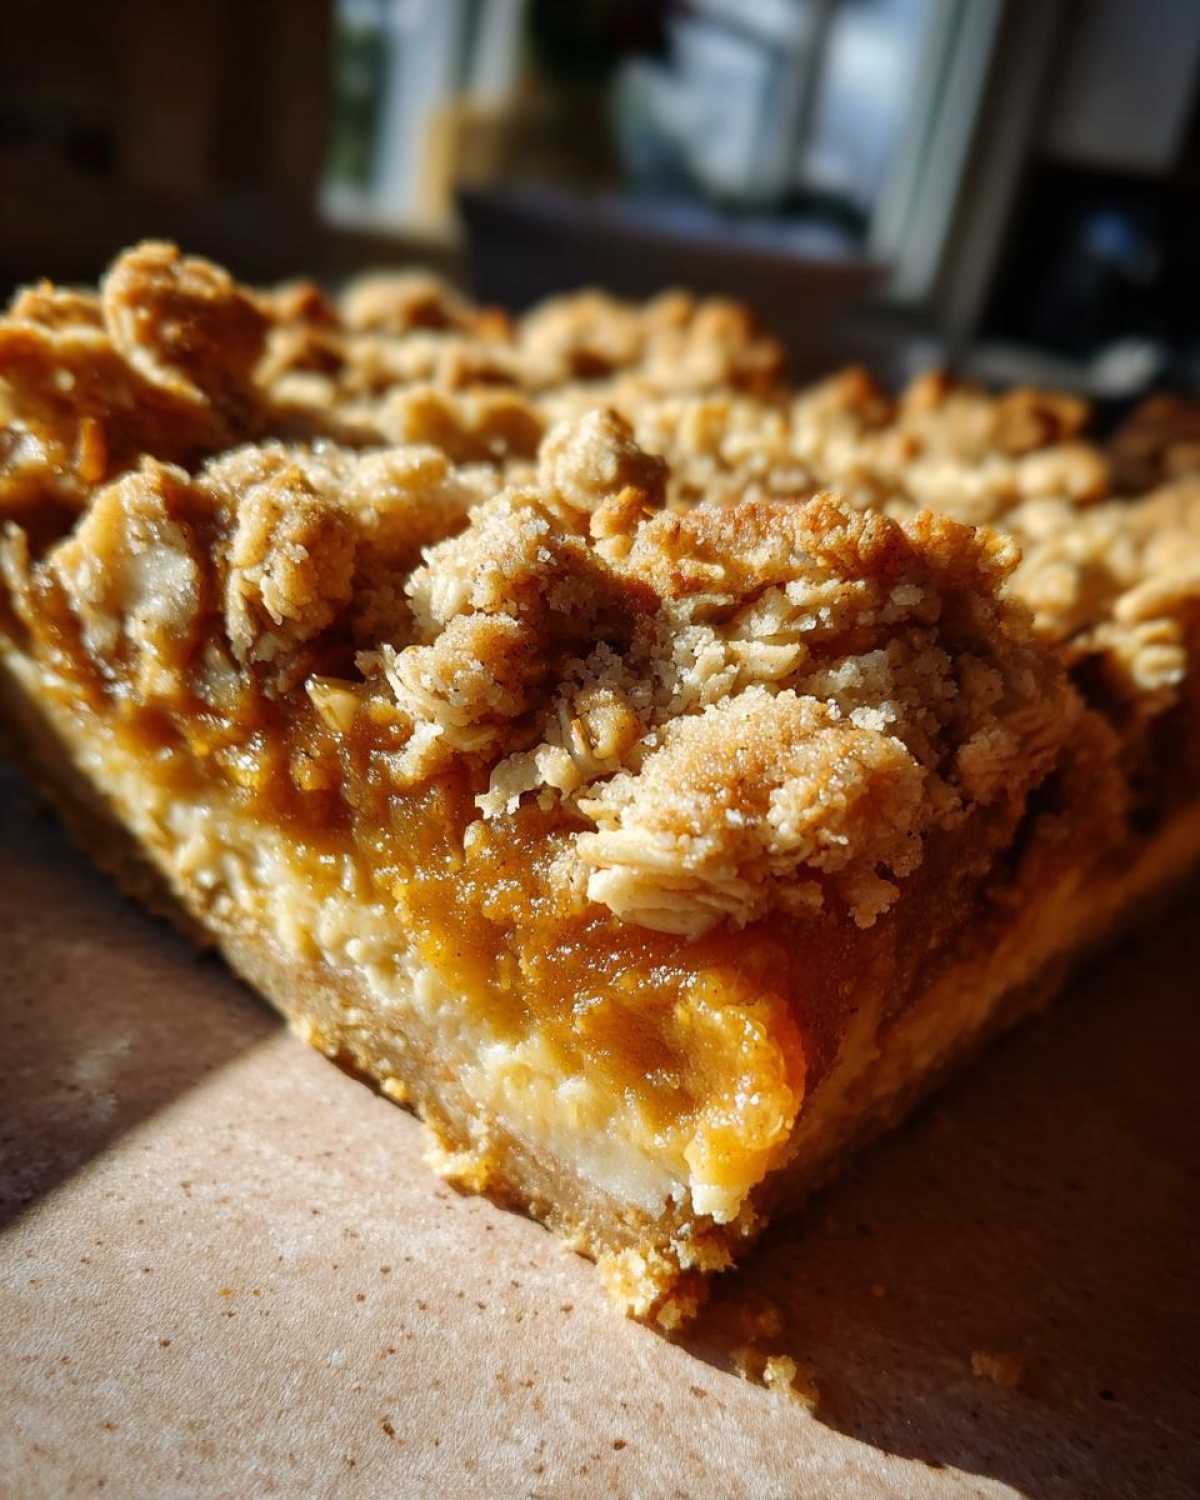
- It’s a perfect no-pie pumpkin dessert—no blind baking needed!
- The sweet, spiced pumpkin filling is luxurious.
- It uses incredibly basic pantry staples.
Quick Prep Time for Your Pumpkin Crisp
Listen, I have zero patience when fall hits and I need dessert *now*. That’s why I love this so much. You can genuinely have this assembled in less than 10 minutes! That amazing speed makes it perfect for quick fall baking when you decide last minute you need a warm treat.
Superior Texture: Creamy Filling Meets Buttery Oat Topping
This is where the magic happens, honestly. You get this unbelievably silky, creamy pumpkin layer underneath the most satisfying crunch. That buttery oat topping achieves the perfect chew and crispness every single time. It’s the ultimate textural dream!
Gathering Ingredients for Your Spiced Pumpkin Filling
Okay, let’s get down to the good stuff—the ingredients! I want you to gather everything before you even think about turning the oven on. This pumpkin crisp recipe is so streamlined, which means having everything ready to go is the key to that 10-minute prep time. We’re talking two main components here: the filling and the topping. Don’t panic about measuring; we’re keeping things super simple.
Here’s what you need for this ultimate autumn bake:
- 1 (15 ounce) can pumpkin puree
- 1 (14 ounce) can sweetened condensed milk
- 2 large eggs
- 1 teaspoon ground cinnamon
- 1/2 teaspoon ground nutmeg
- 1/4 teaspoon ground ginger
- 1/4 teaspoon salt
- 1/2 cup all-purpose flour
- 1/2 cup packed light brown sugar
- 1/2 cup old-fashioned rolled oats
- 1/2 cup cold unsalted butter, cut into small pieces
Ingredient Notes for the Perfect Pumpkin Crisp
Listen, the quality of your pumpkin matters more in a crisp than in a pie because there’s no fussy crust to hide behind! First rule: You absolutely must use pumpkin puree—the plain kind—not the pre-sweetened pumpkin pie filling. That canned filling is already spiced up and sweetened for you, and it will make this crisp way too sweet and gooey.
Also, if your spice cabinet is looking a little bare, don’t sweat it! I keep a jar of my favorite pumpkin spice mix on hand. You can easily use about 2 teaspoons of your favorite store-bought mix instead of measuring out the separate cinnamon, nutmeg, and ginger. It saves time, and honestly, the flavor blends perfectly into that creamy spiced pumpkin layer. Just make sure that butter for the topping stays ice cold—that’s a non-negotiable if you want that crunchy topping!
How to Make Pumpkin Crisp: Step-by-Step Instructions
Alright, let’s tackle the assembly! Learning exactly how to make pumpkin crisp is seriously less involved than folding a fitted sheet, I promise. We’re moving fast because the oven needs to be ready to go. Remember, we’re heading for that perfect rich filling and that amazing golden crust. This whole process moves quickly, so have your spoon ready!
Preparing the Creamy Spiced Pumpkin Filling
First things first: get that oven humming at 350 degrees F! And grab an 8×8 inch baking dish—that’s the perfect size for this recipe. If you use anything bigger, your filling will bake too thin, and you won’t get that decadent texture we want.
Next, grab a good medium bowl. We’re just whisking this filling together, no fancy stand mixer required! Combine your pumpkin puree, the sweet condensed milk, those two eggs, and all those beautiful spices—cinnamon, nutmeg, and ginger—plus a little pinch of salt. Whisk it until it looks completely smooth and uniform. You don’t want any streaks of white milkiness! Once it’s glossy and uniform, pour that glorious spiced mixture right into your greased 8×8 dish. Simple!
Achieving the Best Buttery Oat Topping for Your Pumpkin Crisp
Now for the star of the show: that crunchy layer! In a separate, smaller bowl, we mix the dry stuff for the topping first—that’s your flour and your light brown sugar. Make sure that brown sugar is packed in well! You want that molasses flavor working for you.
This next step is critical for the best pumpkin crisp topping, so listen up! You need to cut in the cold butter. If your butter is soft, the topping will just dissolve into the filling, and we don’t want mush! Use a pastry blender if you have one—it makes the job super quick. If you don’t have one, trust me, your clean, cold fingertips work just as well. Mash and squeeze the butter into the sugar and flour until it looks like coarse, delicious pebbles. Then, stir in those rolled oats. You want the topping to look crumbly, not like dough—those little butter clumps are what turn golden and crispy in the oven!
Baking Times and Setting the Pumpkin Crisp
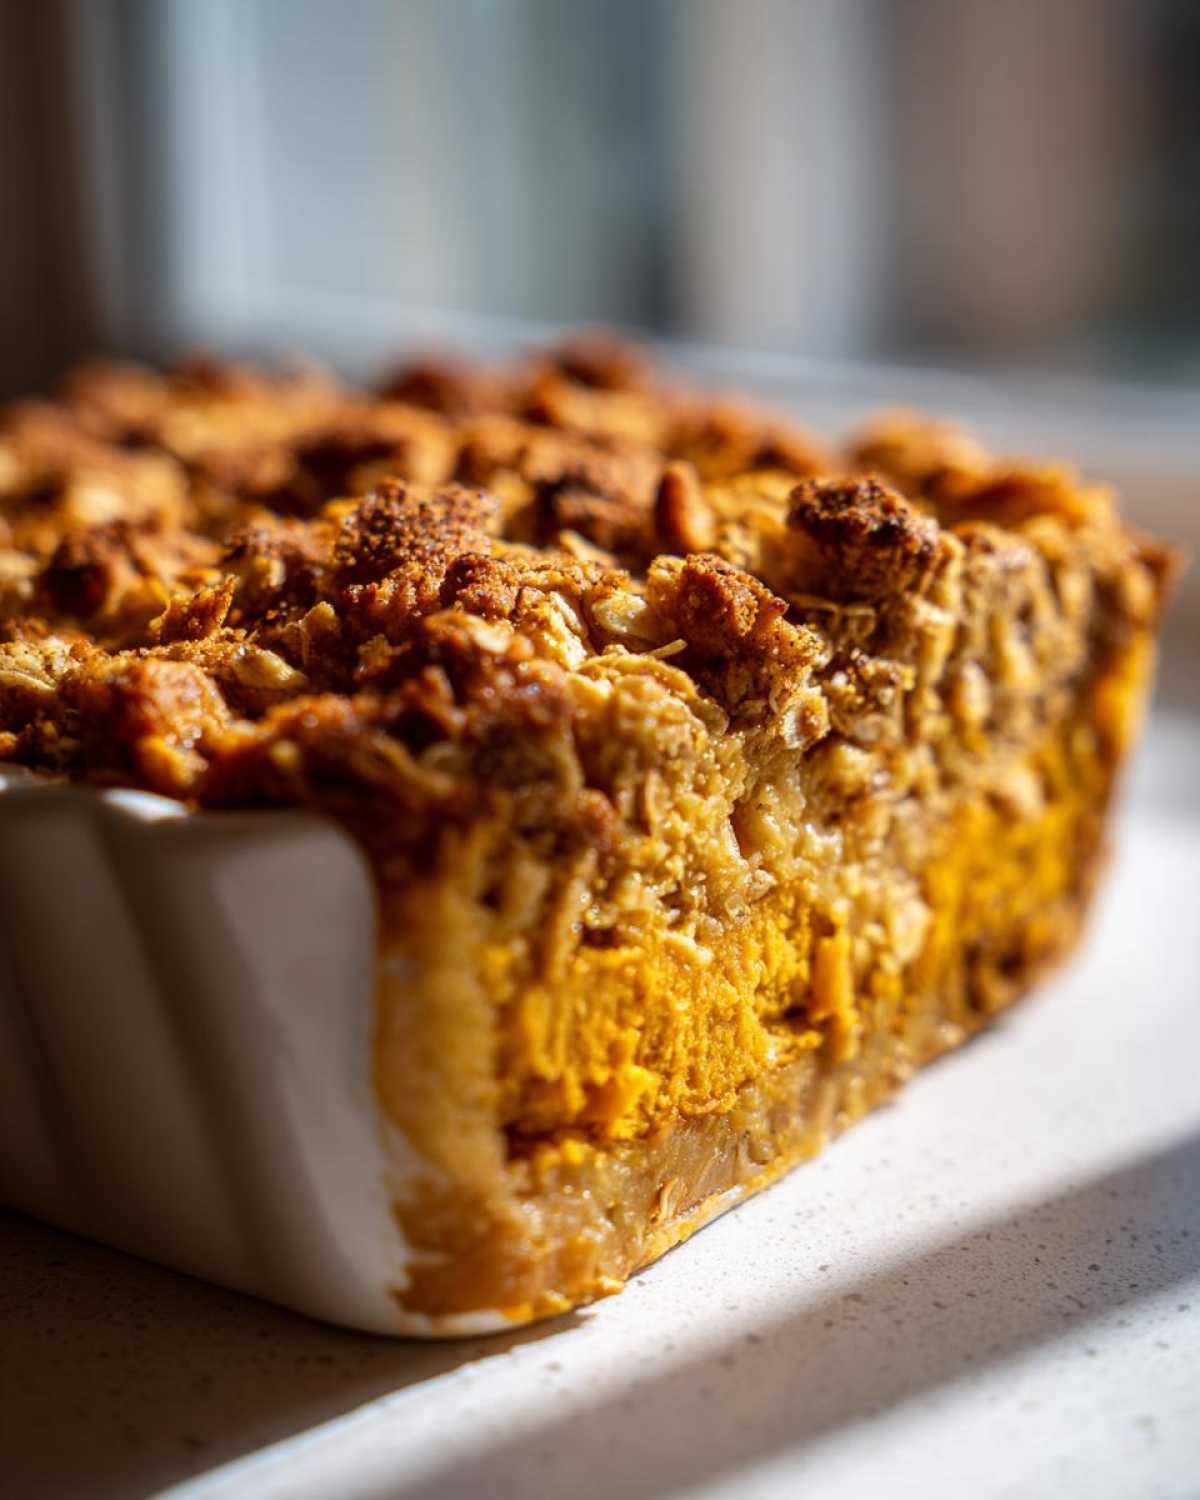
Once everything is assembled—filling down below, glorious crumble scattered evenly over the top—it’s time for the oven. Pop that 8×8 dish into your preheated 350-degree oven. It generally takes between 40 and 45 minutes. You’ll know it’s done because that oat topping will be gorgeously golden brown, and when you gently shake the pan (carefully, please!), the center of the pumpkin filling shouldn’t look watery anymore; it should look set.
My biggest tip? Don’t slice into it right away! This sweet, spiced dessert really needs about 20 minutes to cool down on a wire rack. This resting time is crucial because it allows the filling to firm up properly so you can scoop out nice, clean portions when you’re ready to serve.
Tips for the Best Ever Pumpkin Crisp
I’ve learned a few things over the years making this pumpkin crisp—mostly from my own kitchen disasters! The most important technique, which I always stress, is keeping the butter for that topping absolutely rock-solid cold. If you skip that, you end up with a soggy, buttery puddle instead of those beautiful crisp clusters.
I remember one year, I got distracted and left the butter out too long; the resulting crisp was awful! Now, I even chill my flour if the kitchen is warm. Also, don’t rush that resting period after it comes out of the oven. It feels like torture when you want that warm dessert immediately, but giving it 20 minutes on the cooling rack lets that creamy filling set up. Those little moments of patience are what separate a good pumpkin crisp from the one everyone asks for year after year. For more of my favorite baking insights, check out what else I’m up to on my main baking blog page!
Serving Suggestions for Your Warm Dessert Ideas
Okay, the hardest part is over—your incredible pumpkin crisp is baked, it smells like heaven, and it has cooled just enough to serve! Now comes the fun part: deciding how to enjoy this masterpiece. This really shines as one of those ultimate warm dessert ideas because the contrast in temperatures and textures is everything. Trust me, you never want to serve this cold!
When considering how to serve pumpkin crisp, you have two champion paths, both of which are noted in my recipe instructions:
- The Classic A La Mode: You simply cannot beat slightly warmed pumpkin crisp topped with a generous scoop of vanilla ice cream. As the ice cream melts down into the spiced filling and mixes with the buttery oat topping, it creates this divine, slightly saucy bite. It’s my personal favorite way to eat it, especially straight from the oven.
- The Whipped Dream: If you’re feeling a little lighter, a dollop of real whipped cream is perfect. I sometimes sweeten mine just a touch, but honestly, the natural sweetness of the crisp doesn’t need much help! The cream offers a lovely, cool fluffiness against the spice.
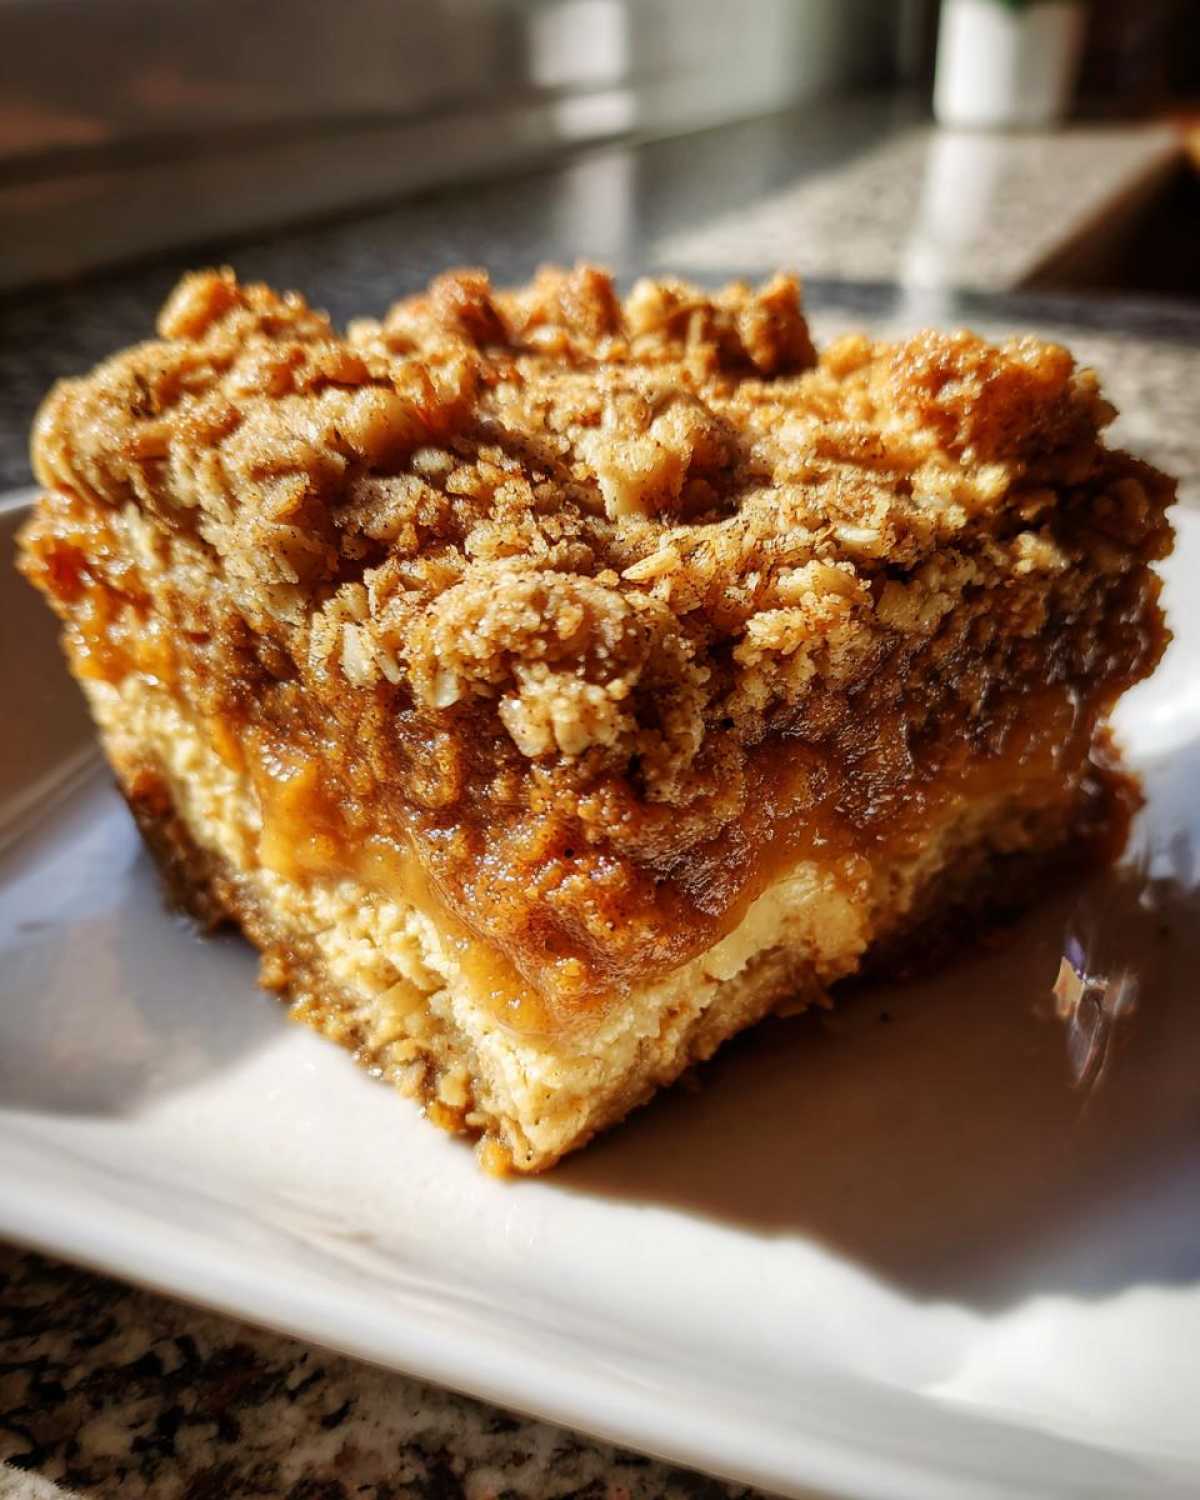
For special occasions like Thanksgiving, I like to serve this right out of the baking dish so everyone can see that beautiful golden topping. If you’re taking it to a party, just bring the dish and let people customize their scoops! It always disappears first, I promise you that.
Storage and Reheating Instructions for Leftover Pumpkin Crisp
I hate to admit it, but sometimes my family can’t finish an entire batch of pumpkin crisp in one go (shocking, I know!). The good news is that this dessert travels beautifully into the next day, and it’s just as delicious for breakfast, which is my secret vice!
When you have leftovers, you need to treat them right so that oat topping doesn’t get sad and soft. The key here is airtight storage. Once the crisp has cooled completely—and I mean *completely*, don’t rush this part—cover your 8×8 dish tightly with plastic wrap, or better yet, transfer the slices into an airtight container. You can keep it stored in the refrigerator for up to four days. It holds up really well, though the topping naturally softens a bit down the line.
Now for the important part: reheating! Nobody likes a cold, mushy topping, right? If you try to microwave this, you’re going to steam that topping into oblivion, and it won’t be a pumpkin crisp anymore; it’ll just be warm pudding. So, skip the microwave if crispness is important to you!
The best way to revive that beautiful crunch is to use the oven. Preheat your oven (or toaster oven) to about 325 degrees F. Place a serving or two on a small baking sheet lined with foil. Pop it in for just about 8 to 10 minutes. You just want to warm the filling through and let any residual moisture escape the topping. It comes out perfectly golden again! If you need more tips on preparing big batches of cozy winter treats, feel free to check out my recipe for an easy homemade hot cocoa mix; sometimes a warm drink is the perfect accompaniment to a leftover slice of crisp!
Frequently Asked Questions About Pumpkin Crisp
I totally get it; sometimes you just need a quick confirmation before diving into a recipe, especially when planning for big holidays like Thanksgiving pumpkin dessert events! Here are some of the questions I get most often about the pumpkin crisp. If you still have doubts, drop them in the comments below!
Can I make this pumpkin crisp recipe ahead of time?
Oh, yes! This is one of the best things about using a crisp format for your holiday baking inspiration. You have two options, and both work beautifully. You can mix up the base filling and the topping separately, keep them airtight in the fridge for up to two days, and then assemble and bake them fresh when you’re ready.
If you bake the whole thing beforehand, that’s fine too! Just let it cool completely, cover it well, and refrigerate. When you want to serve it, use my reheating tip from the previous section—a short blast in a warm oven (325°F) will revive the topping and warm the filling right up. It’s a major stress reducer!
What is the difference between pumpkin crisp and pumpkin crumble?
Honestly, when I’m whipping up these cozy comfort food desserts, these terms are totally interchangeable! For my pumpkin crisp recipe, the crucial defining element is that topping. Since we use rolled oats, flour, brown sugar, and butter, that texture is precisely what makes it a crisp.
Some bakers define a crumble as having more oats and a crisp as having more flour, or vice versa, but for the home cook, they both mean the same glorious thing: a dreamy, buttery oat topping layered over a soft, spiced fruit or pumpkin base. If you search for a pumpkin crumble recipe anywhere else, you’re going to find something very, very similar to this!
Isn’t this just pumpkin pie without the crust?
That’s exactly right! If you love the creamy, spicy texture of a classic pumpkin pie filling but dread making and handling that delicate pastry crust, then this pumpkin crisp is your answer! You get all that luscious spiced flavor without worrying about a flaky bottom. It’s definitely one of my favorite better than pie desserts for that reason alone. And since this filling sets up beautifully thanks to the eggs and condensed milk, you get a structurally sound dessert you can scoop easily!
Can I use fresh pumpkin instead of canned puree?
You certainly can, and I admire your dedication! Using fresh pumpkin—say, roasting a few sugar pumpkins until tender and then pureeing them—gives you the freshest possible flavor. However, freshly roasted pumpkin usually has a higher water content than canned puree. If you go this route, make sure you roast it until it’s very dry, or even cook it down a bit on the stovetop to evaporate some of that extra liquid. Otherwise, your pumpkin crisp filling might stay a touch too thin and won’t set up as firmly as it should. Stick with canned puree for the quickest, most reliable results, especially if you’re after that 10-minute prep!
Nutritional Estimates for This Fall Dessert Recipe
Now, I know some of you are eyeing this glorious dessert thinking about macros, and hey, I get it! Since this pumpkin crisp is loaded with sweet condensed milk and butter in that topping, it’s definitely an indulgence, but hey, it’s fall, right? We’re all about comfort food desserts this time of year!
I ran these standard ingredients through my calculator, and here are the general estimates per serving (assuming this recipe yields 6 servings, as noted). Remember, these figures are just a guide. If you use low-fat milk instead of condensed milk, or switch out the butter, your numbers will change!
- Serving Size: 1 serving
- Calories: Around 380 per slice
- Sugar: Roughly 35 grams (That’s where the sweetness comes from!)
- Fat: 19 grams total
- Saturated Fat: About 11 grams
- Carbohydrates: 48 grams
- Protein: 8 grams
- Sodium: 210 mg
It’s important to note that this recipe does contain a decent amount of sugar due to the sweetened condensed milk playing such a vital role in creating that creamy center. That’s what makes it such a fantastic, rich finish to a big meal! Portion control is key when diving into these amazing seasonal dessert favorites.
Share Your Perfect Pumpkin Crisp Experience
Well, there you have it—the easiest, creamiest, and crunchiest pumpkin crisp recipe you’ll find anywhere! It’s officially time for you to get baking, and I truly can’t wait to hear what you think. Did you top it with my favorite melting vanilla ice cream? Did you experiment with a sprinkle of pecans in that buttery oat topping?
Once you get this in your oven, please come back here and leave a star rating! It helps other folks know this is the real deal for Thanksgiving pumpkin dessert planning. If you made any little tweaks that you think I should know about, drop those in the comments too—we bakers love sharing our kitchen secrets!
And please, if you snap a picture of your beautiful golden-brown masterpiece, share it on social media! Tag me so I can see how amazing your pumpkin crisp turned out. Seriously, tag me! Showing off your delicious results keeps me inspired to share more of my family’s favorite comfort food desserts. Happy baking this fall, my friends!
PrintEasy Pumpkin Crisp with Buttery Oat Crumble

Make this simple pumpkin crisp for a comforting fall dessert that features a creamy, spiced pumpkin filling topped with a buttery, crunchy oat crumble. It is easier than making a traditional pumpkin pie.
- Prep Time: 10 min
- Cook Time: 45 min
- Total Time: 55 min
- Yield: 6 servings
- Category: Dessert
- Method: Baking
- Cuisine: American
- Diet: Vegetarian
Ingredients
- 1 (15 ounce) can pumpkin puree
- 1 (14 ounce) can sweetened condensed milk
- 2 large eggs
- 1 teaspoon ground cinnamon
- 1/2 teaspoon ground nutmeg
- 1/4 teaspoon ground ginger
- 1/4 teaspoon salt
- 1/2 cup all-purpose flour
- 1/2 cup packed light brown sugar
- 1/2 cup old-fashioned rolled oats
- 1/2 cup cold unsalted butter, cut into small pieces
Instructions
- Preheat your oven to 350 degrees F. Lightly grease an 8×8 inch baking dish.
- In a medium bowl, whisk together the pumpkin puree, sweetened condensed milk, eggs, cinnamon, nutmeg, ginger, and salt until smooth. Pour this filling into the prepared baking dish.
- In a separate small bowl, combine the flour and brown sugar for the topping.
- Cut in the cold butter using a pastry blender or your fingers until the mixture resembles coarse crumbs. Stir in the rolled oats.
- Sprinkle the oat mixture evenly over the pumpkin filling.
- Bake for 40 to 45 minutes, or until the topping is golden brown and the filling is set.
- Let the crisp cool on a wire rack for at least 20 minutes before serving.
Notes
- Serve warm with a scoop of vanilla ice cream or a dollop of whipped cream for the best texture contrast.
- You can substitute pumpkin pie spice mix for the individual spices listed.
- This dessert is excellent for Thanksgiving gatherings.
Nutrition
- Serving Size: 1 serving
- Calories: 380
- Sugar: 35
- Sodium: 210
- Fat: 19
- Saturated Fat: 11
- Unsaturated Fat: 8
- Trans Fat: 0
- Carbohydrates: 48
- Fiber: 2
- Protein: 8
- Cholesterol: 65