

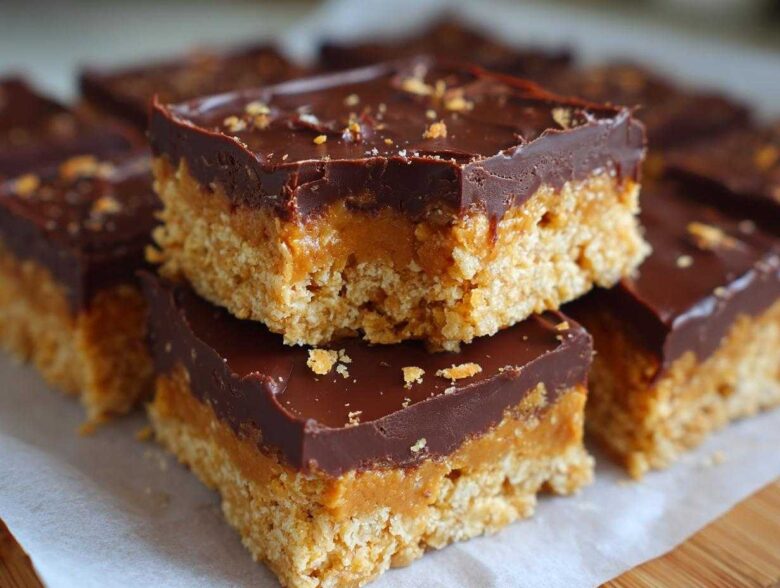
Oh my goodness, are you tired? Because I am often exhausted by the time 4 PM rolls around, and that’s when the sweet craving hits hardest! When you need a huge hit of satisfaction without turning on the oven even for a second, you know I have the answer. You absolutely MUST try my recipe for the Ultimate No-Bake Chocolate Peanut Butter Oatmeal Bars. They are pure magic! These things come together faster than you can decide what streaming service to watch.
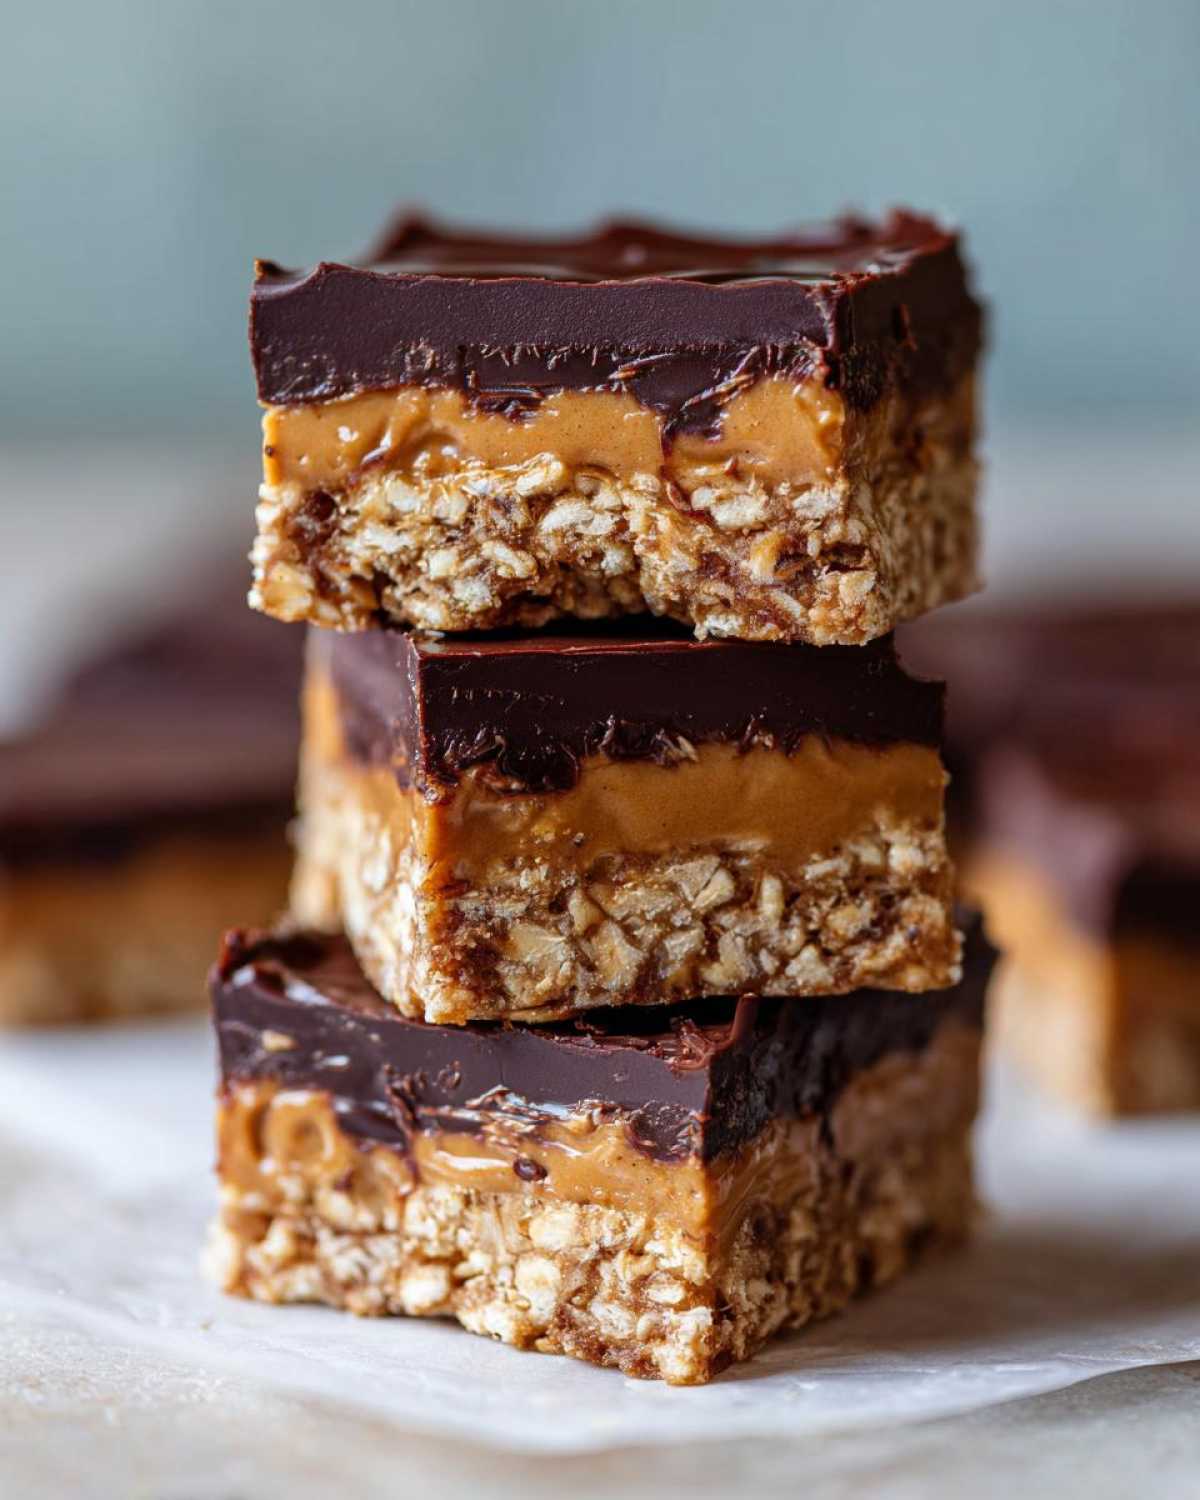
I’m not kidding, these are the best No-Bake Chocolate Peanut Butter Oat Bars you will ever find. They remind me so much of those lunch counter treats we used to sneak as kids, but way better because I know exactly what’s in them. We’re talking a chewy, slightly dense oat base, a thick layer of creamy peanut butter filling, and a silky chocolate topping that just melts in your mouth. You don’t need to be a baker; you just need a mixing bowl and 15 minutes! I promise, they basically disappear the moment they set.
If you want to see another amazing no-bake treat perfect for that afternoon slump, check out my recipe for those throwback Lunch Lady Peanut Butter Bars. But first, let’s get these oat bars into the fridge!
Why You Will Crave These No-Bake Chocolate Peanut Butter Oat Bars
Seriously, what’s not to love about a dessert that delivers big flavor without the fuss? These bars nail every single craving check box. They’re super fast, incredibly satisfying, and they look way fancier than the five minutes of effort they actually take. Trust me, once you try these, they’ll become your go-to quick chocolate snack recipe for busy weeks.
- They are truly a no-oven situation! Total win for summer cooking or when you just don’t feel like heating up the kitchen.
- The texture combo is unbeatable: that firm, chewy oat base contrasting with the soft, almost fudgy peanut butter middle.
- They are perfect for making ahead; in fact, they taste better after a full day in the fridge! Great for meal prepping snacks.
- We use simple pantry staples here. No fancy ingredients needed for this easy no bake dessert.
- They pack up beautifully for lunchboxes, picnics, or quick energy boosts. They’re basically homemade candy bars without the baking!
- The classic, dreamy combination of salty peanut butter and sweet, rich chocolate is always a winner.
If you’re looking for other easy, handheld energy boosters, you absolutely must check out my recipe for No-Bake Peanut Butter Protein Balls—those are perfect for workouts!
Essential Ingredients for Perfect No-Bake Chocolate Peanut Butter Oat Bars
When you’re skipping the oven, every single ingredient has to pull its weight, which is why I love that this recipe is so ingredient-focused! We’re building three very distinct layers here, and I’ve listed everything below so you can grab it all at once. Don’t skimp on the quality here—especially the peanut butter! This recipe works best when you have creamy peanut butter, not the natural, drippy kind, because we need that binding power.
It’s simple stuff, honestly. You probably have most of this hanging out in your pantry right now. If you are looking for a different kind of chilled treat, my no-bake peanut butter pie uses similar creamy magic!
- For the Base: 1 1/2 cups rolled oats, 1/2 cup creamy peanut butter, 1/2 cup butter (must be melted), and 1 cup powdered sugar.
- For the Middle Layer: 1/4 cup creamy peanut butter plus 1 tablespoon coconut oil (or use butter if you don’t have oil).
- For the Chocolate Topping: 1/2 cup semi-sweet chocolate chips, melted, with 1 tablespoon coconut oil.
That’s it! You mix the base ingredients, press it down, spread the slightly warmed middle layer, and pour the chocolate over the top. Super straightforward for those simple layered dessert bars.
Step-by-Step Guide: Making Your No-Bake Chocolate Peanut Butter Oat Bars
The beauty of these No-Bake Chocolate Peanut Butter Oat Bars is just how little time this takes upfront! You finish the mixing in maybe 15 minutes, and then you let the magic happen in the fridge. Remember, our total time is just a little over two hours because of that chill time, but you can be done with the active work almost instantly. If you need a super simple chocolate fix while you wait for these to set, my recipe for Easy 3-Ingredient Chocolate Mousse is a lifesaver!
Here is how we build these beauties, layer by layer:
Preparing the Pan and Oat Base for the No-Bake Chocolate Peanut Butter Oat Bars
First things first: you have to be prepared for easy removal later! Grab an 8×8 inch baking dish. Line it with parchment paper, making sure you leave a generous overhang on two opposite sides. This overhang acts as your handles when it’s time to cut them up later, so don’t skip that part. Now for the base: combine your rolled oats, the first portion of peanut butter (the 1/2 cup), the melted butter, and the powdered sugar. Mix it really well until everything is incorporated. I mean really well. Then, press this oat mixture into the prepared pan. You need to press it down so firmly that the bottom layer of your no bake oatmeal squares recipe is almost rock hard. Use the bottom of a measuring cup to really compact it!
Creating and Spreading the Creamy Peanut Butter Layer
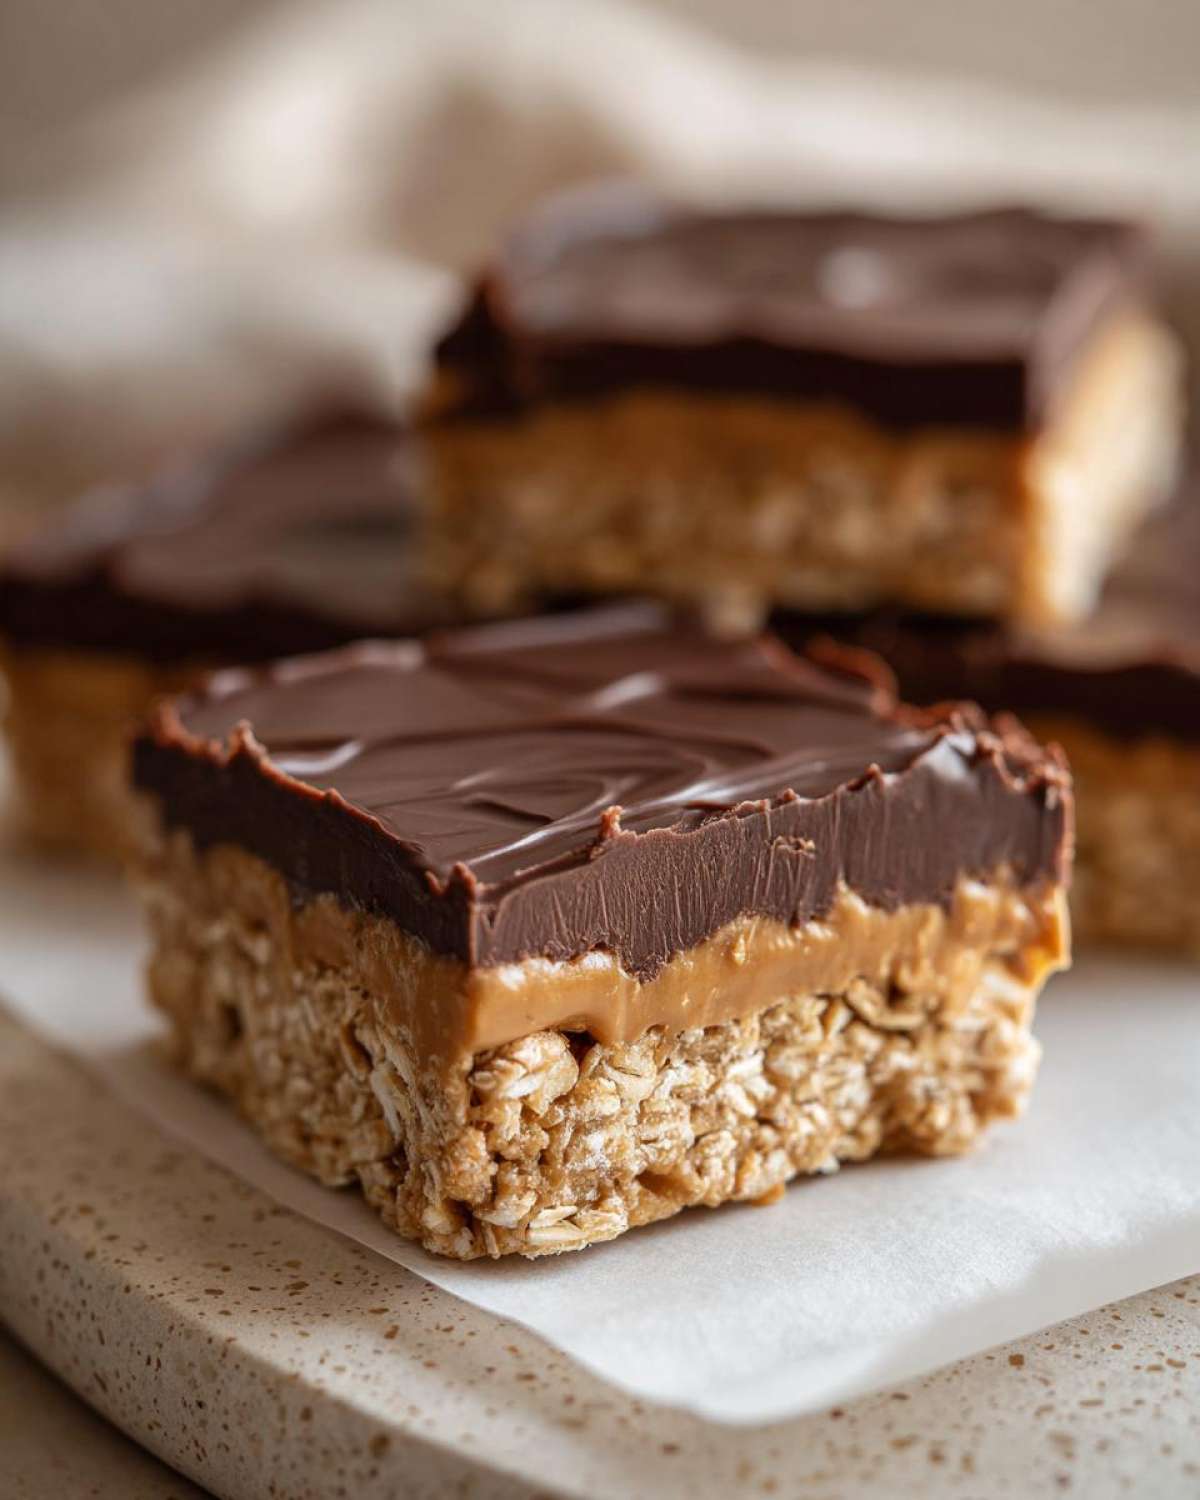
This middle layer is what separates a good bar from a great one—it adds that perfect soft ‘give’ when you bite in. For this layer, we mix the remaining 1/4 cup of peanut butter with just 1 tablespoon of coconut oil. Coconut oil helps it stay beautifully spreadable. If your peanut butter is cold and stubborn, you need to microwave this combination for about 20 to 30 seconds. It should be super smooth and glossy. Gently spread this peanut butter mixture evenly right over that packed oat base. Don’t smash it down, just spread it smoothly so you get a consistent second layer.
Finishing with the Rich Chocolate Topping and Chilling
Time for the grand finale! In a small bowl, melt down your chocolate chips with the last tablespoon of coconut oil—again, a quick zap in the microwave works wonders, stirring every 20 seconds so you don’t scorch it. When it’s perfectly liquid and shiny, pour it straight over that peanut butter layer. Use an offset spatula to spread the chocolate right to the edges, making sure you get perfect coverage. Now, the hardest part: you must let these chill in the refrigerator for a minimum of 2 hours. If you rush this, the layers will slide apart when you cut them. For the absolute best, firmest texture, leave them overnight!
Tips for Success When Making No-Bake Chocolate Peanut Butter Oat Bars
Okay, so since you aren’t actually baking these no bake energy bars recipe, you have to rely on compression and chilling power to hold everything together. That’s where technique comes in! I’ve learned a few tricks over the years that stop these beautiful bars from turning into a crumbly mess when you try to cut them. Remember, no oven means we rely on physics!
The absolute most crucial step is packing that base. Seriously, be aggressive here. When you press the oat mixture into the parchment-lined pan, use the flat bottom of a heavy measuring cup or a sturdy glass. Press down hard, moving back and forth across the entire surface. You want that base to feel dense, almost like a compressed chewable granola bar. If you leave any soft spots, the peanut butter layer will sink in, and your final bar won’t stand up straight.
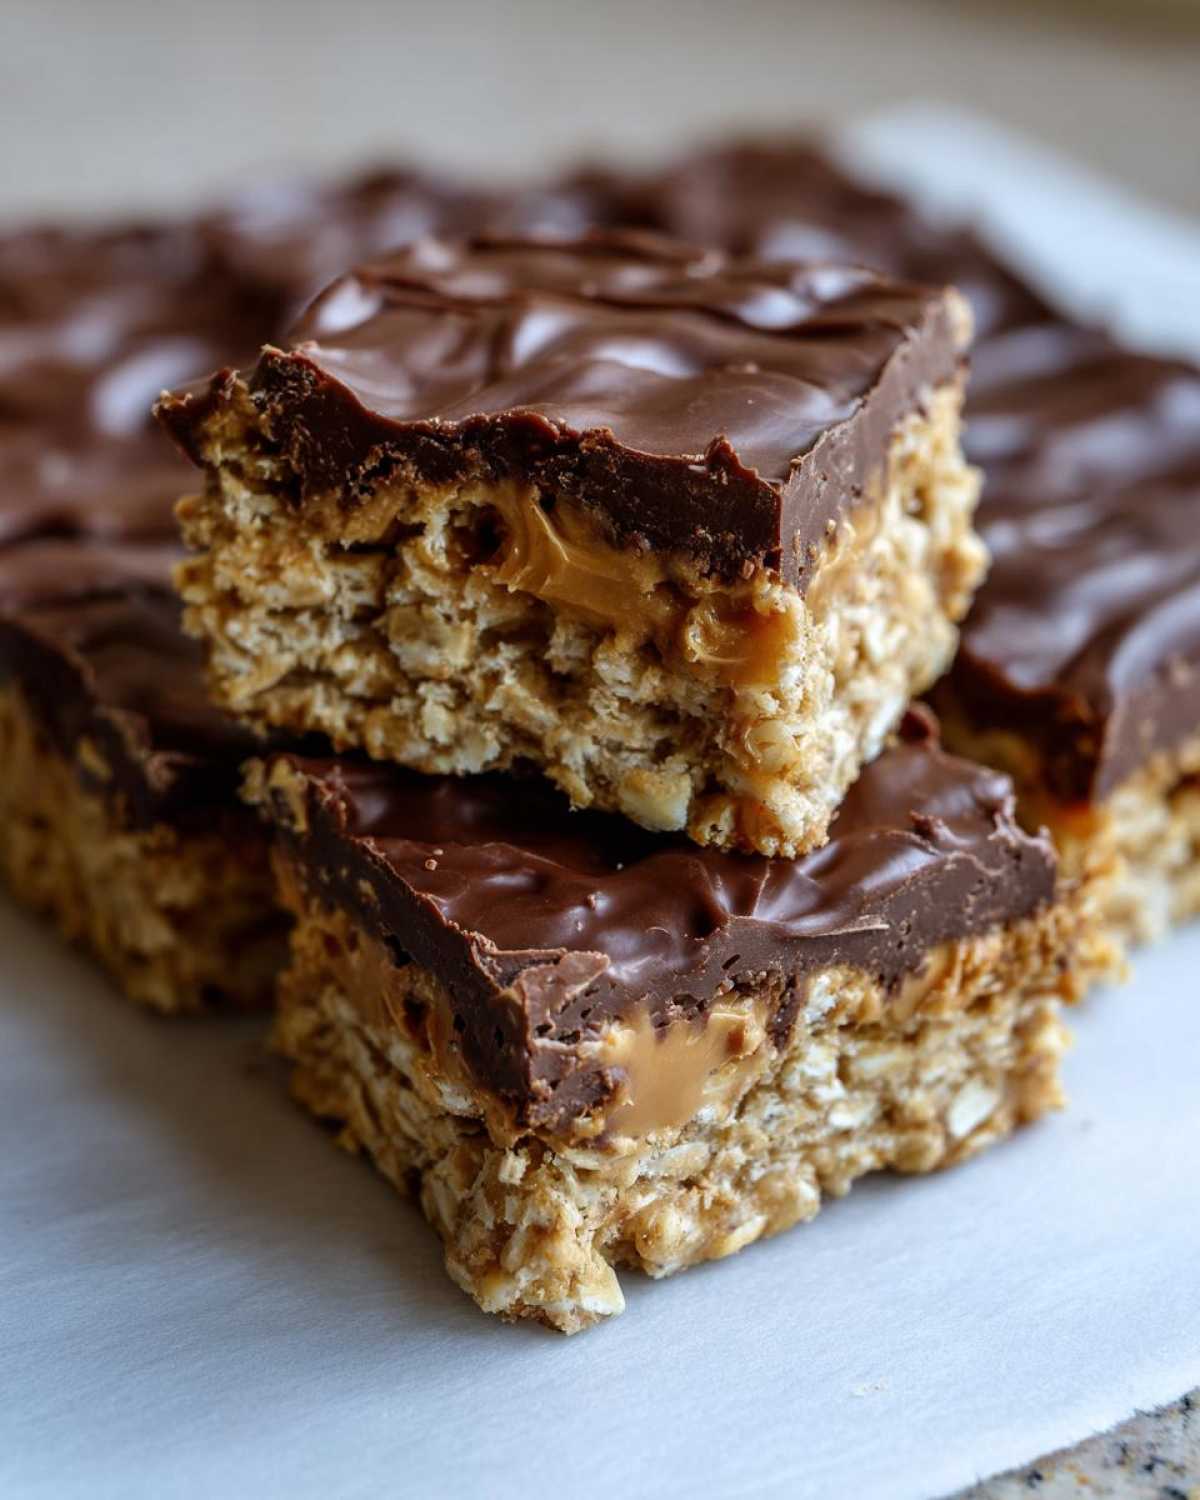
Another thing people sometimes forget is temperature control for the layers. If your melted butter for the base is too hot, it can start dissolving the powdered sugar a little too much, making it almost sticky goo instead of a firm binder. I usually let my melted butter cool for about five minutes before I mix it with the sugar and oats. Just warm to the touch, not piping hot!
And for the topping—don’t be tempted to skip the coconut oil in the chocolate layer! That little bit of added fat keeps the chocolate from getting that hard, brittle snap when it chills. We want fudgy and slightly soft, not hard like a candy shell. If you find your bars are still too soft after two hours (maybe your fridge isn’t the coldest beast in the world), just leave them longer!
I often make these the day before I need them because the longer they sit in the fridge, the cleaner your cuts will be. If you want those perfectly defined squares, plan on at least four hours of chilling time, or even better, let them hang out in the refrigerator overnight. For more ideas on getting the creamiest textures when working with oats, peek at my guide on Overnight Oats—same principle applies!
Ingredient Notes and Substitutions for Your No-Bake Recipe
I know sometimes you have to make do with what you have on hand, and that’s totally fine! But since these No-Bake Chocolate Peanut Butter Oat Bars rely on the ingredients sticking together perfectly, we need to talk about the key players. Understanding how they work helps you swap things out without turning your pan of bars into a puddle! This is key for making sure your **peanut butter dessert bars no oven** actually set up nicely.
Let’s start with the oats. The recipe calls for rolled oats, which I prefer because they give you that classic, slightly chewy texture we want in a good bar. If you only have quick oats (the instant kind), you can absolutely use them. Just know that because they are thinner, your base layer will be a little softer and less chewy. They absorb liquid faster, so keep an eye on how dry the mix looks. If you need a gluten-free option, this recipe is naturally perfect for that—just make sure you buy certified gluten-free rolled oats. That small detail is important if you have sensitivity!
Now, the peanut butter drama! This is where I sound very strict, but I have my reasons. For the binding layers (both in the base and the middle layer), you really need regular, creamy peanut butter—the kind that doesn’t separate a lot, like Jif or Skippy. That processed stuff has the right emulsifiers and fats to hold up against the melted butter and sugar. If you use natural peanut butter (the kind you have to stir), your bars might end up super soft or even greasy, because the oils separate out when they chill. You can use crunchy if you want texture in the middle, but avoid the oily naturals if you can!
For the fat component, I used butter because I love the flavor it adds, but I’ve seen folks swap it out. For the base, melted coconut oil works as a 1:1 substitute for the melted butter. However, if you swap the butter for oil in the base, your bars will be much softer overall, even when chilled. If you want a firmer bar, stick to the butter or use a high-quality shortening instead.
If you’re interested in how different oats behave in chilled recipes generally, you might want to check out the subtle variations in my Apple Cinnamon Overnight Oats. It’s the same idea—texture matters!
Storage and Make-Ahead Instructions for No-Bake Chocolate Peanut Butter Oat Bars
One of the absolute best features of these No-Bake Chocolate Peanut Butter Oat Bars is that they are meant to be made ahead of time! Seriously, they are the perfect dessert solution when you’re trying to prep snacks for the week or get ahead of a party menu. They are champions of the make-ahead category!
The general rule of thumb is that they need a solid 2 hours in the fridge after you pour that chocolate on top just to firm up enough so you can slice them without everything squishing out of alignment. But honestly? Don’t stop there! I find that if I let them hang out in the refrigerator for at least 4 hours, or even better, overnight, they are incredibly easy to cut into perfect, neat squares. When you cut them while the chocolate is still a little soft, you end up with jagged edges and chocolate smudges everywhere, which is cute for home, but less great if you’re packing them up.
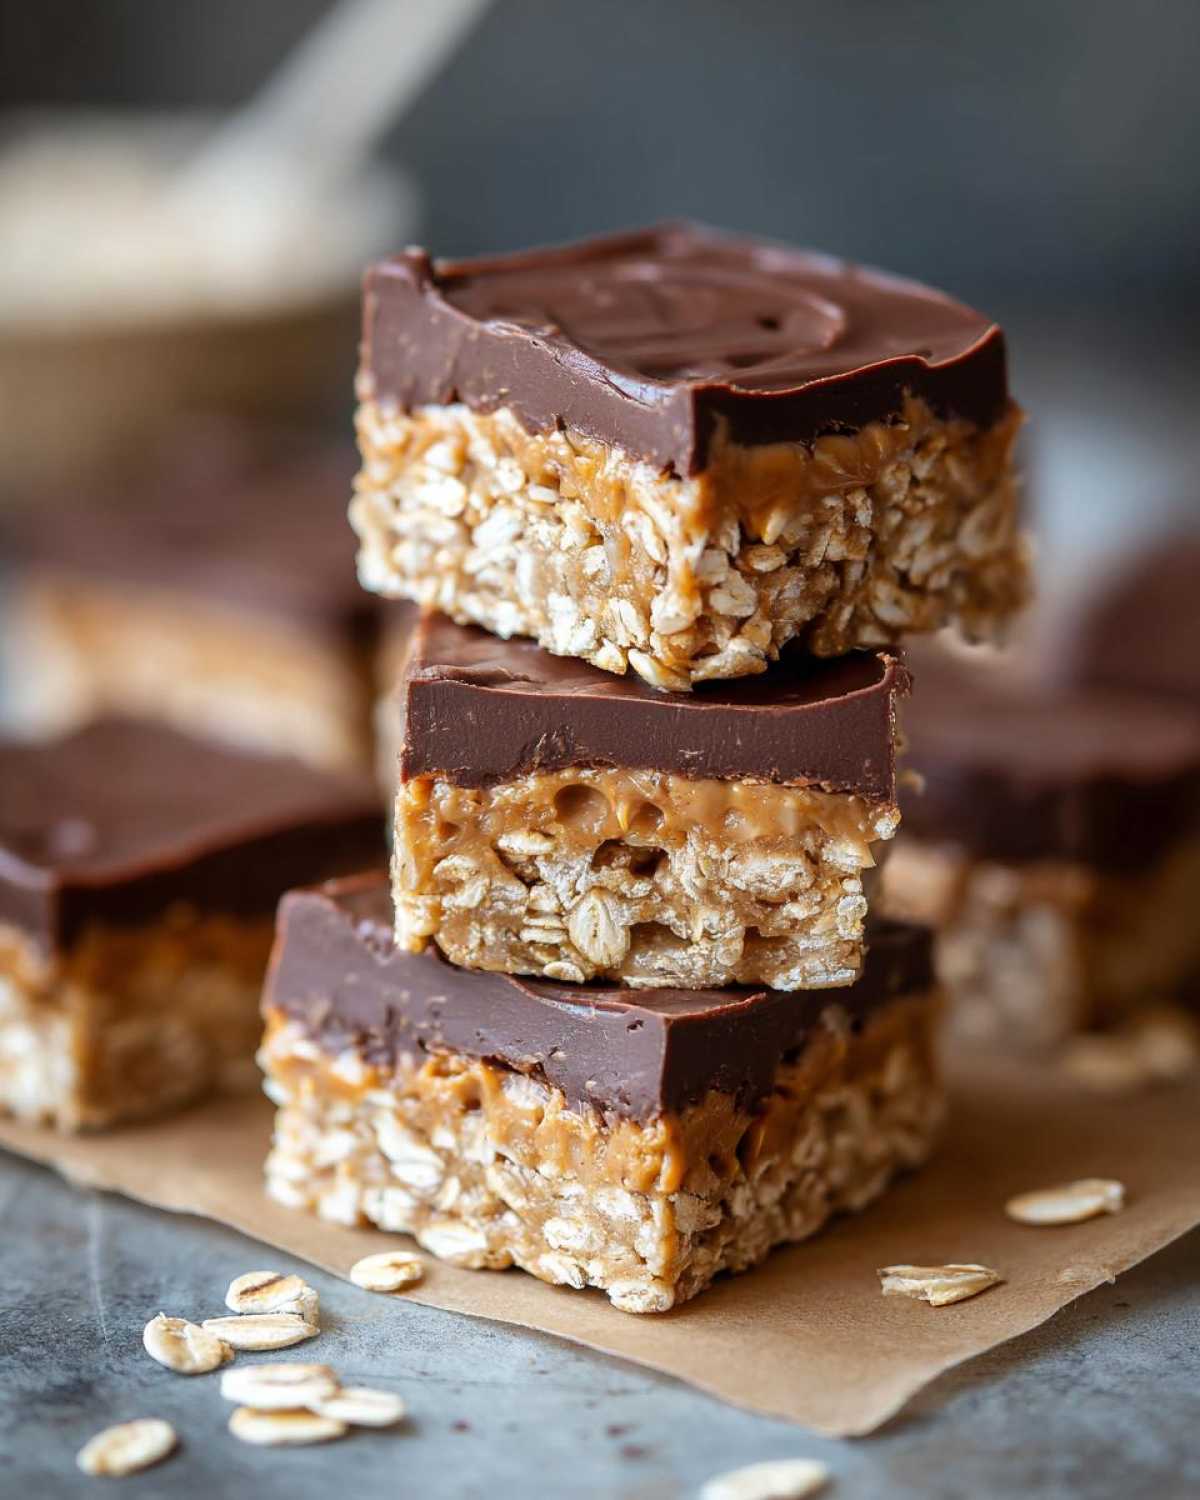
Once you get those clean cuts, storage is super simple. You need an airtight container. Always layer them between sheets of parchment paper or wax paper. Why? Because if you stack the chocolate layers directly on top of each other, even when chilled, they can sometimes stick together, and you’ll end up peeling off half your topping when you lift one out. Layer, paper, layer, paper! This way, they stay looking gorgeous.
They keep beautifully in the refrigerator—up to a full week! The moisture from the oats and peanut butter actually helps them stay wonderfully soft and chewy, not dry them out, which is amazing for a make ahead sweet snack. If you happen to have an overwhelming amount (which, let’s be honest, happens!), you can totally freeze these. Wrap them tightly—maybe even twice in plastic wrap, then pop them into a freezer-safe bag or container. They freeze perfectly for up to 3 months. When you want to eat one, just pull it out of the freezer and let it sit on the counter for about 15 minutes to soften up just slightly before enjoying that perfect chewy bite.
If you want to see more fantastic recipes that are designed totally for prepping in advance, check out my dedicated page on Make Ahead Sweet Snacks!
Variations on These Simple Layered Dessert Bars
Look, while I stand by my belief that the classic combo of chocolate and peanut butter is unbeatable, everyone loves a little personalization now and then! Since these No-Bake Chocolate Peanut Butter Oat Bars are so forgiving and require zero baking guesswork, it’s fun to throw in a little something extra to keep things feeling new. We’re keeping these variations super quick, though; no one wants to start a whole new complicated recipe!
My absolute favorite way to dress these up is right on top. If you are using semi-sweet chocolate chips for the topping, try sprinkling a tiny pinch of flaky sea salt over the chocolate right after you pour it on, while it’s still wet. Just a tiny bit! That touch of salt cuts through the sweetness perfectly and makes the chocolate flavor pop like crazy. It transforms it from a simple dessert bar into something that tastes way more gourmet.
If you’re feeling adventurous with your nut butter, you can technically swap the peanut butter in the filling layer. Almond butter works okay, but remember what I said about texture—almond butter is often oilier, so your middle layer might stay a hair softer. If you use sunbutter, just be aware it has a stronger, earthier flavor!
Before you press the oat base into the pan, that’s your chance to mix in some fun stuff. I’ve folded in a half cup of mini chocolate chips right into the oat mix—it makes that base layer look extra decadent! You could also add sprinkles if the kids are decorating, or even finely chopped pretzels if you want a serious salty crunch mixed throughout the bottom layer. Remember, just keep it around a half cup of mix-ins so you don’t throw off the base binding too much.
And speaking of chocolate, if you’re looking for something delightful to wash these down with—maybe you decided to make a double batch—you have to check out my Quick Homemade Chocolate Milk Recipe. It’s so much better than the store-bought stuff!
Frequently Asked Questions About No Bake Energy Bars Recipe
So many people have great questions when they try these for the first time, especially since they are so different from traditional baked goods. If you’re wondering about tweaks or stability, chances are I’ve got the answer right here. We want this to be the easiest, most reliable no bake energy bars recipe you’ve ever tried!
Can I use quick oats instead of rolled oats?
Yes, you absolutely can use quick oats, but I’ve got to warn you—the texture will change! Rolled oats have more structure, so they give you that satisfying, substantial chewiness that makes these bars feel like a hearty snack. Quick oats are much finer and absorb the liquid faster, so your oat base will be softer, almost crumbly, and less chewy. It still tastes amazing, but it won’t have that classic bite. If you use quick oats, make sure you press that base down even harder into the pan!
How do I prevent the chocolate layer from cracking when I slice the bars?
This is such a common issue with **homemade candy bars no baking**! Cracking usually happens for two reasons: either the chocolate cooled too fast or you didn’t use enough fat in the topping. Make sure when you melt your chocolate chips, you mix in that mandatory tablespoon of coconut oil. That oil keeps the chocolate coating flexible, not brittle. More importantly, don’t try to slice them straight out of the fridge after only an hour. Give them 2 to 4 hours, or even better, let them sit on the counter for about 10 minutes before you cut. A slightly warmer chocolate topping slices like a dream!
Can I make these bars vegan?
You can definitely create vegan no bake peanut butter bars using this template! It’s very easy to adapt. You’ll need to swap the butter for a good quality, solid vegan butter stick or coconut oil in the base mixture. For the chocolate topping, make sure you use dairy-free or vegan chocolate chips. As long as you check those two components, the oats, sugars, and peanut butter are usually fine! It makes for a really tasty quick weeknight dessert bar.
My base layer feels too dry; what should I do?
If your oat base feels dry before you even press it into the pan, it usually means your peanut butter was stiff, or perhaps your melted butter cooled down too much before you mixed it in. You can rescue it! Just add another tablespoon of warm, melted butter, one teaspoon at a time, mixing gently until the mixture just starts to barely clump together when squeezed. We don’t want slurry, just enough moisture so it holds its shape when pressed. If you are looking for more robust, no-bake options, check out my guide on specialized No Bake Energy Bars Recipe!
Estimated Nutritional Data for No-Bake Chocolate Peanut Butter Oat Bars
Now, I know a lot of you guys are making these bars for quick snacks or treats for the family, and you might be curious about the numbers. Since these **No-Bake Chocolate Peanut Butter Oat Bars** are homemade and depend a little bit on what brand of peanut butter you grab, I always want to emphasize that this is an *estimate*! Eat them because they are delicious, not because they are the best ‘health’ food, but they are certainly better than store-bought candy!
Based on the ingredients listed—and assuming standard measurements—here is what you can generally expect for one serving (one square):
- Serving Size: 1 square
- Calories: 220
- Fat: 14 grams (This includes 5g of saturated fat)
- Carbohydrates: 22 grams
- Protein: 6 grams (That’s the oats and peanut butter doing the heavy lifting!)
- Sugar: 15 grams
- Fiber: 2 grams
- Cholesterol: Roughly 10 mg
I always look at that 6g of protein and think, “Yep, that’s why these keep me full until dinner!” Keep in mind, if you use a natural, low-sugar peanut butter or a dark chocolate, those numbers will shift slightly. But this gives you a great baseline for these fantastic **simple layered dessert bars**.
PrintUltimate No-Bake Chocolate Peanut Butter Oatmeal Bars
Make these simple, layered bars with a chewy oat base, creamy peanut butter filling, and a rich chocolate topping. No oven required.
- Prep Time: 15 min
- Cook Time: 0 min
- Total Time: 2 hr 15 min
- Yield: 16 servings
- Category: Dessert
- Method: No-Bake
- Cuisine: American
- Diet: Vegetarian
Ingredients
- 1 1/2 cups rolled oats
- 1/2 cup peanut butter
- 1/2 cup butter, melted
- 1 cup powdered sugar
- 1/2 cup semi-sweet chocolate chips
- 1/4 cup peanut butter (for the middle layer)
- 1 tablespoon coconut oil
Instructions
- Line an 8×8 inch pan with parchment paper, leaving an overhang for easy removal.
- In a medium bowl, mix the rolled oats, 1/2 cup peanut butter, melted butter, and powdered sugar until fully combined.
- Press this mixture firmly and evenly into the bottom of the prepared pan.
- In a separate small bowl, combine the 1/4 cup peanut butter and coconut oil. Microwave for 20-30 seconds until soft, then stir until smooth. Spread this layer evenly over the oat base.
- In a third small bowl, melt the chocolate chips with the remaining 1 tablespoon of coconut oil (or use the microwave in 20-second intervals). Stir until smooth.
- Pour the melted chocolate over the peanut butter layer and spread it to cover completely.
- Refrigerate the bars for at least 2 hours, or until the chocolate topping is firm.
- Lift the bars out of the pan using the parchment paper overhang and cut into squares.
Notes
- For a firmer bar, chill the bars for 4 hours or overnight before slicing.
- If you want a gluten-free version, use certified gluten-free rolled oats.
- Store leftovers in an airtight container in the refrigerator for up to one week.
Nutrition
- Serving Size: 1 square
- Calories: 220
- Sugar: 15
- Sodium: 110
- Fat: 14
- Saturated Fat: 5
- Unsaturated Fat: 9
- Trans Fat: 0
- Carbohydrates: 22
- Fiber: 2
- Protein: 6
- Cholesterol: 10